Using a coffee urn can seem tricky, especially if you’ve never worked with one before. But once you know the basics, you’ll see how much time and effort it can save. Whether you are hosting an event, running a small café, or just want to serve coffee for a large group, mastering the coffee urn is a valuable skill.
This guide will walk you through everything you need—from understanding the parts to cleaning up afterward. Along the way, you’ll get practical tips and learn mistakes to avoid, so your coffee always tastes fresh and your guests stay happy.
Understanding The Coffee Urn
A coffee urn is a large, electric coffee maker designed to brew and keep coffee hot for a crowd. Most urns hold between 30 and 100 cups. The main advantage is convenience—one machine can serve an entire group, making it popular for offices, church gatherings, weddings, and meetings.
Main Parts Of A Coffee Urn
Knowing the parts helps you set up and clean your urn safely:
- Lid: Covers the urn, keeping heat in and preventing spills.
- Coffee basket: Holds the coffee grounds, usually sits at the top inside the urn.
- Stem: A long tube that connects the basket to the bottom, letting hot water flow up.
- Water reservoir: The main body that holds water before brewing.
- Spigot or faucet: The tap at the bottom for pouring coffee.
- Power cord and base: Supplies electricity and sometimes houses the heating element.
- Indicator lights: Show when the urn is brewing or ready to serve.
Most urns are made of stainless steel for durability and heat retention. Some models have a sight glass that shows the coffee level inside.
How Does A Coffee Urn Work?
A coffee urn uses percolation. Water heats up, rises through the stem, and then pours over the coffee grounds in the basket. The water absorbs flavor and drips back down, repeating until the coffee is brewed. This cycle gives urn coffee its rich taste.
Choosing The Right Coffee Urn
Not all coffee urns are the same. Picking the right one means thinking about:
- Capacity: How many people are you serving? For most events, a 30- to 60-cup urn is standard. For larger crowds, consider 100-cup models.
- Material: Stainless steel is best for durability and easy cleaning.
- Heating features: Some urns have automatic keep-warm settings, while others need manual attention.
- Ease of use: Look for clear markings, sturdy handles, and simple controls.
- Brand reputation: Reliable brands often last longer and provide better warranties.
Here’s a quick comparison of common urn sizes:
| Urn Size | Approximate Cups | Best For |
|---|---|---|
| Small | 20–40 | Family gatherings, small meetings |
| Medium | 40–60 | Offices, medium events |
| Large | 60–100+ | Churches, weddings, big conferences |
Non-obvious tip: Never choose a huge urn if you only need a few cups. Coffee left sitting in a nearly empty urn can taste burnt and stale.
Preparing To Use A Coffee Urn
Before you brew, a little preparation goes a long way. Skipping these steps can lead to weak or bitter coffee, or even damage the urn.
Cleaning Before Use
Even if the urn is new or was cleaned after the last use, always rinse it with hot water before brewing. This removes dust, old coffee oils, or soap residue. Pay special attention to the spigot, as leftover grounds can clog it.
Placing The Coffee Urn
Find a sturdy, heat-safe surface near an outlet. Place the urn where people can easily pour coffee but away from the edge to prevent spills. Make sure the spigot hangs over a tray or towel in case of drips.
Practical tip: Never move a full, hot urn. Always set up in the serving area before filling with water.
Measuring Water And Coffee
The right ratio of coffee to water is key to good flavor. Too strong, and guests might complain. Too weak, and you’ll waste coffee and disappoint everyone.
How Much Water?
Most urns have markings inside showing water levels for different cup amounts. If not, use a measuring jug. One standard cup is 5–6 oz (150–180 ml). For 50 cups, you’ll need about 2. 5 gallons (9. 5 liters) of water.
How Much Coffee?
A safe rule: Use 1/3 to 1/2 cup of ground coffee per 5 cups of water. For a 50-cup urn, that’s about 3.5 to 5 cups of grounds. Adjust based on taste and brand strength.
| Number of Cups | Water Needed | Ground Coffee |
|---|---|---|
| 30 | 1.5 gal (5.7 L) | 2–3 cups |
| 50 | 2.5 gal (9.5 L) | 3.5–5 cups |
| 100 | 5 gal (19 L) | 7–10 cups |
Non-obvious insight: Use coarser ground coffee for urns. Fine grounds can slip through the filter, making coffee cloudy and clogging the spigot.
Choosing Coffee Type
Most people use regular pre-ground coffee. Avoid flavored or oily beans, as they can leave residue and change taste over time. If you want decaf, use a separate urn to avoid mixing flavors.

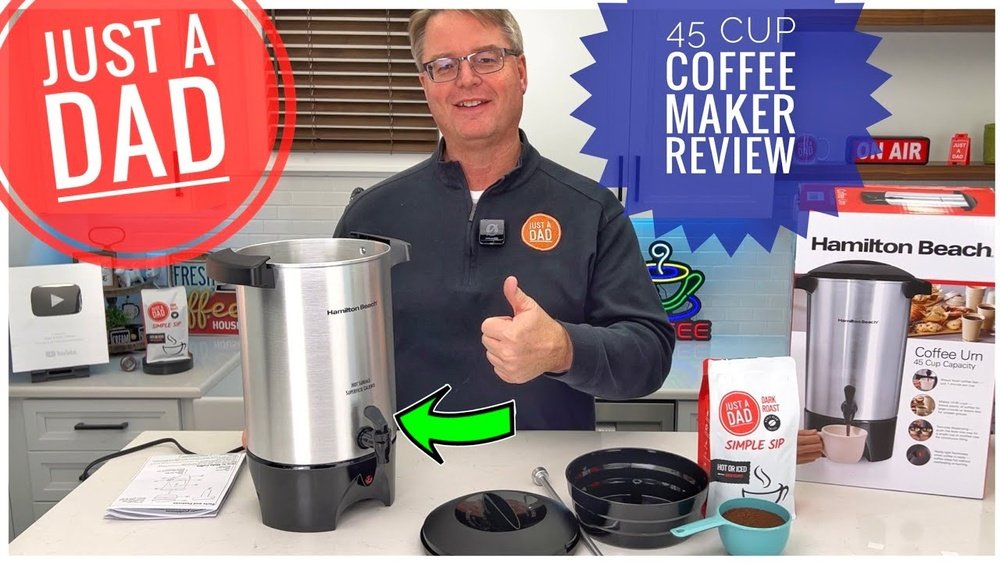
Credit: www.youtube.com
Assembling The Coffee Urn
Now it’s time to set up:
- Remove the lid and basket. Take out the stem and basket. Make sure all parts are clean and dry.
- Fill with water. Pour cold, fresh water into the urn to the desired level.
- Insert the stem. Place the stem into the center well at the bottom.
- Add the coffee basket. Place it at the top of the stem.
- Measure and add coffee grounds. Spread the grounds evenly in the basket.
- Secure the lid. Make sure it’s tight to trap heat and prevent spills.
Practical advisor tip: If your urn comes with paper filters, use them. They catch fine particles for smoother coffee.
Brewing Coffee In The Urn
With everything assembled, you’re ready to brew. Brewing takes time, so plan ahead.
Plugging In And Starting
Plug the urn into the outlet. Most urns start brewing automatically; some have an On/Off switch. The heating element will begin to warm the water.
Safety note: Never plug in the urn without water. This can burn out the heating element.
Brewing Time
Brewing time depends on capacity:
- 30-cup urn: About 30 minutes
- 50-cup urn: 40–45 minutes
- 100-cup urn: 60–70 minutes
A light will usually indicate when brewing is finished. Until then, don’t open the lid—steam and hot water can cause burns.
Non-obvious insight: Brew time starts after the urn is fully heated. If you use cold water, it may take longer, but the coffee will taste fresher.
Serving Coffee From The Urn
Once brewing is done, the urn will switch to “keep warm” mode. The coffee is ready to serve.
Pouring Safely
Use the spigot to pour coffee into cups. Hold the cup close to the spout to avoid splashing. For large events, provide a stack of disposable cups nearby.
Experience-based tip: Stir the coffee gently every 20–30 minutes with a long, clean spoon. This keeps the flavor even, as strong coffee can settle at the bottom.
Keeping Coffee Hot
Most urns keep coffee at 185°F–200°F (85–93°C). This is hot enough for taste but not boiling. Don’t keep coffee in the urn for more than 2 hours—after that, it can taste bitter or burnt.
If you need to serve for longer, brew smaller batches or move coffee to thermal carafes.
Cleaning And Maintenance
A clean urn means better-tasting coffee and a longer-lasting machine. Don’t skip this part, even if you’re tired after an event.
Basic Cleaning Steps
- Unplug and cool: Let the urn cool down fully before cleaning.
- Empty: Pour out any leftover coffee and rinse with warm water.
- Wash parts: Remove the lid, basket, and stem. Wash with warm, soapy water. Use a brush for stubborn stains.
- Clean the reservoir: Wipe the inside with a soft cloth or sponge. Don’t use harsh abrasives.
- Rinse well: Make sure all soap is gone before reassembling.
Straight-to-the-point helper tip: Never immerse the urn’s base in water. This can damage the electric parts.
Deep Cleaning
Every few uses, deep clean to remove oils and buildup:
- Fill the urn with water and add 1/2 cup of white vinegar.
- Run a brew cycle (without coffee).
- Let cool and rinse thoroughly several times.
Non-obvious insight: Check the spigot for blockages. Old coffee oils can build up and affect taste.
Troubleshooting Common Problems
Even good urns can have issues. Here’s how to handle the most common ones:
Coffee Tastes Bitter Or Burnt
- Coffee sat too long: Don’t keep coffee hot for more than 2 hours.
- Water too hot: Some urns overheat—check with a thermometer.
- Wrong grind: Too fine a grind leads to over-extraction.
Coffee Is Weak Or Watery
- Not enough grounds: Use the recommended amount.
- Water overfill: Always check inside markings.
- Old coffee: Use fresh grounds for best flavor.
Urn Won’t Turn On
- Check the outlet and plug.
- Make sure the lid is securely in place—some urns have safety locks.
- Heating element may be damaged if urn was run dry.
Spigot Is Clogged
- Grounds too fine: Switch to coarser grind.
- Spigot not cleaned: Disassemble and soak in hot, soapy water.
Safety Tips For Using A Coffee Urn
- Keep children away: The urn gets very hot and can cause burns.
- Use both hands: Move only when empty and cool.
- Secure cords: Keep the power cord out of walkways to prevent trips.
- Don’t overfill: Leave space at the top to prevent spills.
Coffee Urn Usage: Event Planning Examples
Office Meeting
For a 20-person office meeting, a 30-cup urn is perfect. Set up early, brew a medium roast, and offer sugar, milk, and stirrers. Clean up promptly to keep the break room tidy.
Wedding Reception
For 100 guests, use a large 100-cup urn. Assign someone to monitor the urn, refill supplies, and stir the coffee every so often. Offer both regular and decaf (with two urns). Place the urns on a sturdy, decorated table near desserts.
Church Gathering
A 60-cup urn covers most church events. Brew before the service, and have a volunteer serve and clean up. Store the urn in the kitchen until next use.
Comparing Coffee Urn Brands
There are several well-known brands, each with strengths and weaknesses.
| Brand | Main Features | Warranty | Average Price |
|---|---|---|---|
| Hamilton Beach | Easy-clean, ready light, sturdy handles | 1 year | $60–$120 |
| West Bend | Fast brew, dual spigot, sight glass | 1 year | $90–$150 |
| Avantco | High capacity, commercial use, keep-warm mode | 6 months | $120–$220 |
Practical advisor tip: For occasional home use, stick with consumer brands. For frequent, large events, invest in a commercial model.
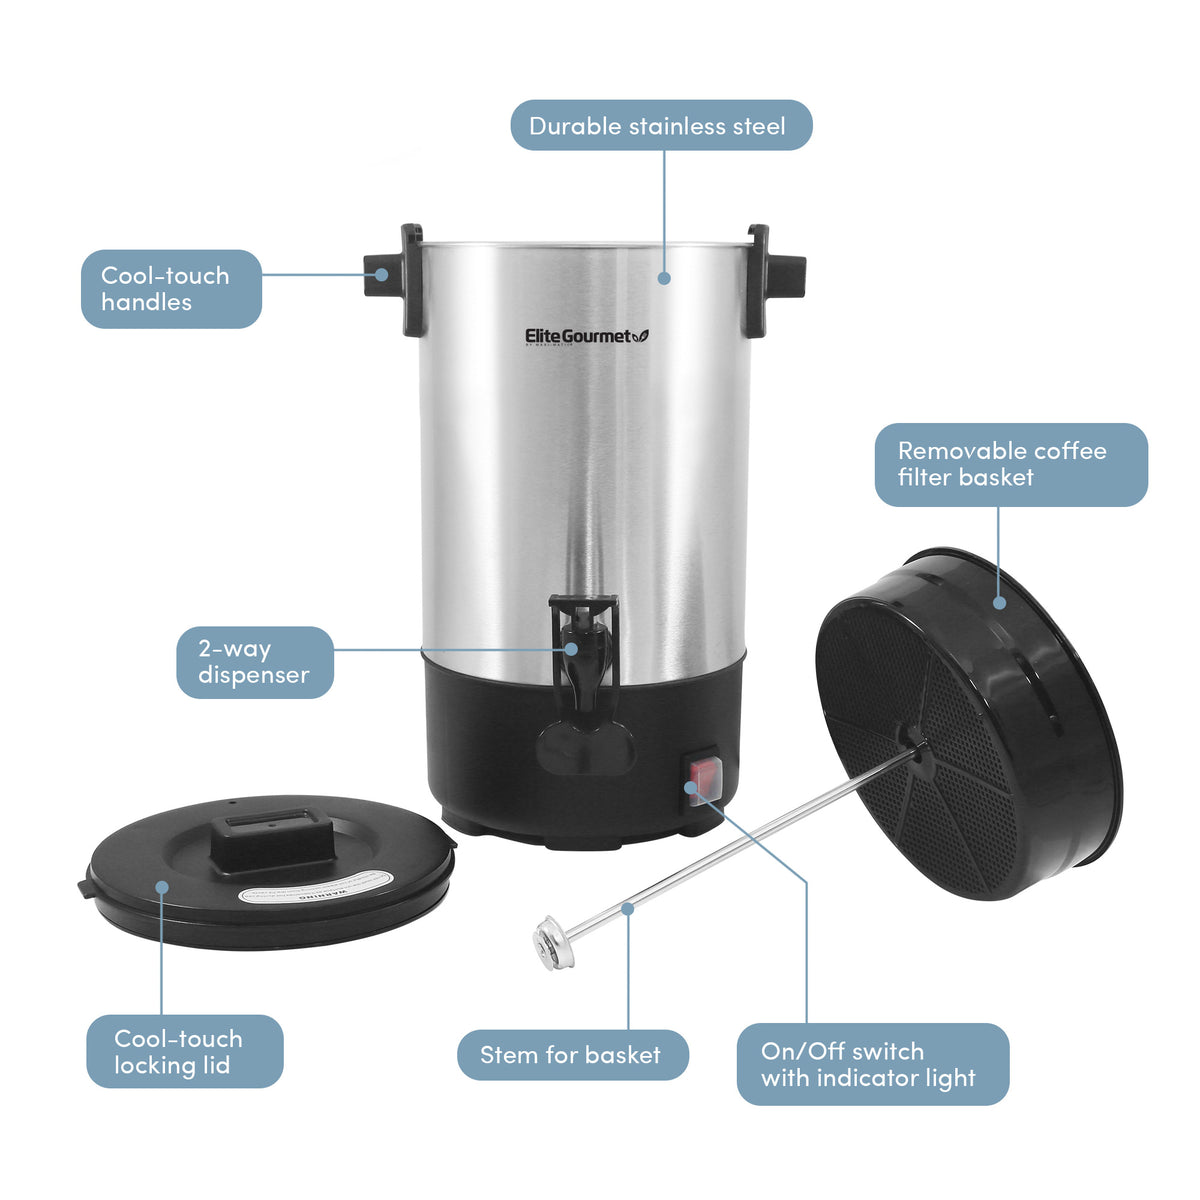
Credit: shopelitegourmet.com
Advanced Tips For Great Coffee
- Preheat the urn: Run a cycle of hot water before brewing. This keeps the coffee hotter, longer.
- Warm your cups: Pour a little hot water into each cup, then discard before serving coffee.
- Flavor add-ins: Offer cinnamon sticks, orange peel, or nutmeg on the side for guests who want variety.
- Track usage: Note how much coffee gets used at each event. This helps you plan better next time.
Mistakes To Avoid
- Leaving coffee in the urn overnight: Always empty and clean after use.
- Using fine espresso grounds: These clog the filter and make cleanup hard.
- Overfilling: Never fill above the max line.
- Forgetting to stir: Uneven flavor can lead to complaints.
- Ignoring the power cord: Loose cords are a safety hazard.
Non-obvious insight: Never use milk or creamer directly in the urn. It can coat the inside and spoil quickly. Always serve add-ins on the side.

Credit: www.amazon.com
Environmental Considerations
Coffee urns use electricity. For large events, they save more energy than brewing many small pots. Use reusable cups and filters to reduce waste. Clean with vinegar instead of harsh chemicals to protect the environment.
When Not To Use A Coffee Urn
- Small groups: If you’re serving under 10 people, a drip pot or French press is easier and faster.
- Specialty coffee: Espresso, cappuccino, or cold brew are not for urns. These need different machines.
For more about the history and science of coffee urns, check the Wikipedia Coffee Urn page.
Frequently Asked Questions
How Long Does It Take To Brew Coffee In A Coffee Urn?
Brewing time depends on the urn size. For a 30-cup urn, it usually takes about 30 minutes. A 100-cup urn can take over an hour. Always allow extra time if you’re serving a crowd.
Can I Use Tea Bags In A Coffee Urn?
Yes, you can brew tea in a coffee urn. Place the tea bags in the basket as you would coffee grounds. Clean the urn well before and after to avoid flavor transfer.
How Do I Keep Coffee From Tasting Bitter In An Urn?
Don’t leave coffee on the “keep warm” setting for more than 2 hours. Use the right ratio of grounds to water, and clean the urn thoroughly after each use to prevent old oils from affecting flavor.
Is It Safe To Leave A Coffee Urn Plugged In?
It’s safe while serving, but always unplug the urn when not in use. Never leave it on overnight or unattended, as this is a fire risk.
Can I Use Pre-ground Coffee For A Coffee Urn?
Yes, but choose a coarser grind. Fine grounds can slip through the filter and clog the spigot. Use fresh, good-quality coffee for best results.
Using a coffee urn the right way isn’t hard once you understand the basics. With practice, you’ll brew great coffee for any group—and keep your urn working well for years to come.