Refreshing your kitchen cabinets can make your whole kitchen look new again. Many people think they need to replace their cabinets if they look old, scratched, or faded. But often, a careful touch-up is enough to bring back their shine and beauty.
Touching up kitchen cabinets is not just about paint or stain; it’s about fixing small problems, cleaning properly, and protecting your cabinets so they last longer. If you do it right, you can save thousands of dollars and avoid the mess of a full remodel.
This guide will walk you through every step of the process. You’ll learn how to prepare, repair, paint, or stain, and finish your cabinets so they look their best. Whether your cabinets are wood, laminate, or painted, you’ll find tips that match your needs.
Even if you’re not a DIY expert, you’ll get clear instructions to follow with confidence.
As you read, you’ll find non-obvious tips most people miss, like how to match cabinet color or which products professionals use. There are also real examples, comparison tables, and practical advice to avoid common mistakes. By the end, you’ll know exactly how to touch up your kitchen cabinets, and your kitchen will look refreshed without spending a fortune.
Why Touch Up Kitchen Cabinets?
Kitchen cabinets take a lot of abuse. Everyday cooking, steam, grease, and constant handling all leave marks over time. You might see scratches, fading, chipped paint, or stains. Instead of replacing cabinets, touch-ups offer a smart solution.
First, touch-ups save money. Replacing cabinets can cost between $8,000 and $20,000 in the US. A touch-up project usually costs less than $200, even if you use high-quality materials.
Second, touching up is quicker. A full cabinet replacement can take weeks and leave your kitchen unusable. Most touch-up jobs finish in a weekend, so you get your kitchen back fast.
Third, touch-ups protect your cabinets. When you seal and repair cabinets, you help them last longer by blocking moisture and damage.
Another benefit is that touch-ups are eco-friendly. You keep your old cabinets out of the landfill and use fewer resources.
Finally, a good touch-up can increase your home’s value. Real estate agents often say that kitchens sell homes. Fresh-looking cabinets make a big impact on buyers, and you get a better return on investment.
Tools And Materials Needed
Choosing the right tools and materials is the first step for a successful project. Using poor tools or the wrong products can lead to a bad result.
Here are the essentials:
- Mild cleaner or degreaser: For removing oil and dirt (example: TSP substitute).
- Soft cloths and sponges: For cleaning and wiping.
- Fine-grit sandpaper (180–220 grit): For smoothing surfaces.
- Putty knife: For filling dents or holes.
- Wood filler or putty: For repairing chips and scratches.
- Painter’s tape: To protect walls and hardware.
- Touch-up paint, stain, or marker: Match your cabinet color.
- Small paintbrushes or foam brushes: For detailed work.
- Protective gloves and mask: For safety.
- Clear finish (polyurethane or lacquer): For sealing.
- Screwdriver: For removing handles or hinges.
- Small roller (optional): For larger flat areas.
If you want a quick overview of how costs and time compare for different touch-up projects, here’s a handy table:
| Touch-Up Method | Average Cost | Time Needed | Skill Level |
|---|---|---|---|
| Paint Touch-Up | $20–$80 | 2–5 hours | Beginner |
| Stain Touch-Up | $25–$100 | 2–5 hours | Beginner–Intermediate |
| Scratch/Chip Repair | $10–$50 | 1–3 hours | Beginner |
| Full Cabinet Refinish | $150–$400 | 2–3 days | Intermediate–Advanced |
Step 1: Assess Cabinet Condition
Before you start, look closely at your cabinets. This helps you decide which touch-up method to use.
- Surface scratches: Light marks that don’t go deep. Usually on doors or near handles.
- Chips and dents: Small pieces of wood or finish missing.
- Worn finish: Dull or faded areas, often near sink or stove.
- Stains: Grease, water, or food marks.
- Peeling paint: Old paint coming off in flakes.
- Water damage: Swollen, soft, or stained areas.
Check if your cabinets are solid wood, veneer, or laminate. Each needs a different approach. Knock on the inside panel—solid wood sounds dull, while laminate or veneer sounds sharper and feels thinner.
Take photos of the worst spots. You can use these as a reference during your project.
Step 2: Clean Cabinets Thoroughly
Cleaning is the most important step people often skip. If you paint or repair over dirt or grease, the new finish won’t stick.
- Mix a small amount of mild cleaner or TSP substitute with warm water.
- Wipe all cabinet surfaces with a soft cloth or sponge.
- Focus on handles, corners, and near the stove, where grease collects.
- Rinse with clean water and a new cloth.
- Let cabinets dry completely—at least 1 hour.
Never use harsh scrubbers or steel wool. They scratch the finish and make things worse.
Step 3: Repair Scratches, Chips, And Dents
Fixing Surface Scratches
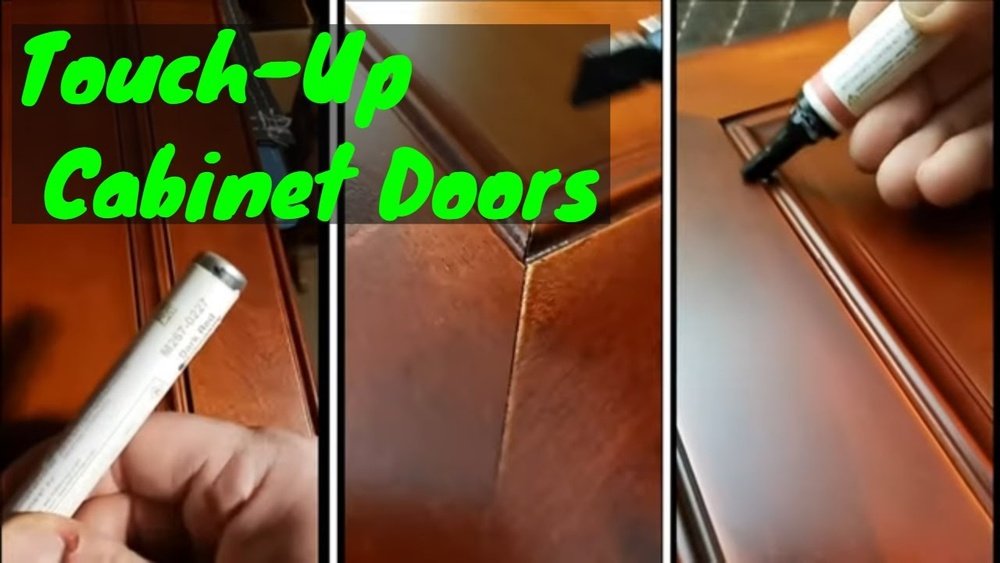
For light scratches, use a touch-up marker or crayon that matches your cabinet color. These are sold in hardware stores with labels like “cherry,” “oak,” or “espresso.” Test on a hidden area first.
- Run the marker over the scratch.
- Wipe off extra with a soft cloth.
- Let dry for 5 minutes.
Filling Deeper Chips And Dents
If you see chips or dents, use wood filler or putty.
- Use a putty knife to press filler into the damaged area.
- Smooth the surface and remove excess filler.
- Let it dry (check the package—usually 30 minutes).
- Sand gently with fine-grit sandpaper until smooth.
- Wipe with a clean cloth.
For laminate cabinets, use a laminate repair paste instead of wood filler. The process is similar.
Non-obvious tip: For small chips on edges, mix a tiny amount of sawdust from your cabinet (from sanding) with wood glue. Fill the chip, let dry, and sand smooth. This helps match the color and texture better.
Step 4: Sand And Prep The Surface
Light sanding helps new paint or stain stick well. Don’t sand too hard—just enough to remove shine or rough spots.
- Use 220-grit sandpaper for painted or stained wood.
- Sand in the direction of the wood grain.
- For laminate, use extra-fine sandpaper (320-grit).
- Wipe away all dust with a damp cloth.
If you only touch up small areas, sand just around the repair. For large faded areas, sand the whole panel.
Pro tip: Fold sandpaper to reach corners and edges. Change sandpaper often if it clogs with old finish.
Step 5: Protect Surrounding Areas
Avoid messy drips or splatters by taping and covering nearby surfaces.
- Place painter’s tape around cabinet edges, walls, and hardware.
- Lay an old sheet or plastic drop cloth on countertops and floors.
- Remove handles and knobs with a screwdriver. Keep screws in a cup so you don’t lose them.
If you touch up only small spots, tape just those areas. For bigger jobs, tape off the whole cabinet face.
Step 6: Apply Touch-up Paint Or Stain
Choosing The Right Product
Pick a paint, stain, or touch-up kit that matches your cabinet’s original color. Bring a cabinet door or drawer to the store to help match. Many brands sell touch-up pens, bottles, or kits designed for popular cabinet colors.
- For painted cabinets, use interior acrylic latex paint.
- For stained wood, use a matching wood stain.
- For laminate, use special laminate paint or a repair kit.
Non-obvious insight: If you can’t find an exact match, buy two close colors and mix a small amount until you get a better match. Test on a hidden spot before using on the cabinet front.
Applying Paint Or Stain
- Stir your paint or stain well.
- Use a small brush or foam brush for detailed areas.
- For paint, dab gently over the repaired area and feather the edges so it blends.
- For stain, wipe on with a clean cloth, following the wood grain.
- Let dry fully (check can for drying time).
- Apply a second coat if needed for full coverage.
If you paint a large area, use a mini roller for smooth finishes. For small chips, a brush is easier.
Blending With The Old Finish
The key to an invisible touch-up is blending. Wipe off extra paint or stain before it dries, and keep the brush strokes light. For stains, always wipe in the same direction as the original finish.
If you see a clear line between old and new finish, lightly sand just the edge and add a tiny amount of paint with a dry brush. This “feathering” hides the repair.
Step 7: Seal And Protect The Finish
After paint or stain is fully dry, seal the repair to keep it strong and shiny.
- Use a clear polyurethane, lacquer, or cabinet topcoat.
- Choose water-based polyurethane for low odor and fast drying.
- For glossy cabinets, use a gloss finish. For matte, use satin or flat.
- Apply with a clean brush or foam applicator.
- Cover just the repaired area or the whole panel for a consistent look.
- Let dry for 2–4 hours.
- Add a second coat for best protection.
Tip: Don’t rush this step. Touch-ups look best when the final finish is smooth and even.
Step 8: Reattach Hardware And Clean Up
Once the finish dries, remove all tape and protective coverings. Reinstall handles, knobs, and hinges. Wipe the cabinets with a soft, dry cloth to remove any dust.
Double-check that all repairs are smooth to the touch. If you see any rough spots or missed areas, you can repeat the touch-up process just on those spots.
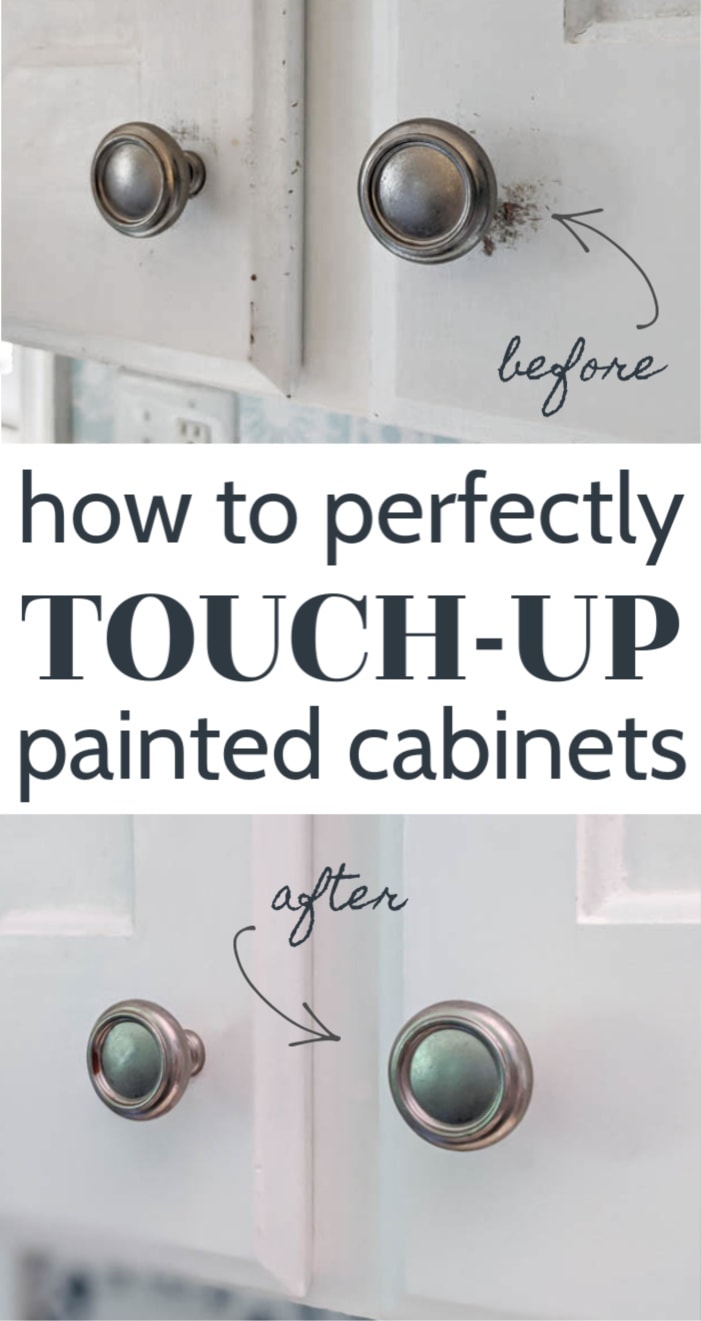
Credit: www.lovelyetc.com
Special Cases: Painted, Stained, And Laminate Cabinets
Painted Cabinets
- Use only acrylic latex paint for durability.
- Sand between coats for an ultra-smooth finish.
- Always prime bare wood or large repairs before painting.
Stained Wood Cabinets
- Test stain on a hidden area, as wood absorbs stain differently.
- Use a wood conditioner for blotchy woods like pine.
- Wipe off excess stain quickly to avoid dark patches.
Laminate Cabinets
- Do not sand too much—just enough to dull the shine.
- Use only products labeled for laminate.
- Avoid water-based stains, as they won’t stick to laminate.
Common Mistakes And How To Avoid Them
- Skipping cleaning: Paint and stain won’t stick to greasy surfaces.
- Using the wrong color: Always test color first. Lighting in your kitchen may change how the color looks.
- Not sanding enough: A smooth surface helps new finish blend in.
- Applying paint too thickly: Thin coats look better and dry faster.
- Forgetting to seal repairs: Unsealed touch-ups can peel or wear off quickly.
- Rushing the drying process: Allow each layer to dry completely before adding the next.
- Ignoring hardware: Dirty or old handles make new cabinets look old. Clean or replace them for a full refresh.

Credit: diy.stackexchange.com
How To Match Cabinet Colors And Sheens
Matching the original cabinet color can be tricky. Lighting, age, and wood type all change how a color looks.
- Take a small door or drawer to the paint store.
- Ask for a color matching scan—many stores offer this service.
- Match not just the color, but also the sheen (gloss, satin, matte).
- Buy a small sample jar and test in a hidden spot first.
For stained cabinets, matching the wood grain is as important as color. Use a light hand with stain and build up slowly. For laminate, always use the repair kit closest to your color, then blend with a soft cloth.
Here’s a quick reference for sheen choices:
| Sheen Type | Best For | Pros | Cons |
|---|---|---|---|
| Gloss | Modern kitchens | Easy to clean, bright look | Shows scratches, fingerprints |
| Satin | Most kitchens | Soft shine, hides marks | Less dramatic look |
| Matte | Rustic/traditional | Hides flaws, subtle | Harder to clean, can look flat |
When To Call A Professional
Sometimes, DIY touch-ups aren’t enough. You may need a pro if:
- Damage is widespread (water damage, mold, warped panels).
- You want a full refinish or color change.
- You have high-end cabinets (exotic woods, custom finishes).
- The cabinets are over 30 years old and very brittle.
A professional can use spray equipment for a perfect finish and help with repairs that require special tools. For small touch-ups, most homeowners can do the job themselves and get great results.
Maintenance Tips To Keep Cabinets Looking New
Once your cabinets look fresh, keeping them that way is easy if you follow a few simple steps:
- Wipe spills immediately with a dry or slightly damp cloth.
- Clean cabinet doors and handles every month with a mild cleaner.
- Avoid hanging wet towels on cabinet doors.
- Check for new scratches or chips every few months and touch them up quickly.
- Oil wood cabinets twice a year with lemon oil or a wood conditioner.
- Use felt pads under items that bump or scrape the cabinet surfaces.
Tip: Avoid harsh chemicals like bleach or ammonia—they damage the finish over time.
Cost Comparison: Touch-up Vs. Replacement
Many homeowners wonder if touch-ups are worth it compared to replacement. Here’s a breakdown:
| Project Type | Average Cost | Time Required | Impact on Kitchen Use |
|---|---|---|---|
| Touch-Up (DIY) | $50–$200 | 4–8 hours | Kitchen stays usable |
| Professional Refinish | $1,500–$4,000 | 2–5 days | Some disruption |
| Cabinet Replacement | $8,000–$20,000 | 1–3 weeks | Major disruption |
The numbers show that DIY touch-ups are by far the most affordable and least disruptive way to improve your kitchen’s look.
Credit: www.kraftmaid.com
Expert Insights: What Most People Overlook
Most guides skip two important details:
- Lighting matters: The color of your cabinets can look very different under warm or cool lighting. Always check the match in your kitchen, not just at the store.
- Humidity control: Kitchens get steamy. If you don’t seal touch-ups properly, steam from cooking can lift paint or stain. Keep a small fan or dehumidifier in your kitchen when working and for a few days after.
Also, don’t forget the inside edges of doors and drawers. Touching up only the visible part can leave a clear line when doors are open. Spending a few extra minutes to blend edges makes the job look professional.
Frequently Asked Questions
How Long Does A Typical Kitchen Cabinet Touch-up Last?
A well-done touch-up can last 3 to 5 years, especially if you use high-quality paint or stain and a strong sealer. How long it lasts depends on kitchen use, humidity, and how often you clean the cabinets.
Can I Touch Up Just Part Of A Cabinet Door, Or Do I Need To Redo The Whole Door?
You can touch up small areas if you blend the new finish carefully with the old. For large or very visible repairs, it’s often best to paint or stain the whole door for a perfect match.
What’s The Best Way To Clean Kitchen Cabinets After A Touch-up?
Use a mild soap and warm water with a soft cloth. Do not scrub hard or use bleach, ammonia, or abrasive cleaners. Wait at least two weeks after touch-up before wet cleaning, so the finish is fully cured.
Will Touch-up Products Work On All Types Of Cabinets?
Most touch-up kits and paints work on wood and painted cabinets. For laminate or thermofoil cabinets, buy products made specifically for those surfaces. Always check the product label before using.
Where Can I Find Good Color Matches For Cabinet Touch-ups?
Many hardware stores offer color matching services using a sample from your cabinets. You can also look for touch-up kits sold by popular cabinet brands. For more color matching tips, check resources like Home Depot.
Restoring the look of your kitchen cabinets doesn’t have to be expensive or overwhelming. With careful cleaning, a few repairs, and the right products, you can make your cabinets look almost new. Take your time, follow each step, and enjoy your refreshed kitchen for years to come.