
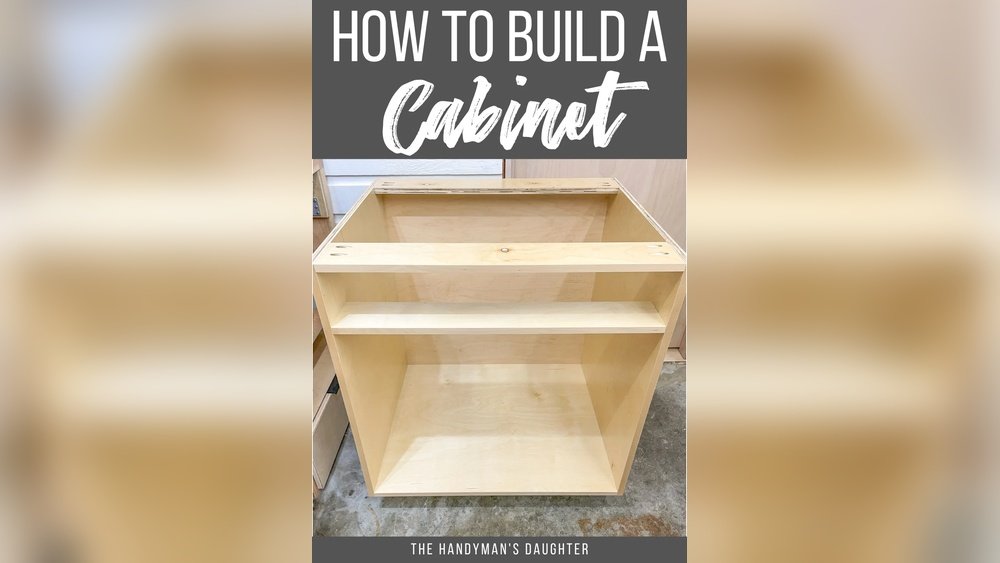
Building your own kitchen cabinet base can be a rewarding project. Whether you’re remodeling your kitchen or creating custom storage, doing it yourself saves money and gives full control over design and quality. Many people think making cabinets is only for professionals, but with the right guidance and tools, you can build a strong, stylish cabinet base at home. This guide will walk you through every step, from planning to installation, with practical advice, clear instructions, and tips that even many beginners miss.
Understanding The Kitchen Cabinet Base
A kitchen cabinet base is the bottom part of a cabinet that sits on the floor. It supports the countertop, drawers, and doors. Getting this part right is important because the base affects the cabinet’s strength, level, and how it fits your kitchen.
Most base cabinets are 24 inches deep and 34. 5 inches high (without countertop), but you can adjust these dimensions for your needs. For example, if you are taller or shorter, you might want to change the height for comfort.
If your kitchen is small, you can make shallower cabinets to save space. Materials, joinery, and installation methods can change depending on your skill level and kitchen layout. For instance, a corner cabinet may need special support or extra bracing, while a long row of cabinets must be level throughout.
Planning Your Cabinet Base
Before buying materials or cutting wood, you need a solid plan. Good planning prevents wasted wood and frustration later.
Measure Your Space
Use a tape measure to get the exact size of your cabinet area. Write down the width, depth, and height. Check if the floor is level and if the walls are straight—many kitchens have small slopes or bumps that can affect your cabinet’s fit.
Take several measurements along the wall in case it isn’t perfectly straight. If you have baseboards or pipes along the wall, note their locations so you can plan cutouts or notches.
Decide On The Cabinet Style
There are two main types:
- Face frame: Has a frame on the front. Doors attach to the frame. Looks traditional and is common in the US.
- Frameless (Euro style): No frame. Doors attach directly to the sides. Gives a modern look and more storage inside.
Frameless cabinets are easier for DIY because they need fewer cuts and parts. If you want to maximize storage, the frameless design gives a wider opening for drawers and shelves. But if you plan to match cabinets in an older home, the face frame style may blend in better.
Sketch The Cabinet
Draw a simple diagram. Include the width, depth, and height. Mark where drawers, doors, and shelves will go. This helps you order the right amount of material. Label each part and its size. If you are building several cabinets, make one drawing for each cabinet—even if they are similar—because small differences can add up.
A tip many people miss: sketch the kitchen wall and mark where the cabinet will sit, including nearby appliances or features. This avoids surprises if, for example, a stove or refrigerator door swings into your cabinet.
List Your Tools And Materials
You’ll need:
- Plywood or MDF (3/4″ for sides, top, bottom, and shelves; 1/4″ for back panel)
- Wood glue
- Wood screws (1 1/4″ or 1 5/8″)
- Drill
- Circular saw or table saw
- Measuring tape
- Carpenter’s square
- Clamps
- Level
- Edge banding (for a clean look)
- Sandpaper
- Paint or finish (optional)
Many beginners forget clamps and a level. These tools are crucial for getting tight joints and a straight cabinet. As an extra tip, a scrap piece of plywood works well as a temporary “assembly table” to keep your parts off the floor and free from dirt.
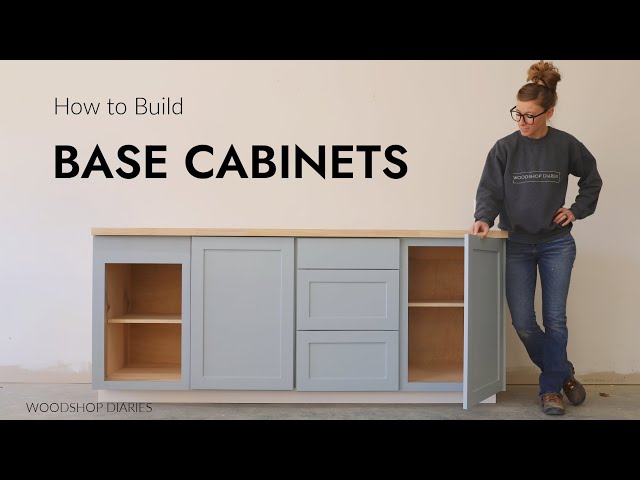
Credit: www.youtube.com
Cutting The Parts
Accurate cuts are key for a strong cabinet. Poor cuts lead to gaps, weak joints, and a cabinet that might not fit or look right.
- Mark Your Cuts: Use a pencil and square to draw lines on your plywood. Double-check each measurement before cutting. If you’re not confident, make a test cut on a scrap piece first.
- Cut Sides: Two identical pieces for the left and right sides. Check that the grain direction matches on both sides for a better look.
- Cut Top and Bottom: These fit between the sides. Measure carefully so the box will be square.
- Cut Toe Kick: The toe kick is a notch at the bottom front. It’s usually 3.5″ high and 3″ deep. This lets you stand close to the counter without hitting your toes. Some people forget to cut the toe kick, which makes the cabinet uncomfortable to use.
- Cut Back Panel: Use 1/4″ plywood. It adds strength and helps with squaring. If your wall has outlets or pipes, mark and cut holes in the back panel now.
- Cut Shelves: If your cabinet will have shelves, cut them now. If you want adjustable shelves, wait to drill shelf pin holes until after the cabinet is assembled.
A common mistake is not double-checking measurements before cutting. Measure twice, cut once. For beginners, labeling each part with a pencil helps keep things organized.
Building The Cabinet Box
This is the main structure that holds everything together. Don’t rush this step, as mistakes here are hard to fix later.
Assembling The Sides
Lay the two side pieces flat. Mark where the bottom, top, and shelves will go. Drill pilot holes for screws to avoid splitting the wood. Dry-fit all the parts before gluing to be sure everything lines up. If something seems off, check your measurements again before assembly.
Attaching Top And Bottom
Apply wood glue to the ends of the top and bottom pieces. Use screws to attach them between the side panels. Make sure everything is square—check with the carpenter’s square. If you see a gap, loosen the screws, adjust, and tighten again.
If you want a stronger box, add a small bead of glue in each joint before screwing together. Clean up any glue squeeze-out with a damp cloth right away.
Adding The Back Panel
Lay the box face down. Place the 1/4″ back panel on the rear. Attach using small screws or nails. The back keeps the cabinet square and strong. Start by attaching one corner, then check for square before finishing the rest.
If you notice the box is out of square, gently tap the corners until the diagonals match in length.
Installing The Toe Kick
Cut a strip of plywood for the toe kick and attach it along the front bottom edge. Use glue and screws. Some people build a separate base frame and set the cabinet box on top; this is a more advanced method but gives more flexibility for leveling.
For a single cabinet, attaching the toe kick directly is fine. For a row of cabinets, a separate base makes it easier to get everything level and supported.
Adding Shelves
Support the shelves with small strips of wood (cleats) or use shelf pins. Attach cleats to the inside walls at the desired height, then set the shelves on top. If you plan to store heavy items, use thicker shelves or add a center support to prevent sagging.
Edge Banding For A Clean Look
Plywood edges can look rough. For a smooth finish, use edge banding—a thin strip of wood or plastic glued to the plywood edge.
- Cut banding slightly longer than the edge.
- Apply glue or use pre-glued banding with an iron.
- Press the banding on and let it cool.
- Trim the excess with a sharp knife or file.
Edge banding makes even simple cabinets look professional. For a stronger bond, press firmly while the glue is hot. Sand the edges lightly for a seamless look. Matching the banding color to your plywood gives a high-end finish.
Building The Face Frame (optional)
If you want a traditional look, add a face frame. This is a frame of solid wood strips (usually 1.5″ wide) attached to the front.
- Cut rails (horizontal pieces) and stiles (vertical pieces).
- Join them with wood glue and pocket screws or dowels.
- Attach the frame to the cabinet box with glue and clamps.
Face frames add strength and cover rough plywood edges, but they take extra work. For the best look, sand the frame flush with the cabinet sides after attaching. Be careful to align the frame with the box so the doors and drawers fit well later.
Preparing For Doors And Drawers
Decide if you want doors, drawers, or both.
- For doors, add hinges inside the cabinet or on the face frame. Mark where the hinges will go before drilling.
- For drawers, measure openings carefully. Drawer boxes should be slightly smaller than the opening to fit slides. Always check the manufacturer’s instructions for the slides you choose, as the size needed can vary.
It’s easier to buy ready-made doors and drawers if you’re a beginner. You can also order custom sizes online if you want a perfect fit without the hassle of building them yourself.
Sanding And Finishing
Smooth all surfaces with sandpaper (start with 120 grit, finish with 220 grit). Remove dust with a vacuum or cloth. Sand in the direction of the wood grain for the best result.
You can paint or stain your cabinet for a finished look. Use primer before painting plywood. For a more natural look, use clear wood finish. If you want a tough, washable surface, use a polyurethane topcoat. Let each coat dry fully before sanding lightly and adding the next.
Installing The Cabinet Base
When the cabinet is built and finished, it’s time to install it.
Level The Base
Set the cabinet in place. Use a level to check if it’s flat front-to-back and side-to-side. Shim under the cabinet if the floor is uneven. Stack thin shims and trim them flush after installation.
Attach To The Wall
Drill holes through the back panel into wall studs. Use long screws to secure the cabinet. Check for level again after tightening. For safety, use at least two screws per stud.
For multiple cabinets, connect them to each other with screws through the side panels. Clamp cabinets together while drilling to keep the faces flush.
Fitting Countertops
The cabinet base must be strong and level before adding a countertop. Wait until the cabinets are fully installed before measuring for countertops. If using heavy stone counters, make sure your cabinet is well-supported and anchored.
Cost Comparison: Diy Vs. Pre-made Cabinets
Building your own kitchen cabinet base is not just about pride—it’s about smart budgeting. Here’s a quick comparison:
| Option | Average Cost (per 36″ base) | Time Required | Skill Level |
|---|---|---|---|
| DIY Build | $80 – $200 | 6–12 hours | Beginner–Intermediate |
| Pre-Made Cabinet (Big Box Store) | $180 – $400 | 1–2 hours (installation only) | Beginner |
| Custom Ordered | $400 – $1,000+ | 2–4 weeks (waiting) | None |
DIY saves money but takes time and effort. You can also customize the size and features for your kitchen. Another advantage: you can use leftover materials for smaller cabinets or accessories.
Material Choices: Plywood Vs. Mdf Vs. Particleboard
Choosing the right material is important for durability and cost.
| Material | Pros | Cons | Best For |
|---|---|---|---|
| Plywood | Strong, holds screws well, resists water | More expensive | Cabinet boxes, shelves |
| MDF | Very smooth, paints well, cheap | Heavy, swells with water | Painted cabinets, doors |
| Particleboard | Cheapest, easy to cut | Weak, absorbs moisture | Temporary cabinets |
Plywood is usually the best choice for kitchen cabinet bases. It balances strength, cost, and durability. For humid kitchens, always seal the edges to prevent swelling.
Common Mistakes And How To Avoid Them
Not Checking For Square
If your cabinet isn’t square, drawers and doors won’t fit. Always check with a carpenter’s square and measure both diagonals. If they are equal, your box is square. This step is easy to miss if you’re tired or rushing.
Ignoring The Level Of The Floor
Many kitchens have uneven floors. If you don’t shim and level the base, countertops will not sit flat and doors may swing open by themselves. Bring extra shims to the installation.
Using Cheap Fasteners
Low-quality screws can break inside the wood. Use strong, coated wood screws for best results. Stripped screws are a hassle to remove and weaken the cabinet.
Skipping The Back Panel
Some skip the back panel to save money. This weakens the cabinet and makes it harder to install. The back panel also helps keep out dust and pests.
Rushing The Finish
Let paint or stain dry fully before handling. Rushing can cause smudges or dust to stick to the surface. Waiting an extra hour or two makes a big difference in the final look.
Adding Custom Features
One benefit of building your own cabinet base is adding custom features.
Pull-out Shelves
Install pull-out shelves for easy access to pots and pans. Use heavy-duty drawer slides. These are especially helpful in deep cabinets where reaching the back is difficult.
Trash Bin Storage
Build a special compartment for a pull-out trash bin to keep your kitchen tidy. You can buy a sliding trash kit or make your own with simple slides and a strong shelf.
Adjustable Shelves
Drill shelf pin holes to move shelves up or down as needed. For flexibility, space the holes about 2 inches apart.
Corner Cabinets
For L-shaped kitchens, a lazy Susan or swing-out shelf makes corners useful. These can be added during the build, but adding them later is much harder.
These upgrades are easier to add during the building phase than after installation. Think about what will make your daily cooking routine smoother.
Safety Tips For Diy Cabinet Building
- Always wear safety glasses when cutting or drilling.
- Use hearing protection with loud power tools.
- Work in a well-ventilated area, especially when gluing or painting.
- Keep fingers away from saw blades and drill bits.
- Clamp wood securely before cutting.
Many accidents happen because people rush or skip safety gear. Take your time and focus on safety. If you’re unsure about using a tool, look up a video or ask someone experienced for help.
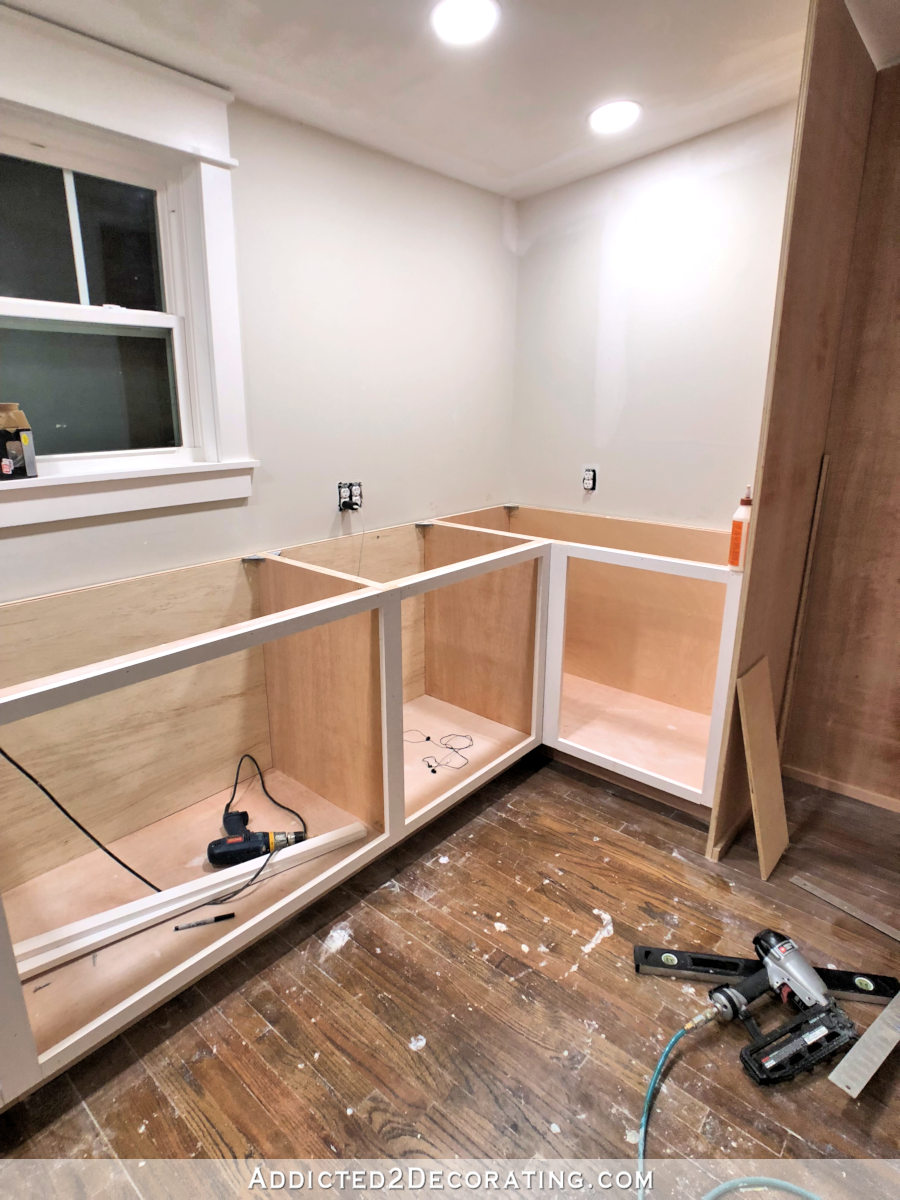
Credit: www.addicted2decorating.com
Maintenance And Longevity
A good cabinet base should last decades. Here’s how to keep it in top shape:
- Wipe up spills quickly to prevent water damage.
- Tighten screws every few years as wood can shift.
- Check for signs of wear on shelves and hinges.
- Refinish surfaces as needed to protect the wood.
With simple care, a DIY cabinet can last as long as store-bought. Inspect your cabinets every spring and fall to catch problems early. If you notice the cabinet shifting, re-level and re-anchor it before damage gets worse.
When To Call A Professional
DIY is rewarding, but not for every situation. Call a cabinetmaker if:
- Your kitchen has complex corners or odd angles.
- You want high-end features like inset doors or custom moldings.
- You need the project finished very quickly.
For most straight walls and basic cabinets, building your own is possible with patience and planning. But for very heavy countertops or if you want built-in appliances, expert help is smart.
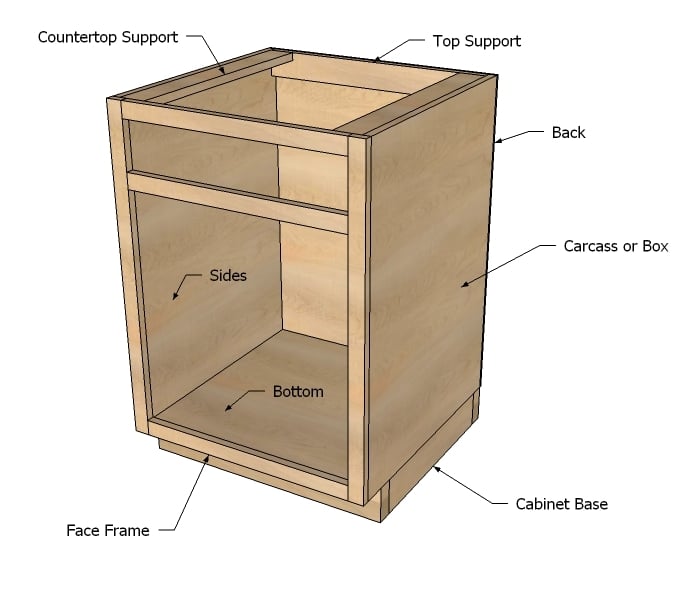
Credit: www.ana-white.com
Advanced Techniques: Pocket Holes, Dowels, And Biscuits
If you want stronger joints, try these methods:
- Pocket holes: Special screws join two boards at an angle. Fast and strong.
- Dowels: Wooden pegs fit into matching holes for invisible strength.
- Biscuits: Thin wood pieces fit into slots for alignment and strength.
These techniques need special tools but add a professional touch. Many professional shops use pocket holes for quick, strong frames. Biscuits are great for lining up long edges, like joining two pieces of plywood.
Environmental Impact And Sustainability
Building your own cabinet base lets you choose eco-friendly materials. Look for:
- FSC-certified plywood (from responsible forests)
- Low-VOC glues and paints (healthier indoor air)
- Recycled materials (for less waste)
DIY also reduces shipping and packaging compared to factory cabinets. If you have leftover materials, use them for drawer dividers, spice racks, or other kitchen organizers to reduce waste.
Real-world Example
Consider Alex, a homeowner with basic tools and little woodworking experience. By following step-by-step plans and taking measurements carefully, Alex built two sturdy cabinet bases for under $300. Mistakes happened—like cutting a shelf too short—but extra planning and double-checking saved time and money.
Now, Alex’s kitchen has custom storage that fits perfectly and matches the home’s style.
One lesson Alex learned: buying a better-quality plywood saved time during finishing and made the cabinets stronger. Also, spending a few dollars on extra clamps made assembly much easier and resulted in tighter, cleaner joints.
Helpful Resources
For visual learners, video tutorials on YouTube or guides from home improvement stores can help. One trusted source for cabinet building basics is the Family Handyman. Local woodworking clubs or classes can also be a great place to get advice and hands-on practice.
Frequently Asked Questions
How Long Does It Take To Build A Kitchen Cabinet Base?
Building a cabinet base from scratch usually takes 6–12 hours for one cabinet. This depends on your skill, tools, and if you paint or finish the wood. Allow extra time for the first cabinet as you learn the process. If you build several cabinets at once, you can save time by cutting and assembling in batches.
What Type Of Wood Is Best For Kitchen Cabinet Bases?
Plywood is the best option for most DIYers. It’s strong, resists moisture better than MDF or particleboard, and is easier to work with. For a painted finish, MDF is smooth but not as durable for the base. If you live in a humid area, consider marine plywood for even better water resistance.
Can I Build Cabinets Without Special Tools?
You can build basic cabinets with a circular saw, drill, and clamps. A table saw, pocket hole jig, and nail gun make the process faster and neater, but are not required for a simple base cabinet. Borrowing tools from friends or renting from hardware stores is a good option for one-time projects.
How Do I Make Sure My Cabinet Is Level?
Use a bubble level on the cabinet after placing it on the floor. Add thin wood shims under the base until it reads level in all directions. This step is important before attaching the cabinet to the wall. If the floor slopes a lot, trim the bottom of the cabinet sides at an angle to fit better.
Do I Need To Finish The Inside Of The Cabinet?
It’s not required, but finishing the inside (painting or sealing) makes cleaning easier and protects the wood from moisture. Many DIYers finish visible surfaces only, but a full finish adds durability. If you use plywood with a nice surface, a clear sealer is often enough.
Building a kitchen cabinet base is a practical project that saves money and teaches valuable skills. By planning carefully, using the right materials, and following safe, clear steps, you can create a cabinet base that will serve your kitchen for years.
With these tips, even beginners can achieve solid, professional-looking results.