Tightening the kitchen faucet nut under your sink might sound simple, but for many homeowners, it can quickly become a frustrating job. The space is tight, your tools barely fit, and one wrong move can lead to leaks or even damage.
Yet, keeping this nut secure is important for a stable faucet and a dry cabinet. If you notice your faucet is wobbly, water is leaking under the sink, or you hear strange noises when you turn the handles, the culprit could be a loose faucet nut.
You don’t need to be a plumber to fix this issue. With a bit of patience, the right tools, and some smart techniques, you can tighten the nut and restore your faucet’s stability. In this guide, you’ll find step-by-step instructions, practical advice, and non-obvious tips that even many DIY enthusiasts miss.
Whether you’re a beginner or have tried and failed before, you’ll discover clear answers and solutions that work in real kitchens, not just in theory.
Why Tightening The Kitchen Faucet Nut Matters
Many people ignore a loose kitchen faucet because it seems like a small problem. However, even a slightly loose nut can cause bigger issues:
- Leaks: Water may drip under the sink, soaking wood and making mold grow.
- Instability: The faucet wobbles, making it hard to use and causing stress on other parts.
- Noise: A loose nut can create annoying sounds each time you use the faucet.
Ignoring these problems often leads to more expensive repairs. A quick tightening now can save you from replacing cabinets or the entire faucet later.
Tools And Materials You Need
Before you start, gather everything you need. Having the right tools makes the job faster and reduces frustration.
Basic Tools
- Adjustable wrench – For most nuts, this is essential.
- Basin wrench – Designed for tight spaces under sinks.
- Socket wrench – Useful if you have enough clearance.
- Pliers – Sometimes help grip or hold the nut.
- Flashlight or headlamp – To see clearly in dark cabinets.
- Towel or foam pad – For comfort when lying under the sink.
- Bucket – To catch any water drips.
Optional But Helpful Items
- Penetrating oil – For rusted or stubborn nuts.
- Duct tape – To protect surfaces from tool scratches.
- Mirror – Helps see awkward angles.
- Gloves – Protect your hands from sharp edges.
- Zip ties or bungee cords – To move hoses temporarily.
Safety First
Water and electricity don’t mix. If your sink has any nearby outlets or garbage disposals, make sure they are off. Also, check for any leaks before you start and keep towels handy.
Understanding The Faucet Nut And Sink Anatomy
Every kitchen faucet has a mounting nut or locknut that holds it to the sink or countertop. Most of the time, this nut is located directly under the faucet base, behind the sink basin.
There are two common nut types:
- Plastic nuts: Used on many modern faucets. Easier to turn, but can crack if overtightened.
- Metal nuts (usually brass): Found on older or heavy-duty faucets. Stronger but may rust.
Knowing your nut type helps you choose the right tool and apply the correct amount of force.
Typical Faucet Under-sink Setup
Below is a simple comparison of two common under-sink setups:
| Feature | Single-Hole Faucet | Three-Hole Faucet |
|---|---|---|
| Number of Nuts | 1-2 | 2-3 |
| Space Under Sink | More | Less |
| Tools Needed | Basin wrench, pliers | Basin wrench, socket wrench |
Different sink types may need slightly different approaches. Always check where your nut is before you start.
Preparing Your Workspace
Working under a sink is uncomfortable for most people. Good preparation makes a big difference.
- Clear out the cabinet: Remove cleaning supplies, trash bins, or anything stored below the sink.
- Lay down a towel or pad: You’ll be lying on your back. This prevents back pain and protects your clothes.
- Position your light: A headlamp keeps both hands free. Otherwise, set a small flashlight inside.
- Turn off water valves: Look for two small valves (hot and cold) under the sink. Turn them clockwise to shut off water.
- Open the faucet: This relieves any pressure and drains remaining water.
Many beginners skip these steps and end up working in cramped, dark, wet conditions. A few minutes of setup saves a lot of frustration.
Step-by-step Guide: How To Tighten The Kitchen Faucet Nut
Now that you’re ready, follow these steps. Each is important for a safe, successful repair.
Step 1: Locate The Faucet Nut
Crawl under the sink and look up behind the sink basin. The nut is usually at the base of the faucet’s threaded tailpiece. If you see two nuts, you may have a two-handle faucet or a faucet with a sprayer.
Tip: Use a mirror to see behind pipes or in tight corners.
Step 2: Inspect The Nut And Surroundings
Look for these common issues:
- Rust or corrosion: Makes nuts harder to turn. Apply penetrating oil and wait 10-15 minutes.
- Water stains or mold: Signs of ongoing leaks.
- Cracks in plastic nuts: If cracked, tightening may make it worse (you may need to replace).
If everything looks good, move to the next step.
Step 3: Choose The Right Tool
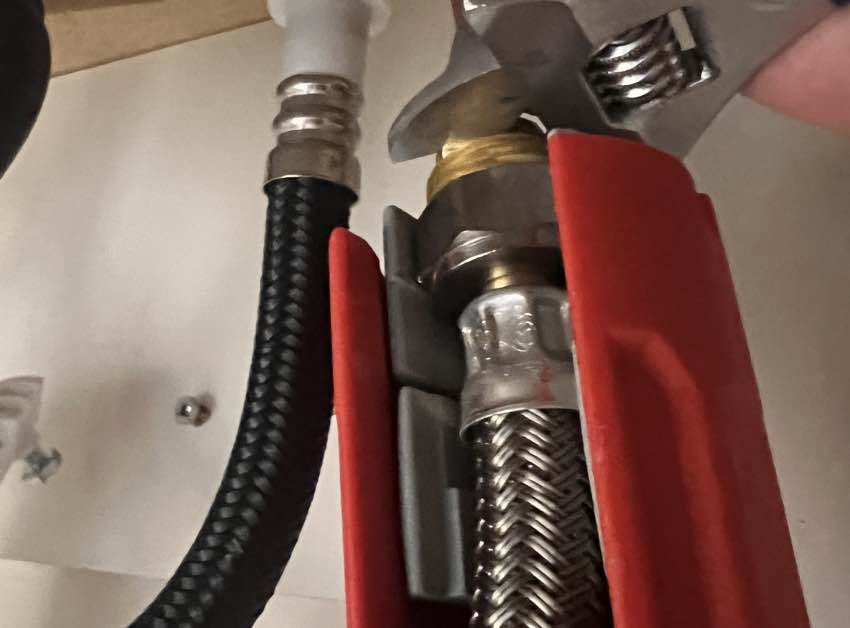
If the nut is easy to reach, an adjustable wrench or pliers may work. For harder-to-reach nuts, use a basin wrench.
Basin wrench: This tool has a long handle and a swiveling jaw, perfect for tight spaces.
Non-obvious insight: Many people try to use pliers in tight spots and end up damaging the nut or surrounding pipes. A basin wrench is designed for this job and reduces the risk of injury or damage.
Step 4: Tighten The Nut
Position your tool around the nut. Turn clockwise to tighten. Start slowly and feel for resistance.
- Plastic nuts: Tighten until snug; do not force. Overtightening can crack the nut or faucet base.
- Metal nuts: Tighten firmly, but don’t use excessive force. Stop as soon as the faucet feels stable.
Practical tip: If your tool keeps slipping, wrap a bit of duct tape around the jaws for better grip and to protect the nut.
Step 5: Check The Faucet Above The Sink
Stand up and gently wiggle the faucet. It should feel stable and not move side to side. If it still wobbles, tighten the nut a little more.
Common mistake: Overtightening. This can bend metal parts or crack plastic. If the nut will not tighten, it may be stripped or damaged.
Step 6: Test For Leaks
Turn the water valves back on slowly. Run the faucet for a few minutes. Check under the sink for drips or puddles.
- If you see water, turn off the valves and inspect your work.
- If dry, you’ve done the job.
Step 7: Clean Up
Put everything back under the sink. Wipe down any tools or surfaces. If you used penetrating oil, clean up any drips to prevent odors.
Troubleshooting: When Things Go Wrong
Even careful DIYers sometimes face issues. Here’s what to do if you hit a snag.
Nut Won’t Budge
- Apply more penetrating oil and wait longer.
- Use a longer-handled basin wrench for more leverage.
- Tap the nut gently with the handle of your tool to break rust.
Advanced tip: Heat the nut slightly with a hairdryer (never a flame) to expand metal and loosen rust.
Nut Is Stripped Or Damaged
- If the nut spins but won’t tighten, it may be stripped.
- Try gripping the nut with locking pliers while turning.
- If still loose, the nut may need replacement.
Faucet Still Leaks After Tightening
- Check for cracks in the faucet base or sink.
- Inspect washers or gaskets for wear. Replacing them may solve the leak.
- Tighten supply lines if water is coming from hose connections, not the base.
You Can’t Reach The Nut
- Remove the garbage disposal (if installed) for better access.
- Use a mirror and flashlight to guide your wrench.
- Ask a friend to help hold the faucet steady from above.
Non-obvious Insights For A Smoother Repair
- Mark the Nut Position Before Tightening: Put a small dot with a marker on the nut and sink. This shows you how much you’ve moved the nut and helps track progress.
- Loosen, Then Tighten: If the nut is very stuck, try loosening it slightly before tightening. This can break any seal and make tightening easier.
- Use a Socket Extension: For sinks with deep recesses, a socket wrench with a long extension can reach where hands and standard tools cannot.
- Check Hoses and Other Connections: Sometimes, a loose faucet nut causes other connections to loosen too. Inspect all fittings to avoid future leaks.
- Replace Worn Nuts: If you see cracks, rust, or stripped threads, replacing the nut is smarter than forcing it tight.
Special Cases: Dealing With Different Faucet Styles
Not all faucets are the same. Here’s how to handle some common styles.
Single-handle Faucets
These often use one central nut. The process is straightforward, but the nut can be larger and harder to turn.
- Make sure to support the faucet from above when tightening.
- If the faucet has a pull-out sprayer, keep the hose out of the way.
Two-handle Faucets
There may be two nuts, one under each handle.
- Tighten both nuts evenly to avoid tilting the faucet.
- Check for leaks around both handles.
Pull-down Or Pull-out Faucets
Extra hoses for the sprayer can get in the way.
- Use zip ties to secure hoses while you work.
- Be gentle to avoid damaging sprayer connections.
Wall-mounted Faucets
These are rare in kitchens, but tightening the nut requires removing the faucet from the wall.
- Shut off water at the main valve.
- Remove the faucet, tighten the nut, then reinstall.

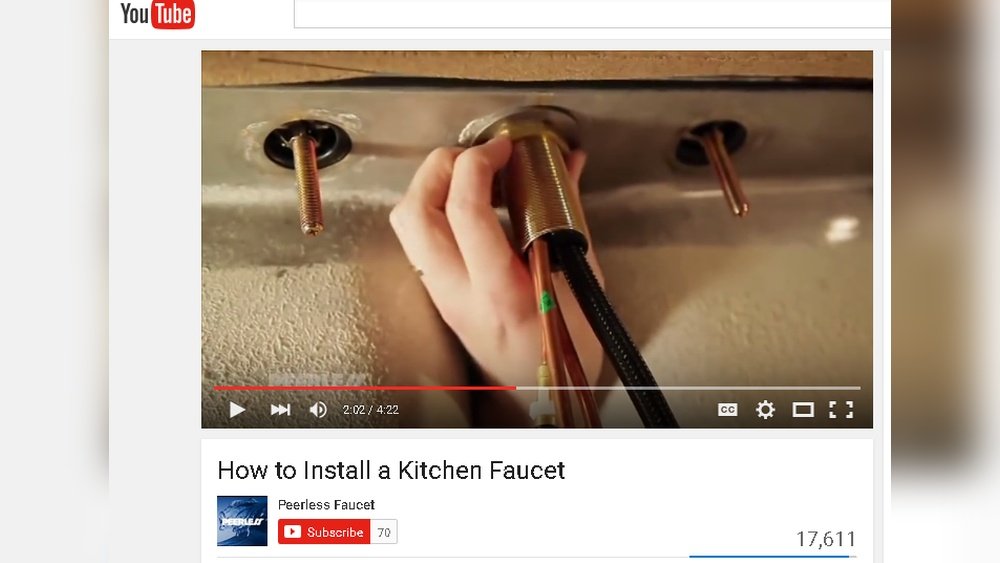
Credit: www.youtube.com
When To Replace Instead Of Tighten
Sometimes, no amount of tightening will fix the problem.
- Stripped threads: The nut will not grip and must be replaced.
- Cracked plastic: A cracked nut or faucet base can break under pressure.
- Old, corroded parts: If rust is severe, replacing both nut and faucet may be safer.
Pro tip: If your faucet is over 15 years old and keeps coming loose, consider a full replacement for better performance and fewer leaks.
Maintenance Tips To Prevent Future Problems
Regular care keeps your faucet stable and leak-free.
- Check the nut every six months. A quick inspection can catch problems early.
- Clean out mineral deposits. Hard water can cause buildup around the nut.
- Keep cabinet dry. Wipe up spills to prevent rust or mold.
- Lubricate threads. A drop of plumber’s grease can make nuts easier to adjust.
- Don’t hang heavy items on faucet. Extra weight can loosen the nut over time.
Comparison: Basin Wrench Vs Other Tools
Choosing the right tool makes a big difference. Here’s a quick look at the main options:
| Tool | Best For | Pros | Cons |
|---|---|---|---|
| Basin wrench | Tight spaces under sinks | Long reach, swiveling head | Learning curve, slips if not used correctly |
| Adjustable wrench | Easy-to-reach nuts | Simple, versatile | Too large for most sink nuts |
| Pliers | Holding or turning hoses | Good grip | Can damage nut, hard to use in tight space |
| Socket wrench | Deep-set nuts | Strong grip, fast turning | Needs exact size, limited space |
If you plan to do more plumbing, investing in a basin wrench is smart.
Real-world Example: Fixing A Wobbly Faucet
Sarah, a homeowner in Ohio, noticed her kitchen faucet shaking every time she turned it. She crawled under the sink, found the mounting nut, and tried to tighten it with pliers. The nut was too tight, and her pliers kept slipping.
After buying a basin wrench, she could easily grip and tighten the nut. The faucet stopped wobbling, and the leak disappeared.
Her main lesson? The right tool saved her hours of frustration—and a call to the plumber.
How Much Does Professional Repair Cost?
If you decide not to DIY, hiring a plumber is an option. Average costs:
- Service call fee: $75–$150
- Hourly labor: $50–$125 per hour
- Parts: $5–$30 for a new nut
Total cost can range from $100 to $250 for a simple tightening or replacement. In most cases, doing it yourself saves money.
Common Mistakes To Avoid
- Using the wrong tool: This can damage the nut or faucet.
- Overtightening: Leads to cracks and more leaks.
- Forgetting to turn off water: Causes sudden leaks or even flooding.
- Ignoring other leaks: Fix all problems while you’re under the sink.
- Rushing: Take your time to avoid injury and poor results.
Credit: www.protoolreviews.com
Additional Resources
If you want to see diagrams or watch step-by-step videos, check out this helpful Family Handyman tutorial for real-world visuals and tips.
Frequently Asked Questions
How Do I Know If My Kitchen Faucet Nut Is Loose?
A loose nut often causes the faucet to wobble or move when you use it. You might also see water leaking under the sink or hear a clunking sound when you turn the faucet. Checking under the sink for a loose nut or water stains can confirm the issue.
What If I Can’t Reach The Nut With My Tools?
If your wrench is too short or the space is too tight, use a basin wrench with a long handle. You can also remove the garbage disposal or drain pipes temporarily for more access. Using a mirror and flashlight helps in tight spots.
Can I Over-tighten The Faucet Nut?
Yes, overtightening is a common mistake. It can crack plastic nuts or bend metal parts, causing worse leaks. Tighten the nut until the faucet is stable, but stop if you feel strong resistance.
Do I Need To Turn Off The Water Supply Before Tightening?
It’s safest to turn off the water valves under your sink before starting. This prevents surprise leaks if you accidentally loosen a hose or fitting.
When Should I Replace The Faucet Nut Instead Of Tightening?
Replace the nut if you see cracks, rust, or stripped threads. If the nut keeps coming loose after tightening or if water still leaks, a new nut (or even a new faucet) may be needed for a long-term fix.
Securing your kitchen faucet isn’t just about stopping leaks—it protects your home and keeps daily tasks easy. By following these steps and tips, you’ll have a stable, leak-free faucet and more confidence with DIY plumbing jobs.
Credit: www.reddit.com