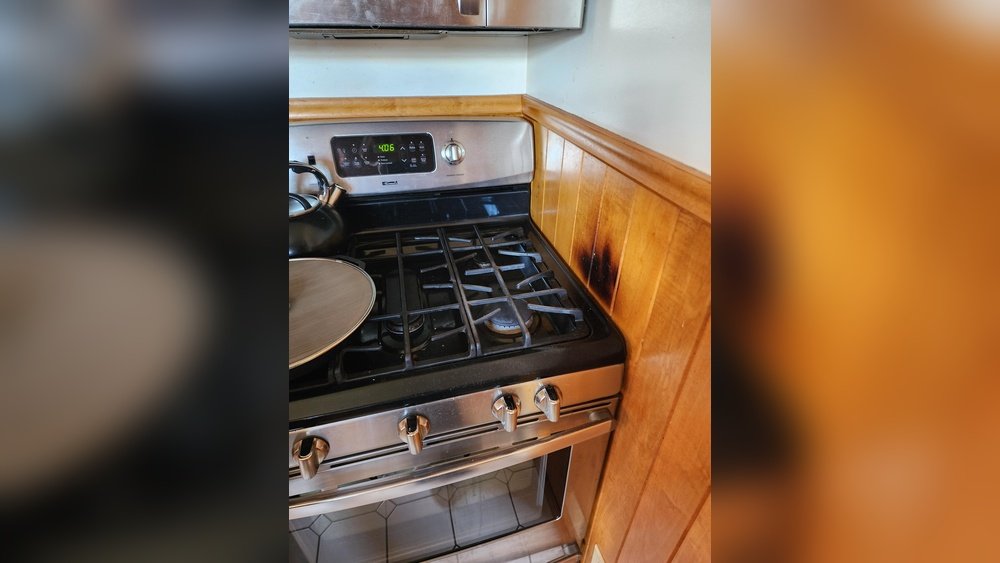
If you cook often, you know the kitchen gets messy fast. The area behind the stove is one of the hardest places to keep clean. Oil splashes, food stains, and steam can damage your wall quickly. Over time, these stains can leave permanent marks, cause bad smells, or even lead to mold. But with the right solutions, you can protect your wall, make cleaning easier, and keep your kitchen looking fresh.
This article will give you everything you need to know about how to protect the wall behind your stove. We’ll cover all the best methods—from quick DIY tricks to more permanent options. You’ll learn about the best materials, installation steps, and what mistakes to avoid. Whether you rent or own your home, there’s a solution here for you.
Why Protecting The Wall Behind Your Stove Matters
Cooking sends out a mix of grease, moisture, and heat. Even with a good exhaust fan, some of this lands on your wall. If left unprotected, you’ll face:
- Grease stains: Hard to remove and can discolor paint.
- Peeling paint or wallpaper: Steam and oil break down the surface.
- Mold and mildew: Moisture can seep in and cause health risks.
- Fire hazards: Grease buildup may catch fire if not cleaned.
On top of that, cleaning oil and food from a bare wall is much tougher than cleaning a protected surface. If you want your kitchen to stay neat and safe, protecting the wall behind your stove is essential.
Common Types Of Damage To Walls Behind Stoves
Understanding the risks helps you choose the right protection:
- Oil and Grease Splatter
- Frying and sautéing send tiny droplets onto the wall. Over time, these build up and become sticky.
- Steam Damage
- Boiling water and simmering sauces produce steam. This moisture can cause paint to bubble or peel, and wallpaper to come loose.
- Food Stains
- Tomato sauce, curry, or soups can splash and stain. Some foods leave marks that never come out.
- Heat Exposure
- High heat can discolor or warp paint. Some materials may even crack or melt if they’re too close to the burner.
- Mold Growth
- Moisture that gets behind the surface can lead to mold, especially if cleaning is difficult.
Knowing what you’re up against helps you pick the best protection.
Popular Materials For Protecting The Wall
There are several ways to protect your wall, each with its own pros and cons. Let’s look at the most popular options.
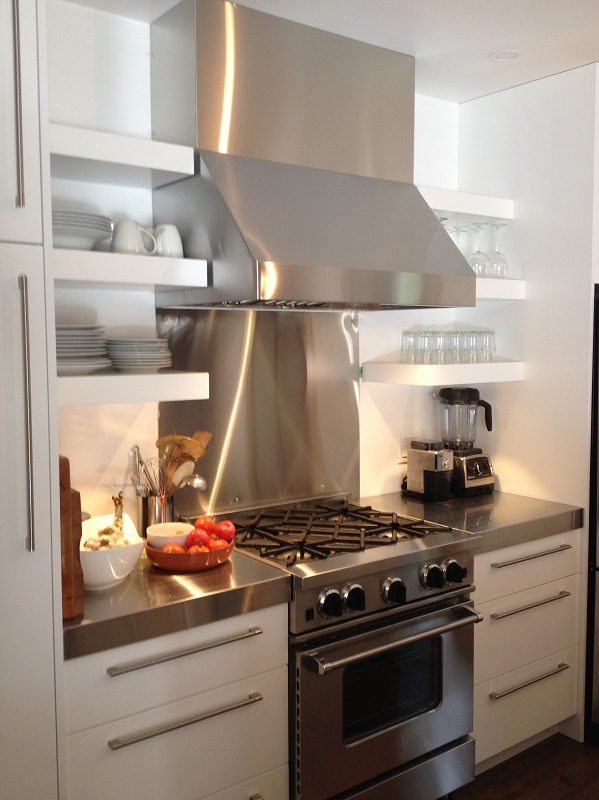
1. Stainless Steel Sheets
Stainless steel is a top choice in professional kitchens. It’s heat-resistant, doesn’t stain easily, and looks modern.
- Pros: Easy to clean, very durable, resists heat and stains, gives a sleek look.
- Cons: Can be expensive, may show fingerprints, sometimes hard to install if custom-fit is needed.
2. Ceramic Or Glass Tiles
Tiles are a classic choice for kitchen backsplashes. Both ceramic and glass options work well.
- Pros: Many styles and colors, easy to wipe, good resistance to heat and stains.
- Cons: Grout can get dirty, installation takes time, glass tiles may chip if hit.
3. Peel And Stick Backsplash Panels
Peel and stick panels are popular for renters and DIY fans. Made of vinyl, metal, or even PVC, they’re quick to apply.
- Pros: Affordable, easy to install, removable without damage.
- Cons: Some may not handle high heat well, can peel off over time if steam is frequent.
4. Tempered Glass Panels
Tempered glass is sturdy and very easy to clean. It’s a modern solution that’s becoming more common.
- Pros: Heat and stain-resistant, looks stylish, easy to wipe.
- Cons: Higher cost, must be cut to size, fingerprints show easily.
5. Washable Paint
Special washable or scrubbable paint creates a tougher surface than regular wall paint.
- Pros: Inexpensive, easy to apply, many color choices.
- Cons: Not as protective as hard materials, can still stain with heavy splatter.
6. Acrylic Or Pvc Sheets
Acrylic and PVC sheets are lightweight and clear or colored. They protect the wall while blending in.
- Pros: Budget-friendly, easy to cut and install, waterproof.
- Cons: Can scratch, may warp under high heat, not as stylish as tile or glass.
7. Aluminum Composite Panels
These panels sandwich a plastic core between aluminum sheets.
- Pros: Good heat resistance, lightweight, modern look.
- Cons: More expensive, installation may need tools.
8. Removable Splash Guards
Some people use portable splash guards that sit right behind the stove.
- Pros: Moveable, no installation needed, easy to clean.
- Cons: Only covers part of the wall, may not look as tidy.
9. Laminate Sheets
Laminates offer a smooth finish and can come in many patterns.
- Pros: Budget-friendly, easy to clean, many styles.
- Cons: Can peel or bubble with heat, not as durable as tile or metal.
10. Wallpaper (special Types)
Some modern wallpapers are washable and heat-resistant.
- Pros: Many designs, easy to install.
- Cons: Not as tough as tile or metal, may need replacing after a few years.
Comparing The Main Protection Materials
To help you choose, here’s a quick side-by-side look at key features:
| Material | Heat Resistance | Ease of Cleaning | Cost | Style Options |
|---|---|---|---|---|
| Stainless Steel | Excellent | Very Easy | High | Modern/Industrial |
| Ceramic/Glass Tile | Good | Easy | Medium | Wide Variety |
| Peel & Stick Panel | Fair | Easy | Low | Many |
| Tempered Glass | Excellent | Very Easy | High | Modern |
| Washable Paint | Fair | Moderate | Low | Many |
| Acrylic/PVC Sheet | Fair | Easy | Low | Simple |
| Aluminum Composite | Good | Easy | High | Modern |
| Removable Guard | Good | Very Easy | Low | Basic |
| Laminate Sheet | Fair | Easy | Low | Many |
| Special Wallpaper | Poor-Fair | Moderate | Low | Very Wide |
How To Choose The Right Protection For Your Kitchen
Each kitchen is different. Here’s what to think about before you decide:
1. Budget
- If you want a permanent, high-end look, invest in tile, glass, or stainless steel.
- For temporary or rental homes, peel-and-stick panels or removable splash guards are smart.
2. Cooking Habits
- Frequent frying or boiling? Go for high heat and stain resistance (steel, tile, glass).
- Light cooking? Washable paint or wallpaper may be enough.
3. Style And Design
- Modern kitchens often use stainless steel or glass.
- Classic or colorful kitchens might choose tile or patterned wallpaper.
4. Installation Skill
- DIY fans can handle peel-and-stick or acrylic sheets.
- Tiles and steel panels may require professional installation.
5. Cleaning Effort
- Smooth surfaces like glass or steel are easiest to wipe.
- Tiles need extra grout cleaning; textured surfaces hold more dirt.
Here’s a simple comparison for installation difficulty:
| Material | DIY Friendly | Professional Needed? |
|---|---|---|
| Stainless Steel | Medium | Sometimes |
| Ceramic/Glass Tile | Low-Medium | Often |
| Peel & Stick Panel | High | No |
| Tempered Glass | Medium | Sometimes |
| Washable Paint | High | No |
| Acrylic/PVC Sheet | High | No |
| Aluminum Composite | Medium | Sometimes |
| Removable Guard | High | No |
| Laminate Sheet | High | No |
| Special Wallpaper | High | No |
Step-by-step: Installing Different Wall Protections
Let’s break down how to install the most common types.
Stainless Steel Sheet
- Measure the area behind your stove.
- Buy a pre-cut sheet or have one cut to size.
- Clean the wall and make sure it’s dry.
- Apply construction adhesive to the back of the sheet.
- Press the sheet onto the wall, aligning carefully.
- Secure with screws if needed (use anchors for drywall).
- Seal edges with clear silicone to keep moisture out.
Tip: Wear gloves; steel edges can be sharp.
Ceramic Or Glass Tiles
- Plan your tile layout before gluing.
- Spread tile adhesive on the wall with a trowel.
- Press tiles into place, using spacers for even lines.
- Let adhesive dry (usually 24 hours).
- Apply grout between tiles, wipe away excess.
- Seal grout after it’s dry to resist stains.
Tip: Use a level to keep rows straight.
Peel And Stick Backsplash Panels
- Clean the wall with soap and water.
- Let the wall dry fully (important for stickiness).
- Peel off backing and align the panel at the starting point.
- Stick panel to wall, pressing firmly, smoothing air bubbles.
- Trim edges with a utility knife for a perfect fit.
Tip: Don’t install over textured walls; panels may not stick well.
Tempered Glass Panel
- Order custom-cut glass for a perfect fit.
- Mount with brackets or use special adhesives.
- Seal edges to prevent moisture behind the glass.
Tip: Tempered glass is much safer than regular glass—always choose it.
Washable Paint
- Sand and clean wall for a smooth surface.
- Apply primer if needed.
- Paint with washable, scrubbable paint (at least two coats).
- Let dry fully before using the stove.
Tip: Use a high-quality brush or roller to avoid streaks.
:strip_icc()/gray-white-kitchen-herringbone-b5228e30-c3ce430d1c9a4bfe8b26c4e8ab2676a1.jpg)
Credit: www.bhg.com
Diy Tricks For Fast, Cheap Protection
Not ready for a big project? Try these quick ideas:
- Aluminum foil: Tape a sheet behind the stove for a temporary shield during heavy cooking.
- Clear plastic film: Use self-adhesive film (like shelf liner) to guard against splatters.
- Cutting board barrier: Place a large, cheap cutting board behind the stove for splash-heavy recipes.
- Removable wall decals: Some are waterproof and can protect for a few months.
These aren’t as durable but work for renters or when you need a fast fix.
Cleaning And Maintenance Tips
No matter what material you choose, regular cleaning keeps it looking good. Here’s how:
- Wipe after cooking: Use a damp cloth or sponge to remove fresh splatters.
- Degrease weekly: Use a kitchen degreaser spray for tough oil.
- Deep clean monthly: Scrub grout or seams, especially if you see buildup.
- Check for mold: If you notice dark spots, clean with diluted bleach and dry well.
- Inspect edges: Make sure panels and tiles haven’t lifted, which allows moisture underneath.
Insider tip: For shiny surfaces like glass or steel, finish with a microfiber cloth to avoid streaks.
Credit: www.ridalco.com
Common Mistakes To Avoid
Beginners often make these errors. Avoid them for the best results:
- Choosing the wrong material: Not all panels handle heat; vinyl too close to burners can warp or melt.
- Bad installation: Uneven panels or tiles can trap moisture or look messy.
- Skipping wall prep: Grease or dust will prevent panels and paint from sticking.
- Ignoring edges and seams: Unsealed edges let in moisture and food—always caulk or seal.
- Not cleaning regularly: Even with protection, dirt can build up and become hard to remove.
Ideas For Stylish And Practical Backsplashes
The wall behind your stove doesn’t have to be boring. Here are some creative ideas:
- Mosaic tile: Mix colors for a bright accent.
- Chalkboard paint: Write recipes or meal plans right above the stove.
- Patterned glass: Frosted or colored glass adds a unique touch.
- Magnetic panels: Hold spice containers or notes.
- Stainless steel with shelves: Add small racks for utensils or oils.
Bonus insight: Combining two materials (like tile and glass, or steel and wood) can make cleaning easier and add style.
Safety Considerations
Always put safety first:
- Never use flammable materials (like regular wallpaper or untreated wood) near open flames.
- Leave at least 2 inches between any plastic panel and the nearest burner.
- If you use adhesives, choose heat-resistant types.
- Make sure panels are securely attached; loose panels can fall onto burners.
For more on kitchen fire safety, see the recommendations from the National Fire Protection Association.
How To Protect The Wall In A Rented Kitchen
Renters often can’t make permanent changes. Here are smart solutions:
- Use removable peel-and-stick panels.
- Try portable splash guards.
- Cover the wall with a large cutting board or removable plastic sheet during cooking.
- Choose removable decals or clear shelf liner for easy cleaning.
Always check your lease or ask your landlord before adding anything permanent.
How Long Do Different Protections Last?
Here’s a rough guide for how long each method lasts with normal cleaning:
| Material | Expected Lifespan |
|---|---|
| Stainless Steel | 20+ years |
| Ceramic/Glass Tile | 20+ years |
| Peel & Stick Panel | 2-5 years |
| Tempered Glass | 20+ years |
| Washable Paint | 2-5 years |
| Acrylic/PVC Sheet | 5-10 years |
| Aluminum Composite | 15+ years |
| Removable Guard | 2-5 years |
| Laminate Sheet | 5-10 years |
| Special Wallpaper | 2-5 years |
Non-obvious insight: Even the best protection won’t last if you don’t clean regularly. Grease buildup can damage any surface over time.
Frequently Asked Questions
What Is The Cheapest Way To Protect The Wall Behind My Stove?
Peel-and-stick panels and washable paint are the most affordable options. You can also use removable plastic film or even aluminum foil for a short-term fix. These methods are easy for renters or anyone on a budget.
Can I Use Regular Wallpaper Behind My Stove?
No, regular wallpaper will absorb moisture and oil, leading to stains and peeling. Only use washable, heat-resistant wallpaper designed for kitchens. Even then, keep it a safe distance from direct heat.
How Do I Clean Grease Off A Backsplash?
Wipe fresh splatters with a damp cloth right after cooking. For stubborn grease, use a kitchen degreaser or a mix of baking soda and water. For grout, use a small brush and soapy water. Always dry the area after cleaning.
Is It Safe To Use Plastic Panels Behind The Stove?
Plastic panels like acrylic or PVC are safe if placed far enough from the burners (at least 2 inches away). Never use thin or low-quality plastics where they might melt. Always check the manufacturer’s heat rating.
Do I Need To Protect The Wall If I Have A Range Hood?
A range hood helps reduce grease and moisture, but it does not catch all splatter. Walls behind the stove still get dirty and can be damaged over time. Wall protection is still recommended for easy cleaning and safety.
Protecting your kitchen wall behind the stove keeps your home cleaner, safer, and more beautiful. With so many choices, you can find the perfect solution for your style, budget, and needs. A little effort now saves hours of cleaning and costly repairs later—making your kitchen a place you’ll love to cook in every day.

Credit: www.reddit.com