Packing up your kitchen for a remodel can feel overwhelming. The kitchen is the heart of most homes, filled with daily essentials, fragile items, and memories. Suddenly, you need to box up everything from dishes to pantry goods, and keep life running with limited space.
Many people underestimate how much time, planning, and care this process requires. If you want your kitchen remodel to go smoothly, preparing well is key. This guide will walk you through every step, from initial planning to the final box, so your belongings stay safe and your stress stays low.
Why Packing Up The Kitchen Is Different
Packing a kitchen is not like packing other rooms. Here, you have breakable dishes, sharp utensils, food items, and appliances of all sizes. The area is often used until the last minute, so last-second rushes are common. A well-packed kitchen can save you money by preventing broken items and reduce headaches when setting up your new space.
Step 1: Make A Plan Before You Start
Jumping straight into boxing things up can lead to chaos. Start with a clear plan.
- Set a Timeline: Look at your remodel schedule. Aim to finish packing at least 2 days before work starts. This avoids last-minute stress if construction begins early.
- Decide What You’ll Need: Pick out essentials you’ll use during the remodel. Think about coffee makers, a few plates, and basic cooking tools. Set these aside.
- Map Out Storage: Know where you’ll keep packed boxes. Choose a dry, safe room nearby, like a guest room or corner of the living room.
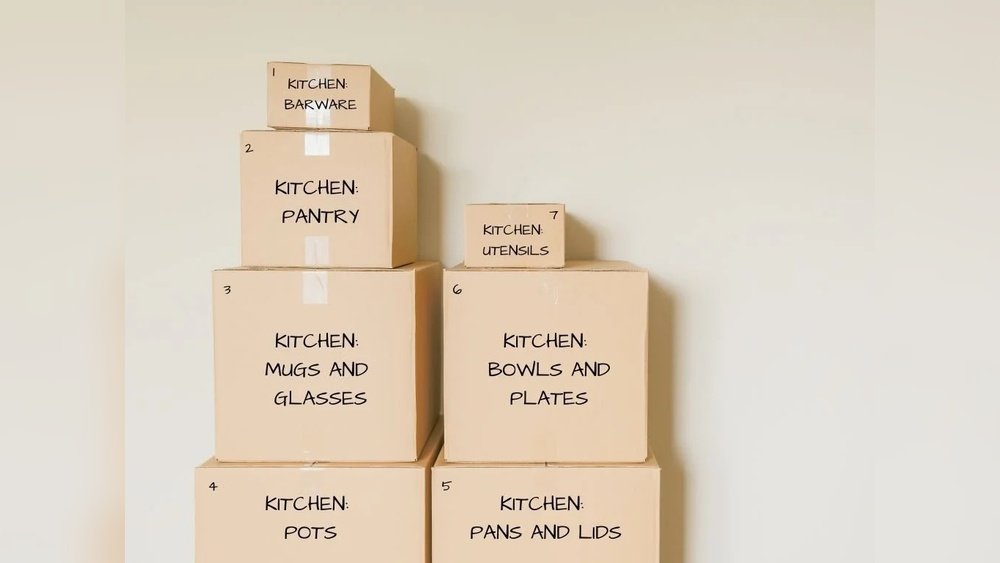
- Label Everything: Use sticky notes or a spreadsheet to track which cabinets contain what, so unpacking later is easier.
Non-obvious insight: Many people forget to check if their storage space for packed boxes is pest-free and temperature controlled. High humidity or leaks can damage boxed items, especially food and electronics.
Step 2: Gather The Right Packing Supplies
Having the proper materials makes a big difference. Cheap or weak boxes can break, causing damage and frustration.
Essential Packing Materials
- Sturdy moving boxes (small for heavy items, medium for most kitchenware)
- Bubble wrap or packing paper for fragile items
- Heavy-duty tape
- Markers for labeling
- Zip-top bags for small parts (like screws from disassembled appliances)
- Stretch wrap for utensils and odd shapes
- Dish pack boxes (double-walled boxes for glassware)
- Plastic bins for items you want extra moisture protection
Pro tip: Save the boxes from recent appliance purchases. They are designed to fit and protect those items.
Quality Comparison: Packing Materials
Here’s a quick look at how different packing materials protect your kitchen items:
| Packing Material | Best Use | Protection Level | Cost |
|---|---|---|---|
| Bubble Wrap | Glasses, plates, fragile items | High | Moderate |
| Packing Paper | Dishes, cups | Medium | Low |
| Dish Pack Boxes | All breakables | Very High | High |
| Plastic Bins | Food, electronics | High (moisture) | High |
Non-obvious insight: Dish pack boxes are more expensive but prevent most breakage. If you have expensive glassware, invest in a few.
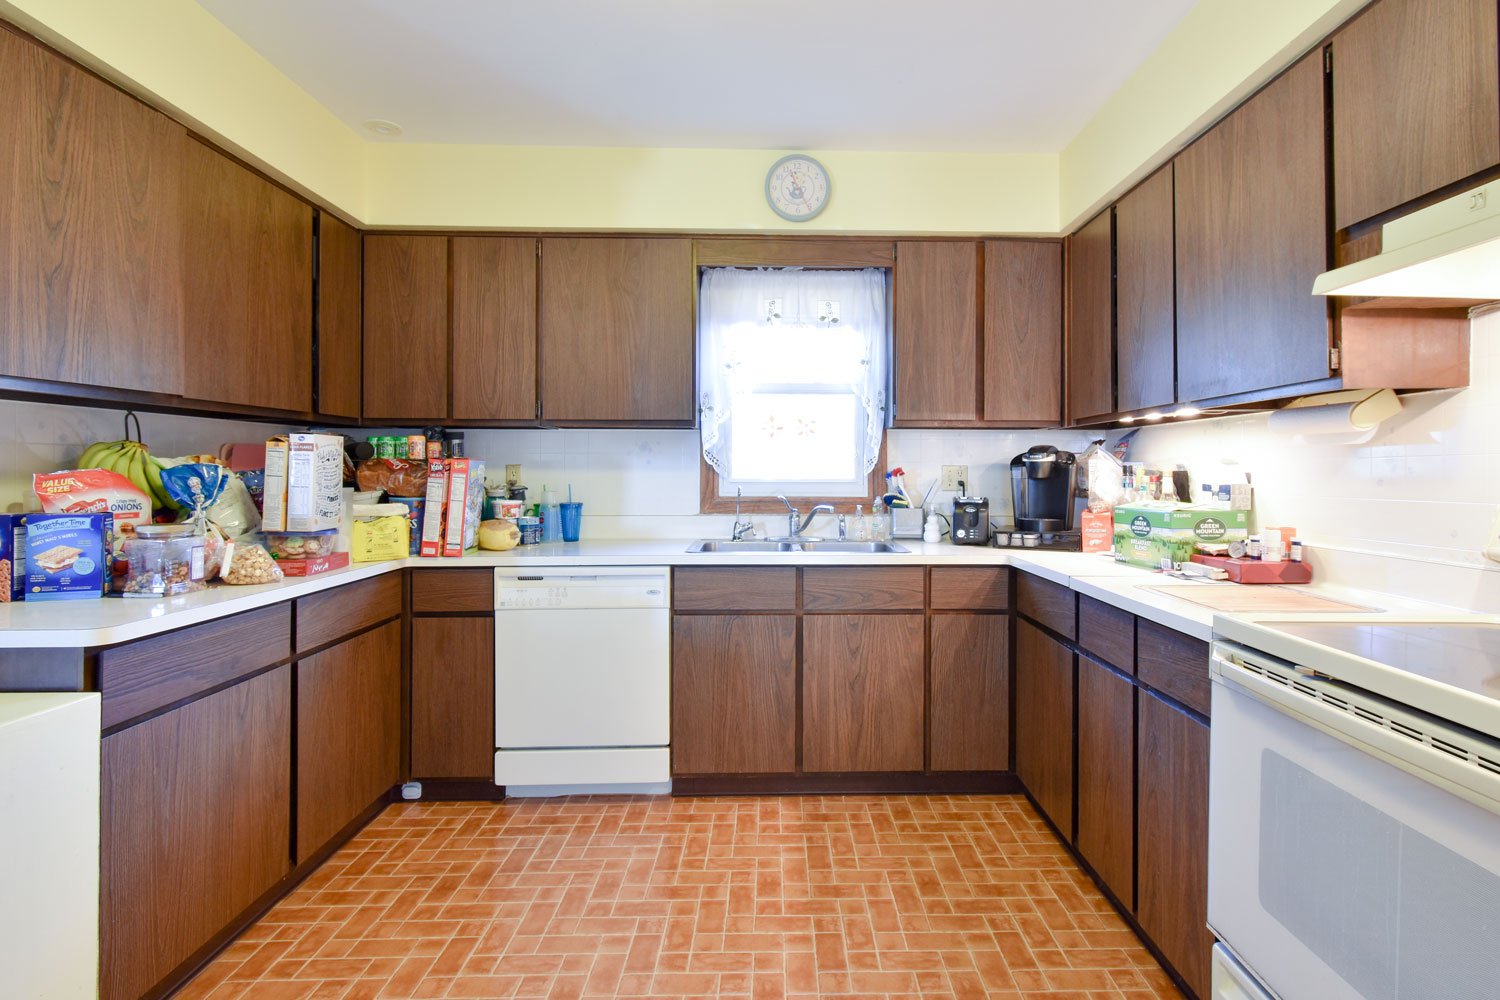
Step 3: Sort And Declutter Before You Pack
Moving everything out is a rare chance to clear clutter. Only pack what you truly need and love.
- Group Items: Sort into categories: everyday, special occasion, never used, and expired (for food).
- Decide What to Keep: If you haven’t used an item in a year, consider donating or selling it.
- Dispose Safely: Throw out expired food, chipped mugs, and rusted utensils.
- Set Aside Essentials: Collect what you’ll use during the remodel (more on this later).
Example: Many people keep old plastic containers without lids. Now’s the time to recycle or discard them.

Credit: www.teamshane.com
Step 4: Clean Everything Before Packing
Packing dirty or greasy items can attract pests and make your new kitchen smell bad. Clean everything, from appliances to silverware.
- Wipe down all items.
- Wash and dry dishes and containers before boxing.
- Defrost and clean the fridge and freezer if they will be moved.
Tip: Place a box of baking soda in any sealed container to absorb odors during storage.
Step 5: Pack Non-essentials First
Start with items you rarely use. These can be boxed up weeks before the remodel.
- Holiday dishes
- Serving platters
- Rarely used appliances (ice cream maker, fondue pot)
- Cookbooks
Label boxes clearly with both contents and location (e. g. , “Holiday Platters – Upper Cabinet Left”).
Step 6: Packing Method For Different Kitchen Items
Dishes And Glassware
- Wrap each item in packing paper or bubble wrap.
- Stack plates vertically (like records) in small boxes. This reduces breakage.
- Glasses and cups go rim down, with padding between each.
- Fill gaps with crumpled paper to prevent movement.
Pots, Pans, And Bakeware
- Nest smaller pans inside larger ones with paper between to prevent scratches.
- Wrap glass lids separately.
- Pack heavy items in small boxes so they’re easier to lift.
Utensils And Silverware
- Bundle similar utensils with rubber bands.
- Place in zip-top bags or wrap in paper.
- For sharp knives, use blade guards or wrap in a dish towel secured with tape.
Appliances
- Remove all loose parts (blades, bowls, attachments).
- Wrap cords around the base.
- Pack all parts together in the original box, if available.
- For large appliances, tape doors shut and secure moveable parts.
Food
- Sort pantry items: Toss anything expired or near expiry.
- Pack unopened dry goods in small boxes or bins.
- Seal open items in zip-top bags to prevent spills.
- Avoid packing perishable food unless you have a backup fridge.
Cleaning Supplies
- Dispose of nearly empty bottles.
- Pack upright in a plastic bin with a lid to prevent leaks.
- Do not pack flammable products with other kitchenware.
Non-obvious insight: Many people forget to check local rules for disposing of chemicals. Check if your city has a hazardous waste drop-off.
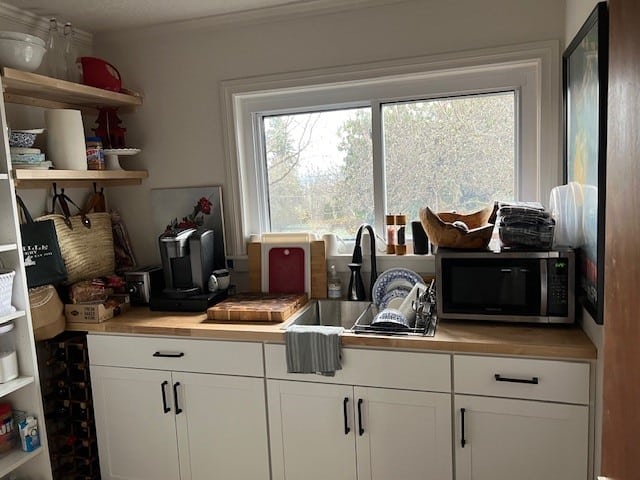
Step 7: Create A Temporary Kitchen
You’ll need a way to prepare simple meals while your kitchen is under construction.
What To Set Aside
- Microwave
- Toaster oven or hot plate
- Coffee maker or kettle
- Basic utensils (spatula, knife, spoon)
- A few plates, bowls, cups, and silverware
- Cutting board
- Mixing bowl
- Dish soap, sponge, towel
Keep these in a clear, labeled bin for easy access.
Where To Set Up
Pick a spot near a water source, like the laundry room or bathroom. Use a folding table or cleared countertop. If you have a mini fridge, move it here.
Tip: Paper plates and disposable cutlery can save washing time, but consider the environmental impact.
Table: Essentials For A Temporary Kitchen
| Item | Why Needed |
|---|---|
| Microwave | Heats leftovers, cooks simple meals |
| Hot Plate | Boils water, cooks pasta, etc. |
| Mini Fridge | Keeps food cold during remodel |
| Basic Dish Set | Minimal washing, keeps life normal |
| Cleaning Supplies | Prevents mess in the temporary area |
Step 8: Label Every Box Clearly
Detailed labeling saves hours when you unpack. Write both contents and room location (e. g. , “Everyday Plates – Lower Cabinet Right”). Use color-coded tape for quick ID.
- Mark boxes FRAGILE if needed.
- List main items on the outside.
- Label “Open First” on essentials for easy access later.
Pro tip: Take photos of box contents, especially if you have a lot of similar items.
Step 9: Store Boxes Safely
Stack boxes in a low-traffic area. Place heavier boxes at the bottom, lighter ones on top. Leave a clear path for moving and don’t block emergency exits.
Tips for Safe Storage:
- Keep boxes away from heaters or windows.
- Use pallets or boards under boxes if storing in a basement or garage to protect from moisture.
- Cover with a sheet to keep dust off.
Step 10: Prepare Large Appliances
If your remodel involves moving the fridge, stove, or dishwasher, follow these steps:
- Unplug and clean thoroughly (defrost freezer if needed).
- Remove shelves and trays; pack them separately.
- Secure cords and doors with tape.
- If moving a gas stove, have a professional disconnect it.
Non-obvious insight: Many people forget to measure doorways and hallways before moving large appliances. Double-check these spaces to avoid damage.
Step 11: Handle Fragile And Valuable Items
If you have heirloom china, crystal, or expensive small appliances, treat them with extra care.
- Wrap each piece individually with extra padding.
- Consider transporting these in your own car, not with movers or stacked boxes.
- Insure high-value items if your homeowner’s policy allows.
Credit: www.neilkelly.com
Step 12: Packing Timeline And Checklist
Having a timeline helps you avoid panic. Here’s a sample schedule you can adjust for your situation.
2-3 Weeks Before Remodel
- Sort and declutter all cabinets
- Buy packing materials
- Pack non-essentials and seasonal items
1 Week Before Remodel
- Pack rarely used appliances and serving ware
- Set up temporary kitchen
- Clear out pantry (donate or use up food)
2-3 Days Before Remodel
- Pack everyday dishes and utensils
- Pack cleaning supplies
- Prepare large appliances
1 Day Before Remodel
- Finish packing fridge and freezer items
- Pack temporary kitchen box for first night
- Do a final sweep for overlooked items
Step 13: What Not To Pack
Some items should not go into boxes at all.
- Perishable food (unless using a backup fridge)
- Open liquids that can spill
- Hazardous chemicals (paint thinner, propane)
- Items you’ll need daily, like medications or important documents
Keep these in a separate area or take them with you.
Step 14: Common Mistakes To Avoid
1. Packing Everything At Once
Trying to do it all in one day leads to mistakes and broken items. Spread the process over several days.
2. Using Oversized Boxes
Big boxes get heavy fast. Use smaller boxes for heavy items and larger ones for light, bulky objects.
3. Not Labeling Boxes
Unlabeled boxes lead to chaos when you unpack. Be specific with your labels.
4. Forgetting To Set Up A Temporary Kitchen
Without a plan for daily meals, you may spend more money on takeout and feel more stressed.
5. Ignoring Appliance Prep
Not cleaning or securing appliances can lead to leaks, mold, or broken parts.
Step 15: Special Tips For Small Kitchens
If your kitchen is tight on space, packing can be even trickier.
- Pack in phases: One cabinet at a time.
- Use suitcases for heavy items.
- Store boxes under beds or in closets if you lack storage rooms.
- Stack vertically to save floor space.
Step 16: Involving The Family
Packing can be a family project. Assign simple tasks to kids, like sorting plastic containers or wrapping utensils. Make it a game to find expired pantry items.
Step 17: When To Hire Professionals
If you have little time, many fragile items, or physical limitations, consider hiring packers. Professional movers bring their own supplies and can pack a kitchen in a few hours. Ask for references and check reviews before hiring.
External resource: For more tips on packing for home renovations, see this guide from the Better Homes & Gardens.
Step 18: Unpacking After The Remodel
When your kitchen is ready, unpack in stages:
- Start with essentials and the temporary kitchen bin.
- Set up your cooking area first (stove, fridge, basic tools).
- Unpack dishes, then pantry goods, then specialty items.
- Wash everything before putting it away—boxes and storage can collect dust.
Step 19: Eco-friendly Packing Tips
If you want to reduce waste:
- Use towels and blankets instead of bubble wrap for non-glass items.
- Reuse boxes from local stores.
- Choose biodegradable packing peanuts.
- Donate or recycle packing materials after the remodel.
Credit: kowalske.com
Step 20: Quick Reference: Packing Timeline Overview
Here’s a side-by-side look at what to pack and when:
| Timeframe | What to Pack |
|---|---|
| 3 weeks out | Holiday dishes, cookbooks, rarely used gadgets |
| 2 weeks out | Serving dishes, specialty bakeware |
| 1 week out | Everyday dishes, utensils, pantry items |
| 2 days out | Fridge/freezer food, cleaning supplies |
| Last day | Temporary kitchen setup, last sweep |
Step 21: Final Walkthrough
Before construction starts, double-check:
- All cabinets, drawers, and shelves are empty.
- Appliances are unplugged, cleaned, and ready.
- Boxes are labeled and stacked safely.
- Temporary kitchen is set up and functional.
- You have access to essentials for daily living.
Taking a few minutes for a final walkthrough prevents surprises.
Packing your kitchen for a remodel may seem challenging, but with a step-by-step plan, the right supplies, and careful labeling, you can protect your belongings and keep your life running smoothly. Remember to start early, involve your family, and don’t rush the process.
The effort you put in now will pay off when you enjoy your new kitchen—stress-free and fully equipped.
Frequently Asked Questions
How Long Does It Take To Pack Up A Kitchen For A Remodel?
Most people need 1 to 3 days to pack a typical kitchen, depending on size and how much you own. Start early and spread tasks over several days for less stress.
What Items Should I Keep Out For Daily Use During The Remodel?
Set aside basic cooking tools, a few dishes, a coffee maker, and any small appliances you use daily. Store these in a “temporary kitchen” bin for easy access.
How Do I Pack Fragile Items Like Glasses And Plates?
Wrap each item in packing paper or bubble wrap. Stack plates vertically and fill gaps with paper. Use double-walled boxes for extra protection and label boxes as “fragile.”
Can I Leave Food In The Kitchen During The Remodel?
Avoid leaving perishable or open food. Pack dry goods in sealed containers and move perishables to a backup fridge if possible.
Should I Hire Professionals To Pack My Kitchen?
If you’re short on time, have many fragile items, or cannot lift heavy boxes, hiring professionals may be a good idea. They bring supplies and work quickly, but check their reviews and insurance before hiring.
By following these steps, you’ll make packing up your kitchen for a remodel more organized and less stressful, protecting your belongings and your peace of mind.