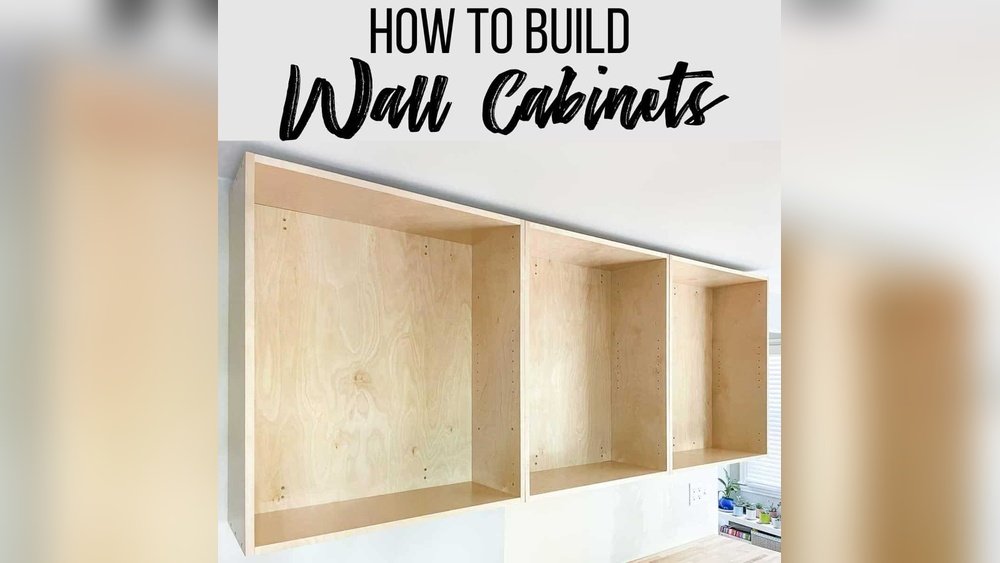
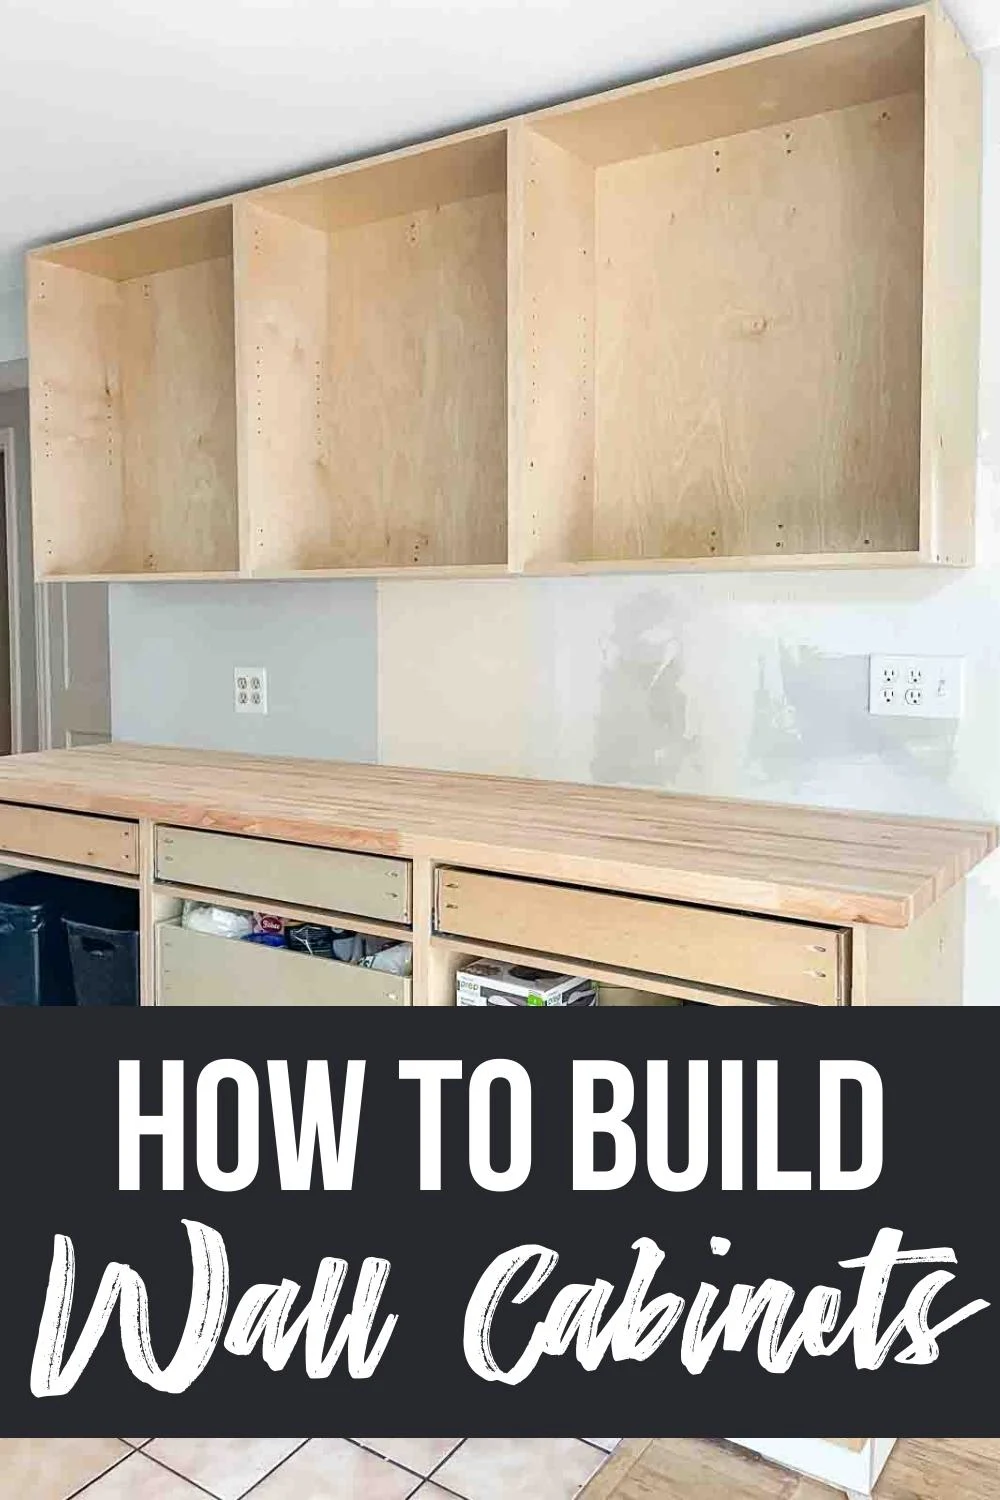
Building your own wall cabinets can completely change a room, whether it’s a kitchen, laundry, workshop, or even a home office. Many people believe cabinet making is only for professionals, but with the right tools, clear steps, and some patience, even beginners can create strong, good-looking cabinets.
This guide will walk you through every stage—from planning and measuring to installing the finished cabinet on your wall. Along the way, you’ll learn expert tips, avoid common mistakes, and understand the details that make cabinets last for years.
Planning Your Wall Cabinets
Before picking up a saw or buying wood, careful planning is crucial. Rushing this step leads to waste, frustration, and sometimes unsafe cabinets.
Choosing The Right Location
Start by looking at the space where you want to install your wall cabinets. Note nearby doors, windows, outlets, and switches. Make sure there is enough clearance above counters or appliances. If you’re working in a kitchen, the standard space between the countertop and the bottom of the wall cabinet is 18 inches. In laundry or garage settings, you might want more space for taller items.
Measuring Your Space
Accurate measurements are the foundation of a successful project. Use a steel tape measure for reliability. Measure the height, width, and depth of the area. Write down all numbers, and double-check them before moving forward. A mistake of even 1/8 inch can cause problems during installation.
Here’s a sample measurement sheet for a single cabinet:
| Dimension | Standard (Inches) | Your Measurement |
|---|---|---|
| Height | 30, 36, or 42 | |
| Width | 12–36 | |
| Depth | 12–18 |
Make sure the final size fits your needs and the items you plan to store.
Designing Your Cabinet
Decide on the cabinet style. Do you want an open shelf, doors, or both? Will it match other cabinets? Sketch a simple drawing or use free online design tools. Include all dimensions and mark the location of shelves, doors, and hardware.
For beginners, a basic box-style cabinet with one or two shelves and simple doors is best. More advanced options include glass doors, special trims, and built-in lighting—but start simple if this is your first project.
Choosing Materials
The material you choose greatly affects strength, appearance, and cost. Here’s a quick comparison of common options:
| Material | Pros | Cons |
|---|---|---|
| Plywood | Strong, stable, lightweight, holds screws well | More expensive than particleboard |
| Particleboard | Cheap, smooth surface | Heavy, weak edges, soaks up water |
| MDF | Very smooth, easy to paint | Heavy, not as strong, can sag |
| Solid wood | Attractive, very strong | Expensive, can warp, harder to cut |
For most home wall cabinets, 3/4-inch plywood is a safe and durable choice.
Gathering Tools And Materials
Having the right tools makes every step easier and safer. You don’t need a full workshop, but some basics are essential.
Essential Tools
- Circular saw or table saw: For straight cuts in large panels
- Drill and driver: For making holes and driving screws
- Clamps: To hold pieces together while gluing or screwing
- Measuring tape and square: For accurate layout and marking
- Level: To ensure the cabinet hangs straight
- Sander or sandpaper: For smoothing edges and surfaces
Helpful Extras
- Pocket hole jig (like Kreg Jig): Makes strong, hidden joints
- Brad nailer: Speeds up attaching trim or back panels
- Stud finder: Locates wall studs for safe mounting
- Countersink bit: For neat, flush screws
Materials List
A typical single-door wall cabinet (30” high × 24” wide × 12” deep) will need:
- One 4’ × 8’ sheet of 3/4” plywood (body and shelves)
- 1/4” plywood or hardboard for the back
- Wood glue
- 1-1/4” wood screws
- 2 cabinet hinges
- 1 cabinet door handle or knob
- Paint, stain, or finish of your choice
Don’t forget safety gear: goggles, ear protection, and a dust mask.
Credit: www.thehandymansdaughter.com
Cutting And Preparing Cabinet Parts
Careful, accurate cutting makes assembly much easier and gives the cabinet a professional look.
Marking And Cutting Panels
Lay the plywood sheet on a stable surface. Use a straightedge and pencil to draw all your cut lines before starting. Label each part—sides, top, bottom, shelves, and door—to avoid confusion.
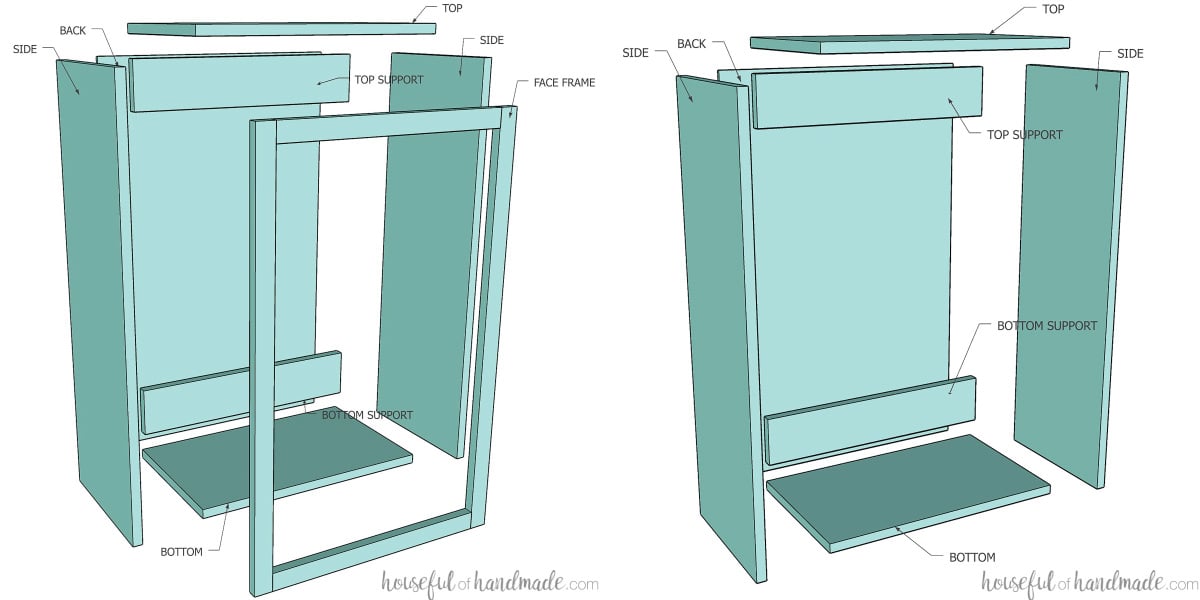
For a basic cabinet, you’ll need:
- 2 side panels (height × depth)
- 1 top panel (width × depth)
- 1 bottom panel (width × depth)
- 1 or 2 shelves (width minus 1/16” for easy fit × depth)
- 1 back panel (height × width, cut from 1/4” plywood)
- 1 door (height × width, minus 1/8” for clearance)
Cut slowly to avoid splinters, especially if using a circular saw. If possible, use a fine-tooth blade for smooth edges.
Edging And Sanding
Plywood edges can look rough. Sand all edges with 120-grit sandpaper. For a neat finish, apply edge banding (a thin strip of wood or plastic) to visible edges using an iron. This step is optional but makes a big difference in appearance.
Assembling The Cabinet Box
Now it’s time to bring your cabinet to life. Working carefully here will make the rest of the project easier.
Dry Fitting
Before using glue or screws, put all pieces together without fasteners. Check for fit and squareness using a carpenter’s square. Make adjustments now; it’s much harder later.
Gluing And Screwing
- Apply wood glue along the edges of the bottom and top panels.
- Attach the side panels, holding them flush at each end.
- Use clamps to hold everything tight.
- Drill pilot holes for screws (this prevents splitting).
- Drive 1-1/4” wood screws every 6–8 inches.
For extra strength, use pocket hole screws from inside the cabinet.
Adding The Back Panel
Lay the cabinet face down. Place the 1/4” back panel on the box. Make sure all edges are flush. Attach with short screws or brad nails every 6 inches. The back adds strength and keeps everything square.
Installing Shelves
If you want fixed shelves, glue and screw them in place before attaching the back. For adjustable shelves, drill rows of shelf pin holes inside the sides using a template or shelf pin jig. This lets you move shelves up or down as needed.
Building And Attaching The Door
A cabinet door can be simple or fancy. For beginners, a flat panel door is easiest.
Cutting The Door
Cut a piece of 3/4” plywood to the size of your cabinet opening, minus about 1/8” on all sides for easy opening. Sand all edges smooth.
Attaching Hinges
Mark hinge locations on the door and cabinet box—usually about 3 inches from the top and bottom. Drill pilot holes and attach the hinges to the door first, then to the cabinet. Use a level to ensure the door hangs straight.
Adding A Handle
Drill a hole for the handle or knob. Attach it with the included screw. For double doors, check that they meet neatly in the middle.
Door Upgrades
If you want a fancier look, add a simple frame around the door, or cut a groove for a glass panel. These upgrades add work, but can make your cabinet unique.
Finishing And Painting
Good finishing protects your cabinet and makes it look professional.
Filling Holes And Gaps
Use wood filler for screw holes or small gaps. Let dry, then sand smooth. Wipe all surfaces with a damp cloth to remove dust.
Primer And Paint
If painting, apply a quality wood primer first. This helps paint stick and covers wood grain. After drying, use a small foam roller or brush for the top coats. Two thin coats give the best results.
If staining, apply wood conditioner first to avoid blotches. Use a clean rag to apply the stain, then wipe off extra. Finish with a clear polyurethane or varnish for protection.
Letting It Cure
Allow paint or finish to dry fully (check the can for times) before handling or installing the cabinet. This prevents fingerprints and smudges.

Credit: www.youtube.com
Installing Wall Cabinets
Proper installation is important for safety and durability. Wall cabinets are heavy, so never skip steps here.
Finding And Marking Studs
Use a stud finder to locate the wall studs behind drywall. Mark their positions with painter’s tape above and below where the cabinet will hang. Cabinets must be screwed into studs, not just drywall.
Setting The Height
Measure up from the floor or countertop to your desired cabinet bottom height. Mark a level line on the wall. For a kitchen, this is usually 54 inches from the floor.
Temporary Support
Install a temporary support board on the wall at the bottom line. This holds the cabinet during installation, so you don’t have to juggle the weight. Screw a straight 1×4 board into the wall studs.
Securing The Cabinet
Lift the cabinet onto the support board. Check for level. Drill pilot holes through the cabinet back and into the wall studs at the top and bottom. Use long (2-1/2” or 3”) cabinet screws. Tighten until snug, but don’t overtighten.
If installing multiple cabinets, join them together first using clamps and screws through the side panels. Then lift and install as one unit. This gives a seamless look and saves time.
Removing Supports And Final Checks
Take away the temporary support board. Open and close the door to check for smooth movement. Adjust hinges if needed. Fill any visible screw holes with matching filler for a clean look.
Practical Tips For Success
Many first-time builders miss small details that make a big difference. Here are two expert tips you may not find elsewhere:
- Label every panel as you cut it. It’s easy to confuse similar pieces, especially if you’re making more than one cabinet.
- Drill pilot holes for every screw. This prevents splitting and makes it easier to drive screws straight. Even pro builders do this for strong joints.
Another thing beginners often forget: Check your wall for level and plumb before starting installation. Old houses may have crooked walls; shims may be needed for a perfect fit.
Credit: housefulofhandmade.com
Common Mistakes And How To Avoid Them
Even careful builders can make errors. Here are some of the most common mistakes:
- Forgetting to square the box: Always check with a carpenter’s square before attaching the back panel.
- Cutting before final measurements: Walls are rarely perfectly straight. Measure the actual space before your final cuts.
- Using the wrong screws: Drywall screws are weak and can snap. Always use proper cabinet or wood screws.
- Skipping sanding: Paint or stain will highlight rough spots. Take time to sand all surfaces and edges.
- Not attaching to studs: Drywall alone won’t hold heavy cabinets. Always anchor into studs for safety.
Advanced Cabinet Features
After mastering a basic cabinet, you might want to add special features. These options can increase function and style:
Soft-close Hinges
These hinges prevent doors from slamming, making the cabinet quieter and longer-lasting. They’re easy to install and fit most standard doors.
Pull-out Shelves
Slide-out shelves or baskets make deep cabinets easier to use. Install drawer slides on the sides and build a simple shelf box to fit.
Lighting
Under-cabinet or in-cabinet LED lights are popular for kitchens and workshops. Look for battery-powered options if you don’t want to run wires.
Glass Or Decorative Doors
Cutting an opening and adding glass or plexiglass can create a display cabinet for special items. Always use safety glass if the cabinet will be used often.
Comparing Diy Vs. Pre-made Cabinets
Is it always better to build your own? Here’s a quick look at the trade-offs:
| DIY Cabinets | Pre-Made Cabinets |
|---|---|
| Custom sizes and features | Standard sizes only |
| Lower material cost | Higher price, but includes labor |
| Time-consuming | Quick to install |
| Requires tools and skills | No woodworking needed |
| Personal satisfaction | Less customization |
For custom spaces or if you enjoy building, making your own is rewarding. If speed and convenience matter, pre-made can be a better choice.
Safety Considerations
Working with power tools and heavy materials always carries some risk.
- Wear eye and ear protection when cutting or sanding wood.
- Work in a well-ventilated area when painting or staining.
- Lift cabinets with help—wall cabinets can be awkward and heavy.
- Check for wires and pipes before drilling into walls.
Take your time, and never rush through steps that involve cutting or installing.
Maintenance And Longevity
A well-built wall cabinet should last decades. Here’s how to keep yours looking and working like new:
- Clean with a damp cloth—avoid harsh cleaners that can damage the finish.
- Tighten screws yearly, especially on hinges and handles.
- Check for sagging shelves—replace or add supports if needed.
- Touch up paint if you see chips or scratches.
Cabinets in kitchens and bathrooms face moisture. Sealing all surfaces (especially edges) helps prevent swelling and warping.
Saving Money And Sourcing Materials
You can save money by choosing the right materials and buying smart:
- Shop for plywood at building supply stores—they often have better prices and quality than home centers.
- Look for “shop grade” plywood for inside panels; it’s cheaper and the face won’t show.
- Reuse old cabinets or doors for parts. Many thrift stores or salvage yards have usable hardware and wood.
A full sheet of 3/4” plywood usually costs $50–$80, and can make several small cabinets. Hardware and finish can add $20–$40 per cabinet.
Where To Learn More
If you want more advanced techniques or design ideas, websites like Family Handyman offer step-by-step tutorials, videos, and free plans.
Frequently Asked Questions
What Is The Best Wood For Wall Cabinets?
The best all-around choice is 3/4-inch plywood. It’s strong, stable, and holds screws well. For visible fronts or doors, you can use hardwood like maple, oak, or cherry for a premium look. Avoid particleboard for wet areas; it can swell and fail over time.
How Do I Hang Cabinets On Drywall?
Never hang cabinets directly on drywall alone. Use a stud finder to locate wall studs, and secure the cabinets with long screws into the studs. If studs are not in the right place, use heavy-duty wall anchors rated for cabinets, but studs are always safer.
Can I Make Wall Cabinets Without Power Tools?
While possible, it’s much harder. You can use a hand saw, screwdriver, and hammer for a small cabinet, but cuts will be less precise and the work will take much longer. Borrow or rent power tools if you can for better results.
How Much Weight Can A Wall Cabinet Hold?
A properly built and installed cabinet, fastened into studs, can hold 100 pounds or more. The limit depends on the strength of the wall, the type of screws, and the cabinet construction. Always spread heavy items evenly and never overload a single shelf.
How Do I Get A Smooth Paint Finish On Cabinets?
Start with light sanding on all surfaces. Apply a quality wood primer. Use a foam roller or spray for thin, even coats of paint. Sand lightly between coats with 220-grit sandpaper. Finish with a clear topcoat for extra durability, especially in kitchens.
Building your own wall cabinets is a project that combines creativity, practical skills, and problem-solving. With careful planning, the right tools, and attention to detail, you can create storage that fits your exact needs and style. Whether you are upgrading your kitchen, organizing your garage, or adding shelves in your office, the satisfaction of a job well done is hard to beat.
Take your time, learn from each step, and enjoy the process—you might find yourself building more than just cabinets.