Making something with your own hands is a special joy. If you love sewing or crafting, mug rugs offer a quick, fun project that adds color and warmth to your table. Many people ask, “What is a mug rug?” Imagine a mini placemat, usually bigger than a coaster but smaller than a full placemat. They protect your table from heat, spills, and scratches while giving you a cozy spot for your coffee or tea—and maybe a cookie too. In this guide, you’ll learn everything you need to make your own mug rugs, whether you’re a total beginner or want to improve your skills.
You’ll get step-by-step instructions, tips on choosing materials, and advice on design and finishing. We’ll also cover common mistakes, creative ideas, and some clever tricks that even experienced crafters sometimes miss. By the end, you’ll know how to make beautiful, practical mug rugs that last—and you might even want to gift them to friends or sell them at craft fairs.
What Is A Mug Rug?
A mug rug is a small fabric mat that sits between a mug and your table. Its main purpose is to catch drips and crumbs, but it also adds style to your kitchen or office. Most mug rugs are rectangular or square, usually measuring between 4″ x 6″ and 6″ x 8″. They are thick enough to protect surfaces but thin enough for a cup to rest safely.
People love mug rugs because:
- They are easy to make, even for beginners.
- You can use leftover fabric or scraps.
- They are perfect for gifts.
- You can wash them easily.
- They let you try new sewing or quilting techniques without a big project.
Essential Materials And Tools
Before you start, gather the right materials. Using quality supplies makes your mug rug look better and last longer.
Basic Supplies
- Fabric: 100% cotton is best. Pick two pieces for the front and back. You can use plain, patterned, or a mix. Quilting cotton is ideal.
- Batting: Thin cotton or polyester batting adds softness and absorbs moisture. Avoid thick batting; it makes the rug bumpy.
- Thread: Cotton or polyester thread in a matching or contrasting color.
- Scissors or Rotary Cutter: Sharp fabric scissors or a rotary cutter for straight edges.
- Pins or Clips: To hold layers together while sewing.
- Iron and Ironing Board: For pressing seams flat.
- Sewing Machine: A basic machine is enough. You can sew by hand, but it’s slower.
- Ruler or Measuring Tape: For cutting straight lines.
- Chalk or Fabric Marker: For marking fabric.
Optional Extras
- Decorative trims: Like lace, rickrack, or ribbon.
- Embroidery thread: For adding names or designs.
- Fusible web: For iron-on appliqué.
- Templates or stencils: For shapes or patterns.
Cost Breakdown
To help you plan, here’s a typical cost estimate for one mug rug:
| Item | Estimated Cost (USD) |
|---|---|
| Fabric (2 pieces, 8″x10″ each) | $1.50 |
| Batting (1 piece, 8″x10″) | $0.75 |
| Thread (per rug) | $0.20 |
| Other (pins, marker, etc.) | $0.10 |
| Total | $2.55 |
Tip: If you buy supplies in bulk or use scraps, your cost can be much lower.
Choosing The Right Fabric And Batting
Picking the right materials makes a big difference in the look and function of your mug rug.
Best Fabric Choices
- Quilting cotton: Durable, washable, and easy to sew.
- Linen: Gives a textured, natural look but wrinkles more.
- Canvas: Heavier, best for rustic styles.
- Flannel: Soft and cozy, but may shrink more.
Avoid stretchy or thick fabrics (like jersey or fleece) because they are harder to sew and may not lay flat.
Batting Options
The inside layer—batting—is what gives your mug rug its softness and absorbency.
- Cotton batting: Absorbs moisture and is easy to sew.
- Polyester batting: Less absorbent but dries faster.
- Fusible batting: Has a heat-activated adhesive, making it easier to keep layers in place.
For mug rugs, choose low-loft (thin) batting. High-loft makes the mug unstable.
Fabric And Batting Comparison
Here’s a quick comparison to help you decide:
| Material | Pros | Cons |
|---|---|---|
| Quilting Cotton | Easy to sew, washable, many prints | May shrink if not prewashed |
| Linen | Natural look, strong | Wrinkles easily |
| Cotton Batting | Absorbs spills, soft feel | May shrink, needs prewashing |
| Polyester Batting | Dries quickly, holds shape | Less absorbent, can melt with heat |
Non-obvious tip: Always prewash your fabrics and batting. This prevents shrinking and color bleeding after the first wash.
Planning Your Mug Rug Design
A mug rug is a small project, but it’s a great place to show your creativity. Simple designs are perfect for beginners, but you can also try more complex ones as you gain confidence.
Size And Shape
Most mug rugs are rectangle or square, but you can also make circles, hexagons, or even fun shapes like hearts. Common sizes:
- 4″ x 6″: Just for a mug
- 6″ x 8″: Mug plus snack
- 5″ x 5″: Square version
For your first mug rug, a 6″ x 8″ rectangle is a safe choice.
Design Ideas
- Patchwork: Sew small squares or strips together for a quilted look.
- Appliqué: Add shapes (like hearts or stars) with fusible web or hand stitching.
- Embroidery: Add a name, word, or small image.
- Seasonal themes: Use holiday fabrics (Christmas, Halloween, etc.)
- Monogram: Personalize with an initial.
Color Combinations
Pick colors that match your kitchen or the receiver’s taste. Bright colors hide stains better, while light colors show off pretty stitching.
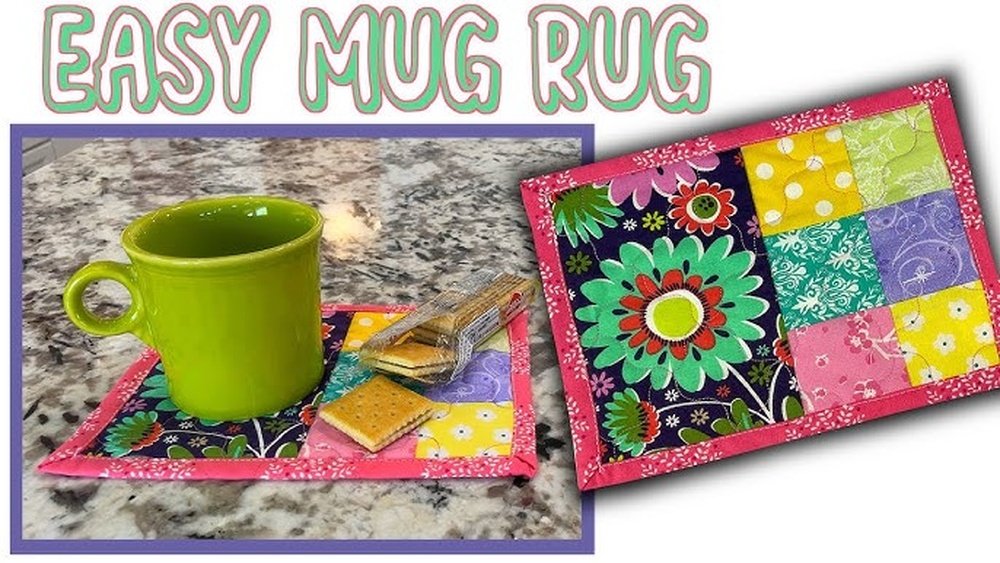
Pro tip: Lay out your pieces before sewing. Take a photo with your phone to see how the colors look together. Many crafters skip this, but it helps catch design mistakes early.
Credit: quilterscandy.com
Step-by-step Instructions: How To Make A Simple Mug Rug
Let’s get started with a basic, easy mug rug. You can finish one in less than an hour.
Step 1: Cut Your Pieces
You’ll need:
- Front fabric: 7″ x 9″
- Back fabric: 7″ x 9″
- Batting: 7″ x 9″
Cutting your pieces a little bigger than the final size allows for trimming after sewing.
Step 2: Layer The Pieces
Make a sandwich:
- Lay the back fabric face down.
- Place the batting on top.
- Place the front fabric face up on top.
Make sure all edges line up. Use pins or clips to hold the layers together.
Step 3: Quilt The Layers (optional)
You can add simple quilting to hold the layers together and add texture. Sew straight lines, diagonal lines, or a grid across the mug rug. If you prefer, skip this and go to the next step.
Step 4: Sew Around The Edges
With your sewing machine, sew a ¼” seam around all four sides, but leave a 2″ opening on one side. This gap lets you turn the mug rug right side out.
Tip: Backstitch at the start and end to keep the opening strong.
Step 5: Trim And Turn
Trim the corners to reduce bulk, but don’t cut your stitches. Carefully turn the mug rug inside out through the opening. Use a chopstick or the blunt end of a pencil to push out the corners.
Step 6: Press And Close The Opening
Press the mug rug flat with an iron. Fold the edges of the opening inside and pin them. Sew close to the edge all the way around (“topstitching”) to close the opening and add a finished look.
Step 7: Finishing Touches
You can add extra stitching, a decorative button, or hand embroidery. Make sure any decorations are flat, so the mug sits evenly.
Advanced Techniques For Mug Rugs
After you’ve made a basic mug rug, you may want to try more advanced methods. These add style and function and let you practice new skills.
Adding Binding
Binding is a fabric strip that wraps around the edge, giving a professional look. It’s common in quilting.
- Cut a 2″ wide strip of fabric, long enough to go around the mug rug.
- Fold in half lengthwise and press.
- Align the raw edge of the binding with the edge of the mug rug, sew, then fold the binding over and hand-stitch or machine-stitch it down.
Non-obvious insight: Use binding to hide uneven edges or mistakes. It covers a lot of flaws and makes your work look neat.
Making Patchwork Designs
Patchwork uses small pieces of fabric sewn together. To try it:
- Cut several 2″ or 2.5″ squares.
- Sew them in rows, then join the rows.
- Trim the patchwork to your mug rug size, then continue as before.
Patchwork lets you use up scraps and makes each mug rug unique.
Appliqué And Embroidery
Iron-on appliqué is simple. Cut a shape from fabric, use fusible web to attach, and sew around the edge. Embroidery adds a handmade touch—try a small flower or an initial.
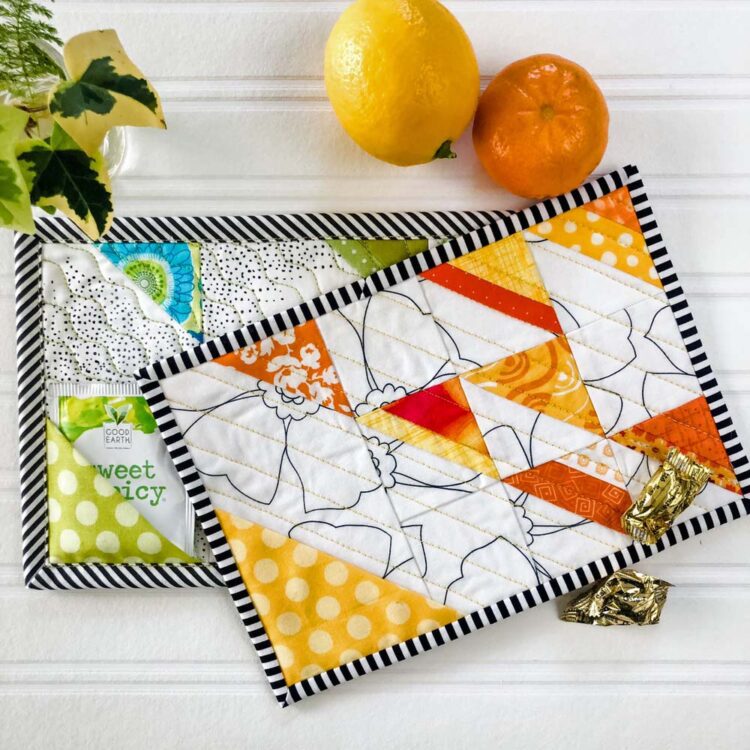
Quilting Patterns
Instead of straight lines, try quilting in waves, circles, or free-motion doodles. This not only looks interesting but also holds the layers together better.
Credit: typicallysimple.com
Troubleshooting And Common Mistakes
Even experienced sewers make small errors. Here’s how to avoid and fix them.
- Puckered Fabric: This happens when layers move during sewing. Use more pins or a walking foot on your machine.
- Crooked Edges: Cut carefully, and always trim the edges before finishing.
- Batting Shows at the Edge: Make sure all layers are even before sewing. If needed, trim carefully after turning.
- Loose Topstitching: Use a slightly longer stitch for neat topstitching and sew close to the edge.
- Mug Rug Too Thick: Use thin batting and avoid adding extra layers.
Extra tip: If your mug rug looks wavy after sewing, press it with steam and let it cool flat under a book. This often helps it keep its shape.
Creative Ideas And Variations
Once you’re comfortable, try these ideas to make your mug rugs stand out.
Seasonal And Holiday Mug Rugs
Use themed fabrics for Halloween, Christmas, Valentine’s Day, or birthdays. Add a pumpkin, snowflake, or heart appliqué for a festive look.
Reversible Mug Rugs
Make the front and back from different fabrics—one side for summer, one for winter. This is a fun way to change your decor with the seasons.
Using Scraps And Upcycling
Turn old shirts, jeans, or tablecloths into mug rugs. Denim makes a strong, rustic rug, while dress shirts give a classic look.
Adding Pockets
Sew a small pocket on one side for a tea bag or spoon. This is especially popular for gift sets.
Shaped Mug Rugs
Try circles, ovals, or novelty shapes like cats, leaves, or stars. Use a plate or cookie cutter as a template.
Mug Rugs As Gifts Or For Sale
Handmade mug rugs are popular gifts for teachers, coworkers, or friends. Personalize with a name or favorite color. Tie a mug rug around a pretty mug with ribbon for a quick gift.
If you want to sell mug rugs, focus on:
- Neat sewing and even edges
- Quality fabrics
- Attractive photos if selling online
Data point: On Etsy, mug rugs often sell for $7 to $15 each, depending on design and complexity.
Buyer mistake to avoid: Don’t undervalue your work. Good materials and careful sewing make your mug rugs last much longer than cheap, mass-produced ones.
Caring For Your Mug Rug
To keep mug rugs looking good:
- Wash in cold or warm water with mild detergent.
- Air dry or tumble dry on low.
- Press with an iron if needed.
Avoid bleach or very hot water. If your mug rug has delicate decorations, hand wash.
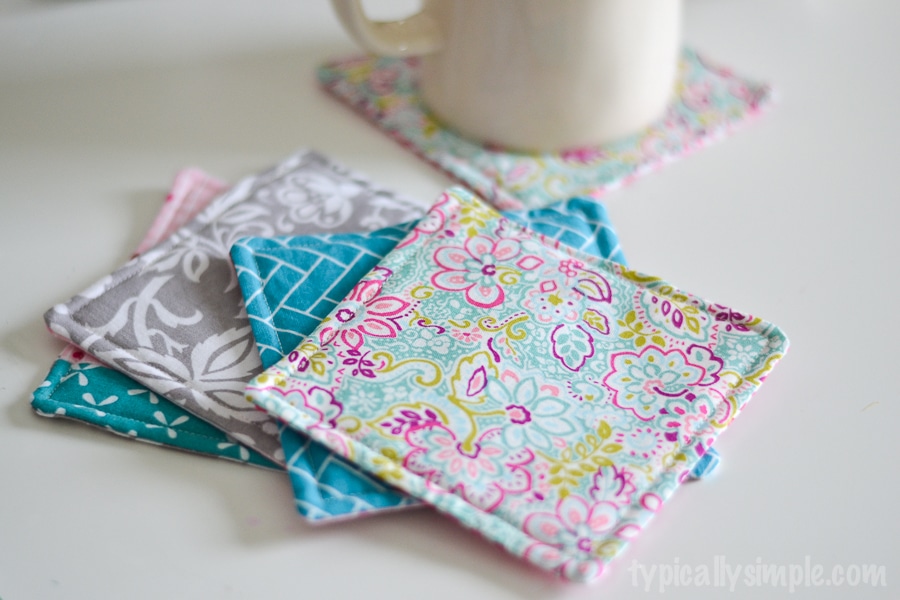
Comparing Mug Rugs To Coasters And Placemats
People often wonder how mug rugs differ from coasters or placemats. Here’s a quick comparison:
| Feature | Mug Rug | Coaster | Placemat |
|---|---|---|---|
| Size | 4″x6″ to 6″x8″ | 3″x3″ to 4″x4″ | 12″x18″ or larger |
| Use | Mug and snack | Mug or glass only | Plate, cutlery, glass |
| Washable | Yes | Sometimes | Yes |
| Decorative | Highly customizable | Limited | Can be, but less often handmade |
Key takeaway: Mug rugs offer more space and style than coasters, but are faster to make (and wash) than placemats.
Non-obvious Tips For Perfect Mug Rugs
Here are two tricks even some advanced crafters forget:
- Test with your mug first: Before finishing, place your actual mug and a cookie on the unsewn layers. This helps check size and balance.
- Label your mug rugs: If you sell or gift them, add a small cloth label with your name or washing instructions. This looks professional and helps people care for their gift.

Credit: www.neverskipbrunch.com
Where To Find Inspiration And Patterns
If you want to try new designs, look for free mug rug patterns online or in quilting magazines. Many blogs and YouTube channels offer tutorials. You can also find inspiration on Pinterest or craft sites.
For more ideas, check out All People Quilt, a trusted resource for patterns and tips.
Frequently Asked Questions
What Is The Best Size For A Mug Rug?
A typical mug rug is 6″ x 8″, which fits a mug and a snack. You can make them smaller (4″ x 6″) for just a mug, or larger if you want more space. The best size depends on your needs and table size.
Can I Make A Mug Rug Without A Sewing Machine?
Yes, you can sew mug rugs by hand stitching. Use a strong backstitch for seams and small, even stitches. It takes longer, but works well for small projects. Choose simple designs for hand sewing.
How Do I Wash And Care For A Mug Rug?
Most mug rugs can be machine washed in cold or warm water. Use mild detergent, and avoid bleach. Air dry or use a dryer on low. If your mug rug has delicate decorations, hand wash and lay flat to dry.
What’s The Difference Between A Mug Rug And A Coaster?
A mug rug is bigger than a coaster. It holds a mug and a snack, while a coaster is just for one cup or glass. Mug rugs also let you try more sewing techniques and designs.
Can I Use Other Materials, Like Felt Or Vinyl, For Mug Rugs?
Felt can work for simple mug rugs, but it may pill or lose shape after washing. Vinyl is not absorbent and may stick to hot mugs. Cotton remains the best choice for long-lasting, washable mug rugs.
Making mug rugs is a rewarding craft, whether you sew for yourself, for gifts, or for sale. With every new rug, you’ll improve your skills and enjoy a practical, beautiful result. Try out new designs, experiment with colors, and soon you’ll have a collection that brings comfort to every coffee break.