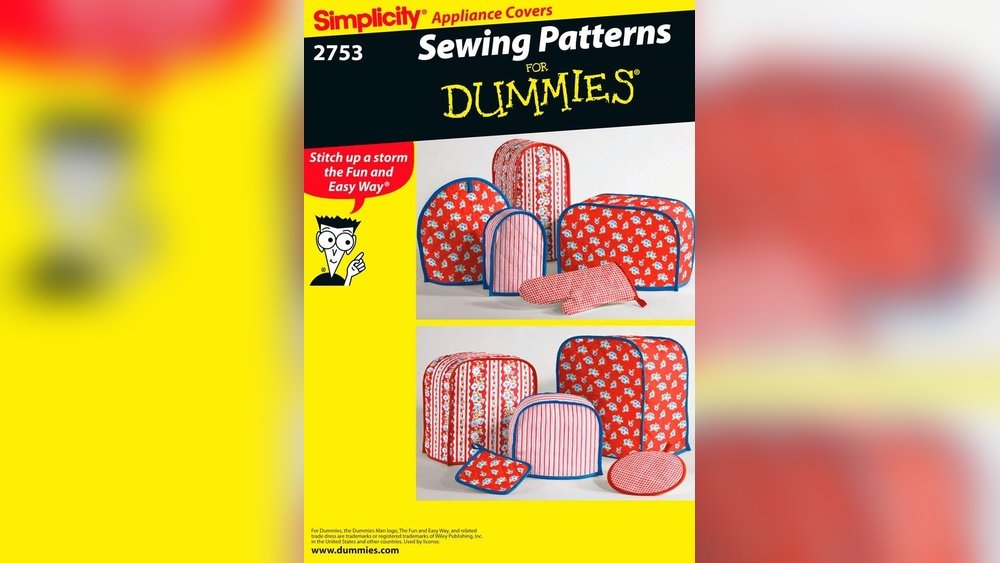
Making covers for kitchen appliances is more popular than ever. Many people want to keep their appliances clean, avoid dust, and add a personal style to their kitchens. But how do you make covers that really fit your needs? With a little planning, the right materials, and some practical tips, you can create appliance covers that look great and last long.
In this article, you’ll learn the step-by-step process for making covers for different kitchen appliances, from mixers and toasters to blenders and coffee makers. We’ll explore materials, sizing, design choices, and even give you tips on maintenance. Whether you’re a beginner or already have some sewing experience, you’ll find helpful insights and guidance here.
Let’s dive in and transform your kitchen with custom appliance covers.
Why Use Covers For Kitchen Appliances?
Kitchen covers are more than just decorative. They have real benefits:
- Dust protection: Appliances gather dust quickly, especially if not used daily.
- Grease barrier: Cooking releases oil into the air, which can settle on appliance surfaces.
- Scratch prevention: Covers reduce scratches from moving or storing items near your appliances.
- Style enhancement: Covers can match your kitchen’s look and feel, making the space more inviting.
- Longer appliance life: Regular protection keeps your appliances looking new and working better for longer.
Many people underestimate how much dust and grime collects on unused appliances. A cover is a simple way to keep everything clean and ready for use.
Choosing The Right Materials
Selecting the right material is key for a good cover. Not all fabrics are equal. Some are easy to clean, others are more stylish, and some offer better protection.
Here’s a quick comparison of popular fabric options:
| Material | Protection Level | Easy to Clean | Style Options | Cost |
|---|---|---|---|---|
| Cotton | Moderate | Yes | High | Low |
| Quilted Fabric | High | Yes | Medium | Medium |
| Vinyl | High | Very Easy | Low | Low |
| Canvas | High | No | Low | Medium |
| Polyester | Moderate | Yes | High | Low |
Cotton is popular for its breathability and variety of designs. Vinyl is best if you want a waterproof surface. Quilted fabrics add extra padding, great for fragile appliances. For a modern look, some choose polyester, which is light but still protective.
A non-obvious tip: If your kitchen is humid or you live in a dusty area, choose a fabric with a tight weave (like vinyl or canvas) to keep out fine dust and moisture.

Credit: www.walmart.com
Measuring Your Kitchen Appliances
Before you start cutting fabric, accurate measurements are essential. If the cover is too tight, it won’t fit. Too loose, and it may look messy or slip off.
- Measure the height: Use a measuring tape from the base to the highest point.
- Measure the width and depth: Measure the front-to-back (depth) and side-to-side (width).
- Account for shape: Some appliances (like mixers) have curved tops. Add 1–2 inches to each measurement for a comfortable fit.
- Note extra parts: For handles, knobs, or attachments, decide if you want to cover them or leave them out.
Write down these numbers. Label each measurement clearly, like “toaster height: 8 inches,” “width: 12 inches.” It’s easy to mix them up later.
A common mistake is forgetting to add seam allowance. Always add about ½ inch (1.3 cm) around all sides for sewing.
Tools And Supplies You’ll Need
Having the right tools makes the process smoother and gives a better result. Here’s what you’ll need:
- Measuring tape: For accurate sizing.
- Fabric: Your chosen material.
- Scissors or rotary cutter: For clean cuts.
- Pins or fabric clips: To hold pieces together before sewing.
- Sewing machine or needle and thread: Machine is faster but hand sewing works for small covers.
- Iron and ironing board: To press seams and fabric.
- Fabric chalk or washable marker: For marking measurements.
- Thread: Match or contrast with fabric as you like.
- Bias tape or trim (optional): For neat edges.
- Velcro or snaps (optional): For easy opening and closing.
Some people use interfacing (a thin fabric layer) inside for extra structure, especially for floppy fabrics.
Step-by-step Guide: Making A Basic Appliance Cover
Let’s walk through making a standard toaster cover, which you can adapt for other appliances. The same method works for blenders, mixers, and even coffee makers.
1. Prepare Your Pattern
Draw a simple pattern based on your appliance’s measurements:
- Front and back panels: Cut two rectangles or shapes matching the appliance’s front and back.
- Side panel: Cut a long strip for the sides, top, and back (like wrapping a ribbon around).
- Bottom edge: Decide if you want an open bottom (most do) or a closed bottom for full coverage.
Add ½ inch (1. 3 cm) for seams on all edges.
2. Cut The Fabric
Lay the pattern on your fabric. Mark with chalk or marker. Cut carefully, keeping edges straight.
If using quilted fabric, you can skip interfacing. For thin cotton, consider adding interfacing to each piece for strength.
3. Pin And Sew The Pieces
Pin the side strip to the front panel, right sides together. Sew along the edge with a straight stitch. Repeat for the back panel.
Sew slowly around curves. Remove pins as you go.
Tip: Press seams flat with an iron for a clean look.
4. Finish The Edges
To prevent fraying, finish the raw edges. You can:
- Zigzag stitch or use a serger.
- Sew bias tape or trim around the bottom edge.
For a professional look, add bias tape around all outer edges.
5. Add Closures (optional)
If you want the cover to open easily, sew Velcro strips or snaps along one side or at the bottom. This is helpful for appliances with handles or odd shapes.
6. Try It On And Adjust
Slip the cover over your appliance. Check the fit. If it’s too tight, you can let out the seams a bit. If too loose, adjust and resew as needed.
7. Personalize
Add embroidery, fabric paint, or decorative trim for a custom look. This is where you can match the cover to your kitchen’s style.
Adapting Covers For Different Appliances
Not all appliances are shaped the same. Here’s how to adjust your cover for common kitchen machines:
Stand Mixers
Mixers are tall and have a curved top. Measure the highest point and the widest part (including attachments if needed). Consider making a “dome” top by rounding the side panel. For handles, you can add a slit or a Velcro opening.
Blenders
Blenders usually have a wide base and tall jar. Make a cover with a boxy shape or, for a snugger fit, sew darts (small tucks) at the top corners.
Coffee Makers
Coffee makers are often tall and slim. Measure with the carafe in place. If your coffee maker has a protruding handle or buttons, add extra fabric or a flap in those spots.
Food Processors
These are usually wide and short. A simple box cover works well. If the blade attachment sticks out, make a pocket or bulge in the pattern.
Toasters
Standard two-slice toasters are easy: just a simple rectangle. For four-slice models, measure the extra width.
Air Fryers And Multi-cookers
Modern appliances are often round or oval. For these, cut a circle for the top and a long strip for the sides. Sew the side strip to the top circle, then finish with bias tape at the bottom.
Here’s a quick size comparison for common appliances:
| Appliance | Average Height (inches) | Average Width (inches) | Average Depth (inches) |
|---|---|---|---|
| Toaster (2-slice) | 7 | 12 | 8 |
| Stand Mixer | 14 | 9 | 14 |
| Blender | 15 | 7 | 8 |
| Coffee Maker | 12 | 8 | 10 |
| Air Fryer | 13 | 11 | 12 |
These are average sizes—always measure your own appliances for the best fit.

Credit: www.amazon.com
Design Tips For Stylish And Useful Covers
A good cover protects your appliance and adds beauty to your kitchen. Here’s how to make your covers stand out:
- Color coordination: Match your covers with kitchen towels, curtains, or wall color.
- Patterns and prints: Use bold prints to brighten up the space or neutral colors for a calm look.
- Personalization: Embroider your family’s initials or the appliance name (“Mixer,” “Coffee”) to avoid confusion.
- Functional pockets: Add a small pocket to the cover for recipes or attachments (like mixer beaters).
- Easy-care fabrics: Choose materials that can be machine washed and dried.
- Reversible covers: Make covers with two different fabrics—just flip for a new look.
People often forget that covers need regular washing. Pick a fabric that won’t shrink or fade easily.
Common Mistakes And How To Avoid Them
Beginners often make a few predictable mistakes. Here’s how to avoid them:
- Incorrect measurements: Double-check each size before cutting. Add seam allowance.
- Wrong fabric choice: Avoid heavy or stiff fabrics that don’t drape well.
- Skipping interfacing: For light fabrics, interfacing adds needed structure.
- Not pre-washing fabric: Wash and dry fabric before sewing. Some materials shrink after the first wash.
- Overcomplicating design: Simple covers are easier to sew and maintain.
- Ignoring appliance vents: Don’t block vents on devices that release heat or moisture.
A non-obvious insight: For covers on appliances with displays or digital panels, consider a clear vinyl window so you can see the controls without removing the cover.
How To Make Covers Without Sewing
Not everyone owns a sewing machine or likes to sew. You can still make covers using no-sew methods:
Using Fabric Glue Or Iron-on Tape
- Cut fabric to size as before.
- Use fabric glue or fusible webbing (iron-on adhesive tape) to join seams instead of sewing.
- For edges, fold the fabric over and glue or iron for a neat finish.
- Attach Velcro or snaps with adhesive backing.
These covers aren’t as durable as sewn ones but work well for light use.
Repurposing Household Items
- Use a clean pillowcase for tall appliances like blenders.
- Cut an old T-shirt and tie the bottom for a simple, casual cover.
- For waterproofing, line the inside with a plastic shower curtain cut to size.
No-sew covers are perfect for quick projects or temporary protection.
Caring For Your Appliance Covers
Good maintenance keeps your covers looking fresh and working well:
- Wash regularly: Most cotton and polyester covers can go in the washing machine.
- Spot clean: For vinyl, wipe with a damp cloth and mild soap.
- Iron when needed: Press covers after washing to keep them crisp.
- Store properly: If you remove the cover for a while, fold and store in a dry place.
- Repair damage: Fix small tears or loose seams right away to prevent bigger problems.
A practical tip: Have at least two covers for each appliance so you can swap them out for washing.
Creative Ideas For Upcycling And Eco-friendly Covers
You don’t need to buy new fabric. Many people use old curtains, tablecloths, or clothes to make unique, eco-friendly covers. Here’s how:
- Upcycle old jeans: Denim is sturdy and gives a modern look.
- Use leftover quilt squares: Patchwork covers are colorful and unique.
- Repurpose kids’ blankets: Soft and easy to sew, these make playful covers.
- Combine fabric scraps: Mix and match different textures and colors for a creative effect.
Upcycling reduces waste and saves money. Plus, these covers often become conversation pieces in your kitchen.
When To Buy Vs. Make Appliance Covers
Sometimes, making a cover isn’t practical. Here’s a quick comparison to help you decide:
| Factor | DIY Cover | Store-Bought Cover |
|---|---|---|
| Customization | High (choose fabric, size, style) | Limited to available designs |
| Cost | Usually lower | Often higher |
| Time Required | Several hours | Instant |
| Durability | Varies (depends on material and skill) | Consistent |
| Skill Needed | Basic to intermediate sewing | None |
Making your own cover is best if you want a perfect fit or unique design. Store-bought covers are great for convenience or if you lack time.
Safety Tips For Using Appliance Covers
Covers are safe if used correctly. But there are a few things to watch for:
- Remove covers before using appliances: Never operate an appliance with the cover on.
- Avoid flammable fabrics: Keep covers away from open flames or hot stovetops.
- Watch for moisture: Don’t let wet covers sit on appliances, especially electronics.
- Allow cooling time: Let appliances cool completely before putting covers back on.
- Don’t block vents: Some appliances need airflow even when not in use.
A smart tip: Label covers on the inside with a small tag showing the appliance name. This avoids confusion if you have many covers.
Troubleshooting: Fixing Common Problems
Sometimes, covers don’t turn out as planned. Here’s how to fix common issues:
- Cover too small: Add a border or sew an extra strip of fabric around the edge.
- Cover too large: Sew new seams inside to make it smaller, then trim the excess.
- Seams coming apart: Reinforce with a zigzag stitch or add bias tape.
- Fabric puckering: Use a longer stitch length and press seams flat.
- Stains: Pre-treat with stain remover before washing.
Don’t get discouraged if your first cover isn’t perfect. Each one gets easier with practice.
Where To Find Patterns And Inspiration
Looking for more ideas? Many websites and craft blogs offer free and paid patterns. Search for “kitchen appliance cover sewing pattern” or visit fabric stores for inspiration.
Some good places to start:
- Pinterest boards for kitchen sewing projects
- Craftsy or Etsy for downloadable patterns
- YouTube tutorials for visual learners
For creative ideas and more advanced projects, check out Sew Mama Sew for tested patterns and community tips.
Frequently Asked Questions
How Do I Choose The Best Fabric For Appliance Covers?
Pick a fabric that matches your needs. For easy cleaning, choose cotton or polyester. For water resistance, use vinyl. Quilted fabric adds extra padding. Make sure the fabric is washable and matches your kitchen style.
Can I Make Covers If I Don’t Have A Sewing Machine?
Yes, you can use fabric glue, iron-on tape, or even repurpose pillowcases and T-shirts. These methods are quick but not as durable as sewn covers.
How Often Should I Wash Appliance Covers?
Wash covers every 2–4 weeks, or more often if your kitchen is dusty or you cook a lot. Always check the care label on your fabric.
Are Appliance Covers Safe For All Kitchen Machines?
Covers are safe if you remove them before using the appliance. Avoid leaving covers on hot or wet appliances. Don’t block vents on machines that need airflow.
Where Can I Find More Patterns Or Tutorials For Making Covers?
Many craft websites and YouTube channels offer free patterns and step-by-step guides. Try searching for “appliance cover sewing pattern” or visit Sew Mama Sew for more ideas.
Covers for kitchen appliances can be a simple DIY project or a way to showcase your creativity. With the right materials, measurements, and care, you can keep your kitchen looking clean, stylish, and organized for years to come.

Credit: www.walmart.com