A chipped mug can feel like a small tragedy, especially if it’s your favorite one. Maybe it’s a souvenir from a special trip, a gift from a friend, or just the perfect size for your morning coffee. But when you see that little chip, you might wonder: Is it safe to use? Can I fix it? Or do I need to throw it away? Luckily, most chips can be repaired, and you don’t need to be a professional to do it. With a little patience and the right technique, you can restore your mug to a usable—and sometimes nearly invisible—condition.
Fixing a chipped mug is not just about looks. It’s about safety, hygiene, and keeping things you love in your daily life. In this article, you’ll learn everything you need: why chips happen, what materials and tools you need, step-by-step repair instructions for different types of chips, safety tips, and even some creative ideas if you want to turn a flaw into a feature. Whether you want a quick fix or a near-perfect repair, you’ll find practical solutions here.
Why Do Mugs Chip?
Understanding why mugs chip helps you avoid future damage. Most mugs are made from ceramic or porcelain, which are strong but can still break if hit the wrong way. Here are the most common reasons for chips:
- Accidental Drops: Even a small fall onto a hard surface can chip the rim or base.
- Stacking: Storing mugs inside each other or with heavy dishes on top can create pressure points.
- Temperature Shock: Pouring very hot liquid into a cold mug, or vice versa, can stress the material.
- Dishwasher Damage: Some dishwashers use high heat or harsh detergents that weaken glaze over time.
- Poor Quality Control: Cheaper mugs may have tiny air bubbles or weak spots from manufacturing.
Knowing these causes makes it easier to prevent future chips. For example, avoid stacking mugs, use gentle detergents, and be careful with temperature changes.
Is It Safe To Use A Chipped Mug?
One of the first questions people ask is: Can I still drink from a chipped mug? The answer depends on where the chip is and how deep it goes.
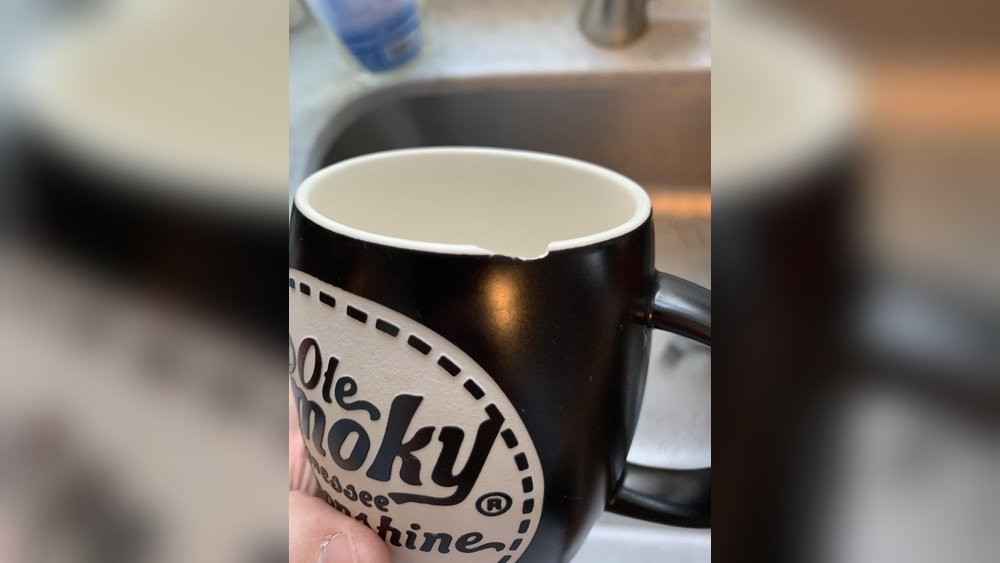
- Rim Chips: If the chip is on the rim, it can cut your lips or mouth. It’s best to repair or retire these mugs for drinking.
- Glaze-Only Chips: If only the outer glaze is chipped but the inside is smooth, it’s less risky but may be uncomfortable to touch.
- Deep Chips: If the chip is deep and exposes the rough ceramic, bacteria can build up in the pores. These mugs are not recommended for drinking until fixed.
Some people keep chipped mugs for decorative use, like holding pens or small plants, but it’s better not to drink from them until repaired.
Tools And Materials Needed For Repair
Before you start fixing your chipped mug, gather these materials. The right tools make the job easier and the repair longer-lasting.
Basic Tools
- Soft cloth
- Small brush (for cleaning dust)
- Cotton swabs
- Fine sandpaper (400–1000 grit)
- Plastic spatula or toothpick
Repair Materials
- Food-safe epoxy: Choose a two-part epoxy labeled as food-safe. Regular super glue is not recommended for drinking surfaces.
- Ceramic filler: Special fillers are available in craft stores for ceramics. Make sure they are food-safe.
- Porcelain paint (optional): For color-matching chips, especially if your mug is colored.
- Clear nail polish (optional): Temporary fix; not for long-term use or dishwasher-safe.
- Glaze pen: Some craft stores sell these for touch-ups on chips.
Cleaning Supplies
- Warm water
- Mild dish soap
- Rubbing alcohol
Protective Gear
- Gloves
- Mask (especially when sanding)
Not all repairs need every item. For simple chips, you may only need epoxy and sandpaper. For larger or visible repairs, you might want paint or filler for a seamless look.
Types Of Chips And How To Identify Them
Not all chips are the same. Identifying the type helps you choose the best repair method.
1. Rim Chips
These are the most common. A small piece breaks off where you sip. This type can be sharp and uncomfortable.
2. Edge Flakes
Tiny flakes come off the rim or base. These are usually shallow but rough to the touch.
3. Glaze Chips
Only the shiny surface glaze is missing. The underlying mug is still mostly smooth.
4. Deep Chips
A chunk of the mug is missing. These are harder to repair perfectly.
5. Hairline Cracks
Not a chip, but a fine crack. Repairing is different, but sometimes chips are attached to cracks.
Recognizing the type helps you decide if a full repair is needed, or if a quick fix is enough.

Credit: www.youtube.com
Step-by-step: How To Fix A Chipped Mug
Let’s walk through the repair process. Start with a clean mug and work in a well-lit, dust-free area.
Step 1: Clean The Mug Thoroughly
Dirt, oils, or residue stop glue or filler from sticking. Wash the mug with warm water and mild soap. Use a small brush to clean the chipped area. Rinse well and dry completely.
For extra cleaning, dab a cotton swab in rubbing alcohol and wipe the chip. This removes hidden oils.
Step 2: Smooth The Edges
If the chip has sharp or jagged edges, carefully sand them with fine sandpaper (400–1000 grit). Always sand lightly, just enough to make the area smooth. Wipe away dust with a soft cloth.
Step 3: Prepare The Repair Material
If using food-safe epoxy, read the instructions. Usually, you mix two parts together for about a minute. Only prepare what you can use in a few minutes, as epoxy hardens quickly.
If using ceramic filler or porcelain paint, follow the package instructions. Some fillers need to cure before painting, while others combine both steps.
Step 4: Apply The Repair
For Small Chips
- Use a toothpick or spatula to apply a tiny amount of epoxy or filler to the chipped area.
- Press the material into the chip, smoothing as you go.
- Try to match the mug’s shape as closely as possible.
- Wipe away excess with a clean cotton swab.
For Larger Chips
- Build up the repair material in layers.
- Allow the first layer to start curing (about 5–10 minutes), then add more as needed.
- Shape carefully to match the mug’s curve.
For Glaze-only Chips
- Sometimes, clear nail polish or a glaze pen is enough for a temporary fix.
- Brush a thin layer over the chip and let it dry.
Step 5: Let It Cure
Most epoxies and fillers need at least 24 hours to fully harden. Place the mug somewhere safe where it won’t be disturbed.
Step 6: Sand And Finish
When the repair is fully cured, sand gently with very fine sandpaper (1000 grit or higher) to smooth bumps. Be careful not to scratch the surrounding glaze.
If you want a perfect look, use porcelain paint to touch up color. Let it dry fully.
Step 7: Clean Again
Wipe the mug with a damp cloth to remove any dust or residue. Avoid harsh detergents for the first week after repair.
Special Tips For A Long-lasting Repair
- Don’t overfill the chip. Thin layers bond better than thick ones.
- Shape while soft: It’s easier to match the mug’s curve before the epoxy hardens.
- Avoid hot drinks for a few days after repair. Heat can weaken fresh repairs.
- Hand wash only: Even after curing, repaired mugs are best washed by hand, not in a dishwasher.
- Check for leaks: Fill the mug with water and check if the repair holds.
- Use food-safe products only: Not all glues are safe for dishes.
When To Replace Instead Of Repair
Some mugs are too damaged to fix safely. Here’s when to say goodbye:
- The chip is very large or the mug is cracked through.
- The mug leaks after repair.
- The chip is in a place that always rubs your lips or tongue.
- The mug is made of materials not meant for repair (like double-walled glass).
In these cases, use the mug for decoration or storage—not for food or drink.
Comparison: Mug Repair Materials
Here’s a quick look at common repair materials for chipped mugs.
| Material | Food Safe? | Durability | Ease of Use | Best For |
|---|---|---|---|---|
| Epoxy (food-safe) | Yes | High | Moderate | Most chips |
| Ceramic Filler | Yes | Medium | Easy | Small chips |
| Porcelain Paint | Some | Medium | Easy | Glaze chips |
| Clear Nail Polish | No (temporary) | Low | Very easy | Quick fixes |
Always check the product label for food safety, especially for surfaces that touch your mouth.
Creative Ways To Hide A Chip
Sometimes, a chip is too visible or the repair can’t make it perfect. Why not turn it into a feature? Here are some creative ideas:
- Gold Kintsugi: Inspired by the Japanese art of repairing pottery with gold, use gold-colored epoxy to fill the chip. It makes the flaw beautiful and unique.
- Painted Designs: Use porcelain paint to create a small flower, heart, or pattern over the chip.
- Sticker Cover: Place a waterproof sticker or decal over the chip (not for the rim).
- Colorful Filler: Choose a contrasting color to make the repair pop.
- Use as Planter: If the chip is unsafe for drinking, use the mug for small plants or as a pen holder.
Turning a chip into art can give your mug new life and a story to tell.
Preventing Chips In The Future
A little care can save your mugs from future chips. Here are practical tips:
- Avoid stacking mugs inside each other.
- Store separately with enough space between them.
- Handle with care when washing, especially around the rim.
- Use soft dish racks or towels when drying.
- Let mugs cool before pouring in hot drinks if they’ve just come from the fridge.
- Choose quality: Heavier, thicker mugs are less likely to chip.
Even with the best care, accidents happen. But these habits can reduce the risk.
Common Mistakes To Avoid
Repairing a mug seems easy, but beginners often make these mistakes:
- Using the wrong glue: Super glue or non-food-safe products can leach chemicals.
- Not cleaning well before repair: Oils or dust stop epoxy from sticking.
- Overfilling the chip: Thick layers don’t cure well and can flake off.
- Ignoring curing times: Using the mug too soon weakens the repair.
- Dishwasher use too soon: High heat and water pressure can break a fresh repair.
- Not matching colors: If appearance matters, test paint or filler on a hidden spot first.
Avoiding these mistakes makes your repair safer and longer-lasting.
Repair Vs. Replace: Cost And Effort
Is it really worth fixing a chipped mug? Here’s a practical comparison:
| Option | Average Cost | Time Needed | Longevity | Best For |
|---|---|---|---|---|
| DIY Repair | $5–$20 (materials) | 30–60 min (+ curing) | Months to years | Sentimental or unique mugs |
| Professional Repair | $30–$100+ | Days to weeks | Years | Antiques or valuable pieces |
| Buy New | $5–$25 (average mug) | Instant | Years | Everyday mugs |
If your mug has sentimental value, repair can be worth the effort. For everyday mugs, sometimes buying new is easier.

Credit: www.reddit.com
Real-life Example: Repairing A Mug At Home
Let’s follow a real repair. Imagine you have a white ceramic mug with a small chip on the rim.
- Clean: Wash and dry the mug. Use rubbing alcohol on the chip.
- Sand: Smooth the sharp edge with 600-grit sandpaper.
- Prepare Epoxy: Mix a few drops of food-safe epoxy.
- Apply: Use a toothpick to fill the chip, matching the curve.
- Shape: Smooth with a plastic spatula, wipe excess.
- Cure: Leave untouched for 24 hours.
- Finish: Sand gently with 1000-grit sandpaper.
- Test: Fill with water to check for leaks.
This method can make the chip nearly invisible and safe for drinking again.
What To Do If The Repair Fails
Sometimes, a repair doesn’t last. Maybe the chip returns, or the epoxy lifts off. Here’s what to try:
- Clean again: Oils or dust may have stopped the glue from sticking.
- Try a different product: Some brands bond better to ceramics.
- Build up slowly: Apply thinner layers, letting each cure fully.
- Consider professional help: For valuable or antique mugs, a restoration specialist may be able to help.
If a mug keeps chipping, it may be time to retire it from daily use.

Credit: www.reddit.com
Environmental Impact: Repair Vs. Throwing Away
Throwing away a mug adds to landfill waste. Ceramics take hundreds of years to break down. Repairing, even just for display or storage use, helps reduce waste. According to the Environmental Protection Agency (EPA), Americans throw away over 9 million tons of glass and ceramics every year. Even small repairs can make a difference if more people choose to fix instead of toss.
Health And Safety: Are Repairs Really Safe?
Many people worry about using repaired mugs for food and drink. Here are some facts:
- Food-safe epoxy is tested for non-toxicity and won’t leach chemicals when cured.
- Never microwave a repaired mug unless the epoxy is labeled microwave-safe.
- Hand wash only: Repairs are not as tough as factory glazing.
- Check for wear: If the repair wears away or cracks, stop using for food.
Always follow the instructions for any repair product you use.
Repairing Special Types Of Mugs
Not all mugs are the same. Here’s what you need to know for different materials.
Porcelain Mugs
Porcelain is delicate. Use fine sandpaper and thin layers of epoxy. Porcelain paint can help hide repairs.
Stoneware Mugs
Stoneware is tougher, but chips can be rough. Use a strong epoxy and sand well.
Bone China
Very thin and light, bone china can be hard to repair invisibly. Consider professional help for valuable pieces.
Glass Mugs
Repairs are usually not safe for glass mugs that will be used for hot drinks. Use for decoration instead.
The Science Behind Mug Repair
When you repair a mug, you’re bonding two surfaces at the molecular level. Epoxy resin forms a chemical reaction that creates a hard, plastic-like surface. For best results, both surfaces must be clean and dry. The rougher the surface (at a microscopic level), the better the epoxy will grip. Most food-safe epoxies can withstand temperatures up to 180°F, but repeated exposure can weaken the bond.
Professional Repair Services
If your mug is antique, very valuable, or you want a flawless repair, professional services exist. Restoration experts can:
- Color-match chips with glaze and paint
- Use industrial fillers for invisible repairs
- Restore hand-painted details
These services can be expensive—often more than a new mug—but are worth it for irreplaceable pieces. To learn more about ceramic repair, visit the Wikipedia page on ceramic repair.
Repair Kit Comparison
If you want to keep supplies at home, here’s a look at popular repair kits.
| Kit Name | Contents | Food Safe? | Price Range | Recommended For |
|---|---|---|---|---|
| PC-Clear Epoxy Kit | Epoxy, mixing stick | Yes | $10–$15 | All-purpose |
| Porc-a-Fix Touch-Up | Porcelain paint, brush | Some | $8–$12 | Glaze chips |
| MagicEzy Chip Fix | Filler, applicator | Yes | $12–$20 | Large chips |
Read reviews and instructions carefully before buying a kit.
Frequently Asked Questions
How Do I Know If My Mug Is Safe To Repair?
If the chip is small and the mug is otherwise intact (no cracks, leaks, or deep damage), you can repair it. Avoid repairing if the mug is badly cracked or unstable.
Is It Safe To Microwave A Mug After Repair?
Most repairs are not microwave safe unless the epoxy or filler says otherwise. Heat can weaken the bond or release chemicals.
Can I Fix A Chipped Mug Without Special Glue?
For small, shallow chips, clear nail polish or a glaze pen can give a short-term fix. For any chip that touches your lips or holds liquid, use food-safe epoxy.
How Long Does A Mug Repair Last?
A well-done repair with quality epoxy can last months or years with gentle use and hand washing. Avoid dishwashers and high heat for best results.
What If My Mug Keeps Chipping?
Repeated chipping may mean the mug is weakened overall. Retire it from daily use and consider repurposing it for decoration or storage.
Fixing a chipped mug can be a satisfying project. With care, the right materials, and a bit of patience, you can keep your favorite mug around for years to come. Whether you repair for function or for memories, you’re making a small but meaningful choice for sustainability and personal value.