When you buy a new dishwasher, connecting the water supply is one of the most important steps. If you do it right, your dishwasher will work perfectly and last longer. If you make mistakes, you may have leaks, water damage, or even a broken machine.
Many people think this job is only for plumbers, but with the right guidance, most homeowners can connect a dishwasher water supply themselves. This guide walks you through every detail, from understanding your kitchen plumbing to testing your work at the end.
Even if you’re not an expert with tools, you’ll learn what you need and how to avoid common mistakes people often make.
Understanding Dishwasher Water Supply Basics
Before you start, it helps to know how a dishwasher gets water. Most dishwashers connect to your kitchen’s hot water supply. This ensures dishes are cleaned with hot water for better results. The standard dishwasher connection is a 3/8-inch compression fitting. You’ll usually find the water supply line under your kitchen sink, and it often shares the hot water line with the kitchen faucet.
Many dishwashers use a flexible braided stainless steel hose, which is reliable and easy to install. Sometimes, older homes have copper tubing. If your kitchen is older, check if you need to update the plumbing for safety and easier installation.
A dishwasher also has a drain hose and an electrical connection, but this article focuses only on the water supply part.
Tools And Materials You Need
Gather all your tools and materials before you begin. Having everything ready saves time and avoids frustration.
Essential Tools:
- Adjustable wrench
- Channel-lock pliers
- Phillips and flathead screwdrivers
- Bucket or small container (for catching water)
- Teflon tape (plumber’s tape)
- Drill and bits (sometimes needed)
- Utility knife or tubing cutter (for copper lines)
- Flashlight
Materials:
- Dishwasher installation kit (usually includes a flexible water supply line, fittings, and a 90-degree elbow)
- 3/8-inch compression fitting (if not included)
- Dishwasher water supply valve (if you need a dedicated shutoff valve)
- Towels or rags (for spills)
Pro tip: Always use a new water supply line. Reusing an old line increases the risk of leaks and is a common mistake beginners make.
Safety Precautions
Working with plumbing means working with water and sometimes electricity. Take these safety steps:
- Turn off the power to the dishwasher at the circuit breaker.
- Turn off the hot water supply under the sink.
- Keep the area dry. Wipe up spills immediately.
- Wear gloves if you have sensitive skin.
Never skip these steps—an accident can happen quickly, and water damage can be expensive to fix.
Step-by-step Guide To Connecting Dishwasher Water Supply
Let’s walk through the process, step by step, so you can be confident doing it yourself.
1. Locate The Hot Water Supply
Find the hot water shutoff valve under your kitchen sink. This is usually a small handle or lever. Turn it clockwise to shut off the flow.
Place a bucket under the supply line in case any water drips out when you disconnect the old line.
2. Disconnect The Existing Water Line (if Needed)
If your old dishwasher is still installed, you’ll need to disconnect it first. Use your wrench to loosen the compression nut at the valve. Some water may spill, so keep towels ready.
If you’re installing a new dishwasher where there wasn’t one before, you may need to add a branch to the hot water line. In this case, install a dual-outlet valve or a T-fitting so both the faucet and dishwasher have their own supply.
3. Prepare The Dishwasher Side Connection
Most dishwashers have a water inlet at the bottom left or right corner. The inlet is usually threaded and requires a 90-degree elbow fitting (often brass). This fitting helps avoid kinks in the supply hose.
- Wrap Teflon tape around the threads of the elbow to prevent leaks.
- Thread the elbow into the dishwasher’s water inlet, tightening by hand first, then using a wrench to snug it up. Don’t overtighten—you may crack the fitting.
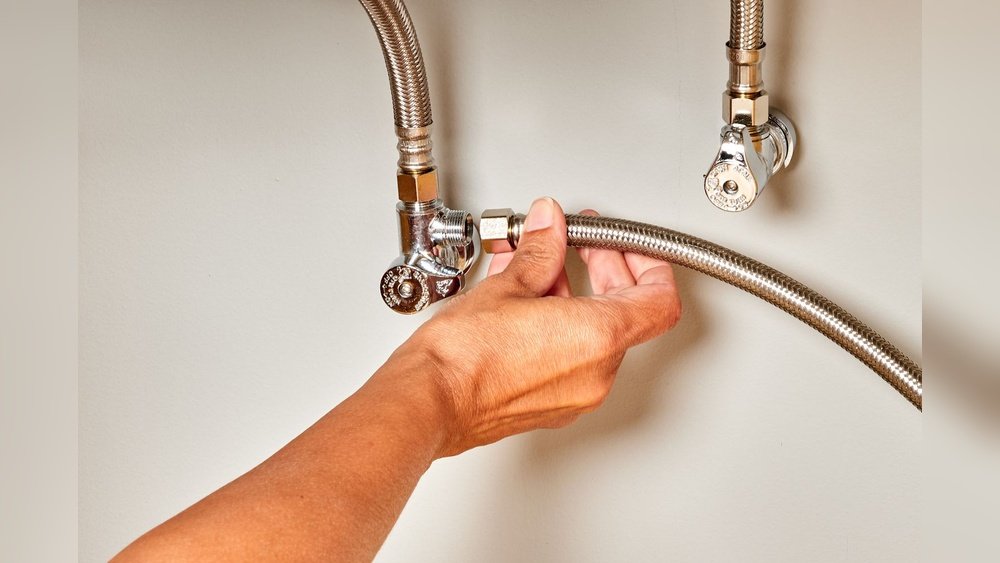
4. Attach The Water Supply Line
Connect one end of the flexible water supply line to the 90-degree elbow you just installed on the dishwasher.
- Tighten the nut with a wrench, but again, don’t overtighten.
- Check that the hose isn’t twisted or kinked.
Run the other end of the supply line through the hole in your cabinet to reach the shutoff valve under your sink. Make sure the line is long enough and won’t be pinched when you slide the dishwasher into place.
5. Connect To The Hot Water Valve
At the shutoff valve, attach the other end of the supply line.
- If you have a compression fitting, slide the nut and ferrule onto the line, then attach it to the valve.
- Use Teflon tape on the threads if the instructions recommend it.
Tighten the connection with your wrench until it’s snug. If you feel resistance, stop and check the alignment.
6. Check And Secure All Connections
Before turning on the water, check every connection by hand to make sure everything feels tight.
- Make sure the hose isn’t touching anything sharp under the sink.
- Use clips or brackets to keep the hose secure if needed.
7. Turn On The Water And Check For Leaks
Slowly turn the hot water valve back on. Watch all connections carefully for leaks.
- If you see drips, turn off the water and tighten the connection a bit more.
- If you can’t stop a leak, remove the fitting and check for debris or a bad washer.
Let the water run for a few minutes to make sure everything stays dry.
8. Slide The Dishwasher Into Place
Once you’re sure there are no leaks, carefully push the dishwasher into its final position.
- Check that the supply line moves smoothly and isn’t caught or pinched.
- Make sure the line isn’t too tight—it should have a gentle curve.
9. Restore Power And Test
Turn the power back on at the circuit breaker.
Run the dishwasher through a short cycle. Watch and listen for any signs of leaks under the sink and around the dishwasher. Open the door partway through the cycle to check for water inside (this confirms the supply is working).
If everything works and you see no leaks, congratulations! You’ve connected your dishwasher water supply correctly.
Common Mistakes And How To Avoid Them
Even careful homeowners make mistakes. Here are some of the most frequent problems:
- Overtightening connections: This can strip threads or crack fittings, causing leaks.
- Using old supply hoses: Old or reused hoses are more likely to burst.
- Forgetting Teflon tape: Missing tape can cause slow leaks that are hard to see.
- Not checking for leaks: Always inspect every connection before finishing.
- Pinching the supply line: Make sure the hose moves freely as you push the dishwasher in.
- Connecting to the cold water line: Dishwashers need hot water for proper cleaning.
- Ignoring manufacturer instructions: Always read the manual for specific steps or parts unique to your model.
Insider tip: Many leaks don’t appear right away. Check the connections again a day after installation.
Do You Need A Plumber?
If your kitchen plumbing is very old, or you need to cut and solder copper pipes, hiring a plumber might be smart. For most basic installations, a handy homeowner can do the work. However, if you’re not confident or see signs of water damage, call a professional.
Comparing Water Supply Line Types
Choosing the right water supply line is important. Here’s a quick comparison:
| Type | Pros | Cons |
|---|---|---|
| Flexible Braided Stainless Steel | Easy to install, durable, resists bursting | More expensive than plastic |
| Copper Tubing | Long-lasting, resists bacteria | Harder to cut/shape, can kink, needs tools |
| Plastic (PEX or PVC) | Cheap, flexible, easy to work with | Less durable, can crack with age |
For most people, braided stainless steel is the best choice. It’s easy, safe, and lasts for years.
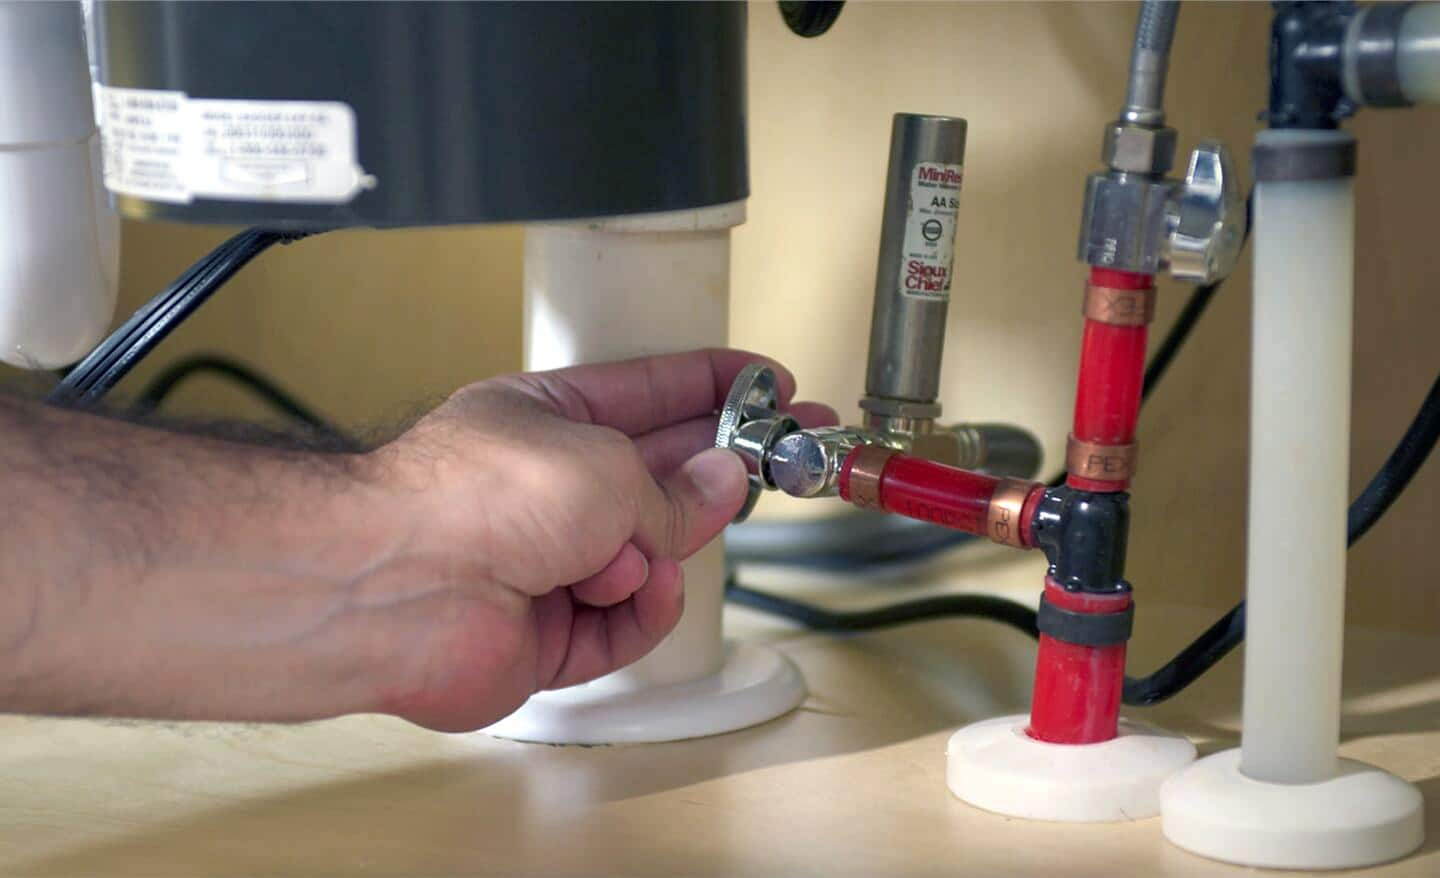
How To Add A Dedicated Shutoff Valve
Some older homes don’t have a separate shutoff for the dishwasher. Adding one makes future maintenance easier. Here’s how:
- Turn off the main water supply.
- Cut the hot water line under the sink using a tubing cutter.
- Install a dual-outlet valve or an add-a-tee valve. These let you connect both the faucet and dishwasher.
- Tighten all connections and turn the main water back on.
- Check for leaks.
If you’re not comfortable cutting pipes, this is a good job for a plumber.
Dishwasher Water Supply Requirements By Manufacturer
Each dishwasher brand may have specific requirements. Here’s a quick look at popular brands:
| Brand | Water Inlet Location | Recommended Water Pressure | Special Notes |
|---|---|---|---|
| Bosch | Bottom Left | 15-145 psi | Requires 120°F minimum water temp |
| GE | Bottom Right | 20-120 psi | Uses 3/8″ compression fitting |
| Whirlpool | Bottom Left | 20-120 psi | Flexible hose recommended |
| Samsung | Bottom Left | 20-120 psi | Check for included elbow fitting |
Always double-check your dishwasher’s installation manual for the exact water supply location and requirements.
Troubleshooting Water Supply Problems
Even with careful installation, problems can happen. Here’s what to do if things don’t go as planned.
Dishwasher Not Filling With Water
- Check the shutoff valve is fully open.
- Inspect the supply line for kinks or blockages.
- Make sure the float switch inside the dishwasher isn’t stuck.
- Verify the water inlet valve on the dishwasher is working (listen for a click or hum when the cycle starts).
Water Leaks Under The Sink Or Dishwasher
- Tighten all connections gently.
- Replace any old washers or supply lines.
- If the leak is persistent, remove and re-tape the threads with Teflon tape.
Low Water Pressure
- Make sure your home’s water pressure is within the recommended range (usually 20-120 psi).
- Clean the screen/filter in the supply hose.
- Replace old supply lines with new, wider ones if needed.
Water Tastes Or Smells Strange
- Run the hot water for a minute before starting the dishwasher.
- Clean the supply line filter.
- If you have old copper or plastic lines, consider replacing them.
Credit: www.homedepot.com
When To Upgrade Your Kitchen Plumbing
If your house is older than 30 years or you see rust, corrosion, or green stains under the sink, it might be time for an upgrade. Modern plumbing materials are safer and easier to work with.
Upgrade signs to watch for:
- Discolored water
- Frequent leaks
- Low water pressure
Replacing old pipes can prevent bigger problems and makes future dishwasher installations much simpler.
Saving Water And Energy With Your Dishwasher
Connecting your dishwasher the right way helps save water and energy. Here are a few ways to optimize:
- Use a hot water supply: This reduces the dishwasher’s energy use, as it doesn’t need to heat cold water.
- Run only full loads: This maximizes efficiency.
- Fix leaks fast: Even small drips waste gallons of water over time.
- Choose an Energy Star dishwasher: These use less water and power.
According to the Environmental Protection Agency, modern dishwashers use as little as 3 gallons per cycle, compared to 10 gallons for hand washing.
:max_bytes(150000):strip_icc()/how-to-install-a-dishwasher-2718667-03-6f43d4b9c9e74ee9add9140ee97f5ff5.jpg)
Credit: www.thespruce.com
Dishwasher Water Supply And Local Codes
In some places, building codes require certain types of water supply lines or shutoff valves. Some areas require a high loop or air gap for the drain hose (to prevent dirty water backflow). Always check your city’s plumbing code or ask an inspector if you’re unsure.
Not following code can cause problems when you sell your home or file an insurance claim.
Environmental Factors And Water Hardness
If you live in an area with hard water, you may notice mineral buildup in your dishwasher. Hard water can clog supply lines and reduce cleaning power.
Solutions:
- Install a water softener.
- Clean the dishwasher’s filter and supply line regularly.
- Use dishwasher cleaner to remove deposits.
Soft water extends the life of both your dishwasher and its water supply components.

Credit: www.reddit.com
Cost Breakdown: Diy Vs. Professional Installation
Let’s compare the typical costs for connecting a dishwasher water supply:
| Item | DIY Cost | Pro Installation Cost |
|---|---|---|
| Supply Line & Fittings | $15-$35 | Included |
| Tools (if needed) | $0-$25 | Included |
| Labor | $0 | $100-$200 |
| Total | $15-$60 | $100-$235 |
DIY saves money, but only if you’re confident in your skills. If you’re unsure, hiring a pro can prevent costly leaks or repairs.
Final Checks Before Finishing
Before you call the job done, do a last review:
- Inspect all connections for leaks.
- Run a full dishwasher cycle.
- Check for water under the sink and around the dishwasher.
- Listen for any strange noises.
Keep an eye on the area for a few days. A slow leak may not be obvious right away.
Hidden insight: If you ever smell a musty odor in your kitchen, check under your sink and around the dishwasher. Small leaks often hide for weeks before you see damage.
Frequently Asked Questions
How Long Does It Take To Connect A Dishwasher Water Supply?
Most installations take 1-2 hours for someone with basic DIY skills. If you need to add a shutoff valve or update old plumbing, it may take longer.
Can I Connect A Dishwasher To Cold Water Instead Of Hot?
It’s not recommended. Dishwashers are designed to use hot water (120°F or above) for best cleaning results. Connecting to cold water will lead to dirty dishes and higher energy use.
What Size Is A Standard Dishwasher Water Supply Line?
The standard size is 3/8-inch compression fitting. Always check your dishwasher’s manual to confirm.
Do I Need Teflon Tape On Dishwasher Water Supply Fittings?
Yes, for most threaded connections, use Teflon tape to prevent leaks. For compression fittings, tape is usually not needed.
Is It Normal For The Supply Line To Get Warm During Use?
Yes, the supply line will get warm because dishwashers use hot water. If the line is very hot or you smell burning, turn off the water and check for problems.
Connecting a dishwasher water supply is a manageable DIY project for most homeowners. By following each step carefully and paying attention to details, you’ll avoid leaks and enjoy clean dishes every time. For more details on plumbing standards and dishwasher installation, visit this helpful Family Handyman guide. Take your time, check your work, and your new dishwasher will serve you well for years.