Cleaning mold from your ice maker is not just about keeping things fresh; it’s about health, taste, and appliance lifespan. Many people trust their ice to be pure because it looks clear. But mold can hide inside, affecting taste, odor, and even causing sickness.
Ice makers, whether inside your fridge or a standalone machine, are perfect places for mold to grow—dark, moist, and often ignored. If you’ve ever noticed your ice tasting strange or looking cloudy, it’s time to take action.
This guide is for anyone who wants ice that’s truly clean and safe. You’ll learn why mold forms, how to spot it, and—most importantly—how to get rid of it step by step. Along the way, you’ll find tips most miss, common mistakes to avoid, and advice that works for any ice maker brand or type.
Whether you have a high-tech fridge or a simple countertop model, this guide will help you clean mold from your ice maker completely and keep it away for good.
Why Mold Grows In Ice Makers
Mold is a fungus that thrives in places with moisture, warmth, and organic material. Your ice maker has all these conditions, even though it stays cold most of the time. Here’s what helps mold grow inside ice makers:
- Standing water: Small pools or drops left after cycles.
- Organic debris: Dust, food bits, or minerals from water.
- Low air flow: Closed compartments hold moisture.
- Warmth during cycles: Some machines heat up during defrosting or cleaning.
Most ice makers are not airtight, so air brings in tiny mold spores. Add moisture and a bit of warmth, and mold finds a home.
How Mold Affects Your Health And Ice
Mold in your ice maker can cause:
- Strange smells and tastes in ice
- Respiratory problems for sensitive people
- Allergic reactions (sneezing, itchy eyes)
- Serious illness if mold is black or toxic
Even if you don’t see mold, your ice can carry spores or bacteria. That’s why a regular, deep clean is essential.
Signs Your Ice Maker Has Mold
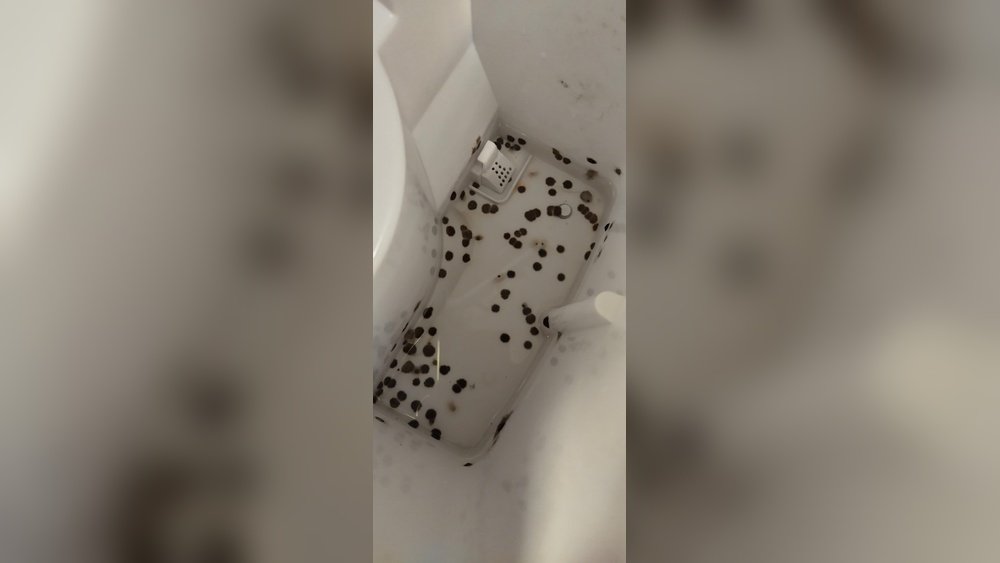
Spotting mold in an ice maker isn’t always easy. Sometimes, there are no obvious black spots. Here are signs to watch for:
- Ice smells musty or earthy
- Cloudy or off-colored ice cubes
- Bits floating in ice or water
- Ice tastes bad or different
- Visible mold: Black, green, or pink spots inside the tray or dispenser
- Sticky residue on ice bin walls or ice scoop
- Ice melts faster than usual
- Unusual noises: Mold can block moving parts
If you notice any of these, it’s time to clean your ice maker. Don’t ignore these signs—mold can spread fast.
Credit: moldfreeliving.com
Tools And Supplies You Will Need
Before starting, gather everything you need. Having the right tools makes cleaning easier and more effective.
- Rubber gloves: Protects your hands from mold and cleaning chemicals
- Face mask: Prevents breathing in mold spores
- Soft brush or old toothbrush: For scrubbing
- Microfiber cloths or paper towels
- Mild dish soap
- White vinegar: Natural, effective mold killer
- Baking soda: Removes smells and stains
- Small bucket or bowl
- Spray bottle
- Screwdriver (if you need to remove parts)
- Measuring cup
- Ice scoop (for removing ice)
- Optional: Commercial ice maker cleaner (make sure it’s food-safe)
Pro tip: Never use bleach inside your ice maker unless the manual allows it. Bleach can damage parts or leave harmful residue.
Step-by-step Guide: How To Clean Mold From Ice Maker
Cleaning an ice maker may sound tough, but it’s simple if you follow the right steps. Set aside about 1–2 hours for a deep clean.
1. Turn Off And Unplug The Ice Maker
- Safety first: Switch off the ice maker at the power button or unplug it from the wall.
- If inside a refrigerator, turn off the ice making function or unplug the fridge.
- Never work on an appliance that is still running.
2. Remove All Ice And Water
- Open the ice bin and take out all ice using the scoop. Throw away the ice.
- Pour out any remaining water from the reservoir.
- Removing all ice helps you see hidden mold and clean every corner.
3. Disassemble Removable Parts
- Take out the ice bin, trays, and any removable covers.
- If your model allows, remove the water reservoir and any tubing you can reach.
- Check your user manual for safe removal instructions.
- Lay parts on a clean towel.
4. Clean Removable Parts
- Mix a solution: 1 cup white vinegar + 2 cups warm water in a bucket.
- Add a squirt of mild dish soap.
- Soak the ice bin, trays, and covers in the mixture for 20–30 minutes.
- Scrub with a soft brush or toothbrush, paying attention to corners and seams.
- For tough stains, sprinkle baking soda and scrub gently.
- Rinse with clean water and let air dry completely.
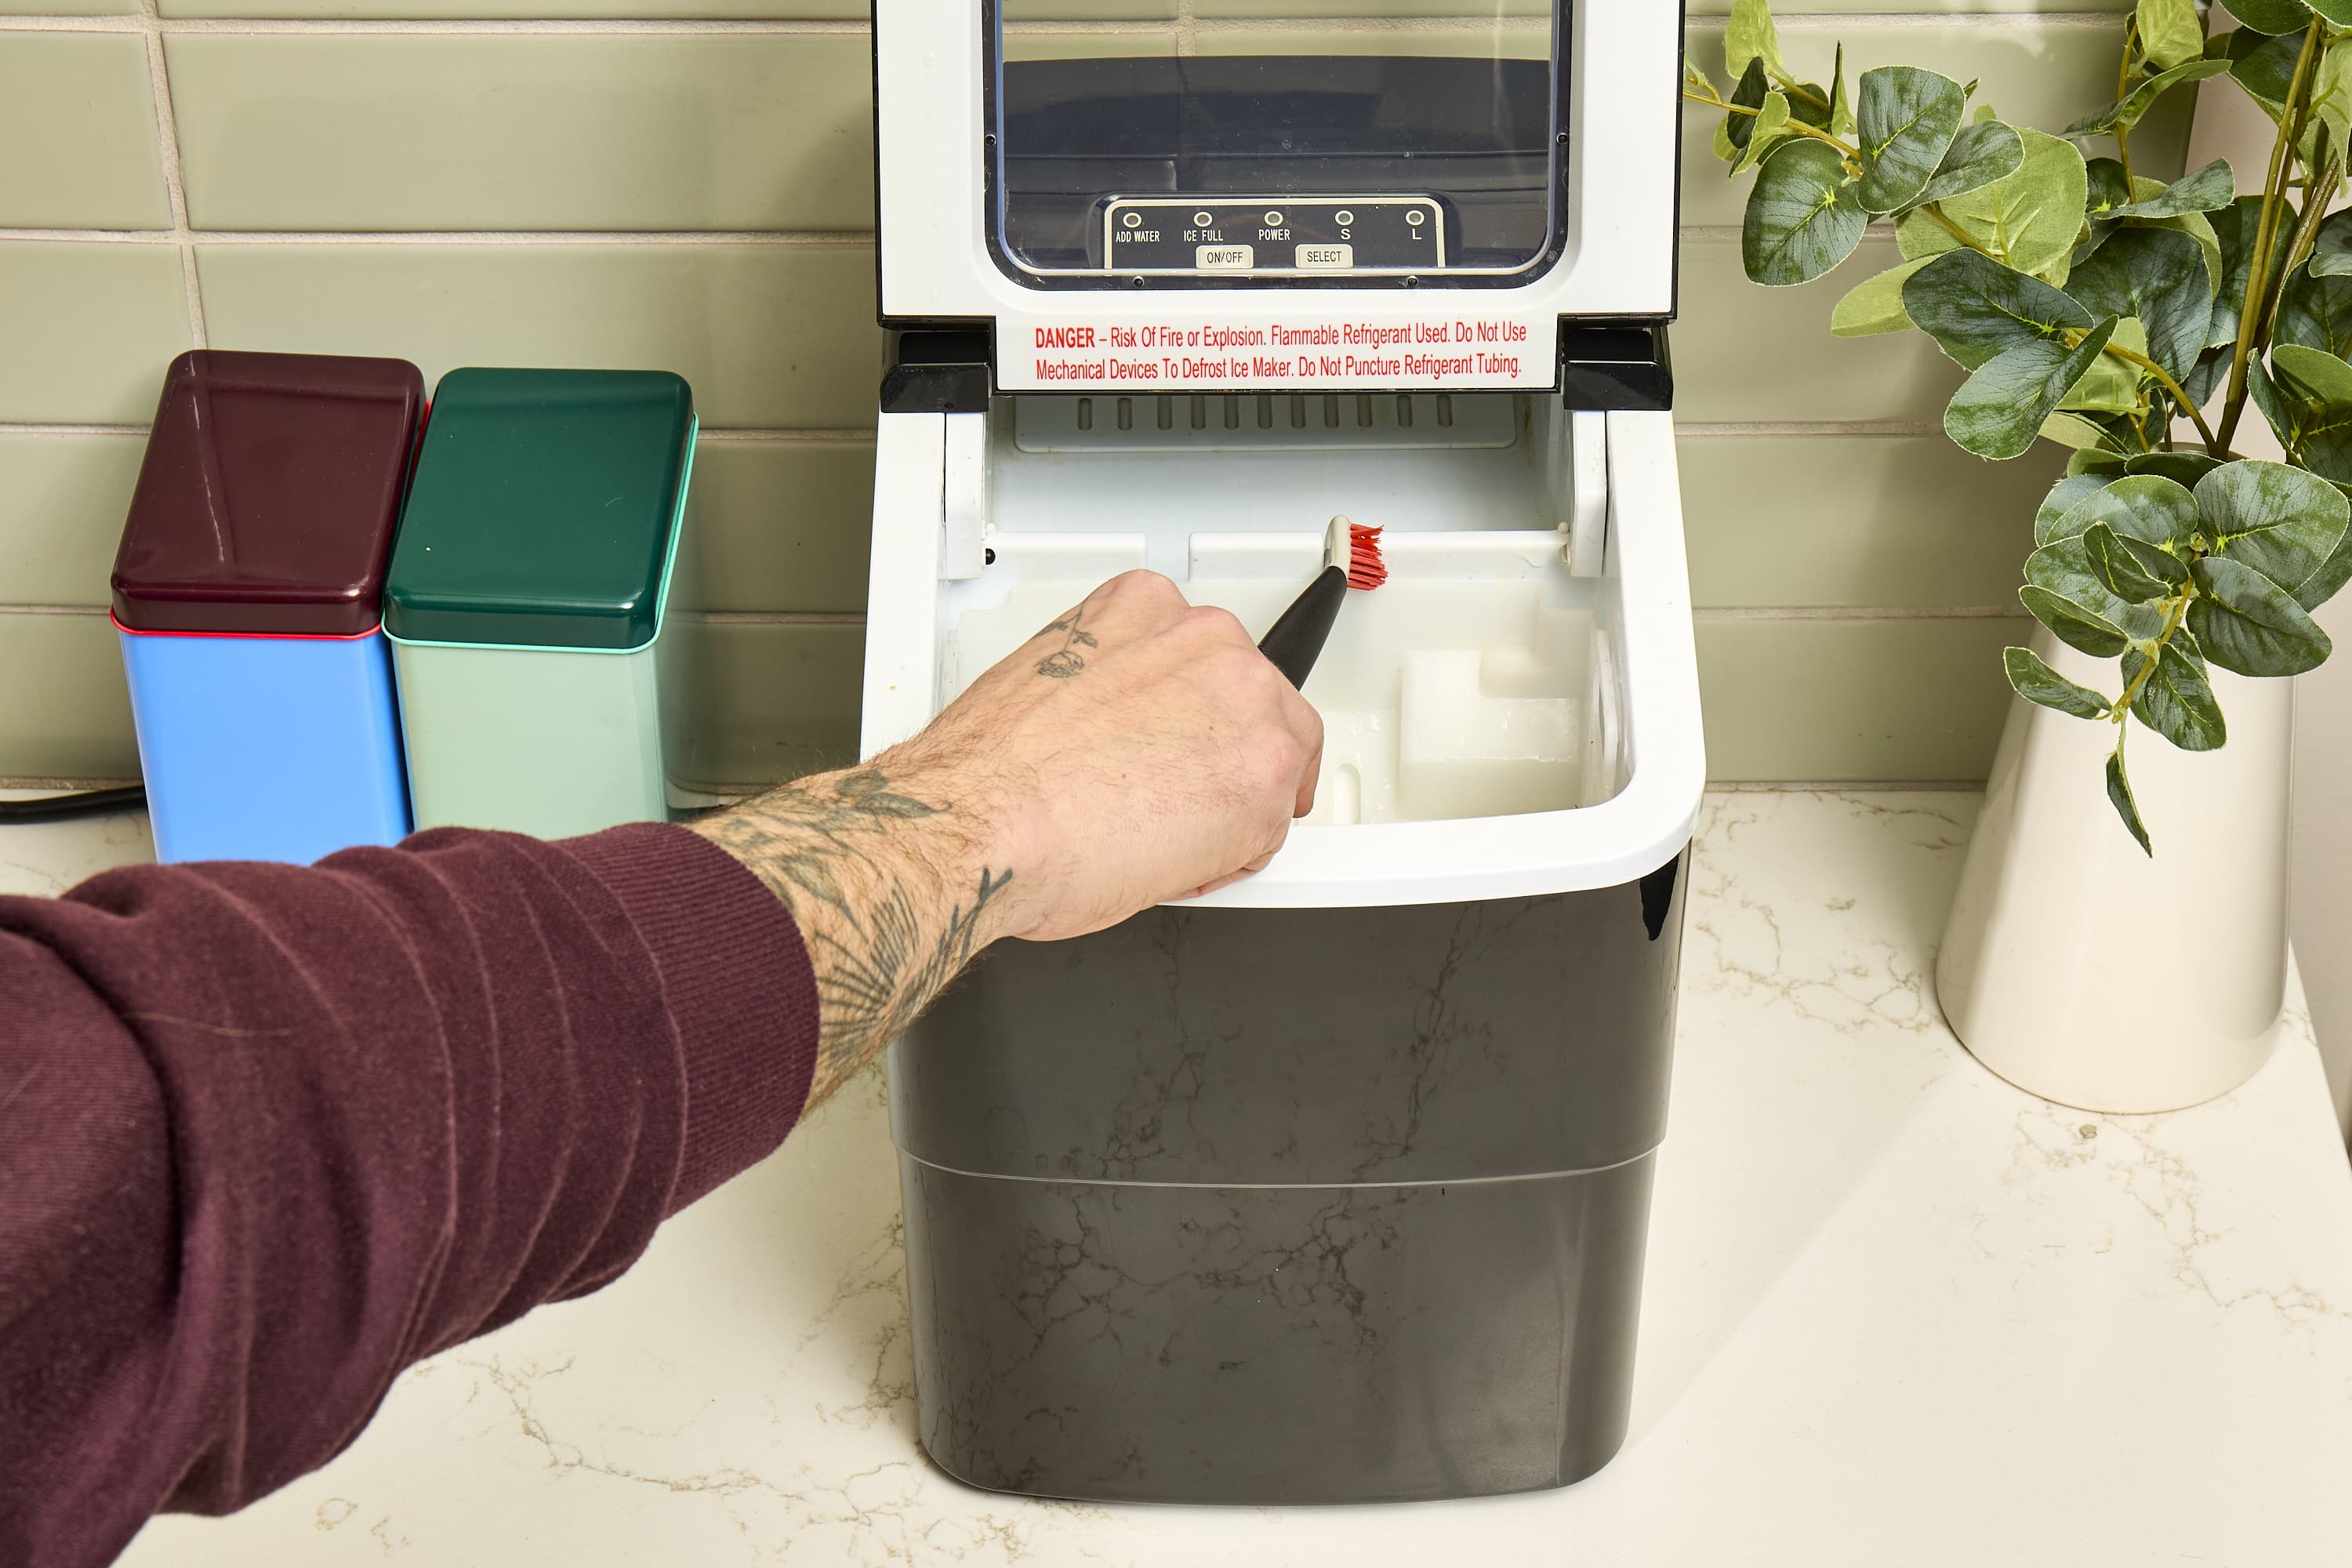
5. Clean Inside The Ice Maker
- Spray the inside with the vinegar-water solution.
- Use a brush or cloth to scrub moldy spots, seams, and hard-to-reach areas.
- Wipe down with a clean, damp cloth to remove any residue.
- Dry with a microfiber cloth or let air dry.
- Don’t forget the ice chute and dispenser area—these often hide mold.
6. Clean The Water Lines (if Possible)
- Mold can live inside water tubes.
- Check your manual: Some machines allow you to flush lines with vinegar or a special cleaner.
- If so, pour the cleaner into the reservoir and run a cleaning cycle as directed.
- Run at least two cycles of clean water afterward to flush out any vinegar or cleaner.
- If you can’t reach or clean water lines, change the water filter if your model has one.
7. Reassemble And Run A Cleaning Cycle
- When all parts are dry, put everything back in place.
- Plug the ice maker back in.
- If your machine has a cleaning or self-clean cycle, run it once with clean water.
- Throw away the first batch of ice after cleaning.
8. Wipe Down The Outside
- Mold can live on handles and buttons too.
- Wipe the outside of your ice maker with vinegar-water or a disinfectant wipe.
- Dry with a cloth.
9. Final Check
- Look carefully inside for any missed spots.
- Smell the ice bin—there should be no musty odor.
- If you find more mold, repeat cleaning as needed.
Comparing Cleaning Methods For Mold Removal
Different people recommend different ways to clean mold from ice makers. Here’s how the most common methods compare:
| Method | Effectiveness | Safety | Cost | Recommended For |
|---|---|---|---|---|
| Vinegar Solution | High | Very Safe | Low | All ice makers |
| Baking Soda Scrub | Medium | Safe | Low | Stains, odors |
| Commercial Cleaner | High | Safe (if food-grade) | Medium | Heavy mold, commercial units |
| Bleach Solution | Very High | Risky (corrosive) | Low | Only if manual allows |
Insight: Vinegar is the safest and most effective for most home ice makers. Bleach is rarely needed and can damage parts.
How Often Should You Clean Your Ice Maker?
Cleaning frequency depends on how much you use your ice maker and your local water quality. Here’s a simple guide:
| Usage | Recommended Cleaning Frequency |
|---|---|
| Daily (home, large family) | Every 1–2 months |
| Occasionally (small family, office) | Every 3–4 months |
| Commercial/business use | Every 2–4 weeks |
| Vacation/rare use | Before and after each use |
Tip: Mark your calendar for regular cleaning. Mold grows faster if you forget.
Credit: www.thekitchn.com
Special Tips For Different Types Of Ice Makers
Not all ice makers are the same. Here’s how to handle the most common types:
Refrigerator Ice Makers
- Usually built into the freezer door or compartment.
- Always unplug the fridge before cleaning.
- Some have water filters—replace these every 6 months or as directed.
- Don’t force parts out; check the manual.
Countertop Ice Makers
- Portable and easy to move.
- Most parts come out for soaking.
- Always dry completely before reassembly to avoid mold regrowth.
Undercounter/commercial Ice Makers
- Larger, with more complex water lines.
- Use a commercial cleaner approved by the manufacturer.
- Clean water lines and change filters more often—mold can spread quickly in these.
Advanced tip: For built-in units, check for drain hoses or pumps that may need cleaning.
Common Mistakes To Avoid
When cleaning mold from ice makers, people often:
- Skip hidden spots: Mold hides in corners, chutes, and under trays.
- Forget to dry parts: Moisture brings mold back fast.
- Ignore water lines and filters: Mold can travel through these and return quickly.
- Use harsh chemicals: Bleach or cleaners not meant for food areas can be dangerous.
- Don’t clean often enough: Waiting until you see mold means you’re already behind.
- Miss the ice scoop: It touches every ice cube—always clean it too.
- Don’t throw away old ice: Old ice can be full of spores.
- Skip safety gear: Gloves and masks protect your health.
Preventing Mold In Your Ice Maker
Stopping mold before it starts is easier and faster than cleaning heavy growth. Try these strategies:
- Keep the lid closed: Reduces air (and spores) getting in.
- Use filtered water: Less organic material for mold to feed on.
- Change water filters regularly: At least every 6 months.
- Dry after cleaning: Air out the bin and trays.
- Clean up spills fast: Don’t let sweet drinks or food bits sit in the ice area.
- Check for leaks: Water leaks create constant moisture.
- Run cleaning cycles: Many modern ice makers have a built-in cleaning feature.
- Store the ice scoop outside: If possible, keep it in a holder, not inside the ice bin.
Hidden Insight: Even new ice makers can grow mold if left unused for weeks. Run a cleaning cycle before first use.
How To Handle Persistent Mold Problems
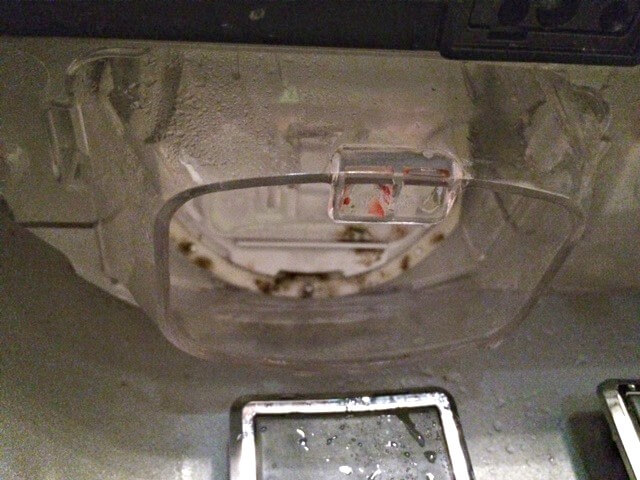
If mold comes back quickly, there may be a deeper issue. Here’s what to check:
- Check water quality: High minerals or bacteria in your water can feed mold. Get your water tested or use a better filter.
- Ventilation: Make sure your ice maker isn’t too close to the wall or in a damp place.
- Drainage issues: If the drain is blocked, water will pool and mold will return.
- Defective seals: Gaps in the door or lid let in air and spores.
- Old or broken parts: Sometimes, seals or bins need replacement to stop mold.
If you’ve tried everything and mold keeps returning, contact the manufacturer or a professional technician.

Credit: www.reddit.com
Is Mold In Ice Makers Common?
Surprisingly, yes. Studies show that up to 70% of home ice makers tested had some form of mold or yeast present. This is because they’re often moist and not cleaned regularly. Even in businesses, mold is a frequent problem. The good news: with good habits, you can keep your ice safe and fresh.
Comparing Home Remedies Vs. Professional Cleaning
You might wonder if you should clean your ice maker yourself or hire a pro. Here’s a quick comparison:
| Cleaning Method | Pros | Cons | When to Use |
|---|---|---|---|
| DIY (Vinegar/Baking Soda) | Low cost, easy, safe | May miss deep mold, needs effort | Most home ice makers |
| Professional Service | Thorough, checks all parts | Expensive, needs scheduling | Commercial units, tough cases |
Expert tip: For most home users, regular DIY cleaning is enough. Call a pro if mold keeps returning, or for large commercial units.
What To Do If You Find Black Mold
Black mold (Stachybotrys chartarum) is rare but dangerous. It looks dark green or black and has a slimy texture. If you see black mold:
- Stop using the ice maker immediately
- Wear gloves and a mask for all cleaning steps
- Use a vinegar solution or a food-safe commercial mold cleaner
- Throw away all ice and clean every part, including water lines
- If you still see black spots after cleaning, consider replacing affected parts
- If you have allergies or asthma, ask someone else to clean or call a professional
Important: Never ignore black mold—it can harm your health.
How To Store Ice Safely After Cleaning
After cleaning, it’s important to keep your ice fresh and mold-free:
- Always use a clean, dry ice bin
- Don’t touch ice with bare hands
- Don’t mix old and new ice—start fresh
- Keep the bin covered or closed
- If you don’t use ice often, empty and clean the bin every week
Real-world Example: Cleaning A Moldy Ice Maker
Let’s look at a real example. Sarah noticed her refrigerator ice tasted musty and the cubes were cloudy. She checked inside and saw pink and black spots on the ice tray.
Sarah unplugged her fridge, removed the ice bin and tray, and soaked them in vinegar and dish soap. She scrubbed with a toothbrush, rinsed, and let everything dry. Next, she wiped the inside with vinegar, paying special attention to the chute and corners.
She replaced the water filter and ran two cycles of ice, throwing away the cubes. The third batch was clear and had no odor. Sarah now cleans her ice maker every two months, and her ice tastes fresh again.
Where To Find More Information
For more details on mold and appliance cleaning, check trusted resources like the Centers for Disease Control and Prevention (CDC).
Frequently Asked Questions
How Do I Know If There Is Mold In My Ice Maker?
Look for signs like musty smells, cloudy ice, or spots inside the ice bin. Mold may also cause ice to taste strange or melt quickly. If you see black, green, or pink spots, that is likely mold.
Can I Use Bleach To Clean My Ice Maker?
Bleach is powerful but can damage many ice makers and leave residue. Only use bleach if your user manual says it’s safe, and always rinse thoroughly. Vinegar is safer for most machines.
How Long Does It Take To Clean Mold From An Ice Maker?
A deep clean usually takes 1 to 2 hours, including soaking and drying time. Some quick cleanings take less, but for heavy mold, allow extra time for scrubbing and drying.
Is It Safe To Eat Ice From A Moldy Ice Maker?
No. Ice from a moldy maker can carry spores and bacteria that may cause illness. Always throw away old ice after cleaning and only use fresh ice.
What If My Ice Maker Keeps Getting Moldy?
Check for underlying problems like bad water quality, poor ventilation, or blocked drains. Clean more often and replace water filters. If mold returns quickly, contact a technician for help.
Keeping your ice maker clean means safer drinks, better taste, and a longer-lasting appliance. With these steps, you can remove mold fully and keep it away—so your ice is always as fresh as it looks.