Keeping your gas oven clean is not just about making it look nice. A clean oven works better, cooks food more evenly, and even lasts longer. Many people feel nervous about cleaning their gas ovens because of all the small parts and the smell of gas. But with the right steps, it’s easier and safer than you might think. In this guide, you’ll learn everything you need to know—from the safest way to start, to the best products for tough stains, to secrets even experienced home cooks sometimes miss. You’ll find clear advice, real examples, and practical tips that will help you keep your gas oven spotless and safe to use.
Understanding Your Gas Oven
Before you start cleaning, it helps to know how your gas oven works. Gas ovens use a gas burner located at the bottom. This burner heats the oven and cooks your food. Above the burner, there are racks, sometimes a broiler drawer, and often a light. Gas ovens also have small vents to let out moisture.
Most modern gas ovens have a removable oven door and racks. Some have a self-cleaning feature, but many do not. Knowing the parts of your oven helps you clean safely and avoid breaking anything.
One thing beginners often miss: Gas ovens have ignition sources—either a pilot light or an electronic igniter. You must keep these dry and free from chemicals.
Safety First: Preparing To Clean
Cleaning a gas oven is safe if you follow a few basic rules. Never rush this part, as working with gas can be dangerous if done carelessly.
- Turn off the oven: Make sure your oven is completely off and cool to the touch.
- Shut off the gas supply: If your oven has a visible gas valve, turn it off. If you’re unsure, check your user manual or ask a professional.
- Ventilate the kitchen: Open windows and turn on fans. Good airflow will remove fumes from cleaners.
- Unplug the oven: If your oven has an electrical plug, unplug it before cleaning.
- Gather tools and supplies:
- Rubber gloves
- Eye protection (optional, but helpful for strong cleaners)
- Old towels or newspapers to protect your floor
- A bucket of warm water
- Non-abrasive sponges, brushes, and rags
- A plastic scraper (never metal)
- Cleaning products (see next section)
Here’s a quick comparison of what you need for a basic clean versus a deep clean:
| Cleaning Type | Time Needed | Supplies Needed | Best For |
|---|---|---|---|
| Basic Clean | 30–45 minutes | Soap, water, sponge | Weekly or light messes |
| Deep Clean | 2–3 hours | Baking soda, vinegar, heavy-duty cleaner, brushes | Monthly or heavy buildup |
Choosing The Right Cleaning Products
Not all cleaning products are safe for gas ovens. Some contain harsh chemicals that can damage metal or leave dangerous fumes.
Best choices for gas ovens:
- Baking soda: Gentle, non-toxic, and works for most stains.
- White vinegar: Great for removing grease and odor.
- Mild dish soap: Safe for racks and oven walls.
- Commercial oven cleaner: Only use if labeled as safe for gas ovens. Always follow instructions.
- Lemon juice: Natural option for mild cleaning and fresh scent.
Avoid:
- Abrasive pads (they scratch surfaces)
- Bleach (can corrode metal parts)
- Ammonia (strong fumes, not safe for all ovens)
If you want to use a commercial cleaner, check the label for “gas oven safe. ” Test on a small area first to see if it affects the finish.
Step-by-step: Cleaning A Gas Oven
1. Remove Oven Racks And Accessories
Take out all oven racks, thermometers, pizza stones, or trays. Set them aside for separate cleaning. This gives you clear access to all oven surfaces.
2. Loosen Heavy Debris
Use a plastic spatula or scraper to gently lift off burnt food or grease blobs. Do not use metal tools—they can scratch the enamel.
Tip: If stuck-on food is hard, place a damp cloth over it for 10–15 minutes. The moisture will loosen the debris, making it easier to remove.
3. Apply A Cleaning Solution
Here are two effective cleaning solutions:
Baking Soda Paste
- Mix 1/2 cup baking soda with about 3 tablespoons water to make a spreadable paste.
- Spread the paste over the oven floor, sides, and inside of the door. Avoid getting it on the gas ports or igniter.
- Let it sit for at least 30 minutes. For heavy stains, leave it overnight.
Commercial Oven Cleaner
- Wear gloves and make sure the kitchen is well ventilated.
- Spray the cleaner on all dirty surfaces, following the label directions.
- Avoid spraying the gas burner and ignition areas.
4. Scrub And Wipe
After letting the cleaner sit:
- Use a damp sponge or cloth to scrub the surfaces. Start with the oven walls, then the floor, and finally the door.
- For tough spots, use a soft brush or non-abrasive pad.
- Wipe away all paste or cleaner with a clean, damp cloth. You may need to rinse the cloth several times.
Beginner’s tip: Don’t forget the oven ceiling. Drips and splatters often collect there, but it’s easy to miss.
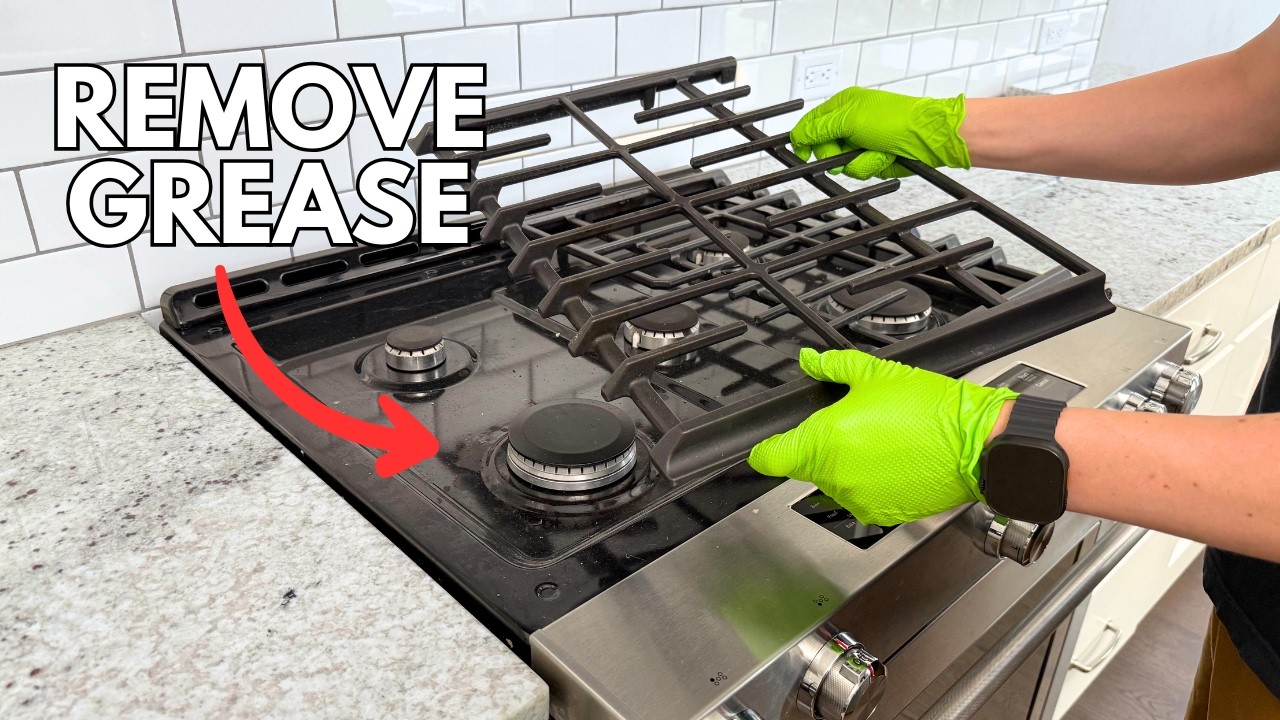
5. Clean Gas Burners And Ignition
Carefully wipe the gas burner and ignition source with a slightly damp cloth. Never soak these parts or use too much water.
If debris blocks the burner holes, use a soft toothbrush or toothpick to clear them. Do not use sharp objects.
6. Wash Oven Racks
Fill a bathtub or large sink with hot water and a few drops of dish soap. Let the racks soak for 1–2 hours. Scrub with a sponge or brush, then rinse and dry.
If racks are very greasy, sprinkle baking soda over them before soaking.
7. Clean Oven Door (inside And Out)
The oven door often collects drips and streaks. Clean the inside with the same baking soda paste or cleaner you used for the oven walls.
For the outside, use glass cleaner or a mix of vinegar and water. Wipe dry with a soft cloth to avoid streaks.
If your oven door has a removable panel, check your manual for instructions. Cleaning between the glass can remove baked-on grease that makes your oven look cloudy.
8. Reassemble And Final Wipe
Dry all surfaces with a towel. Put racks and accessories back in the oven.
Wipe the control knobs and oven handle with a mild soap solution.
9. Restore Power And Gas
Plug the oven back in and turn on the gas supply. Open windows for a few minutes to help any lingering fumes escape.
10. Test Your Oven
Before cooking, turn the oven on for 10–15 minutes at a low temperature. This step burns off any leftover cleaner and ensures everything works properly.
Credit: www.youtube.com
Deep Cleaning Stubborn Oven Stains
Sometimes, regular cleaning isn’t enough to remove baked-on grease or carbonized spills. For tough jobs, try these advanced steps:
- Baking Soda and Vinegar Boost: After spreading baking soda paste, spray white vinegar over it. The fizzing action helps break up stubborn stains.
- Repeat Soaking: For very tough spots, apply paste, let it dry, and repeat. Each round removes a bit more buildup.
- Steam Cleaning: Place a heatproof bowl of water with lemon slices in the oven. Heat to 250°F (120°C) for 30 minutes. The steam softens grime, making it easier to wipe away.
- Commercial Degreaser: Use only if safe for your oven type. Rinse thoroughly to avoid residue.
- Razor Scraper (Last Resort): For glass doors only, you can use a razor scraper at a shallow angle. Avoid using on enamel or near the gas burner.
Note: Deep cleaning is not needed every time. Once every 2–3 months is enough for most ovens.
Cleaning The Oven’s Vent And Broiler
Gas ovens have small vents that let hot air and steam escape. These can collect grease or food particles.
- Use a soft brush or a vacuum with a crevice tool to clear vents.
- Wipe the vent area with a damp cloth. Never spray cleaner directly into the vent.
- For ovens with a broiler drawer, remove and clean the drawer and tray. Scrub away drips and burnt pieces.
Insight: A blocked vent can lead to uneven cooking and even odors of gas. Checking this area is often overlooked.
Cleaning Oven Knobs And Control Panel
Control knobs and panels get greasy from fingerprints and cooking splatters.
- Remove knobs (if possible) and wash in warm, soapy water.
- Wipe the panel with a damp cloth. For digital panels, never spray cleaner directly—spray onto a cloth first.
- Dry thoroughly before reattaching knobs.
How Often Should You Clean Your Gas Oven?
The frequency of cleaning depends on how often you use your oven and what you cook.
| Usage Type | Cleaning Frequency | Signs You Need to Clean |
|---|---|---|
| Light (1–2 times/week) | Every 2–3 months | Light brown stains, mild odor |
| Moderate (3–4 times/week) | Monthly | Visible grease, smoke when heating |
| Heavy (daily use, roasting/meat) | Every 2 weeks | Burnt bits, strong odor, uneven cooking |
Tip: Wipe up spills as soon as the oven cools to reduce how often you need deep cleaning.
Common Mistakes And How To Avoid Them
Even careful cleaners make mistakes that can damage the oven or make cleaning harder:
- Skipping the gas shut-off: Always turn off the gas before cleaning to avoid leaks.
- Using too much water: Extra water can drip into the burner, causing poor ignition or even rust.
- Spraying cleaner on igniters: This can stop your oven from lighting.
- Using abrasive tools: Steel wool and harsh pads scratch the enamel and make it easier for grime to stick next time.
- Ignoring seals and gaskets: Dirty seals can stop the oven door from closing tightly, causing heat loss and wasted gas.
- Forgetting to check vents: Blocked vents can affect oven temperature and safety.
- Not wiping off all cleaner: Leftover chemicals can create smoke or bad smells when you next use the oven.
Insight: Always do a final dry wipe after cleaning to remove any last bits of cleaner. This simple step is often missed and helps prevent smoke or smells.
Natural Cleaning Methods For Sensitive Users
If you’re sensitive to chemicals, there are gentle options:
- Baking soda and water: Safe, no fumes, and good for regular use.
- Vinegar and lemon juice: Freshen your oven and cut grease.
- Salt: Sprinkle on spills while still warm (not hot!) To absorb and loosen food.
Natural cleaners may take a bit longer to work, but they’re safe for you and the environment.
:max_bytes(150000):strip_icc()/cleaning-gas-burners-1900625-976df9789ca8452ca8250bf5fec73c6e.png)
Credit: www.thespruce.com
When To Call A Professional
Most cleaning can be done at home, but sometimes you need expert help:
- If your oven smells strongly of gas after cleaning
- If the oven won’t light or heats unevenly
- If you see yellow flames (should be blue)
- If you notice cracks, rust, or damage to gas lines
A professional can check for leaks, blocked parts, or faulty components. Regular maintenance keeps your oven safe and efficient.
Keeping Your Gas Oven Clean Longer
Prevention saves time and effort. Here’s how to keep your oven cleaner between deep cleans:
- Use oven liners: Place a non-stick oven liner (not aluminum foil) on the lowest rack to catch drips. Remove and wash regularly.
- Cover food: Use lids or foil for casseroles and roasts to reduce splatter.
- Wipe spills right away: Once the oven cools, clean up drips before they bake on.
- Clean racks often: A quick wash every few uses prevents buildup.
- Check the door seal: Clean gently with a damp cloth to keep it tight.
- Ventilate after cooking: Open the door for a few minutes after baking to reduce moisture and odors.
Credit: www.makingmanzanita.com
Comparing Self-cleaning Vs Manual Cleaning
Some gas ovens come with a self-cleaning feature. Is it better than manual cleaning? Here’s a side-by-side look:
| Feature | Self-Cleaning | Manual Cleaning |
|---|---|---|
| Effort Required | Low (just start cycle) | High (scrubbing needed) |
| Time Needed | 2–5 hours | 1–3 hours |
| Odor/Fumes | High (can be smoky, smelly) | Low (if using natural cleaners) |
| Wear on Oven | High heat can stress parts | Mild, if using soft tools |
| Safety | Must stay home, monitor for gas | Safe if following steps |
Note: Self-cleaning ovens use very high heat to burn off food. This can create smoke and sometimes damage oven parts. Manual cleaning is more work but gives you full control.
What To Do If You Smell Gas
If you ever smell gas while cleaning or using your oven:
- Turn off the oven immediately.
- Open windows and doors.
- Do NOT turn on lights or use anything that makes a spark.
- Leave the house and call your gas company from outside.
Never try to fix a gas leak yourself. Safety always comes first.
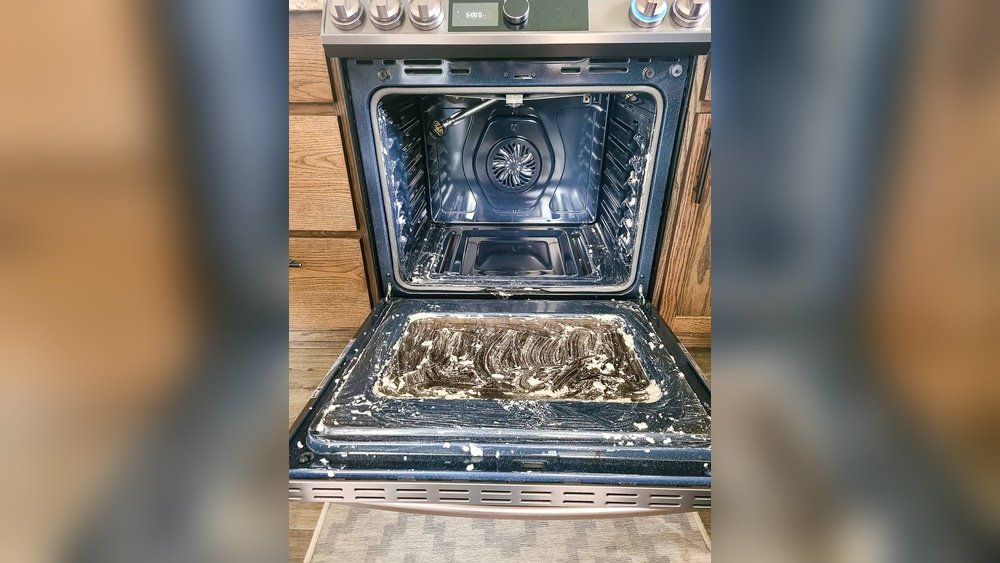
Real-world Example: Cleaning A Very Dirty Gas Oven
Let’s look at a real example. Anna, a busy mom, used her gas oven every day for roasting and baking. She noticed smoke and a bad smell, but hadn’t cleaned the oven in six months.
Here’s how she got her oven back in shape:
- Turned off gas and unplugged the oven.
- Removed racks and soaked them in hot soapy water.
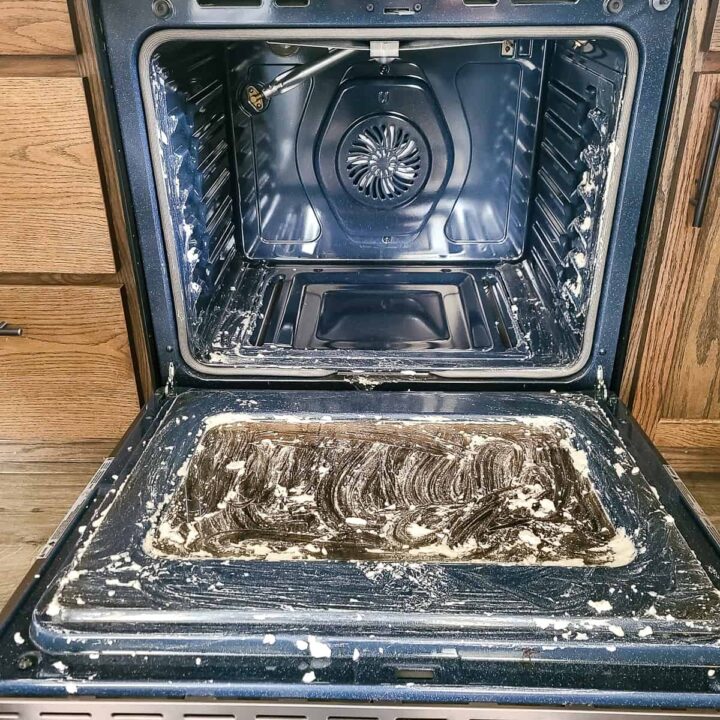
- Scraped off large burnt pieces with a plastic spatula.
- Covered all dirty surfaces with baking soda paste, left overnight.
- Sprayed vinegar in the morning—watched it fizz!
- Scrubbed with a sponge, wiped with a damp cloth until clean.
- Cleaned the burners and vents with a soft brush.
- Washed racks, rinsed, and dried them.
- Cleaned the door glass with vinegar and wiped dry.
- Reassembled everything, restored gas and power, and did a test bake.
Anna’s oven looked almost new—and she noticed her cakes baked faster and more evenly after cleaning.
Frequently Asked Questions
Why Does My Gas Oven Get Dirty So Quickly?
Gas ovens produce moisture and sometimes small amounts of soot. Roasting, baking, and drips from food all add up. Covering food and using a liner can help reduce mess.
Is It Safe To Use Oven Cleaner In A Gas Oven?
Yes, if the cleaner is labeled as safe for gas ovens. Always avoid the burner and ignition parts, and ventilate well. Test on a small area first.
What If The Oven Still Smells After Cleaning?
A lingering smell could be leftover cleaner, hidden spills, or a blocked vent. Run the oven empty at 200°F for 20 minutes to burn off residue. If the smell is of gas, turn off and call a professional.
Can I Clean The Oven Door Between The Glass Panels?
Some oven doors can be removed and opened for cleaning between the glass. Check your user manual or look for screws at the top or bottom. Never force the panels open, as this can break the glass.
Where Can I Find More Safe Cleaning Tips?
For more tips on safely cleaning kitchen appliances, check out Consumer Reports.
A clean gas oven is safer, cooks better, and makes your kitchen feel fresh. With these steps, you’ll have the confidence to tackle any mess—big or small. Regular care saves time, and the results are worth it. Happy cooking!