Steam damage on kitchen cabinets can be a frustrating surprise. You might notice doors swelling, paint peeling, or even a musty smell. These problems often start small but quickly get worse if ignored. Many homeowners wonder if it’s possible to fix steam-damaged cabinets without replacing them. The good news: you can repair most steam damage with the right methods, tools, and a bit of patience. This guide will help you understand why steam damage happens, how to repair it step by step, and what you can do to prevent future issues. Even if you’re not a DIY expert, you’ll find clear instructions and tips to restore your cabinets and keep your kitchen looking its best.
Why Steam Damages Kitchen Cabinets
Steam may seem harmless, but it’s one of the top reasons kitchen cabinets get damaged. When you cook, boil water, or use the dishwasher, steam rises and finds its way to cabinet surfaces. Most cabinets are made from wood, MDF, or laminate, all of which can react badly to moisture.
Steam softens the finish and seeps into the material. Over time, this causes:
- Swelling or warping of wood and MDF
- Peeling or bubbling of laminate or paint
- Discoloration or staining
- Delamination (when layers separate)
- Mold or mildew if moisture stays trapped
The kitchen’s warm and humid environment speeds up this damage. Cabinets near stoves, kettles, or dishwashers are especially at risk. Understanding how steam damages different cabinet types is key before you start any repair.
Identifying The Type And Extent Of Steam Damage
Before grabbing your tools, take a closer look at your cabinets. The repair approach depends on what you see.
Signs Of Steam Damage
Look for these common signs:
- The surface feels soft or spongy
- Paint or finish is blistering or bubbling
- Laminate is lifting at the edges or corners
- Wood grain looks raised or swollen
- Visible water stains or discoloration
Try pressing gently on the affected area. If it feels weak, you may have deeper damage inside.
Assessing The Severity
Not all steam damage is the same. For best results, match your repair strategy to the severity:
- Light: Minor discoloration, faint bubbling, or slight lifting of finish
- Moderate: Larger bubbles, peeling, or small areas of swelling
- Severe: Deep swelling, separation of layers, mold, or structural weakness
If you’re unsure, compare with unaffected cabinet areas or take photos to track changes.
Cabinet Material Matters
Different materials react differently to steam:
| Material | Common Damage | Repair Difficulty |
|---|---|---|
| Solid Wood | Swelling, finish wear | Moderate |
| MDF (Medium Density Fiberboard) | Swelling, crumbling | Challenging |
| Laminate | Peeling, bubbling | Easy to Moderate |
| Plywood | Delamination | Moderate |
Knowing your cabinet’s construction helps you pick the right tools and products.
Tools And Materials You’ll Need
Having the correct tools makes repairs smoother and more effective. Here’s what most jobs require:
- Screwdriver (to remove hardware and doors)
- Putty knife or scraper
- Sandpaper (medium and fine grit)
- Wood filler or epoxy (for wood/MDF repairs)
- Contact cement or laminate adhesive
- Clamps
- Primer and paint or wood finish
- Clean rags and mild detergent
- Protective gloves and mask
- Hairdryer or fan (to speed drying)
For severe damage, you may also need:
- Replacement laminate sheets
- Utility knife
- Replacement hardware (if rusted or damaged)
Tip: Always check the product label to make sure it’s suitable for your cabinet material.
Step-by-step: How To Repair Steam Damage On Kitchen Cabinets
Let’s break down the process by the most common types of steam damage. Follow these steps carefully to get a professional result.
1. Dry Out The Area
Before doing anything else, make sure the cabinet is completely dry. Moisture trapped inside will ruin any repair.
- Open cabinet doors and windows for airflow.
- Use a hairdryer or fan on a low setting (don’t overheat).
- For deep swelling, leave the cabinet open for 24–48 hours.
- Check for mold. If you see black or green spots, clean them with a mix of vinegar and water before repairing.
2. Remove Hardware And Loose Material
Take off cabinet doors, handles, and hinges. Set them aside safely.
- Use a putty knife to gently scrape off loose paint, laminate, or finish.
- Don’t force off anything that’s still well attached. You don’t want to make the damage worse.
3. Repair Swollen Or Warped Wood And Mdf
Steam causes wood and MDF to swell. If the swelling is minor, sanding may be enough. For deeper damage, you’ll need to rebuild the area.
For Minor Swelling
- Sand the swollen area using medium-grit sandpaper until it’s smooth and level.
- Wipe away dust with a clean, damp cloth.
For Deeper Damage
- Use a utility knife to carefully cut away any loose or crumbling material.
- Fill holes or gouges with wood filler or a two-part epoxy. Apply in thin layers.
- Let the filler dry as recommended (usually a few hours).
- Sand the area until it matches the surrounding surface.
- Wipe clean.
Tip: For MDF, use a high-quality filler designed for engineered wood. MDF absorbs moisture quickly, so sealing is essential.
4. Fix Bubbling Or Peeling Laminate
Laminate often bubbles or peels away from the base when exposed to steam.
For Small Bubbles
- Use a syringe or needle to inject wood glue or contact cement under the bubble.
- Press down and hold for several minutes.
- Wipe off any excess glue.
For Peeling Edges
- Apply a thin layer of laminate adhesive under the lifted area.
- Press the laminate back in place.
- Clamp the area tightly for at least 1 hour.
- Remove clamps and clean up any glue residue.
For Large Damaged Areas
If a big section is loose, it may be easier to replace the laminate:
- Cut away the damaged piece using a utility knife.
- Sand the base smooth.
- Apply new contact cement to both the base and the replacement piece.
- Press firmly, starting from one edge to avoid air bubbles.
- Clamp or use a heavy object to hold in place until dry.
5. Sand And Smooth The Surface
Once repairs are dry, sand the area with fine-grit sandpaper (220 grit or higher).
- Blend the edges with the rest of the cabinet.
- Make sure there are no rough spots or ridges.
- Remove all dust before finishing.
6. Prime And Refinish
A good finish protects your repair and makes the cabinet look new.
- Apply a stain-blocking primer if you repaired wood or MDF.
- For paint, use a matching color and apply with a small brush or foam roller.
- For wood stain, match the original shade and finish with a clear sealant.
- For laminate, use special laminate paint for best results.
Apply at least two thin coats, letting each dry fully.
Tip: Many beginners skip primer, but it’s critical for long-lasting results, especially after steam damage.
7. Reinstall Hardware And Doors
- Make sure everything is dry and cured.
- Reattach hinges, handles, and doors.
- Check for smooth operation. Adjust hardware if necessary.
Credit: www.silverlakecabinetry.com
Special Cases: Mold, Odors, And Large-scale Damage
Sometimes, steam damage does more than just harm the surface. Here’s what to do if you face these bigger problems.
Mold And Mildew
Steam can lead to mold, especially inside cabinets. Mold isn’t just ugly—it can be a health risk.
- Wear gloves and a mask.
- Mix equal parts white vinegar and water. Wipe all affected areas.
- Let dry fully with cabinet doors open.
- For heavy mold, consult a professional.
Persistent Odors
Moisture sometimes leaves a musty smell behind.
- Place an open box of baking soda inside the cabinet for a few days.
- You can also use activated charcoal or coffee grounds to absorb odors.
- Avoid using strong-smelling cleaners, as they can linger and affect food.
When To Replace, Not Repair
Some damage is too severe for home fixes:
- The cabinet structure is soft or crumbling
- Large areas of mold or rot
- Multiple doors or panels are affected
In these cases, replacing the damaged part is safer and more cost-effective. Sometimes, you can replace just the door or panel instead of the entire cabinet.
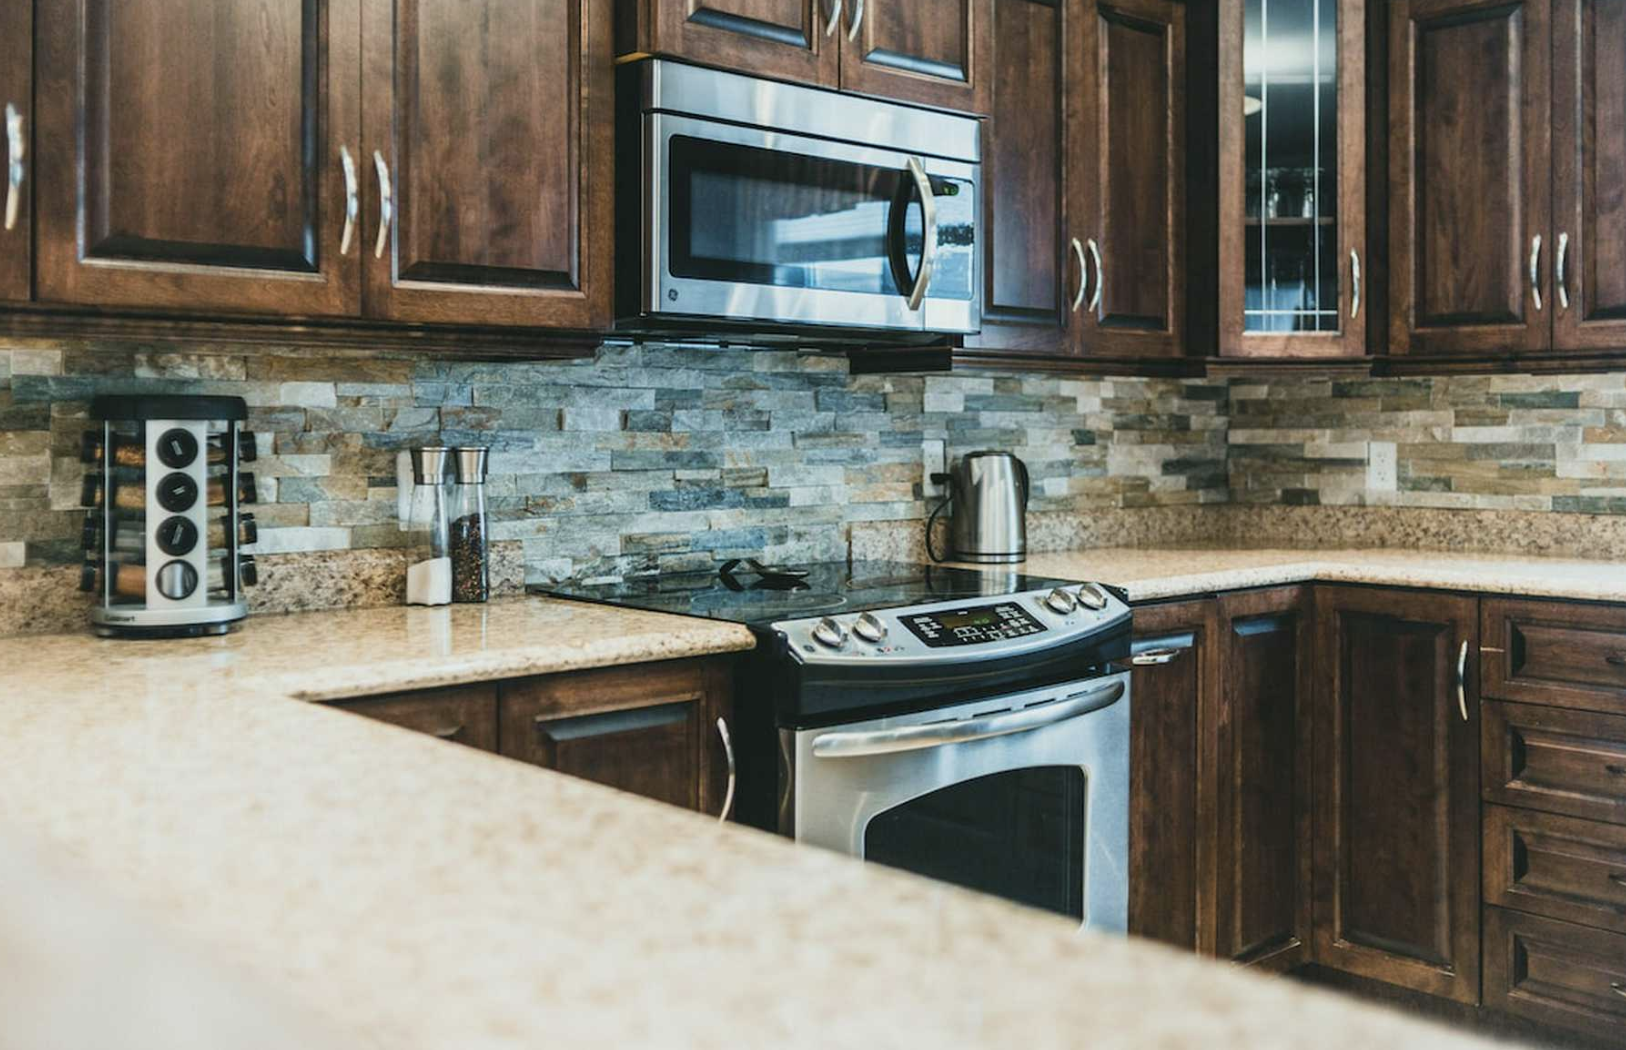
Prevention: Protecting Cabinets From Future Steam Damage
Repairing steam damage takes time and effort. Preventing it is much easier and can save you money in the long run.
Simple Habits To Reduce Steam Exposure
- Always use your range hood or kitchen fan when cooking.
- Open a window or door to allow steam to escape.
- Don’t leave kettle or pot lids open under cabinets.
- Wipe down cabinet surfaces after cooking steamy foods.
- Open dishwasher doors only when the kitchen is well-ventilated.
Improve Kitchen Ventilation
Good ventilation is key. Many kitchens have poor airflow, making steam problems worse.
- Upgrade to a vented range hood if possible.
- Use portable fans in small kitchens.
- Clean vents and filters regularly for best performance.
Seal And Protect Cabinet Surfaces
Protective finishes stop steam from soaking in.
- Reapply polyurethane or varnish to wood cabinets every few years.
- Use cabinet-specific sealants for MDF or laminate.
- Pay special attention to edges and seams—these are the most vulnerable spots.
Choose Steam-resistant Materials For New Cabinets
If you’re renovating, consider materials that handle steam better:
| Material | Steam Resistance | Notes |
|---|---|---|
| Solid hardwood | Moderate | Needs regular sealing |
| Marine plywood | High | Costly but durable |
| High-pressure laminate | High | Easy to clean |
| Thermofoil | Moderate | Edges may peel over time |
| MDF | Low | Very sensitive to moisture |
Investing in quality materials can save you repair headaches later.

Credit: www.reddit.com
Common Mistakes When Repairing Steam Damage
Many homeowners make the same errors when fixing cabinets. Avoid these for the best results.
1. Skipping The Drying Step
Applying fillers or paint to damp wood traps moisture inside and leads to quick failure.
2. Using The Wrong Filler Or Glue
Not all wood fillers or adhesives work on every material. For example, standard wood glue won’t hold laminate.
3. Neglecting Proper Sanding
Failing to sand between repair steps leaves visible lines and uneven finishes.
4. Ignoring Mold
Painting over mold just hides the problem. Always clean it first.
5. Not Matching Paint Or Finish
Mixing colors or finishes makes repairs obvious. Take time to match as closely as possible.
6. Rushing To Use Cabinets
Let all layers dry and cure before reinstalling hardware or storing items inside.
7. Not Fixing The Moisture Source
If you don’t improve ventilation or habits, the problem will return.
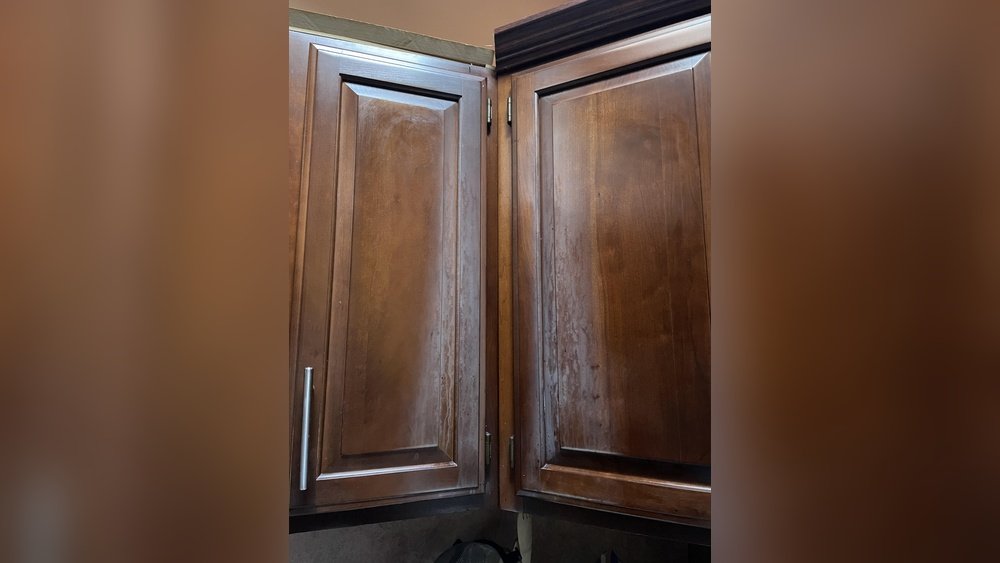
Real-world Example: Repairing A Steam-damaged Cabinet Door
Let’s walk through a real scenario to show these steps in action.
Sarah noticed bubbling on her white laminate cabinet door above the kettle. Here’s how she fixed it:
- She unplugged the kettle and let the cabinet dry overnight with the door open.
- Using a small knife, she lifted the bubbled area slightly and injected wood glue underneath.
- She pressed the bubble down and held it in place with a stack of books for two hours.
- After drying, she sanded the area gently and wiped it clean.
- She touched up the finish with a matching laminate paint.
- Finally, Sarah started using her range hood every time she boiled water.
Within a day, the cabinet looked almost new, and the repair has lasted over a year.
When To Call A Professional
Some repairs are best left to experts, especially if:
- Damage covers a large area or affects several cabinets
- There’s visible black mold or a strong odor
- The cabinet is load-bearing or part of a built-in unit
Professionals have specialized tools and can match finishes perfectly. If you’re not confident, getting a quote may save you time and stress.
Cost Of Diy Vs. Professional Repair
Wondering about the cost? Here’s a rough comparison:
| Repair Type | DIY Cost (USD) | Pro Cost (USD) |
|---|---|---|
| Minor surface repair | $20–$50 | $100–$250 |
| Laminate replacement | $30–$80 | $200–$400 |
| Full cabinet door replacement | $50–$150 | $300–$700 |
| Mold remediation | $10–$30 (DIY supplies) | $500–$2,000 |
DIY is more affordable for small repairs, but pros are worth it for major or complex issues.
Non-obvious Insights Most Beginners Miss
1. Edges Are Most Vulnerable
Most steam damage starts at cabinet edges where the finish is thinnest. Always pay extra attention when sealing or repairing these spots.
2. Humidity, Not Just Direct Steam, Matters
Even if you don’t see visible steam, high kitchen humidity (over 60%) can slowly damage cabinets. Use a humidity meter to monitor levels, especially in older homes.
3. Invisible Mold Can Grow Behind Panels
If the cabinet smells musty even after cleaning, hidden mold might be trapped behind the surface. In these cases, professional help is safest.
Frequently Asked Questions
How Do I Know If My Cabinet Is Too Damaged To Repair?
If the cabinet feels soft, crumbles when pressed, or has visible mold spreading under the surface, replacement is usually safer than repair. Surface issues like bubbling, peeling, or minor swelling can usually be fixed.
Can I Use Regular Paint On Repaired Cabinets?
It’s best to use cabinet-grade paint or specific laminate paint. Regular wall paint won’t hold up to moisture and cleaning. Always prime first for the best results.
How Long Does A Typical Repair Take?
Most repairs, including drying, sanding, and painting, take 2 to 3 days. This allows for proper drying between each step. Rushing can cause the repair to fail.
Is There A Way To Make Cabinets Steam-proof?
No cabinet is 100% steam-proof, but you can greatly improve resistance by sealing all surfaces, using quality finishes, and improving kitchen ventilation. Materials like high-pressure laminate and marine plywood are the most resistant.
Where Can I Learn More About Different Cabinet Materials?
For detailed information on cabinet types and materials, check out this Wikipedia article on kitchen cabinets. It covers construction methods and material choices in depth.
Steam damage doesn’t mean the end of your kitchen cabinets. With careful assessment, the right tools, and a patient approach, you can restore their look and strength. Protect your investment with good habits and regular maintenance, and your cabinets will stay beautiful for years to come.

Credit: www.reddit.com