Applying contact paper on cabinets can quickly change the look of your kitchen or bathroom. But if your cabinets have grooves or raised panels, you may worry about getting a neat finish. The good news is you can cover grooved cabinets with contact paper and make them look great.
It just takes careful planning, the right tools, and some patience. This guide will show you every step, share expert tips, and explain how to avoid common mistakes. By the end, you’ll know exactly how to get a smooth, long-lasting result—even if your cabinets are old or have deep designs.
Why Use Contact Paper On Grooved Cabinets?
Contact paper is a self-adhesive vinyl or laminate sheet. It comes in many colors and patterns. People use it to update cabinets, shelves, and counters because it is affordable, easy to clean, and less permanent than paint. If you rent your home or want a fast update, contact paper is a smart choice.
Grooved cabinets—sometimes called shaker-style or raised-panel—have lines and dips that can make applying contact paper tricky. But with the right method, you can cover even deep grooves and get a new look without hiring a professional.
Some benefits of using contact paper on grooved cabinets:
- Low cost compared to new cabinets or professional painting
- Easy to clean surface that resists stains
- Removable if you want to change styles or move out
- Many choices for colors, wood patterns, or bold designs
What You Need Before Starting
Preparation is key for a smooth finish. Gather these items before you start:
- Contact paper (get extra for mistakes or pattern matching)
- Measuring tape for accurate sizing
- Sharp scissors or a craft knife for cutting
- Plastic smoothing tool (a squeegee or old credit card works)
- Cleaning supplies (mild soap, water, microfiber cloth)
- Spray bottle (optional, for soapy water application method)
- Fine sandpaper (for very rough or shiny grooves)
- Hair dryer or heat gun (helps stretch contact paper into grooves)
- Pin or needle (removes air bubbles)
Many first-timers forget the importance of a plastic smoothing tool—using your hands is not enough to push out all the air and wrinkles, especially in grooves. Also, a hair dryer is often overlooked but is essential for softening the contact paper, making it easier to press into detailed cabinet lines.
Understanding Your Cabinets: Types Of Grooves
Not all grooves are the same. The style and depth of your cabinet grooves affect how you’ll apply the contact paper.
| Groove Type | Difficulty Level | Best Application Tip |
|---|---|---|
| Shallow (less than 1/8 inch) | Easy | Apply contact paper directly; use smoothing tool |
| Medium (1/8 to 1/4 inch) | Moderate | Use heat and a smoothing tool for best results |
| Deep (over 1/4 inch) | Challenging | Consider filling grooves, or use two-step application |
If your grooves are very deep or wide, you have two choices:
- Fill them with wood filler and sand smooth (more work, but totally flat)
- Apply in two steps: First cover the flat surface, then use thin strips for the grooves
Most people choose the two-step method for deep grooves because it keeps the cabinet’s classic look.
Measuring And Planning
Careful measuring and planning will save you time and prevent wasted material. Here’s how to get started:
- Remove cabinet doors and hardware if possible. It’s much easier to work on a flat surface.
- Measure each door or drawer including the grooves. Write down the width and height.
- Decide on coverage style: Do you want to cover the whole door, just the flat parts, or every panel including grooves?
- Allow extra material—add at least 1 inch on each side for trimming and mistakes.
- Match patterns if your contact paper has wood grain or designs. Order extra so patterns line up from door to door.
Beginner’s insight: If your cabinets are very old, grooves may not be even from top to bottom. Measure each door and drawer separately—never assume they’re all the same size.
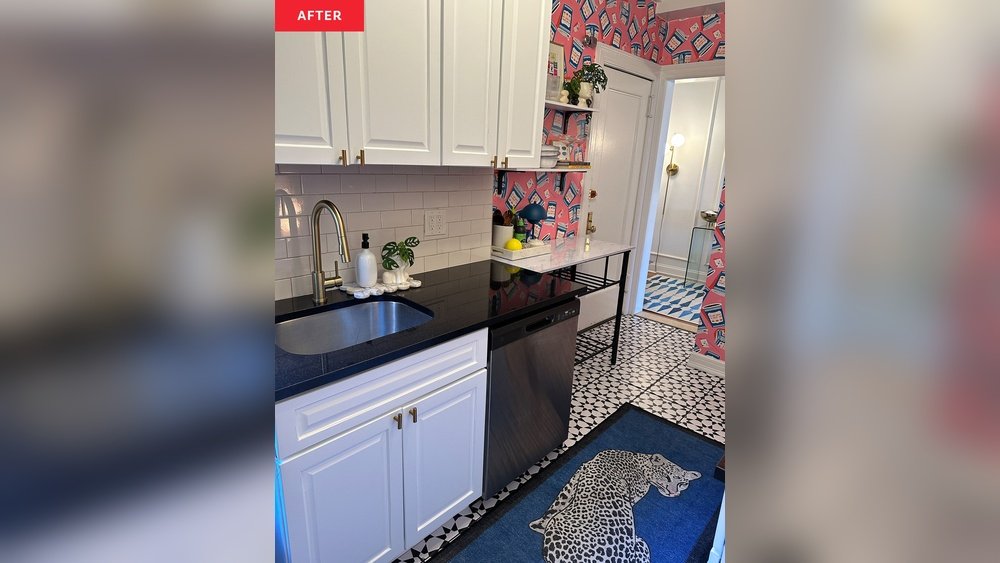
Credit: www.youtube.com
Preparing The Cabinet Surface
The surface must be very clean. Dirt, grease, or old wax will stop the contact paper from sticking.
- Clean with mild soap and water. Remove all grease, especially in kitchens.
- Rinse and dry fully. Any moisture can cause bubbles later.
- Lightly sand shiny or glossy grooves with fine sandpaper. This helps the adhesive grip better.
- Wipe away dust with a damp microfiber cloth.
Expert tip: Avoid strong cleaners or oils. They leave residues that contact paper cannot stick to. If your cabinets are especially greasy, use a 50/50 mix of vinegar and water.
Cutting Contact Paper To Fit Grooved Cabinets
Cutting contact paper for grooved cabinets requires attention to detail.
- Cut large pieces for the main cabinet face. Always cut on a cutting mat or safe surface.
- Cut thin strips for covering grooves, if using the two-step method. Strips should be a bit wider than the groove.
- Mark pieces on the backing paper with a pencil (not pen or marker, which can bleed through).
- Dry-fit the pieces before peeling off the backing. Lay them on the cabinet to check size.
Non-obvious tip: If your grooves are curved or have corners, cut the strips slightly longer. It’s easier to trim excess than to have gaps.

Credit: www.domino.com
Applying Contact Paper: The Step-by-step Process
Now you’re ready to cover the cabinets. Work slowly for the best result.
Step 1: Start With Flat Surfaces
- Peel back a small section of the contact paper backing at the top.
- Align the top edge with your cabinet, making sure it’s straight.
- Stick the top edge and smooth with your tool, moving from the center outward.
- Slowly peel the rest of the backing while smoothing the paper down as you go.
- Work slowly to avoid bubbles or wrinkles.
If bubbles appear, lift the paper gently and try again. For stubborn bubbles, prick with a pin and smooth out.
Step 2: Covering The Grooves
There are two main ways to cover grooves:
Method 1: Stretching Contact Paper Into Grooves
Works best for shallow to medium grooves.
- As you reach a groove, use a hair dryer on low heat to soften the contact paper.
- Press the paper into the groove with a plastic smoothing tool.
- Move the heat source slowly as you work your way down.
- After the groove, keep smoothing to the next flat area.
Beginner mistake: Don’t overheat. Too much heat melts or shrinks the paper.
Method 2: Two-step Application For Deep Grooves
- Apply contact paper to all flat areas first.
- Cut narrow strips for each groove.
- Heat the strip slightly, then press it into the groove with a smoothing tool.
- Trim the edges so they meet the main piece with no overlap.
- Seal the seam by pressing firmly.
This method takes longer but looks better on cabinets with very deep or wide grooves.
Insight: If your contact paper has a pattern, use plain strips for the grooves, or match the pattern carefully. Pattern mismatches stand out more in grooves.
Dealing With Corners And Edges
Cabinet corners and edges are common trouble spots. Here’s how to get a neat finish:
- Wrap edges with at least 1/4 inch of contact paper, folding it to the back.
- For inside corners, make a small diagonal cut so the paper can fold without bunching.
- For outside corners, use heat to soften the paper and pull it tight.
- Trim with a sharp knife for a clean line.
If you notice lifting at the edges after a few days, add a dab of clear glue or use a warm hair dryer to reactivate the adhesive.
Reattaching Hardware And Doors
Wait at least 30 minutes after finishing the last piece. This helps the adhesive set. Then:
- Poke holes for screws with a small knife or pin. Do not screw hardware through the contact paper without pre-cutting holes.
- Clean off dust before reinstalling handles and hinges.
- Hang doors back on cabinets.
Expert tip: If you want a seamless look, consider updating handles or knobs to match your new style.
Caring For Your New Cabinet Finish
Contact paper is durable, but a few simple habits will keep it looking new:
- Wipe spills quickly to prevent stains.
- Use a soft cloth for cleaning, never abrasive pads.
- Avoid strong chemicals like bleach or ammonia.
- Check edges every few weeks, especially near sinks or stoves.
If you find small lifts or bubbles after a few days, use a hair dryer and smoothing tool to fix them.
Common Mistakes And How To Avoid Them
Many people make the same errors when applying contact paper to grooved cabinets. Learn from these to save time and frustration:
- Not cleaning well enough: Even tiny grease spots cause the paper to peel.
- Skipping the sanding step: Glossy grooves need a rough surface for the adhesive.
- Cutting pieces too small: Always cut slightly larger than your measured area.
- Working too fast: Rushing causes bubbles, wrinkles, and crooked lines.
- Using fingers instead of a smoothing tool: This leaves air pockets, especially in grooves.
- Ignoring pattern direction: Wood grain or patterns should all face the same way.
How Long Does It Take?
The time depends on your cabinet size and groove depth. For a small kitchen with 10 cabinet doors:
| Step | Estimated Time (10 doors) |
|---|---|
| Measuring & Planning | 1 hour |
| Cleaning & Sanding | 1 hour |
| Cutting Contact Paper | 1.5 hours |
| Applying Paper | 2–3 hours |
| Reattaching Hardware | 0.5 hour |
Plan for one full day if you are new to the process. Take breaks—rushing leads to mistakes.
Comparing Contact Paper With Other Cabinet Covering Options
If you’re not sure if contact paper is right for your grooved cabinets, here’s a quick comparison with other popular methods:
| Method | Cost | Difficulty | Removable? | Best For |
|---|---|---|---|---|
| Contact Paper | Low | Easy–Medium | Yes | Renters, quick makeovers |
| Painting | Medium | Medium–Hard | No | Permanent changes, custom colors |
| Cabinet Refacing | High | Hard (pro job) | No | New look, long-term |
| Peel-and-Stick Tiles | Medium | Medium | Some | Modern styles, backsplashes |
Advanced Tips For A Professional Finish
If you want your cabinets to look like they came from a designer magazine, try these pro tips:
- Overlap seams slightly where two pieces meet, then trim with a sharp knife for a perfect edge.
- Seal edges with clear acrylic sealer for extra water resistance (especially near sinks).
- Use a brayer roller (like for wallpaper) to press paper into grooves evenly.
- Practice on a hidden area (like inside a cabinet door) before starting on the front.
- Keep the room warm during application—cold makes contact paper stiff and hard to stretch.
Non-obvious expert insight: If you use high-gloss or metallic contact paper, fingerprints and smudges will show more easily. Matte or wood-grain styles hide imperfections better and are easier for beginners.

Credit: www.reddit.com
When To Call A Professional
Most people can apply contact paper themselves, but there are cases where hiring a pro makes sense:
- Cabinets with very deep or complex grooves
- Large kitchens with dozens of doors and drawers
- You have mobility issues or trouble working with small tools
- The cabinet surface is damaged, warped, or peeling
Professionals may use special adhesives and tools for the best finish. If your cabinets are a big investment or you want a guaranteed result, it’s worth considering.
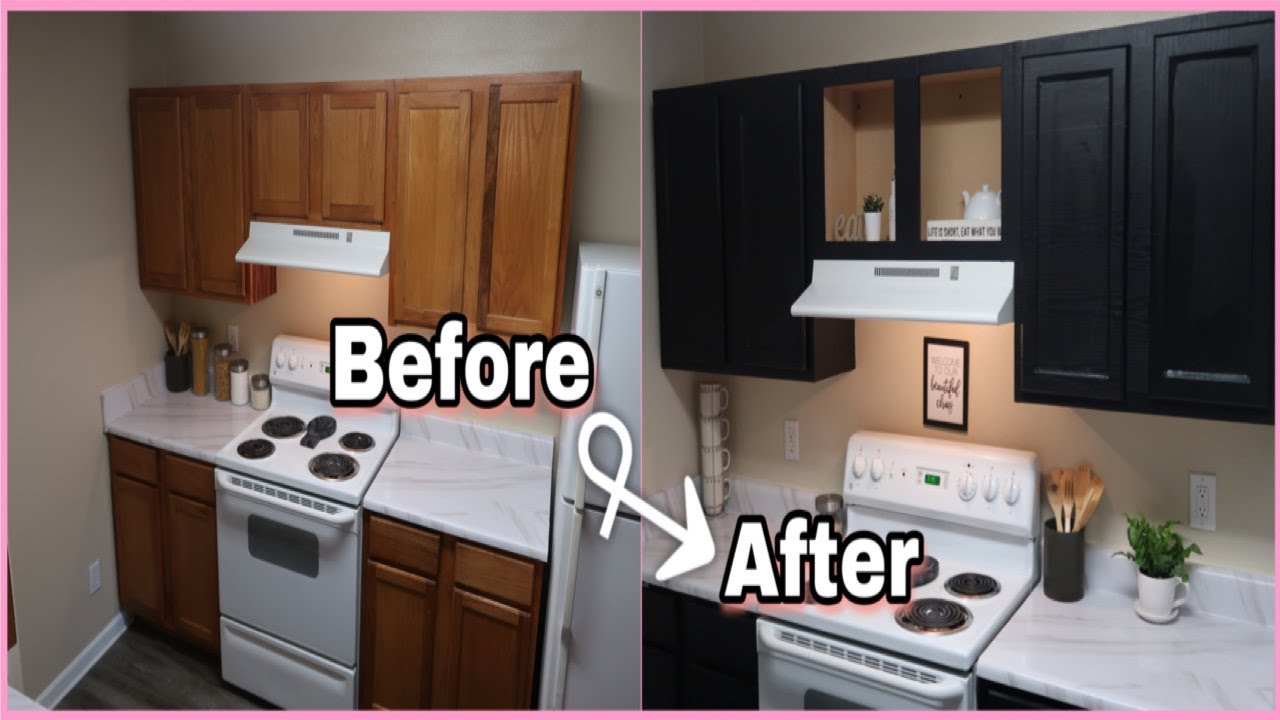
Real-life Example: A Kitchen Makeover
Let’s look at how one family transformed their grooved cabinets using contact paper:
Sarah and her husband had old, dark oak cabinets with deep grooves. They wanted a brighter kitchen but did not want to paint or replace the cabinets. Here’s what they did:
- Measured and ordered wood-grain contact paper with a white finish
- Cleaned and sanded each groove
- Applied contact paper to the flat panels, then used thin strips in each groove
- Used a hair dryer to help the paper fit smoothly into the designs
- Finished the edges and replaced the handles with modern pulls
The whole project took one weekend and cost less than $100. Their kitchen looked brand new, and the paper held up for over two years with only a few small touch-ups.
Where To Buy Quality Contact Paper
Not all contact paper is equal. For grooved cabinets, look for:
- Thickness: Thicker paper is easier to handle and less likely to tear.
- Adhesive quality: Some brands stick better to wood or painted surfaces.
- Pattern selection: Choose a pattern that matches your style.
Popular stores include:
- Home improvement stores (Lowe’s, Home Depot)
- Online shops (Amazon, Wayfair)
- Specialty retailers (DC Fix, Con-Tact Brand)
Tip: Read reviews before you buy. Some papers are hard to reposition, while others are forgiving for beginners.
For more on types and uses of contact paper, see this Wikipedia article.
Frequently Asked Questions
How Long Does Contact Paper Last On Cabinets With Grooves?
Good quality contact paper can last 3–5 years if applied well and cared for. In high-use areas, edges may lift sooner. Using a sealer or adding extra adhesive to edges can extend life.
Can I Remove Contact Paper Without Damaging My Cabinets?
Yes. Most contact paper is removable. Peel it off slowly, starting at a corner. For stubborn spots, use a hair dryer to loosen the adhesive. Clean any residue with warm soapy water.
Is It Possible To Cover Very Deep Grooves With Contact Paper?
You can, but it’s harder. Use the two-step method: cover the flat area first, then add strips for the grooves. For grooves deeper than 1/4 inch, consider filling them with wood filler for a flat finish before applying paper.
What If I Make A Mistake Or Get Bubbles?
Small bubbles can be pricked with a pin and smoothed out. For large mistakes, gently peel back the paper and try again. Always order extra material in case you need to redo a section.
Is Contact Paper Safe For Kitchens And Bathrooms?
Yes, most contact papers are water-resistant and safe for use in kitchens and bathrooms. Avoid direct heat (like on oven doors) and seal edges near sinks to stop water from getting underneath.
Transforming your grooved cabinets with contact paper is not just possible—it can look amazing with care and patience. Follow these steps, take your time, and enjoy a fresh new look for your space without the mess or cost of paint.