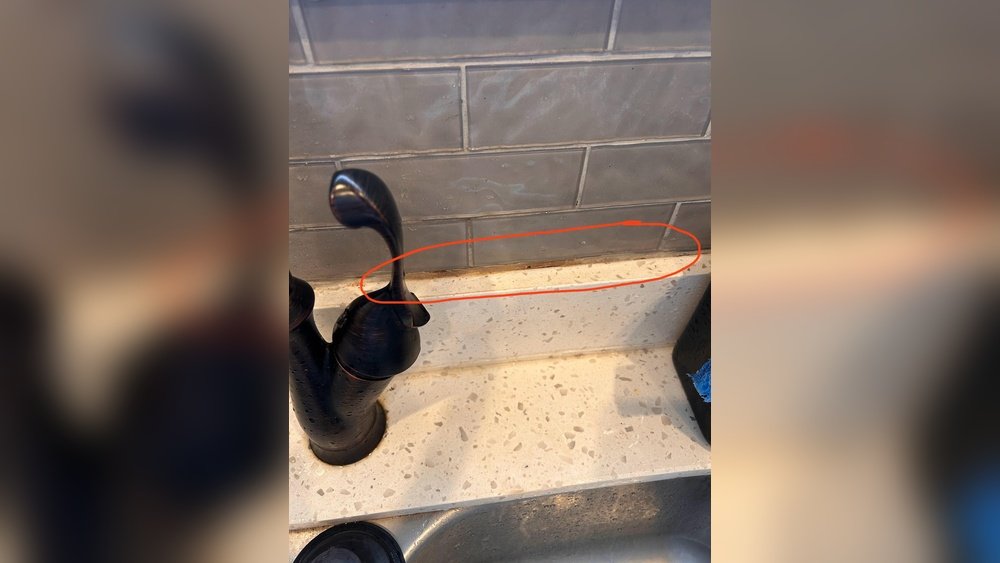
If you see dark stains, crumbling lines, or mildew around your kitchen sink, your grout may be failing. Grout is the material that fills the gaps between tiles and protects your countertop from water damage. Over time, it can crack, discolor, or fall out, leaving your kitchen vulnerable to leaks and mold.
Replacing grout around your kitchen sink is a practical skill every homeowner can learn. It may seem intimidating, but with the right tools and steps, you can restore your kitchen’s look and protect your investment.
This guide walks you through the entire process of removing old grout and applying new grout around your kitchen sink. You’ll learn what tools and materials you need, how to prepare the area, how to remove grout without damaging tiles, and how to apply and seal new grout for lasting results.
I’ll also share tips and common mistakes people make so you can avoid headaches and get a professional finish. Whether you’re a DIY beginner or have some experience, this article gives you clear, step-by-step instructions to make your project a success.
Why Replace Grout Around The Kitchen Sink?
Many people overlook grout maintenance, but it plays a key role in your kitchen. Damaged grout can lead to several problems:
- Water damage: Cracked grout lets water seep behind tiles, causing wood rot, swelling, and mold growth.
- Mold and mildew: Grout is porous and absorbs moisture, making it a breeding ground for mold and mildew, especially near sinks.
- Unsightly appearance: Discolored or missing grout makes your kitchen look dirty and neglected.
- Loose tiles: Without good grout, tiles can shift or come loose, leading to expensive repairs.
Replacing grout is not just about looks—it’s about protecting your kitchen from bigger issues. Grout repair costs are much lower than repairing water-damaged countertops or cabinets.
Another reason to keep grout in good shape is hygiene. Kitchen sinks are exposed to food scraps, soap, and water daily. When grout fails, bacteria and mold can grow in hidden gaps, making it harder to keep your kitchen clean and safe for cooking.
If you have children or anyone with allergies at home, preventing mold and mildew is especially important. Even if you clean your sink regularly, old grout can trap contaminants that are difficult to remove.
People also underestimate how much fresh grout improves the overall look of a kitchen. Clean, well-maintained grout lines make tiles “pop” and can make old tiles look new again. It’s a simple upgrade that can add value to your home, especially if you plan to sell in the future.
Tools And Materials You’ll Need
Before you begin, gather all the tools and materials. Having everything ready will make the process smoother and prevent interruptions.
Essential Tools:
- Grout removal tool (manual or oscillating multi-tool)
- Utility knife
- Bucket and sponge
- Rubber grout float
- Small brush (like a toothbrush)
- Vacuum or brush
- Protective gloves and safety glasses
Materials:
- New grout (choose sanded or unsanded, see below)
- Grout sealer
- Painter’s tape (optional, for protecting edges)
- Clean rags
- Mild cleaning solution
If you’re tackling a larger area or have especially hard grout, a hammer and small chisel may help, but use them carefully to avoid chipping tiles. For cleanup, microfiber cloths work best because they pick up fine dust and leave fewer streaks on tiles.
Choosing Grout Type:
Selecting the right grout is important for durability and appearance. There are two main types:
| Grout Type | Best For | Joint Size | Pros | Cons |
|---|---|---|---|---|
| Sanded Grout | Floor tiles, large joints | 1/8″ or larger | Strong, resists cracking | Can scratch delicate tiles |
| Unsanded Grout | Wall tiles, small joints | Less than 1/8″ | Smooth finish, easy to apply | Less durable in wide joints |
Tip: Most kitchen sinks use wall tiles with narrow joints, so unsanded grout is usually the best choice. Always check your tile manufacturer’s recommendations.
If your tiles are natural stone (like marble), always use unsanded grout to prevent scratching. For glass tiles, some special grouts are formulated to prevent cloudiness—always read the label for compatibility.
Preparing The Area
Preparation is crucial. Skipping steps can lead to messy results or damaged tiles.
Clear The Sink Area
Remove everything from around the sink—soap bottles, sponges, racks, and other items. This prevents accidents and gives you room to work.
It helps to put a towel or container in the sink to catch any tools or debris that might fall during the project. Working on a clear surface also helps you see if any areas need extra attention or cleaning before you begin.
Protect Surrounding Surfaces
Lay down an old towel or plastic sheet to catch debris. If your countertop or sink edges are delicate, use painter’s tape along the tile edges to avoid scratches.
If your kitchen has laminate or wood countertops, take extra care to prevent water or grout from seeping into seams. Use a waterproof drop cloth or extra painter’s tape for protection.
Clean The Tiles
Wipe down the tiles and grout lines with a mild cleaning solution. Remove grease, soap scum, and dirt so you can see the grout clearly. Dry the area well before you start.
Non-obvious insight: If you have old silicone caulk on top of the grout (common in older kitchens), this must be removed before replacing grout. Grout adheres best to clean, bare surfaces.
A simple mix of dish soap and warm water is enough for cleaning, but avoid any oil-based cleaners, as they can leave a residue that makes new grout bond poorly. Make sure all surfaces are dry before you start removing grout, as moisture can make grout removal more difficult.
Removing Old Grout
This is the most labor-intensive part, but patience pays off. The goal is to remove the old grout without damaging the tiles or underlying surfaces.
Manual Removal
Use a grout removal tool or utility knife for small areas. Hold the tool at a slight angle and press firmly into the grout line, scraping away the old material. Work slowly and use short strokes.
If you hit a stubborn spot, don’t force it. Instead, wiggle the tool gently back and forth until the grout starts to break up. This careful approach keeps the tiles safe from chips and scratches.
Using A Power Tool
For larger jobs, an oscillating multi-tool with a grout removal blade speeds up the process. Keep the tool steady and let the blade do the work—do not force it.
Power tools are fast but can slip easily. If you’re new to them, practice on a spare tile or a hidden spot to get a feel for the vibration and control. Always move slowly, especially near corners or sink edges.
Safety tip: Wear safety glasses and gloves. Grout chips can fly and cut your hands or eyes.
Cleaning Out The Joints
After removing most of the grout, use a small brush or toothbrush to clean out dust and crumbs. A vacuum works well to suck out loose material. The joints should be at least 2–3 mm deep for the new grout to hold properly.
You can also use a can of compressed air to blow out fine dust from corners. This is especially useful in older kitchens where debris may be packed tight.
Common mistake: Do not dig too deep or use excessive force, as this can crack tiles or damage the wall.
If you accidentally chip a tile, don’t panic. Small chips can often be hidden by new grout, but take note to be gentler in other spots.
Inspecting And Repairing Tiles
Once old grout is removed, inspect the tiles and substrate (the surface behind the tiles).
- Look for loose tiles: Gently press on each tile. If any move, remove them and apply thin-set mortar before grouting.
- Check for damage: If the substrate is soft, crumbling, or moldy, stop. This means water has penetrated and repairs are needed before grouting.
If everything is solid, you can continue. If you discover damage, consider calling a professional for advice.
Non-obvious insight: Small chips on tile edges can be hidden by new grout. But large cracks or missing tile pieces should be fixed before grouting.
If you find a damp or musty smell when cleaning out grout lines, it’s a clue there may be hidden moisture problems. Let the area dry fully and, if needed, use a fan or dehumidifier for a few hours. Persistent dampness means a leak is likely—fix this before adding new grout.
Mixing New Grout
Follow the manufacturer’s instructions for mixing grout. Most grout comes as a powder that you mix with water.
Steps For Mixing Grout:
- Pour the powder into a clean bucket.
- Add water slowly (usually about 1/4 cup per pound of grout).
- Stir with a margin trowel or stick until you get a smooth, peanut butter-like consistency.
- Let the mixture “slake” (rest) for 5–10 minutes, then stir again.
Do not add too much water. Watery grout is weak and cracks as it dries.
If you’re using pre-mixed grout, stir it well before use to make sure the color and texture are even. Pre-mixed grout is convenient for small repairs but usually costs more per ounce.
| Grout Quantity | Water Needed | Yield (sq ft) |
|---|---|---|
| 1 lb | ~1/4 cup | Up to 10 |
| 5 lbs | 1 1/4 cups | Up to 50 |
Tip: Only mix as much grout as you can use within 30–40 minutes. Grout hardens quickly.
For perfect color matching, always use the same brand and batch of grout for the whole area. If you run out and have to mix more, measure water carefully and mix thoroughly to avoid color streaks.
Applying New Grout
Now you’re ready to fill the gaps with fresh grout.
Loading The Grout Float
Scoop a small amount of grout onto a rubber grout float. Hold the float at a 45-degree angle to the tile surface.
A rubber float is designed to glide smoothly and press grout deep into the joints. If you use a metal tool, be gentle to avoid scratching tiles.
Pressing Grout Into Joints
Spread the grout across the tiles, pressing firmly to pack it into the joints. Work in small sections (2–3 square feet at a time). Move the float diagonally across the tiles to avoid digging out grout.
Move with steady, overlapping strokes. Press the float from multiple directions to ensure every joint is filled. Check for air gaps or holes as you go.
Removing Excess Grout
Hold the float almost upright and scrape off extra grout from the tile faces. Do not worry if some haze remains; you’ll clean this later.
The float should leave a thin, even layer over the tiles. Try not to let excess grout dry on the surface, as it becomes difficult to remove later.
Smoothing The Grout Lines
Let the grout set for 10–15 minutes, then use a damp sponge to smooth the lines and clean tile surfaces. Rinse the sponge often and use light pressure. Do not use too much water, or you’ll wash out the grout.
Work in circles to gently shape the grout lines and remove haze. Edges near the sink can be tricky—take your time to get a neat finish.
Common mistake: Over-wetting the grout during cleanup can weaken it and cause cracks.
Final Cleaning
After the grout starts to harden (about 1 hour), buff any haze off the tiles with a dry, soft cloth. Do not scrub grout lines.
If a haze remains after the first cleaning, wait a few hours and then gently polish with a microfiber cloth. For stubborn haze, use a damp cloth with a drop of mild dish soap.
Curing And Sealing Grout
Proper curing and sealing are key for durability and stain resistance.
Letting Grout Cure
Allow the grout to cure undisturbed for at least 24 hours. Avoid using the sink or spilling water on the area during this time.
If your kitchen is humid, open a window or run a fan nearby to speed up drying. Don’t rush this step—even “fast-setting” grouts need time to fully harden.
Applying Grout Sealer
Once the grout is dry (check the package for exact times), apply a grout sealer to protect against stains and water. Use a small brush or applicator bottle to run sealer along the grout lines. Wipe off excess from tiles immediately to avoid a cloudy residue.
Tip: Sealing is especially important in a kitchen, where water and food spills are common.
| Grout Sealer Type | Protection Level | Reapplication Frequency |
|---|---|---|
| Penetrating Sealer | High | Every 1–3 years |
| Surface Sealer | Medium | Every 1–2 years |
Non-obvious insight: Some modern grouts are “pre-sealed” (epoxy or urethane grout), but most kitchen projects use standard cement-based grout, which must be sealed.
If you’re unsure which sealer to use, ask at your hardware store or check your grout’s packaging. Penetrating sealers are best for kitchens because they soak in and protect from inside out.

Credit: www.reddit.com
Finishing Touches
After sealing, let the area cure for another day if possible. Replace items you removed from around the sink. Stand back and admire your work—you’ve protected your kitchen for years to come!
If you notice any small gaps or pinholes after the grout dries, you can mix a little extra grout and patch these areas. Just make sure the color matches.
For a more polished look, you can run a thin bead of color-matched caulk along the edge where the tiles meet the countertop or sink. This seals out water and gives a neat, finished edge.
Cleaning Up
Grout can be messy, but quick cleanup keeps your kitchen looking good.
- Wipe down all surfaces with a damp cloth to remove dust and residue.
- Wash buckets, floats, and sponges with water before the grout hardens. Dried grout is very hard to remove from tools.
- Dispose of old grout and debris in the trash—never down the sink.
Tip: For stubborn grout haze, use a commercial grout haze remover or a 50/50 mix of vinegar and water, but always test on a small spot first.
If you get grout on your hands, wash with soap and water soon after finishing—dried grout can dry out your skin. For extra stubborn residue, a little baking soda and water paste can help scrub it away gently.

Credit: diy.stackexchange.com
Preventing Future Grout Problems
Regular care extends the life of your grout and keeps your kitchen healthy.
- Seal grout annually. This keeps water and stains out.
- Clean spills quickly. Acidic foods like lemon juice or tomato sauce can stain unsealed grout.
- Use a gentle cleaner. Avoid harsh chemicals or scouring pads, which can erode grout.
- Check for cracks. Repair small cracks before they grow and let water in.
Non-obvious insight: Using a bathroom fan or opening a window when washing dishes helps reduce humidity and slows mildew growth around your sink.
To make daily cleaning easier, keep a soft brush (like an old toothbrush) under the sink. Quick scrubbing of grout lines every few days helps prevent buildup and stains.
Cost, Time, And Difficulty
Many people wonder if they should hire a professional or do it themselves.
- DIY Cost: Around $20–$50 for tools and materials.
- Time Required: 3–5 hours for removal and application, plus 24 hours curing.
- Skill Level: Moderate. Patience and care matter more than experience.
Most homeowners can handle this project in a weekend. If your tiles are expensive or you’re unsure, you can always get a quote from a pro for comparison.
If you already have some of the tools, your cost will be even lower. For first-timers, take your time and watch a few online videos to get familiar with the process before starting.

Credit: www.reddit.com
Common Mistakes To Avoid
Even handy people make errors when replacing grout. Here are the biggest pitfalls:
- Not removing enough old grout: New grout needs depth to bond well.
- Over-wetting grout during cleaning: This weakens the final result.
- Skipping sealer: Unsealed grout absorbs stains and water fast.
- Using wrong grout type: Sanded grout can scratch glass or polished tiles.
- Rushing the curing stage: Don’t use the sink or clean too soon.
Not cleaning dust and debris fully from grout lines is another common problem. Any loose material left behind weakens the new grout and can lead to early cracking. Always vacuum or brush out joints thoroughly before applying new grout.
Take your time. A little patience now saves big repairs later.
When To Call A Professional
While DIY works for most, you may need help if:
- Tiles are loose or falling off.
- There is mold or rot behind tiles.
- You have expensive stone tiles or custom work.
A professional can fix hidden problems and ensure a watertight seal. For most kitchens, though, this is a satisfying DIY project that improves your home.
Frequently Asked Questions
How Long Does New Grout Last Around A Kitchen Sink?
With proper sealing and care, new grout can last 10–15 years around a kitchen sink. High-traffic or high-moisture areas may need touch-ups sooner. Annual sealing and quick cleaning of spills will help extend grout life.
Can I Put New Grout Over Old Grout?
It’s not recommended. New grout needs depth and a clean surface to bond well. Applying new grout over old, cracked, or dirty grout leads to peeling and early failure. Always remove old grout at least 2–3 mm deep before regrouting.
What’s The Best Grout Color For Kitchen Sinks?
White or light gray grout is common, but darker shades hide stains better. Choose a color that matches your tiles and kitchen style. Test a small area or use a sample board, as grout color can look different when dry.
Is It Safe To Use Bleach To Clean Grout?
Bleach can kill mold but is too harsh for regular cleaning and may degrade grout over time. Use a mild cleaner and a soft brush for routine cleaning. Save bleach for tough mildew, and always rinse well. For regular maintenance, opt for pH-neutral cleaners.
How Do I Know If My Grout Needs Replacing Or Just Cleaning?
If grout is cracked, missing, or crumbling, it needs replacing. If it’s just stained but solid, try cleaning first. Persistent stains or black spots that don’t clean up may signal deep mildew, in which case replacement is best.
For more tips on tile maintenance, check out this This Old House guide.
Replacing grout around your kitchen sink is a smart way to protect your home and boost your kitchen’s appearance. With the right tools, clear steps, and a little patience, you can get lasting results that look professional. Don’t wait for leaks or mold—tackle grout problems early and enjoy a clean, healthy kitchen for years to come.