Installing a pot filler in your kitchen is more than just a luxury—it’s a practical upgrade that saves time and strain. If you often cook pasta, soups, or fill large pots, you know carrying heavy water-filled pots from the sink to the stove can be awkward and even risky.
A pot filler, mounted conveniently above the stove, lets you add water right where you need it. But many homeowners worry that installing one, especially in an existing wall, is a job for a full kitchen remodel. The good news?
With the right guidance, tools, and patience, you can install a pot filler without tearing apart your kitchen.
This guide will walk you through every step, from planning and choosing the right model, to running water lines, handling wall finishes, and making sure your installation is both safe and beautiful. Whether you’re a DIY enthusiast or just want to understand what’s involved before hiring a pro, you’ll find clear instructions, expert tips, and practical insights that will help you get the job done with confidence.
Understanding Pot Fillers And Their Benefits
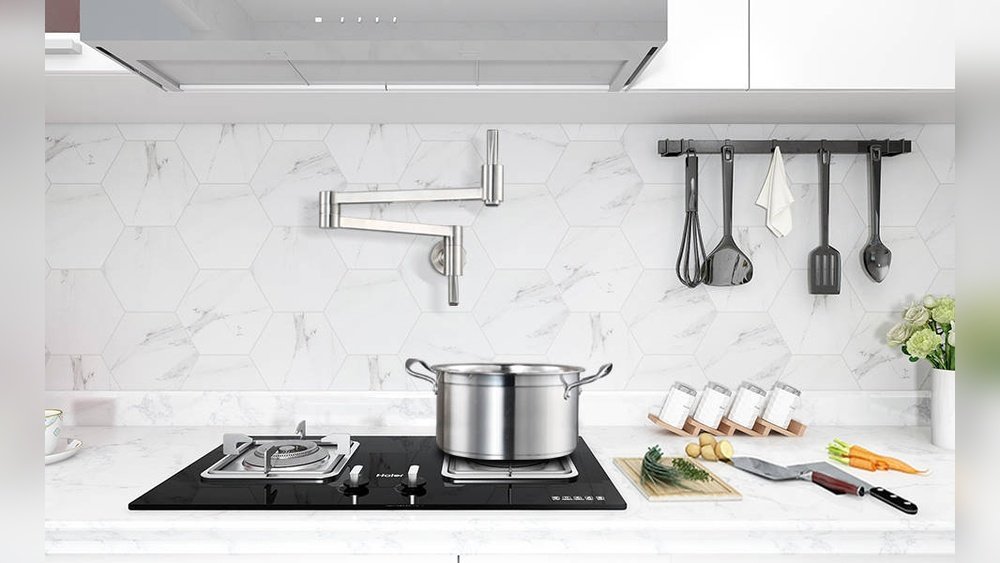
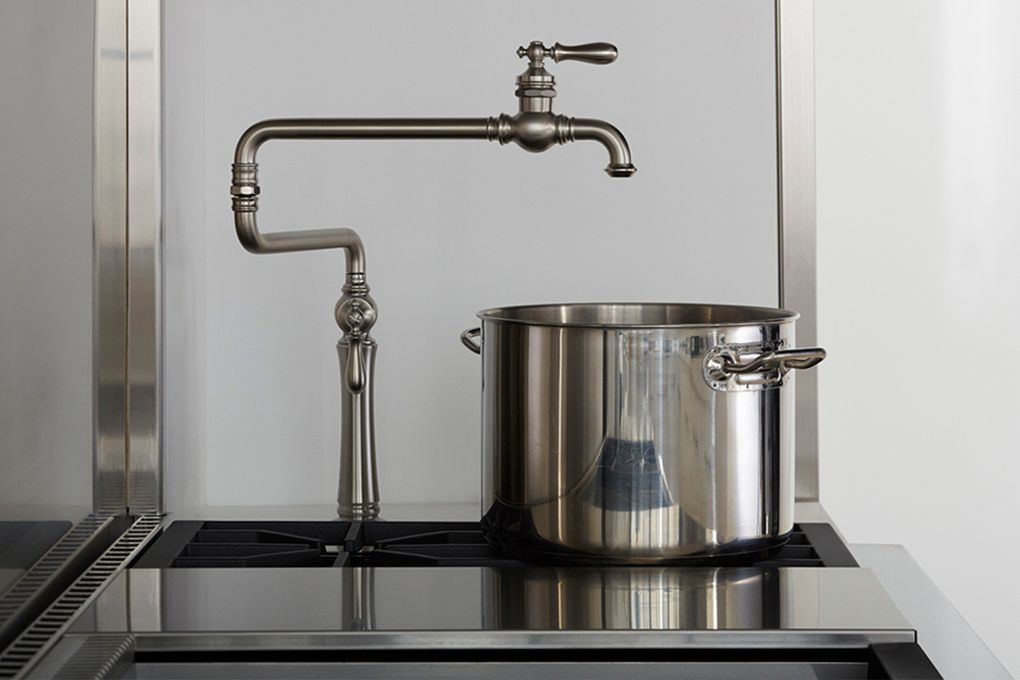
A pot filler is a swing-out faucet installed above the stove. It connects to the cold water supply and makes filling pots easy without carrying them from the sink. They are common in professional kitchens, but are now popular in home kitchens for their convenience and style.
Main Benefits
- Reduces Heavy Lifting: You no longer need to move heavy, water-filled pots from the sink to the stove.
- Saves Time: Fill pots right at the stove while prepping other ingredients.
- Adds Value: Pot fillers are a sought-after feature and can boost your kitchen’s appeal.
- Improves Safety: Less chance of spills or burns from carrying big pots.
Types Of Pot Fillers
There are two main styles:
- Wall-mount pot fillers: Installed directly into the wall above the stove.
- Deck-mount pot fillers: Installed on the countertop, less common for existing kitchens.
Most people choose wall-mount models for their sleek look and space-saving design.
Can You Install A Pot Filler In An Existing Wall?
The short answer is: Yes, you can. But it requires careful planning and some plumbing work. Unlike new construction, where walls are open, installing in an existing wall means you’ll need to run a water line through finished surfaces. You’ll also need to patch the wall and possibly the backsplash.
Key Challenges
- Accessing the cold water line without major demolition.
- Making a clean, safe connection to the water supply.
- Cutting and repairing drywall or tile.
- Ensuring the faucet is properly supported.
With the right preparation, these challenges can be managed by a skilled DIYer or a professional plumber.
Tools And Materials You’ll Need
Gathering the right tools and materials is essential for a smooth installation. Here’s what you’ll typically need:
Tools
- Stud finder
- Pipe cutter (for copper or PEX)
- Adjustable wrench
- Drill and bits (masonry bit if drilling tile)
- Level
- Measuring tape
- Utility knife
- Drywall saw
- Screwdrivers
- Pliers
- Bucket
Materials
- Pot filler faucet (wall-mount)
- Water supply line (copper or PEX)
- Shut-off valve
- Pipe fittings (elbows, tees, couplings as needed)
- Pipe insulation (optional, for cold climates)
- Teflon tape or pipe joint compound
- Mounting hardware (usually included with faucet)
- Drywall patching supplies (if wall is cut)
- Tile repair supplies (if backsplash is tiled)
- Drop cloths
Pro Tip: If you’re installing in a tiled wall, have a few extra tiles on hand for repairs.
Planning The Location
Choosing the right spot for your pot filler is crucial. You want it to be easily accessible but not in the way of cooking.
Ideal Height And Placement
Most pot fillers are installed 12 to 18 inches above the cooking surface. This allows enough clearance for tall pots but keeps the handle within easy reach.
- Find the centerline of your stove.
- Mark a spot about 14-16 inches above the highest burner.
- Make sure the swing arm can reach all burners but does not interfere with the vent hood.
Checking For Obstacles
Use a stud finder to locate wall studs. Avoid placing the faucet where it would need to go directly into a stud, as this makes plumbing difficult. Also, check what’s behind the wall—if it’s an exterior wall or has ductwork, installation may be more complex.
Deciding On Water Supply: Where Will The Water Come From?
A pot filler only uses cold water. The simplest way is to tap into an existing cold water line that serves your kitchen sink or a nearby appliance.
Common Water Line Options
- The cold water line under the sink (usually 4-8 feet away from the stove).
- A line in the basement or crawl space.
- For kitchens on a slab, you may need to run the line through cabinets or above the ceiling.
Insight: Some homeowners try to connect to a hot water line for faster boiling, but this isn’t recommended. Pot fillers are not designed for hot water, and hot water from the tap may not be safe for cooking.
Step-by-step Installation Process
This section covers the detailed steps. Read through them all before starting.
1. Shut Off The Water Supply
Before you cut any pipes, turn off the main water supply to your home. Open the kitchen faucet to release pressure and drain remaining water.
2. Open The Wall
If your wall is drywall, cut a section about 12 inches wide between two studs where the pot filler will be installed. If you have a tile backsplash, use a tile saw or drill with a masonry bit to carefully remove just enough tile for access.
Pro Tip: Cut a neat rectangle for easier patching later. Save the drywall or tile pieces if possible.
3. Plan The Pipe Route
Map the shortest, most direct route from the cold water source to the pot filler location. You may need to snake the pipe horizontally or vertically through wall cavities.
Non-obvious insight: Check for electrical wires in the wall before drilling or cutting. Use a stud/electrical finder for safety.
4. Install The Water Line
Copper Pipe: Measure, cut, and dry-fit the pipe sections. Use elbows and tees as needed. Solder the connections or use push-fit fittings.
PEX Pipe: Cut the PEX to length and use crimp or push-fit connectors. PEX is flexible, making it easier for tight spaces.
Run the pipe to the opening behind the stove. Leave enough sticking out to connect the shut-off valve and pot filler.
Tip: Always include a dedicated shut-off valve at the pot filler location. This allows you to service the faucet without shutting off water to the whole kitchen.
5. Secure The Support
A pot filler is heavier than a typical faucet, especially when extended. Install a solid wood backing (a 2×6 or 2×8 board) between the studs where the mounting bracket will go. This provides solid support.
Non-obvious insight: Do not rely on just drywall or tile to hold the faucet. Over time, the weight and movement can damage the wall if not properly supported.
6. Connect The Valve And Faucet
Attach the shut-off valve to the pipe. Wrap threaded connections with Teflon tape or pipe joint compound.
Mount the pot filler bracket to the wall, securing it to the wood backing. Attach the faucet according to the manufacturer’s instructions, making sure it’s level.
7. Test For Leaks
Turn the water supply back on. Slowly open the shut-off valve and check all connections for leaks. Open and close the pot filler several times to ensure smooth operation.
Pro Tip: Place a bucket under the faucet during the first test in case of drips.
8. Patch And Finish The Wall
Patch the drywall, tape, mud, and sand smooth. For tile, replace cut tiles or use a matching tile patch kit. Let everything dry before painting or grouting.
Clean up the area and reinstall any range hoods or trim you removed.
Credit: www.seattletimes.com
Comparing Pipe Options: Copper Vs. Pex
Choosing the right pipe type makes a difference in installation ease and long-term reliability. Here’s a comparison:
| Feature | Copper Pipe | PEX Pipe |
|---|---|---|
| Flexibility | Rigid, needs elbows | Flexible, bends easily |
| Installation Time | Slower (soldering or compression) | Faster (crimp or push-fit) |
| Durability | Very high (50+ years) | High (40-50 years) |
| Cost | More expensive | Less expensive |
| Freeze Resistance | Can burst | More freeze-tolerant |
| Common Mistakes | Poor solder joints, not cleaned properly | Incorrect crimping, kinking pipe |
Tip: If you’re new to plumbing, PEX is often easier to work with, especially in tight spaces.
How Much Does It Cost To Install A Pot Filler?
Costs depend on several factors, including the faucet model, materials, and whether you hire a pro. Here’s a typical breakdown:
| Item | DIY Cost | Pro Installation |
|---|---|---|
| Pot filler faucet | $150-$700 | $150-$700 |
| Pipe & fittings | $30-$80 | Included |
| Shut-off valve | $10-$25 | Included |
| Wall patching/tiles | $20-$100 | Included |
| Labor | Free (your time) | $350-$800 |
| Total | $210-$905 | $500-$1,600 |
Note: These are typical US costs as of 2024. Prices may vary by region.

Credit: www.youtube.com
Common Mistakes And How To Avoid Them
Even experienced DIYers can make errors when installing a pot filler. Here are mistakes to watch for:
- Skipping a shut-off valve: Always install a dedicated shut-off at the faucet location.
- Poor support: The faucet must be anchored to solid wood, not just drywall or tile.
- Incorrect height: Measure carefully so the faucet swings over all burners but doesn’t hit the vent hood.
- Cross-threading or over-tightening: Use the right tools and avoid stripping threads.
- Not checking for leaks: Test before patching the wall.
- Forgetting about code requirements: Some local codes require an air gap or backflow preventer.
Pro Tip: Take clear photos before you close the wall—this helps with future repairs or upgrades.
Final Checks: Safety And Code Compliance
Before you finish, make sure your work meets local building codes. Some areas have specific rules for plumbing near cooking appliances.
Key Points
- Use only lead-free plumbing materials for drinking water.
- Install a backflow preventer if required by code.
- Test for leaks at both the shut-off valve and the faucet.
- Insulate pipes if the wall is on an exterior surface.
If you are unsure, consider having a plumber inspect your work.
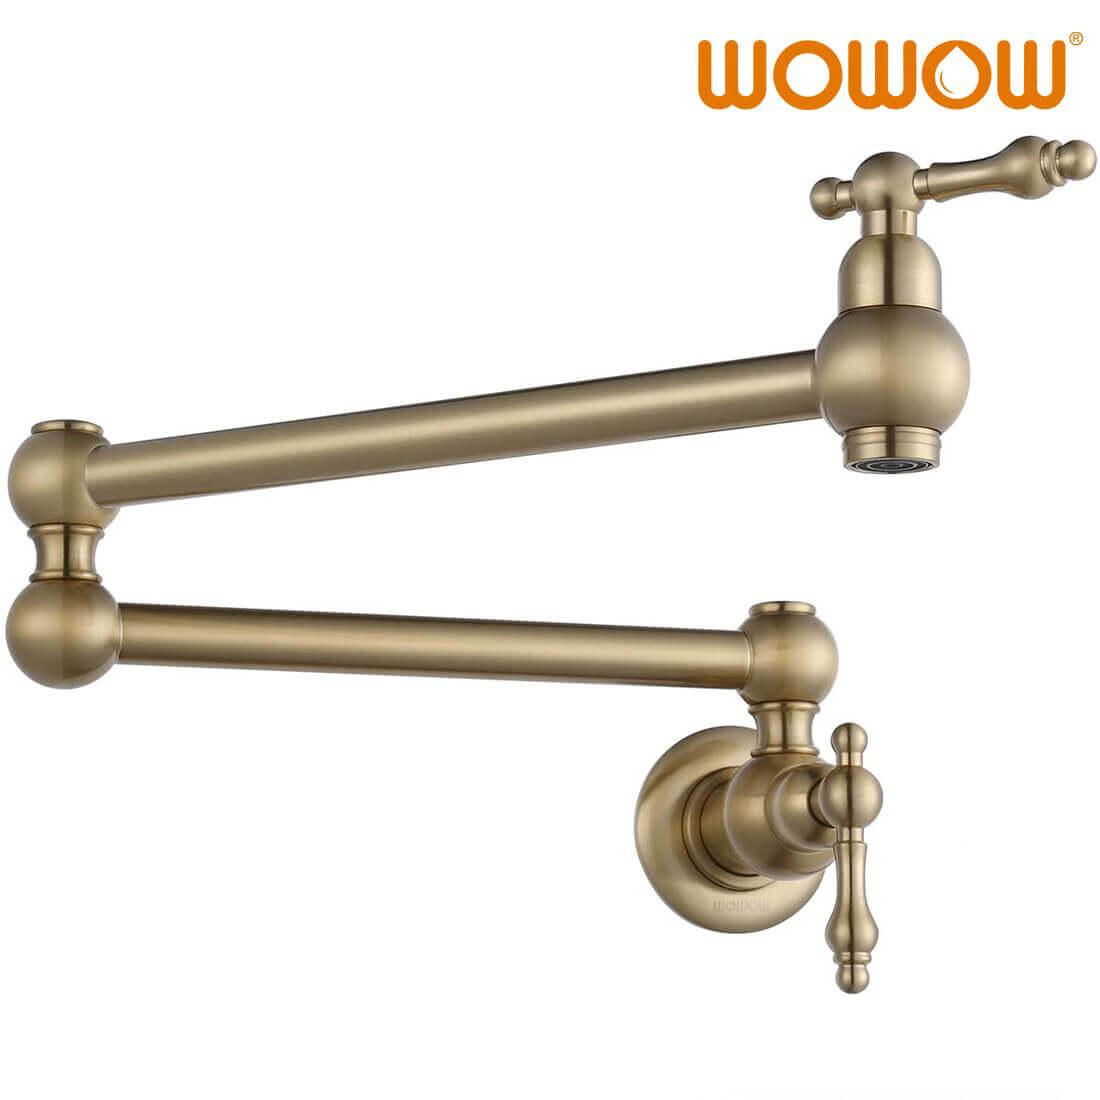
Pot Filler Styles And Finishes
Pot fillers come in a wide range of finishes and styles. Choosing one that matches your kitchen’s look is important for a seamless design.
Popular Finishes
- Brushed nickel: Modern, fingerprint-resistant
- Polished chrome: Classic, easy to clean
- Oil-rubbed bronze: Traditional, warm look
- Matte black: Modern, trendy
Choose a style that matches your existing fixtures for a cohesive appearance.
Cleaning And Maintaining Your Pot Filler
A pot filler is low-maintenance, but regular cleaning and a few simple steps will keep it working smoothly for years.
- Wipe with a damp cloth after cooking, especially if you have a gas stove.
- Check for leaks at the joints every few months.
- Operate the shut-off valve periodically to keep it from sticking.
- Descale the aerator if you have hard water.
Insight: Pot fillers are often overlooked during kitchen cleaning. Make it a habit to inspect and wipe yours down weekly.
When Should You Hire A Professional?
While many handy homeowners can handle this project, call a professional plumber if:
- You’re not comfortable working with water lines or soldering.
- Your wall has complex wiring or ductwork.
- You need to move or reroute existing plumbing.
- Local code requires a licensed plumber.
A plumber can usually complete the job in 2-4 hours, minimizing the risk of leaks or damage.
How Does A Pot Filler Compare To Other Kitchen Faucets?
Pot fillers are specialized tools, not replacements for a standard sink faucet. Here’s how they compare:
| Feature | Pot Filler | Kitchen Faucet |
|---|---|---|
| Location | Above stove | At the sink |
| Water Supply | Cold only | Hot and cold |
| Uses | Filling pots | Washing, rinsing, filling |
| Installation complexity | Medium-High | Low-Medium |
| Maintenance | Low | Medium |
A pot filler is a great complement, not a substitute, for your main kitchen faucet.
Credit: www.wowowfaucet.com
Troubleshooting Common Issues After Installation
Sometimes problems appear after installation. Here’s how to handle them:
Leaks At The Joints
- Check for loose fittings and re-tighten.
- Use Teflon tape on threaded joints.
- Replace faulty washers.
Low Water Flow
- Remove the aerator and clean out debris.
- Check for kinks in the supply line.
Faucet Doesn’t Swing Smoothly
- Loosen the set screw slightly.
- Lubricate the pivot points if needed.
Dripping After Use
- Check the cartridge or valve seat for wear.
- Replace as needed—most manufacturers sell repair kits.
Pro Tip: Keep the installation manual and a list of part numbers for easy future repairs.
Enhancing Kitchen Design With A Pot Filler
A pot filler can be a focal point in your kitchen. Here’s how to make it stand out:
- Choose a matching finish: Coordinate with cabinet hardware, lighting, and other fixtures.
- Add a decorative backsplash: The area behind the stove is highly visible.
- Install under-cabinet lighting: This highlights the pot filler and makes evening cooking easier.
- Consider a custom mounting plate: Some brands offer plates to cover rough tile edges for a polished look.
Insight: If you’re planning a future kitchen remodel, install blocking and a water line now—even if you add the pot filler later.
Safety Considerations
Pot fillers are generally safe, but a few precautions add peace of mind:
- Always turn off the faucet after use to avoid accidental flooding.
- Teach children not to play with the faucet.
- Use the shut-off valve if you’ll be away for long periods.
Useful Resources
For more details on plumbing codes and installation tips, check out the official Family Handyman guide, which includes photos and step-by-step instructions.
Frequently Asked Questions
How High Should I Install A Pot Filler Above The Stove?
Most experts recommend 12 to 18 inches above the cooking surface. This gives enough space for tall pots but keeps the handle within easy reach. Measure your tallest pot and add several inches for comfort.
Can I Install A Pot Filler On An Exterior Wall?
You can, but it’s more complex. Exterior walls may need extra insulation to prevent freezing. If you live in a cold climate, consult a plumber—frozen pipes can burst and cause major damage.
Does A Pot Filler Need Hot Or Cold Water?
Pot fillers are almost always cold water only. Hot water lines are not recommended, as the faucet and supply lines are designed for cold. Cold water is safe for cooking and prevents scalding accidents.
Will Installing A Pot Filler Increase My Home’s Value?
A well-installed pot filler can increase kitchen appeal and home value, especially in high-end homes. Buyers see them as a premium feature, but it’s not a must-have for everyone.
What Maintenance Does A Pot Filler Require?
Little maintenance is needed. Wipe it clean weekly, check for leaks, and operate the shut-off valve monthly. If you have hard water, descale the aerator every few months.
Adding a pot filler to your kitchen is a project that pays off in both convenience and style. With careful planning, the right tools, and attention to detail, you can tackle this upgrade—even in an existing wall—and enjoy the benefits for years to come.