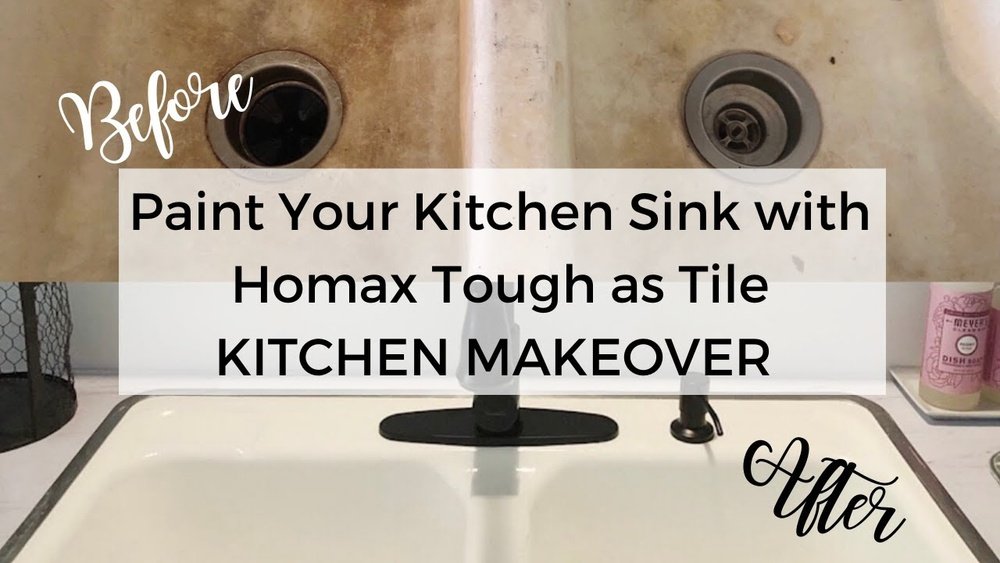
Painting a kitchen sink is an exciting way to refresh your kitchen without spending much money. Many people think they need to buy a new sink if the old one looks worn out or outdated, but that’s not true. With the right process, you can make your current sink look new again—and even change its color to match your kitchen style.
Painting a kitchen sink is not as hard as it sounds, but it does require careful steps and the right materials. If you want a result that lasts, you must follow the right method and avoid common mistakes.
In this guide, you’ll learn how to paint a kitchen sink from start to finish. Whether your sink is stainless steel, porcelain, or cast iron, this article will help you achieve a smooth, attractive, and durable finish. You’ll also discover tips that most beginners miss, see how different paints compare, and understand how to keep your painted sink looking great for years.
Let’s dive into everything you need to know to give your kitchen sink a fresh new look.
Why Paint A Kitchen Sink?
Painting a kitchen sink is more popular now because it’s a fast and budget-friendly way to upgrade your kitchen. Many homeowners want a change without the cost of a full remodel. Instead of spending hundreds or thousands of dollars on a new sink and installation, painting lets you refresh what you already have for a fraction of the price.
Another reason to paint is to customize the look. Maybe your sink is old and stained, or its color doesn’t fit your current kitchen style. Painting gives you the freedom to choose any color and finish you like—matte, glossy, or even metallic.
This flexibility lets you match your sink to your countertop, cabinets, or kitchen decor.
There’s also the environmental benefit: keeping your old sink reduces waste. Most old sinks end up in landfills. By painting and reusing your sink, you help the environment and save resources.
Types Of Kitchen Sinks You Can Paint
Not every sink material is suitable for painting, but many are. Here’s a breakdown of which types you can paint and what you need to know about each one.
| Sink Material | Can It Be Painted? | Best Paint Type | Special Preparation Needed? |
|---|---|---|---|
| Stainless Steel | Yes | Epoxy, Appliance Paint | Degreasing, Light Sanding |
| Porcelain/Enamel | Yes | Epoxy, Acrylic Urethane | Deep Cleaning, Etching |
| Ceramic | Yes | Epoxy, Ceramic Paint | Cleaning, Etching |
| Cast Iron (Enamel Coated) | Yes | Epoxy, Appliance Paint | Thorough Cleaning |
| Composite Granite | No* | — | Painting Not Recommended |
*Composite granite sinks are not recommended for painting because the paint may not stick well and can peel easily.
Non-obvious insight: Many people don’t realize that the key to painting sinks is not just the paint, but the surface preparation. Even the best paint will fail if the sink isn’t cleaned and sanded properly. Also, using the wrong paint (like wall paint) will lead to chipping and peeling very quickly.
Tools And Materials Needed
Before you start, gather all your tools and materials. Having everything ready makes the process smoother and avoids interruptions.
Essential Tools:
- Screwdriver (to remove fixtures if necessary)
- Painter’s tape
- Soft cloths or sponges
- Protective gloves and goggles
- Sandpaper (220-grit and 400-grit)
- Small brush and foam roller
- Drop cloth or plastic sheeting
Cleaning and Prep Supplies:
- Dish soap or degreaser
- White vinegar (optional, for extra cleaning)
- Rubbing alcohol or acetone
- Fine steel wool (for stubborn stains)
Painting Supplies:
- Epoxy paint or appliance epoxy spray
- Primer (if required by your paint choice)
- Paint thinner or mineral spirits (for cleanup)
- Clear topcoat (optional for extra durability)
Non-obvious insight: Many first-timers forget to use painter’s tape to protect the surrounding countertop and faucet area. Skipping this step can lead to paint splatters where you don’t want them, making cleanup harder and the final result less professional.
Choosing The Right Paint For Kitchen Sinks
Selecting the best paint is the most important decision for this project. Not all paints will hold up to water, heat, and daily use in a kitchen sink. You need something strong, waterproof, and made for tough conditions.
Paint Options Compared
| Paint Type | Durability | Finish | Drying Time | Best For |
|---|---|---|---|---|
| Epoxy Paint (2-Part) | Very High | Glossy/Matte | 12–24 hours | Stainless, Porcelain, Cast Iron |
| Appliance Epoxy Spray | High | Glossy | 1–2 hours | Metal Sinks |
| Acrylic Urethane | Medium | Satin/Gloss | 6–8 hours | Porcelain, Ceramic |
| Ceramic Paint | Medium | Glossy | 6–8 hours | Ceramic Sinks |
For most people, epoxy paint is the top choice. It’s very strong, resists water, and sticks well to most sink surfaces. Epoxy is often used for bathtub and tile refinishing, so it’s built to handle water and scrubbing. Appliance epoxy spray is another good choice, especially for metal sinks, but it is less thick than brush-on epoxy.
Tip: Always check the paint’s label to make sure it’s food-safe and suitable for sinks. Some paints can release chemicals when in contact with hot water or dishes.
Credit: www.myperpetualproject.com
Preparing The Kitchen Sink For Painting
Preparation is where most DIYers go wrong. If you rush this part, the paint will not stick well, and your hard work will not last. Take your time with these steps.
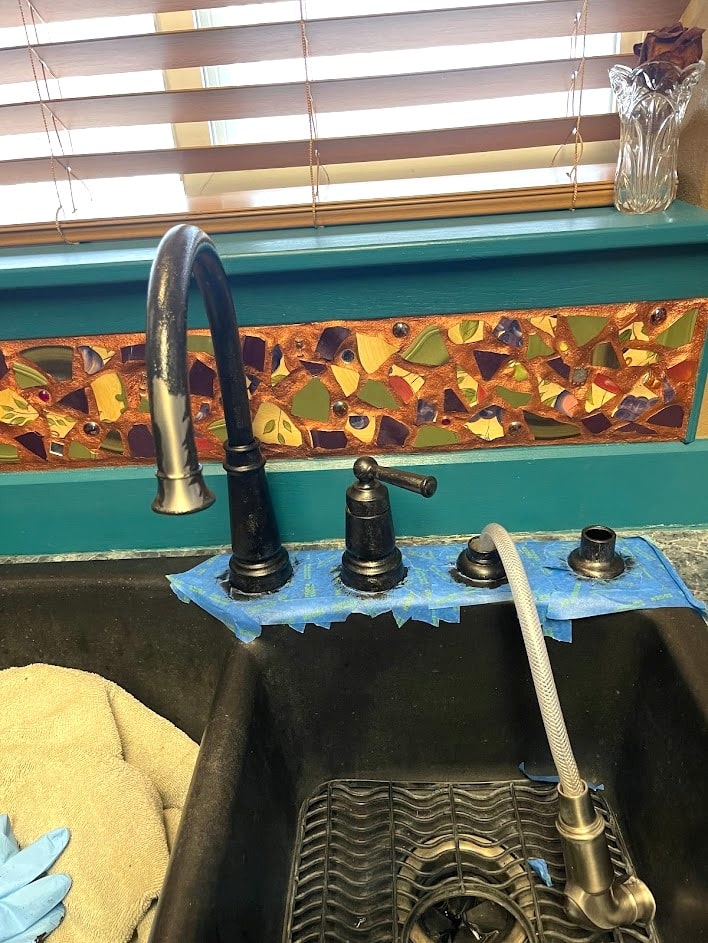
1. Remove Fixtures And Accessories
Start by taking out anything attached to your sink, like the faucet, soap dispensers, or drain covers. If you can’t remove the faucet, cover it well with painter’s tape and plastic wrap. This makes painting easier and prevents accidental paint spots on metal parts.
2. Clean Thoroughly
A greasy or dirty sink will cause paint to bubble and peel. Wash the entire sink with dish soap and hot water. Scrub away all food particles, soap scum, and grease. For stubborn stains or mineral deposits, use white vinegar or a non-abrasive cleaner.
Rinse and dry completely.
After basic cleaning, wipe the sink with rubbing alcohol or acetone. This removes any last traces of oil or residue that can interfere with paint adhesion.
3. Sand The Surface
Use 220-grit sandpaper to lightly roughen the surface. The goal is not to remove the old finish but to give the paint something to grip. For shiny porcelain or ceramic, sand a little longer to dull the gloss. Wipe away all dust with a damp cloth.
Common mistake: Skipping the sanding step or not sanding enough. Paint sticks better to a dull, rough surface. If the sink is still shiny, the paint may peel after a few weeks.
4. Mask And Protect Surroundings
Apply painter’s tape around the sink edges, faucet base, and any areas you don’t want painted. Cover the countertop and floor with a drop cloth. Open windows or use a fan for ventilation—paint fumes can be strong.
5. Repair Chips Or Cracks
If your sink has chips or small cracks, fill them with a waterproof epoxy filler. Let it dry, then sand smooth. This step makes the final result look even and helps prevent water from seeping under the paint.
Applying Primer (if Needed)
Some epoxy paints do not require a primer, but many do—especially on porcelain, ceramic, or when covering a dark color with a lighter one. Primer helps the topcoat stick and makes the color look even.
Read your paint’s instructions. If a primer is needed, brush or roll on a thin, even layer and let it dry completely. This usually takes 1–2 hours, but can vary. Sand lightly with 400-grit sandpaper after drying for a super-smooth finish.
Tip: If you skip primer when it’s needed, the paint may not last more than a few months.

Credit: www.youtube.com
Painting Your Kitchen Sink: Step-by-step
Now the fun part begins—adding color and protection to your sink. Work slowly and carefully for the best results.
1. Mix And Prepare Paint
If using a two-part epoxy paint, mix the resin and hardener according to the label instructions. Only mix what you can use in 30–60 minutes, because epoxy starts to harden quickly.
Stir well, but avoid whipping air bubbles into the mixture.
2. First Coat Application
Use a high-quality brush or a small foam roller for the smoothest finish. Apply a thin, even coat of paint. Start at the edges and work toward the center. Overlap each stroke slightly to avoid visible lines.
Don’t try to cover everything in one coat. Thin layers stick better and dry faster.
3. Drying Time
Let the first coat dry for at least the time listed on the paint can (usually 6–12 hours for epoxy). Do not touch or use the sink during this time.
Non-obvious insight: Humidity and temperature affect drying. In a humid kitchen, epoxy may take longer to set. Use a fan or dehumidifier if possible.
4. Second Coat
Lightly sand the first coat with 400-grit sandpaper to smooth out any drips or brush marks. Wipe away dust. Add a second thin coat, again working from the edges inward.
If the color looks uneven or thin, apply a third coat after the second one dries.
5. Final Drying And Curing
Epoxy paint needs time to cure fully—not just dry to the touch. Wait at least 24–48 hours before using the sink for light tasks, and up to 7 days before heavy scrubbing or placing heavy pots in it.
Tip: The paint will feel dry after a day, but it reaches full strength only after curing. Early use can cause scratches or dents.
Adding A Protective Topcoat (optional)
While epoxy is tough, a clear topcoat adds extra shine and protection—especially for white or light-colored sinks that show stains easily. Choose a food-safe polyurethane or clear epoxy topcoat.
Apply it as you did the paint, in one or two thin layers. Allow each layer to dry completely. This topcoat can make cleaning easier and extend the life of your painted finish.
Reinstalling Fixtures And Cleaning Up
Once the paint is fully cured, carefully remove all painter’s tape. Reinstall the faucet, soap dispenser, and drain covers. Wipe away any dust or tape residue with a soft, damp cloth.
Remove the drop cloth and open windows to air out any remaining paint smell.
Tip: If you see any mistakes or missed spots, touch up with a small brush and let dry fully before using the sink.
Caring For Your Painted Kitchen Sink
A painted sink is durable, but it’s not indestructible. With good care, your new finish can last several years. Here’s how to keep it looking fresh:
- Avoid harsh cleaners – Use gentle dish soap and a soft sponge. Stay away from abrasive pads or powder cleaners.
- Don’t soak hot pans – Sudden temperature changes can damage the paint. Let pans cool before placing them in the sink.
- Wipe up spills quickly – Especially foods like coffee, wine, or tomato sauce that can stain.
- Use a sink mat – A rubber or silicone mat protects the bottom from scratches.
- No cutting in the sink – Knives can gouge the paint.
Common mistake: Using bleach or ammonia-based cleaners. These can break down the paint and cause fading or peeling.
How Long Does A Painted Sink Last?
With proper preparation and care, a painted kitchen sink can last 2 to 5 years before needing a touch-up. High-use sinks or those cleaned with strong chemicals may need refreshing sooner.
Epoxy finishes are the most long-lasting, especially when paired with a topcoat and gentle cleaning habits. Remember, painted sinks are best for light to medium daily use. Heavy scrubbing or dropping heavy pots will shorten their lifespan.
When Not To Paint A Kitchen Sink
Painting works for most sinks, but there are times when it’s not the best solution:
- Deep cracks or leaks – Painting won’t fix structural problems. Replace the sink if it’s badly damaged.
- Heavily rusted sinks – Rust will keep growing under the paint. Remove all rust completely or replace the sink.
- If you want a high-gloss, factory-new look – Painted finishes are beautiful but may show brush marks or slight texture.
- For sinks used for heavy-duty cleaning – Industrial or commercial kitchens should stick with factory finishes.
Cost Comparison: Paint Vs. Replacement
Here’s how painting compares to buying a new sink:
| Option | Average Cost | Lifespan | Time Required |
|---|---|---|---|
| Painting Sink | $40–$100 (paint, supplies) | 2–5 years | 2–4 days (including curing) |
| New Stainless Sink | $150–$400 (plus installation) | 10–20 years | Half to full day (plus plumbing) |
| Professional Refinishing | $250–$500 | 5–10 years | 1–2 days |
Painting is the lowest-cost option if you’re willing to do it yourself and want a fast upgrade. Replacement is best for sinks with major damage or if you want a change in size or material.
Common Mistakes To Avoid
- Skipping surface prep – Not cleaning and sanding enough is the number one cause of paint failure.
- Using the wrong paint – Wall paint or regular spray paint won’t last. Only use epoxy or appliance-specific paints.
- Painting over rust or cracks – These will get worse under the paint.
- Rushing between coats – Each layer needs to dry fully, or you’ll get bubbles and peeling.
- Heavy use too soon – Let paint cure a full week before scrubbing or filling the sink with water.
Real-life Example: Painted Sink Transformation
Anna wanted to update her old, beige porcelain sink to match her new white cabinets. She used a two-part epoxy paint, following every prep step carefully. After three thin coats and a week of curing, her sink looked almost brand new. She says the most important part was sanding and cleaning—her first attempt failed because she didn’t sand enough. The second time, with better prep, the paint lasted over three years with only light scratches.
Expert Tips For Best Results
- Test paint on a small area first to check adhesion and color.
- Work in good light so you can see drips or missed spots right away.
- Wear a mask and ventilate—epoxy fumes can be strong.
- Keep pets and kids away during painting and drying.
- Buy extra paint for future touch-ups.
When To Call A Professional
If your sink has major damage, or if you want a perfect, glossy finish with no brush marks, consider hiring a professional refinisher. They have special tools and spray equipment for flawless results. This can cost more, but the finish may last up to 10 years.
Where To Learn More
For more in-depth information about different types of epoxy paints and their safety in kitchen use, visit the Wikipedia page on epoxy.

Credit: onabudget.blog
Frequently Asked Questions
What Kind Of Paint Should I Use On A Kitchen Sink?
The best option is two-part epoxy paint, which is very durable and water-resistant. Appliance epoxy spray is good for metal sinks. Always choose a paint made for kitchen or bathroom surfaces.
How Long Does It Take To Paint A Kitchen Sink?
The full process takes 2 to 4 days. Painting only takes a few hours, but you must allow time for cleaning, drying, and curing between coats. The sink should not be used for at least 24–48 hours after the last coat.
Will The Paint Chip Or Peel Off Easily?
If you follow proper cleaning, sanding, and priming steps, the paint will not chip or peel easily. However, using abrasive cleaners or sharp objects can damage the surface over time.
Can I Change My Sink From A Dark Color To White?
Yes, but you may need three or more thin coats of paint to cover a dark color. A good primer will help the new color look even and bright.
Is It Safe To Use A Painted Sink For Food And Dishes?
Once the paint is fully cured, it is safe for normal kitchen use. Always choose food-safe, non-toxic paint. Avoid harsh chemicals and do not soak food for long periods in the sink.
Painting your kitchen sink is a smart, affordable way to refresh your kitchen. With the right tools, paint, and careful steps, you can enjoy a new look that lasts for years. Follow this guide, and you’ll be proud of your kitchen’s transformation.