
Bread baking has become a fascinating journey for many home bakers. While recipes, ovens, and flour matter, one tool often makes a surprising difference in your bread: the banneton. If you’ve ever admired those beautiful, rustic loaves with perfect rings and a high rise, chances are a banneton was involved. But what is a banneton, and how do you actually use one? This guide will walk you through everything you need to know, from choosing and preparing your banneton to cleaning, storage, and even troubleshooting common problems. Whether you’re just starting with sourdough or looking to up your artisan bread game, you’ll find clear steps, practical tips, and solutions for every stage.
What Is A Banneton?
A banneton is a basket used by bakers to support dough during the final rise before baking. It’s sometimes called a proofing basket or brotform. Bannetons are usually made from natural materials like rattan, cane, or sometimes wood pulp. Their spiral patterns create those signature flour rings on crusty loaves.
While a mixing bowl can hold dough, a banneton shapes and supports it, helping the dough rise upward instead of spreading. This gives your bread a taller, rounder look and helps create a better crust.
Why Use A Banneton Instead Of A Bowl?
- Keeps Dough Shape: Prevents flat, spread-out bread.
- Improves Crust: Lets the dough breathe, keeping the surface dry for a crispier crust.
- Signature Pattern: The spiral ridges leave beautiful marks on the baked loaf.
- Air Circulation: Natural materials wick away moisture, helping with oven spring.
Types Of Bannetons: Shapes, Sizes, And Materials
Choosing the right banneton can be confusing. Here’s a breakdown to make it easier.
Common Shapes
- Round (Boules): Most common shape. Ideal for classic round artisan loaves.
- Oval (Batards): Best for longer loaves, fits better in some ovens.
- Rectangular: Used for sandwich breads or specialty shapes.
- Other Shapes: Less common, like heart or triangle, mainly for decorative breads.
Materials
- Rattan: Traditional, breathable, and sturdy. Most popular choice.
- Cane: Similar to rattan, sometimes a little lighter.
- Wood Pulp: Pressed wood, smooth surface, easy to clean, but less traditional texture.
- Plastic: Sometimes used for allergies or easy cleaning, but doesn’t wick moisture.
Sizes
Bannetons are sized by how much dough they hold. Here’s a quick reference:
| Size | Dough Weight | Ideal For |
|---|---|---|
| Small | ~500g (1 lb) | Mini loaves, test bakes |
| Medium | ~750g (1.5 lb) | Standard home loaves |
| Large | ~1kg (2.2 lb) | Big artisan breads |
Non-obvious tip: Always size your banneton for your recipe’s total dough weight, not just flour weight. Dough almost doubles in weight after water, salt, and starter are added.
How To Prepare A Banneton For First Use
A new banneton needs preparation before you can use it. Skipping this step is a common beginner mistake and often leads to dough sticking.
Step-by-step Preparation
1. Clean Your Banneton
Wipe with a clean, dry cloth to remove dust. Never wash with soap and water before first use.
2. Lightly Mist With Water
Use a spray bottle or wet your hands and flick a little water inside. The banneton should be damp, not soaked.
3. Dust With Flour
Sprinkle a generous amount of flour inside. Rice flour works best because it’s less sticky than wheat flour. Tilt and tap the banneton to coat all surfaces.
4. Shake Out Excess
Turn the banneton upside down and gently tap to remove extra flour.
5. Let It Dry (optional)
If you used a lot of water, let it air dry for 30 minutes.
6. Ready To Use
Now your banneton is seasoned and less likely to stick.
Practical insight: The first few times, dough may still stick a little. As your banneton becomes “seasoned” with flour over several uses, sticking becomes less likely.
How To Use A Banneton: Step-by-step
Using a banneton is simple but requires attention to detail. Here’s a practical, step-by-step approach for best results.
1. Flour The Banneton
Even if your banneton is seasoned, you must flour it each time. Rice flour is the top choice, but you can mix it with wheat flour. For wet doughs (high hydration), use more flour.
- How much flour? Enough to cover the inside but not so much it clumps.
- How to apply? Use a small sieve or shake gently by hand, turning the banneton as you go.
2. Shape The Dough
Shape your dough according to the loaf you want (round or oval). Tension on the surface is important—this helps the loaf keep its structure.
- Round loaf: Pull edges to the center and tighten.
- Oval loaf: Fold long sides and roll up tightly.
3. Place Dough Seam-side Up
Always place dough with the seam (the “ugly” side) facing up in the banneton. The smooth side should touch the banneton surface. This way, when you flip it out, the smooth side is on top, ready for scoring and baking.
4. Cover And Let It Proof
Cover the banneton with a shower cap, plastic wrap, or a damp towel to prevent drying. Let your dough rise at room temperature or in the fridge (cold proofing). Times vary:
- Room temperature: 1-3 hours, depending on recipe and room.
- Cold proof (fridge): 8-16 hours for deeper flavor and easier handling.
Beginner’s tip: Cold proofing makes dough less sticky and easier to handle.
5. Check Proof Readiness
Gently press the dough with a finger. If it springs back slowly and leaves a slight indent, it’s ready. If it collapses, it’s over-proofed; if it springs back fast, it needs more time.
6. Turn Out The Dough
Flour your peel, baking sheet, or parchment paper. Place it over the banneton, hold both, and quickly flip. Lift off the banneton. The dough should release easily and show a beautiful pattern.
7. Score And Bake
Use a sharp blade (lame or razor) to score the dough. Bake as your recipe says.
8. Clean The Banneton
After baking, knock out any flour or dough bits. Let it air dry completely before storing.
Key Mistakes To Avoid When Using A Banneton
Mistakes are part of learning, but some are easy to avoid with a little guidance.
1. Not Enough Flour
If the banneton isn’t well-floured, dough sticks. Always use enough flour, especially with new or unseasoned bannetons.
2. Over-wetting The Banneton
Too much water makes the flour clump and stick. Only dampen lightly if needed.
3. Wrong Side Up
Placing dough smooth-side up means the top will be sticky and harder to score.
4. Under- Or Over-proofing
Under-proofed dough won’t fill the banneton pattern, while over-proofed dough collapses.
5. Washing With Soap
Never wash your banneton with soap. It absorbs and ruins the natural material.
6. Not Drying Properly
Storing a damp banneton encourages mold growth.
Non-obvious insight: Even seasoned bakers sometimes forget to flour parchment or their hands when flipping dough out—this can ruin a loaf at the last moment.
Comparing Bannetons To Other Proofing Tools
Wondering if you really need a banneton? Here’s how it stacks up against other options.
| Tool | Pros | Cons |
|---|---|---|
| Banneton | Best shape, beautiful pattern, better crust | Needs care, higher cost |
| Mixing Bowl | Cheap, easy to find | No pattern, sticky, less rise |
| Colander with Cloth | DIY option, flexible size | Cloth can stick, less impressive results |
| Wood Pulp Basket | Easy clean, smooth pattern | Less traditional look, less airflow |
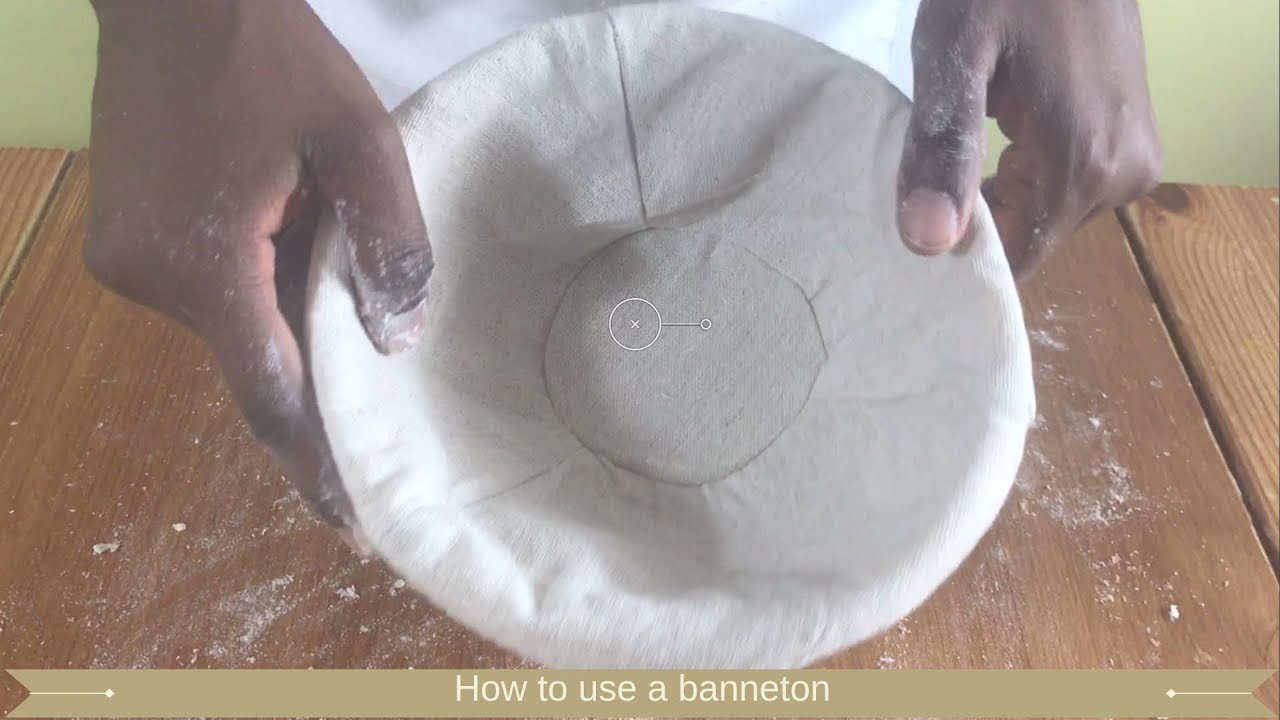
Credit: www.youtube.com
How To Clean And Store A Banneton
Proper care extends your banneton’s life and prevents problems.
Cleaning After Use
- Dry Cleaning: Knock out loose flour and dough bits. Use a stiff brush if needed.
- No Water Needed: Avoid washing with water unless absolutely necessary.
- Deep Clean (Rare): If very sticky, rinse quickly with cold water and dry thoroughly.
Dealing With Stuck Dough
If dough sticks, let it dry completely, then use a brush to remove. Avoid scraping with sharp objects.
Removing Mold
If mold appears, brush out, then bake the empty banneton in a low oven (250°F/120°C) for 30 minutes. This kills most mold spores. Re-season with flour after.
Storage
Store your banneton in a dry, airy place. Avoid plastic bags—they trap moisture and cause mold.
Tip: Sprinkle a little flour inside before storing to keep it dry.
Advanced Banneton Techniques
Ready to go beyond the basics? Try these ideas.
Using Cloth Liners
Many bannetons come with removable cloth liners.
- Why use? Softer crust, no spiral pattern, easier release for very sticky doughs.
- How to use? Dust liner with flour before placing dough.
Creating Patterns
You can add extra flour, cocoa, or spices for decorative patterns. Use stencils or just sprinkle flour in different ways.
Proofing In The Fridge
Cold proofing in a banneton gives better flavor and makes dough easier to handle. Always cover to avoid drying out.
Multiple Bannetons
If baking several loaves, owning more than one banneton is helpful. Let one dry while using another.
Banneton Care Myths And Facts
Some advice gets passed around without much evidence. Let’s clear up a few things.
- Myth: You must wash your banneton every time.
Fact: Only dry clean unless there’s a real need for water.
- Myth: You need special flour to prevent sticking.
Fact: Rice flour is best, but regular flour works if you use enough.
- Myth: Mold means you must throw your banneton away.
Fact: Most mold can be killed with heat and brushing.
How Banneton Choice Affects Your Bread
The banneton you choose affects more than just shape.
- Material: Natural rattan or cane helps wick moisture, improving crust.
- Size: Too small, dough overflows. Too large, dough flattens and doesn’t fill the basket.
- Shape: Round for boules, oval for batards—shape matches final bread style.
Pro tip: For best results, match your banneton to your most common loaf size and shape.

Credit: www.amazon.com
Common Problems And How To Fix Them
Dough Sticking
- Use more flour, especially rice flour.
- Make sure banneton is completely dry before use.
- Avoid over-hydrated doughs if you’re new.
Flat Loaf
- Use a smaller banneton or shape dough with more surface tension.
- Don’t over-proof.
Pale Crust Or No Pattern
- Dust with more flour for visible rings.
- Bake at a higher temperature.
- Remove the liner for a crispier pattern.
Mold Or Smell
- Always dry your banneton thoroughly.
- Store in open air.
- Bake banneton empty occasionally to kill spores.
How To Choose The Right Banneton For You
There’s no single “best” banneton, but some factors make the choice easier.
Consider Your Bread Style
- Sourdough, rustic loaves: Traditional rattan, round or oval.
- Sandwich bread: Rectangular or wood pulp.
Kitchen Space
- Rattan bannetons are stackable but need airflow to dry.
- If you have little space, choose just one medium-sized banneton.
Budget
Plastic and wood pulp are cheaper, but rattan is most traditional and long-lasting.
Allergies
Very sensitive bakers may choose plastic or wood pulp to avoid allergens.
Multiple Loaves
If you bake in batches, consider owning two or three bannetons.
Banneton Accessories And Alternatives
Sometimes a banneton isn’t available or you want to try something else.
Accessories
- Liners: Help with sticky doughs.
- Covers: Shower caps or plastic wrap to prevent drying during proof.
- Brushes: Stiff brushes for cleaning.
Alternatives
- Colander lined with a floured towel.
- Mixing bowl with a clean, floured dishcloth.
- Plastic proofing baskets (less airflow, but work in a pinch).
Banneton Maintenance: Long-term Tips
- Rotate Use: Don’t use the same banneton every day; let it rest to dry fully.
- Sunlight: Occasionally dry in sunlight to reduce bacteria.
- Oven Drying: Bake empty at low heat every few months.
- Inspect Regularly: Check for mold, cracks, or splinters.
Non-obvious tip: If you live in a humid climate, store your banneton near a dehumidifier or in the oven (when cool and off) to keep it dry.
Banneton And Sourdough: A Perfect Pair
Bannetons and sourdough have a special connection. Sourdough is wetter and stickier than most yeasted bread doughs, so the banneton’s flouring and shape support really shine. Many sourdough bakers will not bake without one.
- Better fermentation: Banneton shape supports long, slow proofing.
- Distinct crust: The spiral pattern is a sourdough hallmark.
- Easier scoring: Chilled, well-shaped sourdough is easier to score after proofing in a banneton.
For more on sourdough baking, the Perfect Loaf offers detailed resources.
How To Use A Banneton For Different Types Of Bread
Sourdough
- Needs heavy flouring.
- Cold proof for best results.
- Flip out straight from fridge to oven.
Yeasted Artisan Bread
- Less sticky, but still flour well.
- Proof at room temperature.
Rye Or Whole Wheat
- These doughs are stickier. Use liners or more rice flour.
Sweet Breads
- Less common, but banneton can be used for decorative shape.
Real-world Examples: Banneton Success Stories
Case 1:
Anna, a home baker, switched from a bowl to a banneton. Her loaves rose higher, and the crust had a more rustic look. She learned to use rice flour after two sticky failures.
Case 2:
Jorge used a colander and towel for months. After buying a rattan banneton, he noticed his sourdough got a crispier crust and a much more professional look.
How To Store Dough In A Banneton Overnight
Many bakers proof dough overnight in the fridge.
- Shape dough, place in well-floured banneton.
- Cover tightly to prevent drying.
- Place in fridge for 8-16 hours.
- Bake straight from fridge for best results.
Extra tip: Chilled dough holds its shape better and is easier to score.
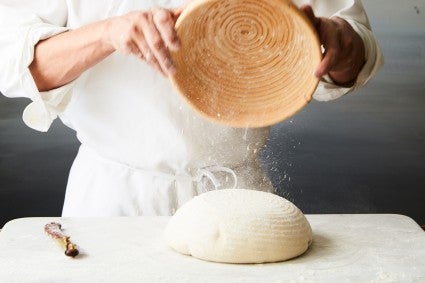
Credit: www.kingarthurbaking.com
Banneton: The Secret To Artisan Bread At Home
A banneton is more than a fancy basket—it’s a tool that helps home bakers create professional-looking, delicious bread. With the right care and technique, your banneton will serve you for years, making each loaf rise higher and look more beautiful.
Frequently Asked Questions
What Is The Difference Between A Banneton And A Proofing Basket?
A banneton and a proofing basket are the same tool. Banneton is the French name, while “proofing basket” is the English term. Both support dough during its final rise.
Can I Use A Banneton For Gluten-free Bread?
Yes, but gluten-free dough is often stickier. Use a cloth liner and plenty of rice flour to prevent sticking.
How Do I Stop Dough From Sticking To My Banneton?
Use rice flour, and make sure your banneton is dry and well-seasoned. For very sticky dough, use a liner or mix rice and wheat flour.
Do I Have To Use A Banneton For Sourdough Bread?
No, but a banneton gives better shape, crust, and appearance. You can use a bowl with a floured cloth, but results are not as consistent.
How Should I Clean Mold From A Banneton?
Brush out the mold. Bake the banneton in a low oven (250°F/120°C) for 30 minutes to kill spores. Let it cool, then re-flour before using again.
By understanding how to use a banneton, you can transform your bread from homemade to artisan-quality. With practice and proper care, you’ll enjoy high-rising, beautiful loaves every time.