
Painting your kitchen island is one of the most rewarding DIY projects you can take on in your home. With a little time, the right tools, and some patience, you can transform a tired or outdated island into a stunning centerpiece.
Whether you want a fresh neutral look or a bold pop of color, painting your kitchen island is a cost-effective way to update your space without a full renovation.
Many homeowners think painting a kitchen island is just like painting any other piece of furniture. In reality, there are unique challenges—like dealing with kitchen grease, heavy use, and the need for a flawless finish. This guide gives you everything you need to know, from preparation to the final coat.
Along the way, you’ll learn pro secrets, what mistakes to avoid, and how to get results that look professional even if you’re a beginner.
Why Paint Your Kitchen Island?
A kitchen island often sits at the heart of your home. It’s where people gather, prep food, and sometimes even work. A painted island can:
- Refresh outdated cabinetry without a full remodel
- Add personality and color to a neutral kitchen
- Increase your home’s value and appeal
- Protect wood and surfaces from daily wear
Unlike replacing cabinets or countertops, painting is affordable and can be done over a weekend. According to the National Association of Realtors, minor kitchen upgrades, like painting, can return up to 80% of their cost when selling.
Painting also gives you the freedom to change your kitchen’s atmosphere quickly. For example, if your kitchen feels dark or small, choosing a lighter paint color for your island can make the whole room seem more open and inviting. On the other hand, a bold color like navy blue or emerald green can turn your island into a true focal point.
And if you get tired of the look in a few years, repainting is much easier (and less wasteful) than replacing.
Another advantage of painting is the ability to hide small imperfections. If your island has scratches, chips, or uneven patches, a fresh coat of paint—applied after proper prep—can make these flaws disappear.
Choosing The Right Paint And Supplies
Not all paints are equal. Kitchens need durable, washable finishes that can handle spills, scrubbing, and heavy use. Here’s what you’ll need:
Types Of Paint
- Acrylic latex paint: Good for most wood or MDF islands. It’s easy to use and dries fast. This paint is also low in odor and easy to clean up with water, making it a favorite for many DIYers.
- Alkyd or enamel paint: Offers a harder, more durable finish. These paints are often used by professionals. Alkyd paints (sometimes called waterborne alkyd) combine the durability of oil-based paints with easier cleanup.
- Chalk paint: Popular for a matte, vintage look. Needs a topcoat for durability. Chalk paint is forgiving for beginners because it shows fewer brush marks, but it’s less durable unless sealed well.
Finish Options
- Satin or semi-gloss are best for kitchen islands. They resist stains and are easy to clean. Flat or matte paints may look nice but are difficult to clean and can show fingerprints.
Essential Supplies
- Primer (stain-blocking, for kitchens)
- Sandpaper (120, 180, and 220 grit)
- High-quality brushes and rollers
- Painter’s tape
- Tack cloth or microfiber cloth
- Degreaser/cleaner
- Drop cloths or plastic sheeting
- Screwdriver (for hardware removal)
- Paint tray
- Stir sticks
If your island has lots of detail or paneling, consider a small detail brush for grooves. Using the right tools makes a big difference in the final result.
Cost Comparison
Here’s a quick look at typical costs for DIY vs. hiring a professional:
| Option | Estimated Cost | Time Required |
|---|---|---|
| DIY (materials only) | $60–$180 | 1–2 days |
| Professional painter | $300–$700 | 1 day |
Remember, if your island is large or has many cabinets and drawers, your cost could be higher. But for most standard islands, DIY is the best balance of cost and quality.
Planning Your Project
Painting a kitchen island is simple, but not fast. Rushing leads to brush marks, peeling paint, or stains bleeding through. Here’s how to plan:
- Set aside two days (one for prep and paint, one for drying and topcoat).
- Empty the island and clear the kitchen area.
- Choose a time when the kitchen is less busy.
If you have kids or pets, try to schedule your project when they’ll be out of the house, or block off the work area. A little planning helps you avoid dust, pet hair, or fingerprints ending up in your wet paint.
Color Selection Tips
- Dark colors (navy, black, hunter green) make a bold statement but show dust and scratches more. They can look stunning, especially in modern kitchens, but be prepared to clean a little more often.
- Light colors (white, light gray, soft blue) brighten the space and hide wear. They’re classic choices for a reason and suit many kitchen styles.
- Use online color visualizers before buying paint. This helps you see how your chosen color works with your cabinets, counters, and flooring.
- Test a small swatch on the side of your island. Colors can look very different under kitchen lighting, so always check before committing.
If you’re unsure, consider shades that match or contrast with your existing cabinetry. For example, a navy island in a white kitchen creates a classic, high-contrast look.
Preparing The Kitchen Island
Preparation is the most important part. Most paint failures happen because of poor prep. Don’t skip these steps.
Cleaning
Kitchen islands collect grease, food residue, and fingerprints. Paint won’t stick to dirty surfaces.
- Remove everything from the island.
- Clean all surfaces with a degreaser or TSP substitute.
- Rinse with water and let dry.
Don’t underestimate this step: even small amounts of grease can ruin your paint job. Pay extra attention to areas near the stove or sink.
Removing Hardware
Take off handles, knobs, and doors. Label hardware in bags so it’s easy to reattach.
For islands with multiple drawers or shelves, take photos before removing parts. This makes reassembly much easier, especially if you have complicated hinges or soft-close mechanisms.
Sanding
Sanding gives paint something to grip and removes glossy finishes.
- Start with 120-grit sandpaper for heavy gloss or old paint.
- Move to 180-grit for smoothing.
- Finish with 220-grit for a super-smooth surface.
Wipe with a tack cloth to remove dust.
If your island is laminate, use a deglosser after sanding to help paint stick. For detailed trim, a sanding sponge or fine sanding block works well.
Repairing Damage
Fill dents, holes, or scratches with wood filler. Let dry, then sand smooth.
Check for loose panels or joints, too. Fix any structural issues before painting—paint won’t hide or fix wobbly parts.
Masking
Use painter’s tape to protect countertops, floors, and any surfaces you’re not painting. Place drop cloths on the floor.
Taping carefully saves time on cleanup and gives your project a crisp, professional look. For extra protection, cover nearby appliances and walls with plastic sheeting.
Priming For Success
Priming is essential, especially for stained or dark cabinets.
- Stain-blocking primers stop old stains from bleeding through.
- For raw wood or MDF, use a high-adhesion primer.
- Apply primer with a brush for corners and a roller for flat areas.
- Allow to dry fully, usually 1–2 hours.
If you skip primer, paint may peel or discolor over time. For glossy surfaces, a bonding primer is a must.
A second coat of primer can help if you’re covering a very dark color or stubborn stains. Lightly sand the primer once dry for a perfectly smooth base.
Painting The Kitchen Island
Now the fun part. Painting is where your kitchen island starts to come alive.
Tools
- Angled brush for corners and edges
- Small foam roller for flat panels
Don’t use old or cheap brushes. Investing in a good brush reduces brush marks and makes painting easier.
Applying Paint
- Stir paint well. Pour into a tray.
- Use the brush to cut in along edges, corners, and detailed areas.
- Roll larger, flat surfaces for a smooth finish.
- Apply thin, even coats. Don’t try to cover in one coat.
- Let each coat dry (usually 4–6 hours) before the next.
Thin coats dry faster and look smoother. It’s better to do three thin coats than one thick, drippy coat.
Number Of Coats
Most islands need two coats of paint. Dark colors over light primer may need a third coat.
If you’re switching from dark wood to white, expect to need an extra coat. Always check the coverage in good lighting before deciding you’re done.
Drying Time Comparison
Here’s how different paints compare:
| Paint Type | Recoat Time | Full Cure Time |
|---|---|---|
| Acrylic latex | 4 hours | 7 days |
| Alkyd/enamel | 8 hours | 14 days |
| Chalk paint (with wax/sealer) | 1 hour | 21 days |
Be patient with cure times. The paint may feel dry to the touch after a few hours, but full hardness takes much longer. Avoid heavy use during this period.
Credit: www.wagnerspraytech.com
Adding A Protective Topcoat
Kitchen islands get a lot of use. A topcoat protects your paint from scratches and stains.
- Use water-based polyurethane for most paint types.
- Apply with a clean brush or foam roller.
- Let dry, sand lightly, and add a second coat if needed.
Avoid oil-based topcoats on light colors—they can yellow over time.
A good topcoat makes cleaning easier and extends the life of your paint job. For chalk paint, topcoat is not optional—wax or a clear sealer is a must for durability in a kitchen.
For best results, sand lightly between coats of topcoat using a fine 320-grit sandpaper. This removes any dust or bubbles and gives a silky finish.
Reattaching Hardware And Doors
Let the paint cure for at least 24 hours before reattaching hardware. This prevents smudges or scratches.
- Use a screwdriver, not a drill, to avoid stripping screws.
- Replace old hardware if you want a new look.
- Make sure doors and drawers move freely.
If you’re upgrading to new hardware, check that hole spacing matches the original. Otherwise, you’ll need to fill and drill new holes before painting.
Cleaning Up
Don’t let paint dry on brushes or rollers. Wash tools with soap and water for latex paints, or mineral spirits for alkyd paints.
Dispose of paint responsibly—never pour it down the drain. Many cities have paint recycling programs.
Allow leftover paint to dry out by leaving the lid off, or use paint-drying powder before disposal if your city allows it. Clean up splatters right away with a damp cloth—dried paint is much harder to remove.
Maintaining Your Painted Kitchen Island
A painted kitchen island will last for years with a little care.
- Clean with a soft cloth and mild soap. Avoid abrasive cleaners.
- Wipe spills quickly to prevent stains.
- Touch up chips with leftover paint.
Pro tip: Save a small jar of touch-up paint labeled with color and brand.
Check hinges and hardware every few months. Tighten any loose screws to prevent wear around holes. If you notice paint wearing off at corners or edges, touch up before it gets worse.
Common Mistakes To Avoid
Even experienced DIYers make mistakes. Here’s how to avoid the most common ones:
- Skipping sanding or cleaning: Paint will peel if the surface is greasy or glossy.
- Not using primer: Stains and wood tannins can bleed through.
- Rushing between coats: Paint needs time to dry fully.
- Using the wrong tools: Cheap brushes shed bristles; poor rollers leave marks.
- Ignoring curing times: The surface may feel dry but can scratch easily before fully cured.
Other mistakes include painting in poor lighting (making it easy to miss spots or drips), not masking off nearby surfaces, and painting in extreme temperatures.
Advanced Tips For A Pro Finish
If you want a finish that rivals a pro’s work, try these methods:
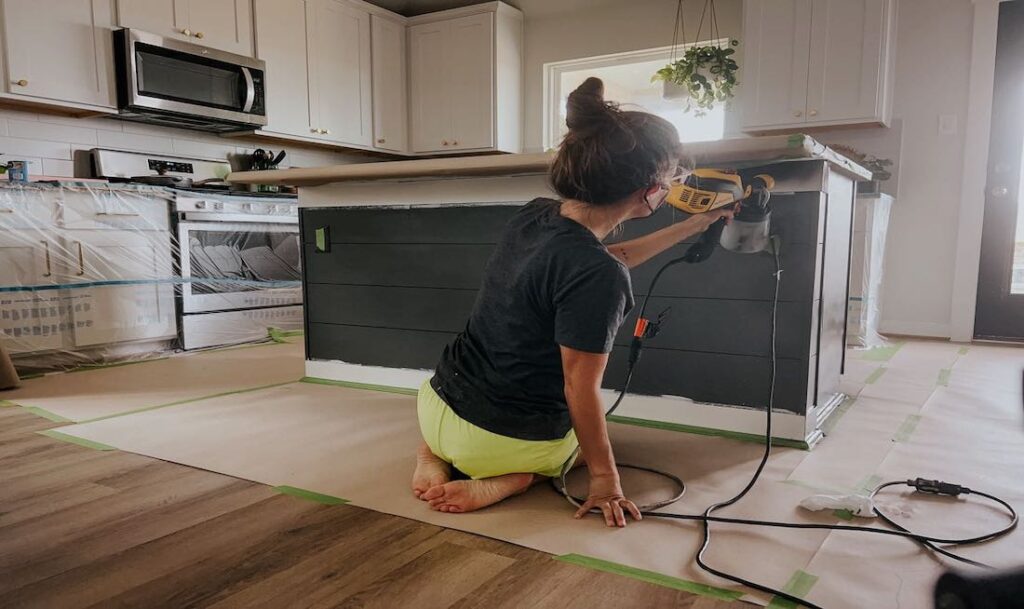
- Spray painting: For the smoothest finish, use a paint sprayer. It’s messier but gives a flawless look.
- Sanding between coats: Lightly sand with 220-grit after each coat for a glass-smooth result.
- Adding hardener: Some paints allow you to add a hardener for extra durability.
- Two-tone islands: Paint the base one color and the top a contrasting shade for a designer look.
Another advanced tip: use a high-density foam roller for final coats. This reduces orange peel texture and makes the paint look more even.
If you want a distressed or antiqued look, gently sand edges and corners after painting, then seal with a clear topcoat.
Troubleshooting Problems
Even with care, issues can happen. Here’s how to fix common problems:
Peeling Paint
- Usually caused by poor surface prep or skipping primer.
- Sand the area smooth and repaint with primer first.
Brush Marks
- Use a high-quality brush and roll over brush strokes while paint is wet.
- Don’t overload the brush; use thin coats.
If you see brush marks after the first coat, sand lightly before the next coat.
Stains Bleeding Through
- Apply a stain-blocking primer and repaint.
Common with oak or mahogany cabinets—tannins can bleed for weeks if not properly sealed.
Paint Feels Sticky After Days
- Humidity or thick coats can cause this. Allow extra curing time and avoid use until fully cured.
If stickiness doesn’t go away, lightly sand and apply a thin, even topcoat to seal.
Real-life Example: Before And After
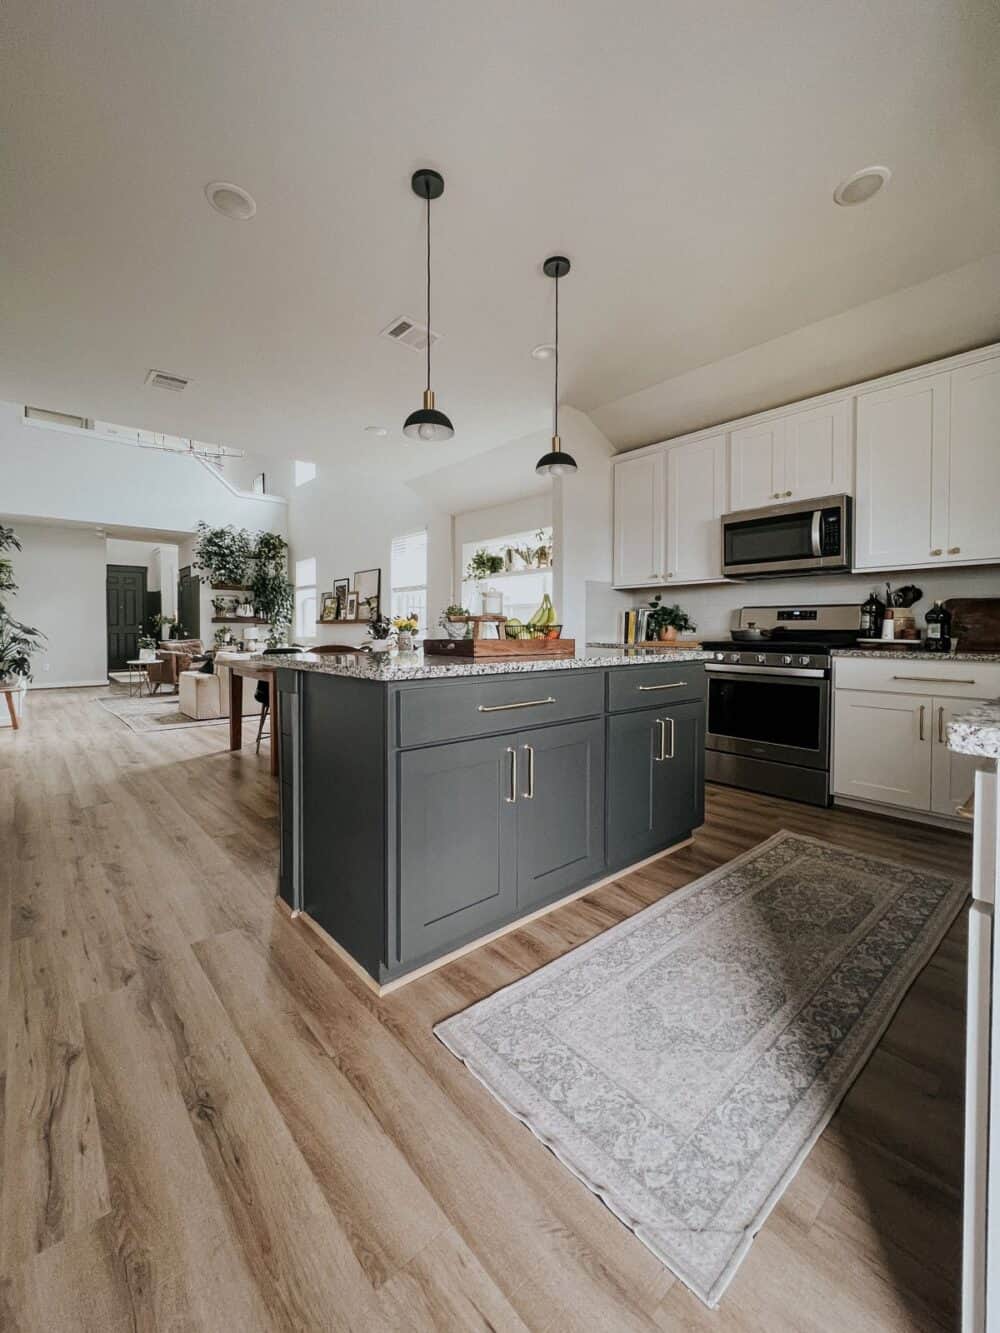
Emily, a homeowner in Ohio, had a dull oak kitchen island. After cleaning, sanding, priming, and two coats of navy blue enamel, her kitchen felt new. She replaced brass handles with matte black pulls for a modern touch. Cost: under $150. Time: one weekend. She says guests always ask if she bought a new island.
Another example: Jason in California painted his laminate island in a light gray chalk paint. He used a bonding primer, applied three coats, and sealed with clear polycrylic. He added brushed nickel handles and a butcher block top. His total spend was just $200, and he says the island still looks brand new two years later.
Sustainability: Eco-friendly Painting Choices
Many paint brands now offer low-VOC and no-VOC options. These paints have fewer fumes and are safer for your family and the environment. Look for Green Seal or Greenguard certifications.
When shopping, check labels for “low odor” or “zero VOC. ” These paints are especially good if you have kids, pets, or allergies. Some top brands even use recycled content.
Disposing of old paint? Check local regulations or visit EPA PaintCare for safe recycling.
You can also reuse leftover paint for small household projects or donate usable paint to community centers or charities.
When To Call A Professional
While most kitchen islands can be painted by a careful DIYer, you might need a pro if:
- The island is very large or ornate
- You want a sprayed or specialty finish
- The existing paint contains lead (common in homes built before 1978)
- You don’t have time for proper prep and drying
A professional can complete the job quickly and with perfect results, but expect higher costs.
If you’re unsure about the condition of your island, get an estimate from a pro before starting. Sometimes, a quick consult is all you need for peace of mind.
Credit: www.loveandrenovations.com
Table: Paint Type Vs. Durability And Maintenance
Here’s a side-by-side look at paint types for kitchen islands:
| Paint Type | Durability | Cleaning | Best For |
|---|---|---|---|
| Acrylic latex | Good | Easy | DIY projects, most islands |
| Alkyd/enamel | Excellent | Very easy | High-traffic kitchens |
| Chalk paint (with topcoat) | Moderate | Wipe with care | Decorative, vintage looks |
Final Touches: Upgrading Your Island’s Look
Once your kitchen island is freshly painted, consider these upgrades:
- New hardware: Knobs and pulls in modern finishes
- Decorative panels or trim: Add interest to plain sides
- Countertop overlay: Butcher block, stone, or laminate for a fresh surface
- Open shelving: Replace doors with shelves for a modern look
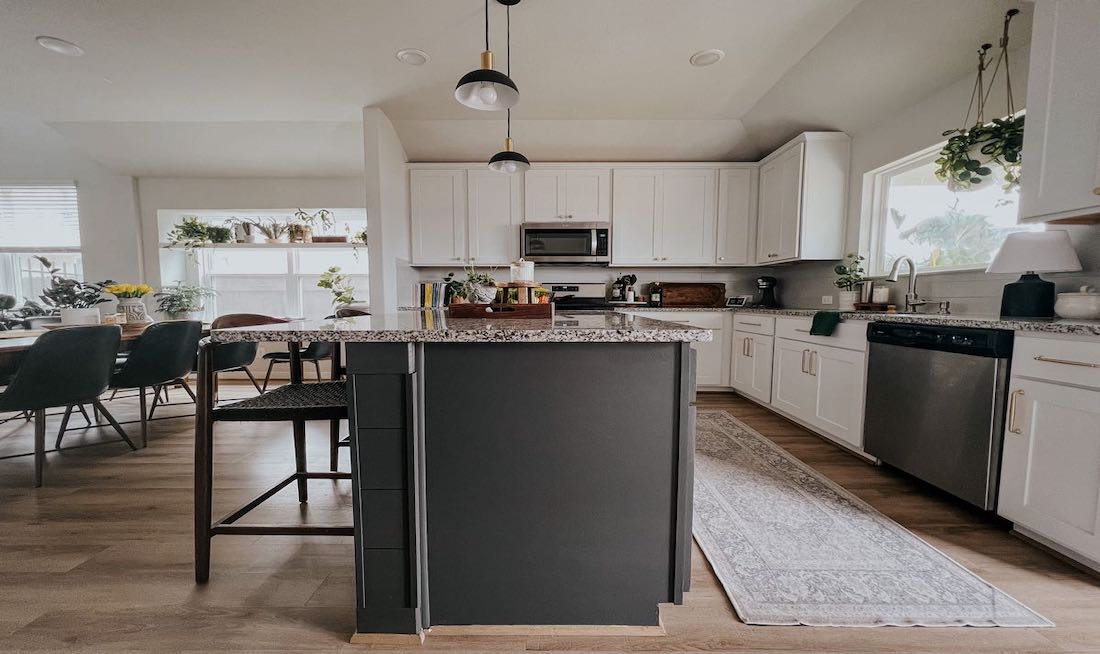
You could also add hooks for towels or utensils, or install a small overhang for extra seating. Even a few new barstools or pendant lights above the island can make the whole kitchen feel new.
These small changes can make a painted island look custom-built.
Credit: www.wagnerspraytech.com
Non-obvious Insights Beginners Miss
Many first-timers overlook these details:
- Temperature and humidity matter: Paint dries best between 50–80°F and low humidity. High humidity can cause sticky paint or slow drying. Painting during rainy or hot, humid weather can lead to poor results.
- Test for adhesion: After sanding and priming, stick a piece of painter’s tape to the surface and pull it off. If primer comes up, sand more.
- Let paint cure fully: Even if it feels dry, it may not be hard enough for kitchen use for up to two weeks. Avoid heavy cleaning or moving appliances onto the island until then.
Another insight: If you’re unsure about paint color, paint a large piece of cardboard or poster board instead of your island. Move it around the kitchen to see how it looks in different light.
Frequently Asked Questions
How Long Does It Take To Paint A Kitchen Island?
Most DIYers spend one day on prep and painting, and another day for drying and topcoat. Allow at least 24–48 hours before using the island, and up to two weeks for paint to fully cure.
For larger islands or more complicated designs (like two-tone finishes), add extra time for each step.
What Kind Of Paint Should I Use For A Kitchen Island?
Use a high-quality acrylic latex or alkyd/enamel paint in a satin or semi-gloss finish. These resist stains, water, and daily wear. Chalk paint is also an option, but only with a strong topcoat.
If your kitchen gets heavy use, alkyd or enamel paints are worth the extra cost for added durability.
Do I Need To Sand Before Painting?
Yes. Sanding removes grease and gloss, giving the paint something to grip. Skipping sanding often leads to peeling or uneven paint.
Even if your island is unfinished wood, a light sanding smooths the surface for a better finish.
How Do I Prevent Brush Marks Or Streaks?
Use a high-quality brush and foam roller. Apply thin coats, sand lightly between coats, and work in the direction of the wood grain. For a flawless finish, consider a paint sprayer.
Don’t paint in direct sunlight or near a heat source—paint dries too quickly and can streak.
Is It Better To Paint Or Replace A Kitchen Island?
Painting is much cheaper—usually under $200 vs. $1,000 or more for a new island. If the structure is sound and you like the shape, painting is the best way to update the look.
Painting your kitchen island is a project you can complete in a weekend but enjoy for years. With the right preparation, materials, and a bit of care, you’ll get a finish that looks professionally done. Whether you go bold or classic, you’ll be surprised how much new paint can transform your kitchen and your home’s value.