Maximizing every inch of a small kitchen without a pantry can feel impossible, but it’s not. Many people live with limited kitchen space and no dedicated pantry, yet still cook efficiently and keep their kitchens neat. If you’re struggling with crowded counters and stuffed cabinets, you’re not alone. The good news: with a few smart strategies, you can create more space, reduce clutter, and make your kitchen work beautifully for you.
In this article, you’ll learn practical ways to organize a small kitchen when you don’t have a pantry. We’ll cover storage solutions, decluttering tips, and creative ideas to help you use every nook and cranny. You’ll also get real-life examples, expert insights, and answers to common questions.
Whether you’re a busy parent, a cooking enthusiast, or just want a tidier space, you’ll discover step-by-step guidance to transform your kitchen into a place that’s both efficient and enjoyable.
Understanding The Challenge
Small kitchens come in all shapes, but they share similar problems: not enough cabinet space, crowded counters, and limited storage for food, cookware, and appliances. Without a pantry, you might find dry goods crammed into random cabinets or bags of rice and cereal stuffed above the fridge. This can make cooking stressful, waste time, and even lead to food going bad because you forget what you have.
But why is a missing pantry such a big deal? Pantries are designed for bulk food storage, easy access, and organization. Without one, you need to find other ways to store everything from snacks to canned goods to baking supplies.
The good news is that a well-organized kitchen can often function better than a cluttered kitchen with a pantry.
Key Insight: Most people underestimate how much space they can save by simply rethinking where and how they store items. Organizing is not just about buying more bins—it’s about creating smart habits and routines.
Step 1: Declutter And Downsize
Before you add new storage, it’s essential to reduce what you own. Many small kitchens feel crowded not because they’re truly too small, but because they’re filled with unused or duplicate items.
- Remove duplicates: Do you really need three spatulas or four mixing bowls? Keep only what you use often.
- Toss expired food: Check dates on cans, spices, and dry goods. Discard anything old or stale.
- Donate or sell unused gadgets: That bread maker or popcorn machine you haven’t used in two years? Free up valuable space by letting it go.
- Group similar items: See what you have in each category—like baking supplies, snacks, or sauces. This helps you spot excess and plan better storage.
Non-obvious tip: Pay special attention to “unitaskers”—tools that only do one job, like avocado slicers or egg separators. In a small kitchen, multi-use items are gold.
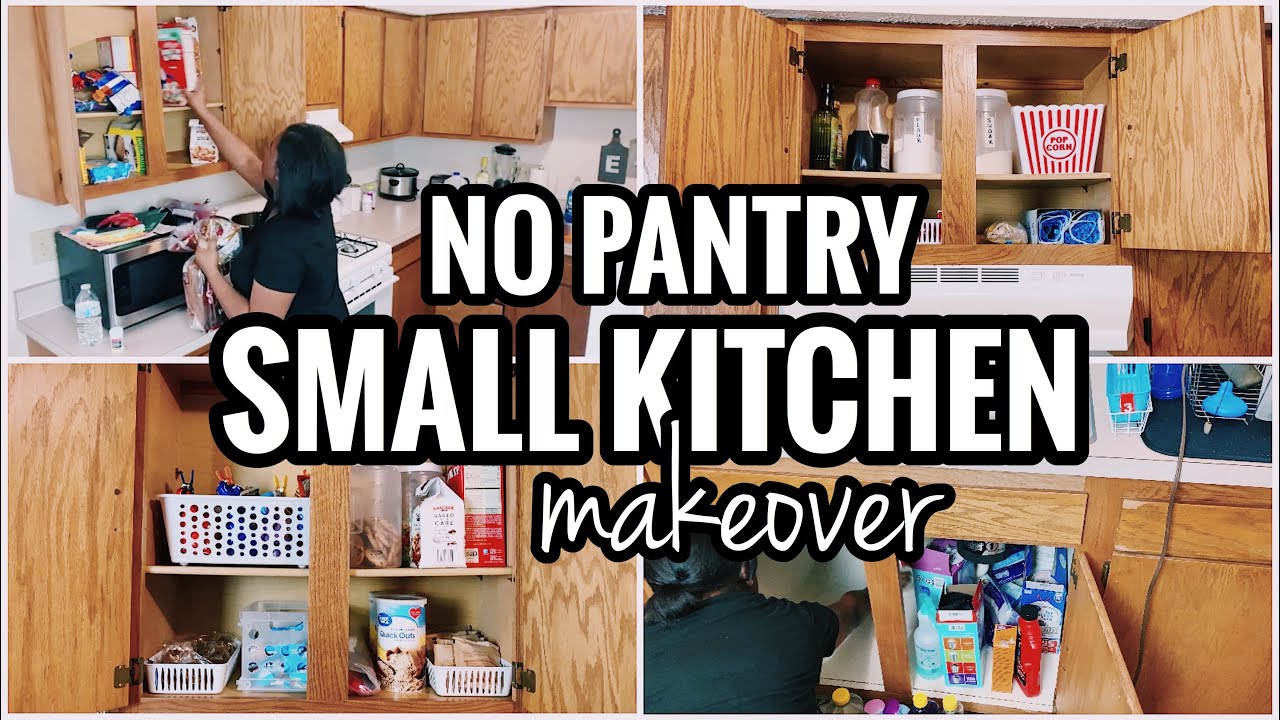
Credit: www.youtube.com
Step 2: Rethink Cabinet And Drawer Storage
Cabinets and drawers are your main storage real estate. Using them wisely can make a huge difference.
Make Cabinets Work Harder
- Adjust shelves: Most shelves can be moved up or down. Place them to fit the height of your items. For example, create a short shelf for canned goods and a taller one for cereal boxes.
- Add shelf risers: These double your vertical space, letting you stack items like plates or canned goods without wasting room above.
- Install pull-out organizers: Sliding trays or baskets make it easy to reach items at the back.
- Use the insides of doors: Hang racks for spices, foil, or cleaning supplies inside cabinet doors.
Optimize Drawer Use
- Drawer dividers: Keep utensils, tools, and gadgets separated and easy to find.
- File, don’t stack: Store baking pans, cutting boards, and trays vertically in deep drawers with dividers.
- Use shallow drawers for small items: Think tea bags, seasoning packets, or rubber bands.
Expert tip: Always store the heaviest items (like Dutch ovens or mixer bowls) in the lowest cabinets or drawers to prevent injuries and make lifting easier.
Step 3: Smart Use Of Countertop Space
Countertops should be for food prep—not for storing food or appliances. But in a kitchen without a pantry, it’s tempting to leave out coffee makers, blenders, or piles of snacks. Here’s how to keep surfaces clear:
- Limit countertop appliances: Only keep out what you use daily.
- Use corner shelves: A tiered corner shelf can hold spices, oils, or fruit without taking up much space.
- Hang a rail with hooks: Mount a rail under cabinets to hang utensils, mugs, or even small pots.
- Add a small shelf riser: Place one near the stove for salt, pepper, and oils—keeping them handy but off the main work space.
Non-obvious insight: “A place for everything” is more important than “more space.” If each item has a dedicated spot, you’re less likely to leave things out.

Credit: askannamoseley.com
Step 4: Make The Most Of Open Storage
No pantry? Open shelves, racks, and carts can fill the gap. Open storage works best when items are neat and containers match—otherwise, it can look messy.
Open Shelves
Install sturdy shelves on empty walls to store:
- Jars of dry goods (rice, beans, pasta, cereal)
- Cookbooks
- Spices and baking supplies
- Attractive baskets or bins for snacks
Tip: Use glass or clear containers so you can see what you have. Label everything for quick identification.
Freestanding Racks
A tall, slim metal rack can hold dozens of cans or jars in just a few square feet. Place it in a corner or next to the fridge.
Rolling Carts
A slim rolling cart (often called a “pantry cart”) fits between appliances or beside cabinets. Use it for:
- Spices
- Oils and vinegars
- Canned goods or snacks
- Baking ingredients
When you need more counter space, just roll the cart away.
Hanging Storage
- Pegboards: Hang pots, pans, and utensils in plain sight.
- Magnetic strips: Store knives, spice jars, or tools on the wall.
Practical advice: Open storage exposes items to dust and grease. Place shelves or racks away from the stove, and clean containers regularly.
Step 5: Creative Food Storage Solutions
With no pantry, you need to find new “homes” for dry goods, snacks, and bulk items.
Use Unused Spaces
- Above cabinets: Store less-used appliances or bulk items in baskets above the cabinets.
- Under the sink: Use stackable bins for cleaning supplies, but also for canned goods if space allows.
- Toe-kick drawers: These shallow drawers can be added under lower cabinets for flat items like baking sheets or wraps.
Store Food In Plain Sight
If cabinet space is tight, make dry goods part of your kitchen’s look:
- Use matching glass jars for rice, beans, or pasta on open shelves.
- Create a “snack station” in a basket on the counter for grab-and-go items.
Repurpose Furniture
A small bookcase, dresser, or even a bar cart can become extra kitchen storage. Paint or decorate to match your style and use baskets or bins for an organized look.
Use Airtight Containers
Bulk packaging wastes space. Transfer food into stackable, airtight containers to save room and keep food fresher.
Here’s a quick comparison of common kitchen storage containers:
| Container Type | Best For | Pros | Cons |
|---|---|---|---|
| Glass Jars | Dry goods, snacks | See contents, airtight, durable | Heavy, breakable |
| Plastic Bins | Bulk food, snacks | Lightweight, stackable | May stain, not always airtight |
| Metal Canisters | Flour, sugar, coffee | Sturdy, often decorative | Not transparent, can dent |
Key insight: Transferring food from original packaging to airtight containers can often double the space in a cabinet.
Step 6: Vertical And Overhead Storage
When floor and cabinet space are maxed out, look up.
Wall-mounted Racks
Mount racks or shelves to hold:
- Spices
- Mugs or cups
- Utensils
- Small baskets for snacks
Ceiling Storage
Hang a pot rack from the ceiling to free up cabinet space for food. Make sure your ceiling can support the weight.
Above-the-door Racks
Install racks over the kitchen door or even on the back of a closet door for storing seldom-used items or extra food.
Tall, Narrow Shelving Units
A tall, slim shelf can fit in the gap between the fridge and the wall, holding dozens of cans or bottles in a tiny footprint.
Expert tip: Always use strong anchors when mounting shelves or racks, especially in plaster or drywall.
Step 7: Use Appliances And Tools Wisely
Many kitchens are overrun by rarely-used appliances. In a small kitchen, you need only the essentials.
Prioritize Multi-use Appliances
- Instant Pot or multi-cooker: Replaces rice cooker, slow cooker, and more.
- Hand mixer vs. stand mixer: Hand mixers are smaller and can do most tasks.
- Blender/food processor combo: One appliance does the job of two.
Store Appliances Out Of Sight
Keep only daily-use appliances on the counter. Store the rest on high shelves, in lower cabinets, or in another room if needed.
Rethink Your Tools
Choose collapsible or stackable tools, like nesting mixing bowls or measuring cups. Hang or store flat items vertically.
Here’s a side-by-side look at space-saving appliances versus traditional ones:
| Appliance | Space Needed | Number of Uses | Ideal For |
|---|---|---|---|
| Multi-Cooker (e.g., Instant Pot) | Medium | 6+ | Small kitchens, meal preppers |
| Toaster Oven | Medium | 3-4 | Countertop baking, reheating |
| Stand Mixer | Large | 2-3 | Frequent bakers |
| Hand Mixer | Small | 2 | General baking, small spaces |
Non-obvious insight: If you only bake a few times a year, borrow specialty appliances or store them outside the kitchen to save space.
Step 8: Organize By Zones
Think of your kitchen in zones—group items by how you use them. This makes cooking faster and keeps clutter away.
Common Kitchen Zones
- Prep zone: Cutting boards, knives, mixing bowls near your main workspace.
- Cooking zone: Pots, pans, oils, and utensils near the stove.
- Baking zone: Mixing bowls, flour, sugar, and pans together.
- Coffee/tea zone: Mugs, coffee, tea bags, and sugar near the kettle or coffee maker.
- Cleaning zone: Sponges, soap, towels under or near the sink.
Practical advice: Store items as close as possible to where you use them, even if it means breaking “sets.” For example, keep one spatula near the stove, not all utensils in a far drawer.
Step 9: Label Everything
Labels make it easy to find what you need and keep things organized.
- Use a label maker or masking tape: Mark jars, bins, and baskets with contents and (if needed) expiration dates.
- Label shelves and drawers: Especially if you share your kitchen, labels help everyone put things back in the right place.
- Include cooking instructions: For bulk foods like rice or quinoa, tape simple instructions on the jar.
Expert tip: Clear labels save time and reduce food waste by making it obvious what you have.
Step 10: Keep It Up—maintain Your System
Organizing is not a one-time job. Set aside 10 minutes each week to tidy up, toss old food, and reset your system. Over time, you’ll develop habits that keep your kitchen neat and functional.
- Do a quick clean-out weekly: Toss expired food and reorganize if needed.
- Revisit your system every few months: Life changes, and so do your storage needs.
- Involve the whole family: Make sure everyone knows where things go.
Non-obvious insight: Maintenance is easier than a big clean-up. Small, regular efforts prevent clutter from piling up.
Real-life Example: Small Apartment Kitchen Makeover
Sarah lives in a 600-square-foot apartment with a tiny galley kitchen and no pantry. She loves to cook but used to feel stressed by the crowded space. Here’s what she did:
- Decluttered: Donated unused gadgets and old spices.
- Cabinets: Added shelf risers and clear bins.
- Counter: Kept only her coffee maker out; everything else went into cabinets or on a wall rack.
- Open shelves: Installed two shelves above her stove for jars of rice, pasta, and snacks.
- Rolling cart: Fit a slim cart between her fridge and wall for canned goods and baking supplies.
- Zones: Created a coffee station near the sink and a prep zone near the stove.
Now Sarah cooks more often, wastes less food, and spends less time searching for what she needs. Her kitchen feels bigger and more enjoyable.
Common Mistakes To Avoid
- Buying storage before decluttering: You’ll waste money and still have too much stuff.
- Ignoring vertical space: Walls and doors are valuable storage spots.
- Leaving food in original packaging: Bulky boxes and bags waste space.
- Overfilling open shelves: Open storage can look messy if too crowded.
- Using every inch: Leave some “white space” for flexibility and a less cluttered look.
When To Consider Outside Storage
If you truly lack space, consider storing seldom-used items elsewhere:
- Basement or attic: For holiday dishes or bulk supplies.
- Closet: Use a utility closet for backup food or appliances.
- Under-bed bins: Ideal for rarely-used gadgets or seasonal items.
Always label and check expiration dates if storing food outside the kitchen.
Balancing Function And Style
An organized kitchen doesn’t have to look boring. Use matching baskets, colorful labels, or decorative jars to add personality. A tidy space is more inviting—and you’ll be proud to show it off.
Quick Summary Table: Top Strategies At A Glance
Here’s a snapshot of the most effective ways to organize a small kitchen without a pantry:
| Strategy | What It Solves | Extra Tip |
|---|---|---|
| Declutter First | Frees up space | Start with duplicates |
| Use Vertical Storage | Adds space without more cabinets | Install strong anchors |
| Open Shelving | Stores dry goods, looks stylish | Label and dust regularly |
| Rolling Cart | Flexible storage | Park in unused corners |
| Zone Organization | Saves time, reduces mess | Store items where you use them |
:strip_icc()/at_lucys_house_123573907_185982149702143_5515199224127652633_n-e9fc7eb3c1094c039733449d7b609530.jpg)
Credit: www.mydomaine.com
Frequently Asked Questions
How Can I Store Bulk Food Without A Pantry?
Store bulk foods in clear, stackable containers that fit in cabinets or on open shelves. Use high or low cabinets for items you don’t use every day. For large quantities, consider storing overflow in a closet or under the bed in airtight bins.
What Are The Best Containers For Small Kitchen Storage?
Glass jars, stackable plastic bins, and metal canisters all work well. Choose containers that fit your shelves and are easy to label. Clear containers help you see what you have and avoid buying doubles.
How Do I Keep My Kitchen Organized Long-term?
Set aside 10 minutes each week to tidy up, toss expired food, and put things back in place. Involve everyone who uses the kitchen so the system stays consistent. Adjust your setup as your needs change.
What If I Have No Wall Space For Shelves?
Focus on inside-cabinet organizers, drawer dividers, and slim rolling carts that fit between appliances. Use the tops of cabinets and under-sink space for extra storage. Consider using over-the-door racks on nearby doors.
Is Open Shelving A Good Idea In A Small Kitchen?
Open shelving is great if you keep items neat and dust regularly. It works best for attractive containers or items you use often. Avoid overcrowding shelves, as this makes the kitchen look messy.
If you want more ideas on maximizing small spaces, check out Apartment Therapy’s storage tips for creative solutions.
A small kitchen without a pantry isn’t a lost cause. With smart planning, regular upkeep, and a bit of creativity, you can have a space that works for you—no matter its size. Start today, and enjoy a kitchen that’s organized, efficient, and a joy to use.