Setting the right temperature for your coffee or tea is no longer just a wish—it’s reality with the Ember Mug. This smart mug lets you control exactly how hot your drink stays, so every sip is perfect. Whether you’re a new Ember user or you want to master all the features, understanding how to set the temperature is key. Many people buy the mug, but only use basic functions. If you follow the right steps, you get the most from your Ember and avoid common frustrations like quick battery drain or lukewarm drinks.
In this detailed guide, you’ll learn everything about setting the temperature on your Ember Mug, including app setup, manual controls, advanced features, and solving common problems. We’ll also compare Ember with other smart mugs to see what makes it unique.
By the end, you’ll have full confidence in using your Ember Mug daily.
Understanding The Ember Mug’s Temperature System
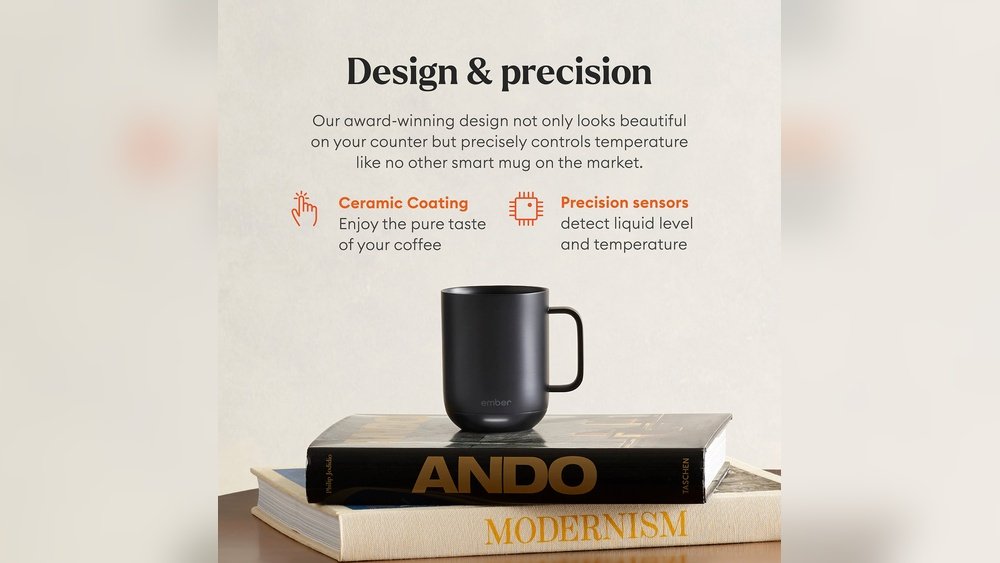
The Ember Mug is not just a heated cup. It uses a built-in heating plate and sensors to keep your beverage at your chosen temperature. The temperature range for most Ember mugs is 120°F to 145°F (49°C to 63°C), which covers almost every hot drink preference.
Ember’s system is designed to sense the actual liquid temperature, not just the mug’s surface. When you pour a drink, the Ember Mug detects the heat and starts to adjust. You can then set the temperature through the Ember app or, for some models, using the mug itself.
The mug uses a battery to heat the drink for up to 1. 5 hours (10 oz model) or up to 80 minutes (14 oz model) on a single charge, but will keep your drink warm all day if you keep it on the charging coaster.
Most regular mugs lose heat quickly, especially in a cool room. Ember’s technology is different: it constantly checks the liquid temperature with sensors and adjusts the heating element to keep things stable. This is why your drink doesn’t get too hot or too cold, and the flavor stays consistent from the first to the last sip.
Key insight: Ember’s sensors are in the base, so if the mug is empty or nearly empty, it may not heat. Always add enough liquid to cover the sensors for best results. If you notice your drink cooling off too soon, double-check the fill level—it’s a simple fix many users miss.
Setting Up Your Ember Mug For The First Time
Before you can set the temperature, you need to set up your mug. Skipping these steps can lead to pairing issues or inaccurate temperature control. Here’s how to get started:
- Charge the Mug Fully
- Place your Ember Mug on its charging coaster.
- Let it charge for at least two hours before first use.
- The LED will pulse red when charging, and turn green when fully charged.
- For best battery health, it’s smart to let it charge completely before the first use, even if you’re eager to try it.
- Download the Ember App
- The Ember app is available for both iOS and Android.
- Search for “Ember” in the App Store or Google Play Store.
- Install and open the app.
- Make sure your phone has enough storage and Bluetooth is enabled.
- Create an Account
- You can use an email or sign in through Google/Apple.
- Creating an account lets you save preferences and get firmware updates.
- With an account, you can also log into multiple devices, so your settings follow you.
- Pair Your Mug
- Make sure Bluetooth is enabled on your phone.
- Open the Ember app and follow the prompts to pair.
- The mug should be close to your phone for pairing.
- If your mug is not found, try restarting Bluetooth or moving to a different spot to avoid interference.
- Firmware Update
- If prompted, update your mug’s firmware through the app.
- This ensures the latest features and fixes.
- Updates may take a few minutes. Don’t turn off your phone or mug during this process.
Practical tip: If pairing fails, reset the mug by holding the power button until the LED flashes blue, then try again. Also, check if your phone is connected to other Bluetooth devices, as this can sometimes cause pairing issues. Restarting your phone can help if things get stuck.

Credit: ca.ember.com
How To Set Temperature On Ember Mug Using The App
The Ember app gives you the most control over your mug. Setting the temperature is simple, but there are a few extra features most people miss.
Step-by-step Guide
- Open the Ember App
- Make sure your phone’s Bluetooth is on.
- The app will detect your mug when it’s powered on.
- Select Your Mug
- If you own multiple Ember products, tap the correct mug.
- The app may show several devices. Naming your mug helps avoid confusion.
- Set the Temperature
- Use the slider to pick your desired temperature (in Fahrenheit or Celsius).
- You’ll see the current temperature and target temperature on screen.
- Tap “Set” or wait a few seconds for it to activate.
- The mug will begin heating or cooling to the new setting.
- Wait for Notification
- The app will notify you when your drink reaches the chosen temperature.
- The mug’s LED will also glow white.
- Some users like to enable sound notifications so they don’t miss the alert.
Advanced App Features
- Temperature Presets: Save favorite temperatures for different drinks (e.g., coffee, tea, hot chocolate). Create as many as you like, and edit them anytime.
- Drink Tracking: Log drinks and see history (handy for keeping healthy habits). This is especially useful if you want to monitor your caffeine intake or develop a routine.
- Battery Status: Check how much charge is left. The app shows both percentage and estimated time remaining, so you’re never surprised by a dead battery.
- Custom Names: Name your mug for easy identification. For example, call it “Office Ember” or “Home Mug.”
Common mistake: Forgetting to update the app can cause connection or display issues. Always keep your app up to date. Also, check app permissions on your phone—if location or Bluetooth access is denied, some features may not work.
Setting Temperature Without The App
Don’t want to use your phone? The Ember Mug can be controlled manually, though with fewer features. The process depends on the model.
Ember Mug² (second Generation)
- Press and hold the power button. After a few seconds, the LED will show a color.
- Tap the button to scroll through preset temperatures. Each color represents a specific temperature:
- Blue: 130°F (54°C)
- Green: 135°F (57°C)
- Yellow: 140°F (60°C)
- Red: 145°F (63°C)
- Release when your desired color shows.
- The mug will heat to that temperature.
This method is quick if you want a common setting and don’t have your phone. It’s also useful in places where phone use is not allowed, such as some offices or libraries.
Ember Travel Mug
- Twist the touch-sensitive ring at the bottom of the mug to adjust temperature in 1-degree increments.
- The display shows the current and target temperature.
- This model is great for people who want more control without needing a phone.
If You Lose The App
Some firmware allows you to set the temperature by pressing the power button a certain number of times. Check your manual, as this feature is not on all models. If you’re unsure, visit Ember’s website for model-specific instructions.
Key insight: Manual control is less precise, but it works when your phone isn’t nearby or if the app malfunctions. Just remember, you lose out on custom presets and drink logging.
Temperature Presets And Customization
One of Ember’s best features is the ability to save presets for different drinks. Many users never set these up, but doing so saves time and ensures consistent results.
How To Create Presets
- Open the Ember app.
- Go to “Presets” or “Drink Profiles.”
- Add a new preset (e.g., “Green Tea” at 135°F).
- Save and name it.
- Some users also add notes for each preset, like “Use for mornings” or “Best with oat milk.”
You can set up presets for:
- Coffee (recommended: 135°F)
- Black Tea (usually: 140°F)
- Green Tea (usually: 130°F)
- Hot Chocolate (usually: 140°F)
- Herbal Tea (try 132°F for delicate flavors)
Using Presets
Simply tap the preset in the app, and the mug will adjust automatically. This is faster than setting the temperature each time. If you have a routine, such as coffee in the morning and tea at night, presets make switching effortless.
Practical tip: Experiment with your favorite drinks and adjust presets until you find your perfect flavor. Don’t be afraid to try a degree or two higher or lower—small changes can reveal new tastes and aromas.
Battery And Charging Best Practices
Many Ember users find their mugs run out of battery too quickly, especially when set at higher temperatures. Understanding battery use can help you get the most from your mug.
Battery Life By Model
| Model | Capacity | Battery Life |
|---|---|---|
| Ember Mug² (10 oz) | 10 oz (295 ml) | ~1.5 hours |
| Ember Mug² (14 oz) | 14 oz (414 ml) | ~80 minutes |
| Ember Travel Mug | 12 oz (355 ml) | ~3 hours |
Tips For Maximum Battery
- Pre-heat the mug with hot water before adding your drink. This uses less battery.
- Keep the mug on the charging coaster when at your desk. The battery won’t drain.
- Use lower temperatures if you want longer battery life.
- Avoid frequent power on/off cycles—the mug uses more power when heating from cold.
- Keep the charging contacts clean to ensure efficient charging.
If you plan to use your mug away from the coaster for a long time (like during meetings), consider setting the temperature a bit lower to extend battery life. You can always increase it later when you return to your desk.
Non-obvious insight: The mug’s battery drains faster in cold rooms or outdoors, as it works harder to maintain temperature. If you’re outside on a cold morning, expect less battery time.

Credit: ca.ember.com
Comparing Ember To Other Smart Mugs
Is the Ember Mug the best choice for you, or are there alternatives that fit your needs? Let’s look at how Ember compares to other popular smart mugs.
| Feature | Ember Mug² | Cauldryn | Smarter Coffee Mug |
|---|---|---|---|
| Temperature Range | 120–145°F | 78–212°F | 120–150°F |
| App Control | Yes | Yes | No |
| Manual Control | Yes (limited) | Yes | Yes |
| Battery Life | 1–1.5 hours | Up to 10 hours | 2 hours |
| Design | Sleek, minimalist | Bulky, rugged | Basic |
Key takeaway: Ember focuses on temperature maintenance and style. If you want to boil water or need longer battery life, there are other options, but Ember offers the best experience for daily coffee or tea. For most people, the simplicity and look of the Ember Mug make it a better fit for home and office.
Solving Common Problems With Temperature Setting
Even advanced mugs can have issues. Here’s how to solve the most common temperature-related problems with Ember.
Mug Not Heating
- Check that the mug is charged.
- Make sure there’s enough liquid in the mug (sensors need to be covered).
- Restart the mug by turning it off and on.
- Ensure the app is connected and the target temperature is set.
- Try a different drink to rule out sensor issues with certain liquids (like thick hot chocolate).
Wrong Temperature
- Calibrate the mug using the app’s calibration tool (if available).
- Use a kitchen thermometer to double-check.
- Update firmware; old software can cause errors.
- If the mug is consistently off by a few degrees, contact support—sometimes recalibration is needed.
App Connection Issues
- Reboot your phone and the mug.
- Forget the mug in Bluetooth settings and re-pair.
- Move away from strong Wi-Fi signals that may interfere.
- Try pairing on a different device to see if the problem is with your phone.
Fast Battery Drain
- Lower your set temperature.
- Preheat the mug.
- Use the coaster when possible.
- Check for firmware updates, as battery improvements are sometimes included.
Pro insight: If your mug still misbehaves, contact Ember customer support. They can run diagnostics and sometimes replace faulty units quickly. Keeping your mug’s receipt or proof of purchase can speed up the process.
Setting The Best Temperature For Different Drinks
Perfect taste depends on more than just heat. Here are ideal temperatures for popular drinks:
| Drink | Best Temperature (°F) | Notes |
|---|---|---|
| Black Coffee | 135 | Enhances aroma, not too hot |
| Latte/Cappuccino | 130 | Protects milk flavor |
| Black Tea | 140 | Releases tannins, ideal for robust teas |
| Green Tea | 130 | Prevents bitterness |
| Hot Chocolate | 140 | Keeps cocoa smooth |
Practical tip: Start with these temperatures and adjust by 2–3 degrees to match your taste. Even a small change can affect flavor. For example, milk-based drinks often taste sweeter at lower temperatures, and strong teas can become bitter if too hot.
Using Ember Mug Features To Enhance Your Routine
The Ember Mug can do more than just heat your drink. Here’s how to unlock its full potential:
- Set up notifications to remind you when your drink is ready.
- Integrate with smart assistants (like Alexa or Google Assistant, where available) to set temperatures by voice. This is helpful if your hands are busy.
- Track caffeine intake using the app’s logging feature. You can review your weekly or monthly habits, which is useful if you’re trying to cut back or be more mindful.
- Customize LED color for quick visual feedback (e.g., blue for tea, white for coffee). This is handy if more than one person uses Ember mugs at home.
Bonus tip: The mug is splash-resistant, but not waterproof. Always hand wash, and don’t put it in the dishwasher. If you spill something on the charging contacts, wipe them dry before charging.
Cleaning And Maintenance For Accurate Temperature
Dirty sensors or residue can affect temperature accuracy. Here’s how to keep your Ember Mug in top condition:
- Hand wash only—never submerge the mug.
- Clean the metal contacts on the bottom with a damp cloth.
- Descale if you use hard water (once a month). Mineral buildup can interfere with sensors.
- Avoid using abrasive cleaners that can scratch the sensors.
- Dry thoroughly before placing back on the charging coaster.
Non-obvious insight: If the mug acts erratically, a deep clean often fixes the problem. Build-up from drinks like cocoa or chai can block sensors, leading to wrong readings.
Advanced Tips For Power Users
If you want to push your Ember Mug to the next level, try these strategies:
- Use temperature step-down: Start your drink hotter, then lower the temperature after 10–15 minutes. This preserves flavor and battery. Many baristas use this method for delicate teas.
- Create profiles for family members if you share the mug (each person can have their own app account and presets).
- Traveling with Ember: Get a USB-compatible charger for charging on the go. Some portable power banks also work, just check voltage compatibility.
- Firmware beta updates: Join Ember’s beta program for early access to new features. This is a good way to test improvements before they’re released to everyone.
Important: Advanced features may require the latest app and firmware. Always back up your presets before updating, just in case.

Credit: ember.com
Troubleshooting Checklist
When something isn’t right, use this quick troubleshooting list:
- Is the mug charged?
- Is the app up to date?
- Are you using the latest firmware?
- Is the mug’s sensor covered with enough liquid?
- Are you within Bluetooth range?
- Is the mug clean and free of residue?
Working through these steps solves 90% of user problems. If you reach the end and things still aren’t right, move to contacting support.
When To Contact Ember Support
Sometimes, problems require expert help. Contact Ember support if:
- The mug won’t turn on after charging
- Temperature cannot be set or stays cold
- LED lights behave strangely
- Firmware won’t update
- The app crashes every time you try to connect
You can reach support through the app or at the official Ember website. Their response is usually fast and helpful. Be ready with your mug’s serial number and purchase details—they help speed up troubleshooting.
For more details about Ember’s technology and support, visit the Ember official support page.
Frequently Asked Questions
What Is The Default Temperature Of The Ember Mug?
The default temperature is usually set to 135°F (57°C). You can change this anytime using the app or manual controls.
Can I Use The Ember Mug Without The App?
Yes, you can set basic temperatures using the power button (Mug²) or the touch ring (Travel Mug). The app is needed for full customization and presets.
Why Does My Ember Mug Stop Heating Before The Drink Is Finished?
If the liquid level is too low, the mug’s sensor may think the mug is empty and stop heating. Add more liquid to cover the sensor.
Is The Ember Mug Waterproof?
No, the mug is splash-resistant but not waterproof. Hand wash only and avoid submerging it in water.
How Do I Reset My Ember Mug?
Hold the power button for about 15 seconds until the LED flashes blue. This will reset the mug and help solve many connection or heating issues.
Using the Ember Mug’s temperature settings is simple once you know the steps, but real mastery comes from understanding its features, caring for your mug, and experimenting with your own drink preferences. With these strategies, you’ll always enjoy your coffee or tea at the perfect temperature—every single time.