
Keeping your ice machine clean is more important than many people realize. You expect your ice to be pure, clear, and safe. But what if your ice cubes hold something invisible—something that could harm your business or family? Slime in the ice machine is a hidden threat that can ruin drinks, spoil reputations, and even cause health problems. Slime is not just an ugly mess; it is a sign that bacteria, mold, or algae are thriving where your ice is made. If you want to keep your drinks fresh and your customers safe, you must prevent slime before it starts.
Most people notice a problem only when the ice tastes or smells bad, but by then, slime has already taken hold. Removing it is harder than stopping it. In this article, you’ll learn exactly how slime forms, why it’s dangerous, and the best practices to keep your ice machine spotless.
Whether you run a restaurant, hotel, hospital, or just want clean ice at home, this complete guide will help you prevent slime in your ice machine with simple, clear steps.
Why Does Slime Form In Ice Machines?
Many believe ice machines are self-cleaning because they stay cold. But this is a myth. Slime forms because ice machines create the perfect environment for microbes. Here’s why:
- Moisture: Water drips and melts, keeping surfaces damp.
- Warmth: The inside of the machine is cold, but the outer parts can be warmer.
- Nutrients: Dust, airborne particles, and even clean hands can introduce nutrients.
Microbes such as bacteria, mold, and algae love these conditions. They stick to surfaces, forming a thin, slippery layer called biofilm—the slime you see and feel. Once a biofilm forms, it protects the microbes, making them hard to remove. Left unchecked, slime can grow quickly.
The Dangers Of Slime In Ice Machines
Slime is not just a cleaning problem. It’s a health hazard. Here’s what can happen if you ignore it:
- Contaminated Ice: Slime may contain harmful bacteria like E. coli, Salmonella, or Listeria. These can cause food poisoning.
- Bad Taste and Odor: Even if the slime is not dangerous, it can make ice taste or smell bad. This ruins drinks and food.
- Failed Health Inspections: In restaurants or bars, inspectors look for slime. If they find it, you could get fined or even shut down.
- Machine Damage: Slime can block water lines and filters, making your ice machine less efficient or causing breakdowns.
- Customer Complaints: Dirty ice leads to complaints and bad reviews.
Don’t wait until you see visible slime. Prevention is always better than cure.
How To Prevent Slime In The Ice Machine
Preventing slime takes regular effort, but the steps are simple. Here’s a full guide to keeping your ice machine clean and safe.
1. Use A Regular Cleaning Schedule
The single most important step is routine cleaning. Most experts recommend cleaning your ice machine at least every 3 to 6 months. High-use machines or those in humid environments may need cleaning every month.
- Set reminders on your calendar.
- Use a cleaning log to track when each cleaning happens.
- Do not skip scheduled cleanings even if the machine looks clean.
2. Choose The Right Cleaning Products
Never use just soap and water. Use approved ice machine cleaners and sanitizers. These are designed to break down biofilm and kill microbes without damaging your machine.
- Check your machine’s manual for recommended products.
- Use nickel-safe cleaner for machines with nickel-plated parts.
- Rinse thoroughly to remove any chemical residue.
3. Clean All Parts—not Just What You See
Slime often grows in hidden places. Always clean:
- Ice bin
- Water reservoir
- Water lines and hoses
- Evaporator plate
- Ice chute and dispenser
- Door gaskets and seals
Disassemble removable parts for deep cleaning. Don’t forget to wipe down the outside surfaces too.
4. Change Water Filters Regularly
Water filters trap minerals and contaminants. Over time, they get dirty and provide a home for microbes.
- Replace filters every 6 months or as the manufacturer suggests.
- Write the next replacement date on the filter or a nearby sticker.
A common beginner mistake is ignoring the filter just because ice looks clear. Even “clean” water can carry nutrients for slime if the filter is old.
5. Control The Environment Around The Machine
Airborne particles and moisture around the ice machine can promote slime.
- Place the ice machine in a dry, ventilated area.
- Avoid putting it near dishwashers, sinks, or areas with grease or steam.
- Clean floors and walls around the machine to prevent dust and mold.
6. Monitor Water Quality
Hard water, high iron, or dirty water sources make slime worse.
- Test your water every year for hardness, chlorine, and microbial contamination.
- Use a water softener if you have hard water.
- Consider a UV water treatment to kill microbes before they reach your machine.
Many beginners think municipal water is always safe. In reality, water quality can change with seasons or pipe repairs.
7. Empty And Sanitize The Ice Bin Regularly
Even if you clean the machine, old ice can harbor microbes.
- Remove all ice from the bin at least once a month.
- Wash the bin with cleaner, rinse, and let it air dry.
- Throw away any ice that was in contact with slime or cleaning chemicals.
Don’t just scoop out ice from the top—clean the entire bin.
8. Train Staff Or Family On Proper Ice Handling
Human contact is a major way for microbes to enter the machine.
- Always use a clean ice scoop—never hands or glasses.
- Store the scoop outside the bin, in a clean holder.
- Teach everyone to close the lid after use.
A surprising fact: Touching ice with bare hands not only introduces bacteria but also speeds up slime growth.
9. Inspect For Leaks And Standing Water
Leaks and puddles are breeding grounds for mold and algae.
- Check for dripping hoses, loose fittings, or condensation.
- Fix any leaks immediately.
- Make sure the ice bin drains properly.
Even small leaks can lead to big problems if ignored.
10. Schedule Professional Maintenance
At least once a year, have a trained technician service your ice machine.
- They can clean parts you can’t reach.
- Technicians check for mechanical problems, leaks, or wear that promote slime.
- Ask for a full maintenance report.
Professional cleaning may seem expensive, but it’s much cheaper than emergency repairs or lost business from a health scare.
Comparing Cleaning Methods For Ice Machines
Different cleaning methods offer different levels of effectiveness. Here is a simple comparison:
| Cleaning Method | Effectiveness Against Slime | Time Required | Best For |
|---|---|---|---|
| Manual Cleaning | High (if thorough) | 1-2 hours | All machines |
| Self-Cleaning Cycle | Moderate | 30-60 minutes | Newer models |
| Professional Service | Very High | 2-3 hours | Commercial use |
Manual cleaning is best for most users, but don’t skip professional service for heavily used machines.
Credit: www.memphisice.com
Signs Your Ice Machine Needs Immediate Cleaning
Sometimes, slime can start growing faster than expected. Watch for these warning signs:
- Cloudy, soft, or misshaped ice cubes
- Ice smells or tastes musty
- Visible pink, brown, or green slime on surfaces
- Ice melts faster than usual
- Machine makes strange noises or works slower
If you see any of these, clean your machine right away—even if you just cleaned it recently.
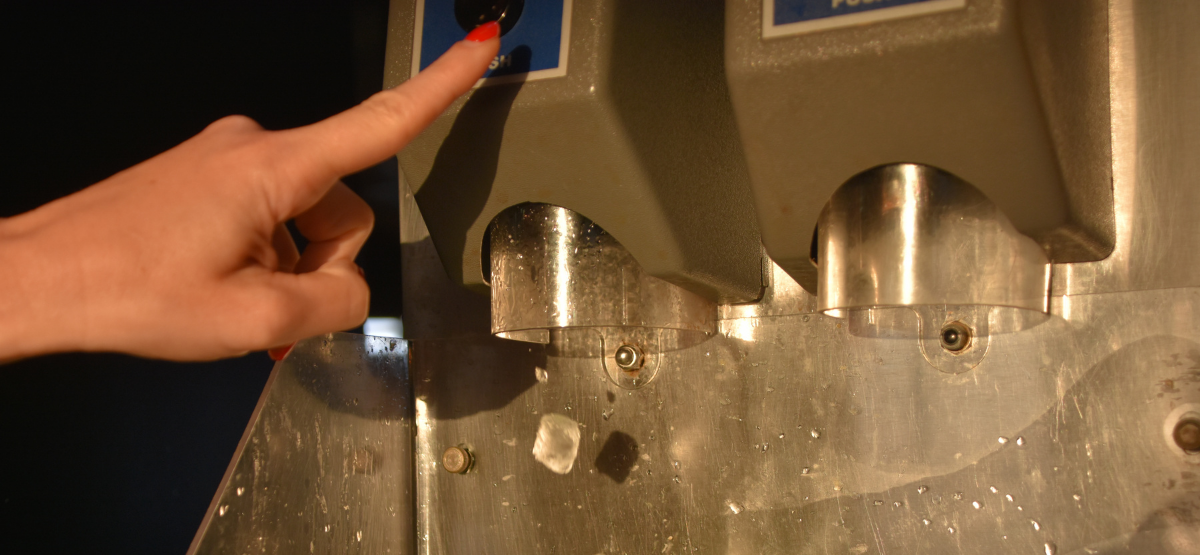
How To Clean An Ice Machine: Step-by-step Guide
Preventing slime is about regular cleaning, but what does a full cleaning look like? Here’s a step-by-step plan:
Step 1: Turn Off And Empty The Machine
- Unplug the ice machine.
- Remove all ice and discard it.
Step 2: Disassemble Removable Parts
- Take out the ice bin, scoop, and any trays or filters.
- Check your manual for safe disassembly.
Step 3: Clean Parts With Ice Machine Cleaner
- Mix cleaner with water as directed.
- Scrub all surfaces with a non-abrasive brush or cloth.
- Pay special attention to corners and hidden areas.
Step 4: Rinse Thoroughly
- Use clean water to rinse all cleaned parts.
- Remove any traces of cleaner or slime.
Step 5: Sanitize
- Spray or wipe all surfaces with a food-safe sanitizer.
- Let the sanitizer sit for the recommended time.
Step 6: Reassemble And Run A Cycle
- Put the machine back together.
- Run a cycle and throw away the first batch of ice to remove any remaining cleaner.
Step 7: Wipe Exterior And Surrounding Area
- Clean the outside of the machine.
- Sweep and mop the floor around it.
Most people rush the rinsing and sanitizing steps. But leftover cleaner or sanitizer can make ice taste bad or even be unsafe.
Key Places Where Slime Hides
It’s easy to clean only what you see. But slime often grows in places you don’t look. Here are some hidden spots to check every time:
- Water lines and hoses: Replace if they look slimy or discolored.
- Evaporator plate: Where water freezes—wipe it carefully.
- Ice chute and dispenser: Slime can block the path.
- Door gaskets: The rubber seal can trap moisture and microbes.
If you miss these spots, slime will return quickly.
Types Of Slime And What They Mean
Not all slime is the same. The color and texture can give clues about the problem:
| Slime Color | Likely Cause | Danger Level |
|---|---|---|
| Pink or Red | Bacteria (Serratia) | Moderate |
| Green | Algae | Low (but unsightly) |
| Brown or Black | Mold, Fungus | High |
| Clear/Sticky | Biofilm (mixed microbes) | High |
Any color of slime means you need to clean your ice machine. But black or clear sticky slime is the most dangerous, as it usually means a strong biofilm has formed.
How Temperature And Humidity Affect Slime Growth
Many people think ice machines are safe from bacteria because they are cold. But temperature and humidity play a big role in slime growth.
- High humidity: Promotes mold and algae, even in cold machines.
- Warm rooms: Make outside surfaces sweat, adding moisture.
- Frequent door opening: Lets in warm, moist air.
A common oversight is forgetting to check the room’s humidity. If your ice machine is in a hot kitchen, use a dehumidifier or increase ventilation.
The Role Of Air Quality In Slime Formation
Dust, grease, and spores in the air can settle in your ice machine and feed slime. This is especially true in restaurants and bakeries.
- Clean air vents and fans regularly.
- Keep fryer and grill smoke away from the ice machine.
- Change HVAC filters often.
Most people focus only on water, but airborne contamination is just as important.
Comparing Home Vs. Commercial Ice Machines
Both home and commercial machines can get slime, but the risks and needs are a bit different.
| Feature | Home Machine | Commercial Machine |
|---|---|---|
| Cleaning Frequency | Every 3–6 months | Every 1–3 months |
| Risk Level | Lower (fewer users) | Higher (many users, more air exposure) |
| Water Filter Use | Optional | Essential |
| Professional Service | Rarely needed | Recommended yearly |
The main difference is that commercial machines need more frequent and professional cleaning due to higher usage.
Common Mistakes That Encourage Slime
Even with the best intentions, people make mistakes that help slime grow. Here are the most common errors:
- Skipping scheduled cleanings
- Using the wrong cleaning products (like household bleach, which can damage machine parts)
- Ignoring hard-to-reach places
- Not changing water filters
- Letting ice sit for weeks
- Storing food or drinks in the ice bin
- Letting staff or family use hands instead of a scoop
- Not fixing leaks or standing water
- Assuming clear ice means clean machine
- Relying only on self-cleaning features
To avoid these, follow each cleaning step carefully and keep a log.
Best Practices For Long-term Slime Prevention
Once your ice machine is clean, keep it that way with these habits:
- Wipe the exterior weekly to remove dust and grease.
- Check the inside every month for early signs of slime.
- Review the cleaning log to stay on schedule.
- Train new staff or family members so everyone knows what to do.
- Keep the area around the ice machine clean and dry.
A little attention each week prevents big problems later.
What To Do If Slime Keeps Coming Back
If you follow all the right steps but still see slime, something deeper may be wrong.
- Double-check your water source for contamination.
- Inspect for hidden leaks behind or under the machine.
- Ask a professional to check for mold in nearby walls or floors.
- Consider relocating the ice machine to a drier, cleaner space.
- Upgrade to a model with improved sanitation features.
Persistent slime often means a problem outside the machine—solving it may require expert help.

Credit: www.pentair.com
The Cost Of Ignoring Slime In Your Ice Machine
It’s tempting to put off cleaning, especially when busy. But the costs of ignoring slime are high:
- Health risks: Ice can make people sick.
- Lost business: Customers notice bad ice and leave bad reviews.
- Fines or closure: Health inspectors take slime seriously.
- Expensive repairs: Slime can damage pumps, hoses, or motors.
Prevention costs far less than fixing a slime outbreak.
Useful Tools And Gadgets For Ice Machine Maintenance
A few simple tools make cleaning easier and more effective:
- Long-handled brushes for hard-to-reach places
- Food-safe sprays for sanitizing
- Water test kits for regular checks
- Replacement gaskets and hoses for quick fixes
- Label maker or cleaning log to track schedules
Investing in the right tools saves time and ensures your machine stays clean.

Credit: www.drain-tech.com
When To Replace Your Ice Machine
Sometimes, old machines become impossible to keep clean. Consider replacing your ice machine if:
- Slime returns right after cleaning, even with good water and air.
- The machine is over 10 years old and parts are worn.
- Repairs cost more than half the price of a new machine.
- You need more ice or want better sanitation features.
Newer machines often have anti-microbial components and self-cleaning cycles, making maintenance easier.
External Resources For More Information
If you want to learn more about ice machine maintenance and health codes, visit the official CDC Food Safety page. It offers detailed guidance on keeping ice and ice machines safe.
Frequently Asked Questions
What Causes Pink Or Red Slime In My Ice Machine?
Pink or red slime is usually caused by a type of bacteria called Serratia. It thrives in moist environments and feeds on nutrients in the water or air. This type of slime is common in areas with high humidity or where the machine is not cleaned regularly. Clean with a proper ice machine cleaner and sanitize all surfaces to remove it.
Can Slime In The Ice Machine Make People Sick?
Yes, slime can contain harmful bacteria and mold. If these get into your ice, they can cause stomach problems, food poisoning, or infections, especially in people with weak immune systems. Always remove slime right away and follow a strict cleaning schedule to keep ice safe.
Is It Safe To Use Bleach To Clean An Ice Machine?
You should not use regular household bleach unless the machine’s manual says it is safe. Some parts can be damaged by bleach, and residue can make ice taste bad or be unsafe. Use only approved ice machine cleaners and sanitizers recommended by the manufacturer.
How Do I Know If My Ice Machine Needs Professional Service?
Call a technician if you see persistent slime, notice strange noises, or the machine works slower than usual. Also, get professional service at least once a year if your ice machine is used in a business or if you cannot reach all the hidden parts during cleaning.
Can A Self-cleaning Ice Machine Still Get Slime?
Yes, even machines with a self-cleaning cycle can develop slime if not maintained properly. The self-cleaning cycle helps, but it does not replace manual cleaning and regular maintenance. Always follow the manufacturer’s cleaning instructions and don’t skip deep cleanings.
Keeping your ice machine free from slime is not just about appearance—it’s about safety, taste, and trust. With regular care, attention to detail, and the right habits, you can make sure your ice is always clean, clear, and safe for everyone.