Removing the bottom drawer from your oven can seem simple, but it often surprises people with unexpected challenges. Many use this drawer for storing pans or trays and rarely need to take it out. But when it’s time to deep clean, repair, or retrieve a lost item, you might realize it’s not as straightforward as it looks.
This guide walks you through every step of how to remove the bottom drawer from your oven safely and effectively, explains common designs, and helps you avoid the mistakes that frustrate many first-timers.
Why Remove The Bottom Drawer?
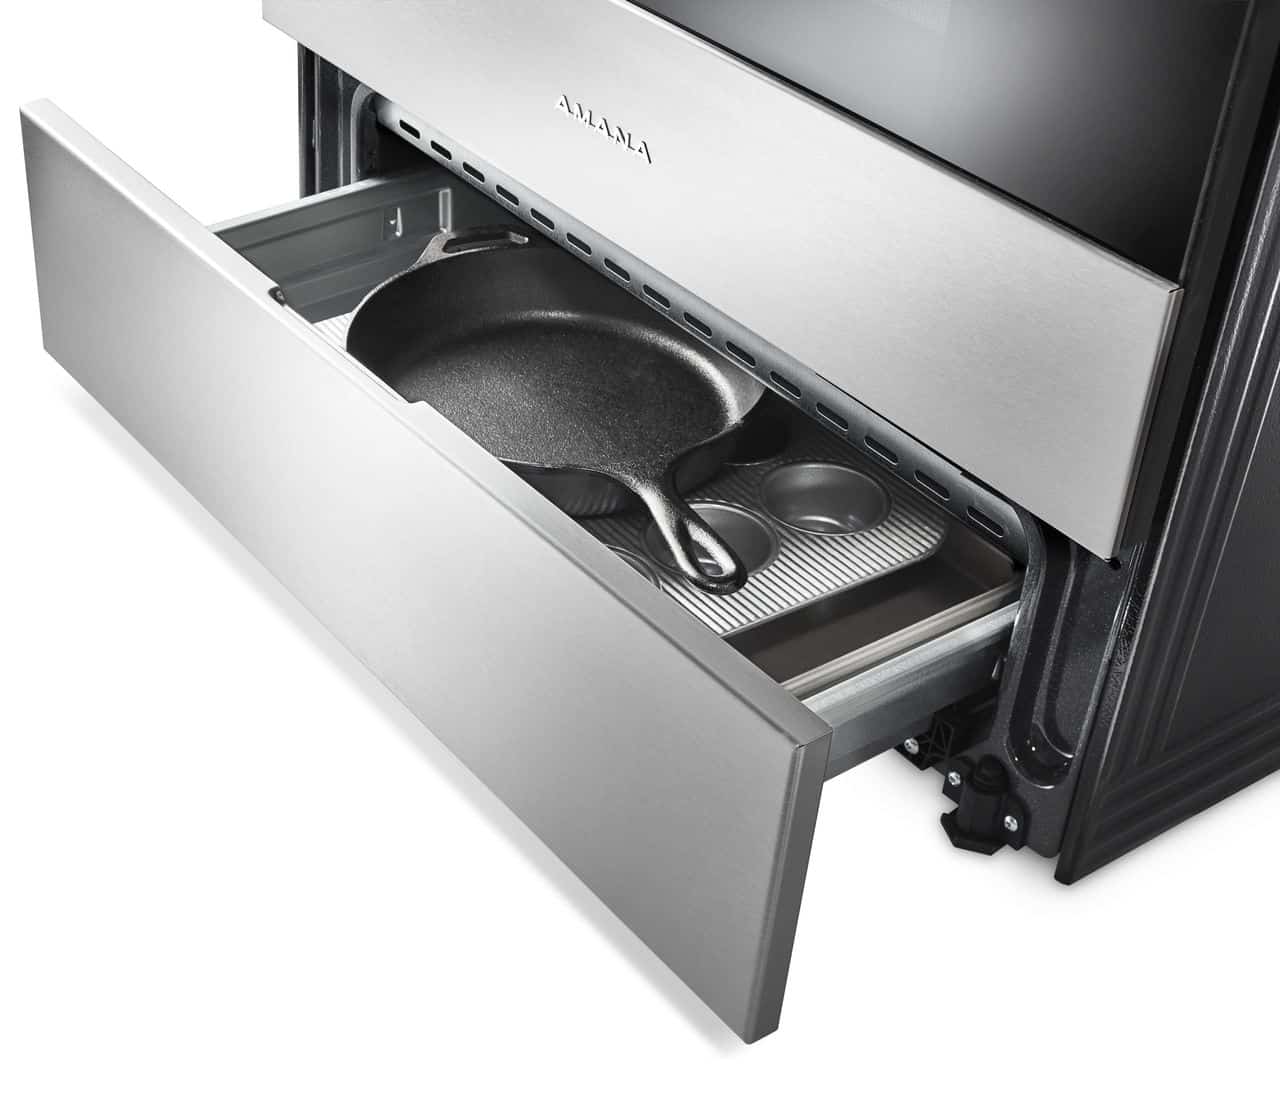
The bottom drawer serves different purposes depending on your oven’s model. Some ovens have a warming drawer to keep food hot, while others provide simple storage space for pans or trays. Sometimes, it’s called a “broiler drawer,” especially in gas ovens. Removing the drawer is often necessary for these reasons:
- Cleaning out crumbs, spills, or grease that collects underneath
- Retrieving dropped utensils or food
- Repairing or replacing drawer parts, like wheels or rails
- Accessing oven components for maintenance
You might be surprised to learn that leaving the drawer dirty can cause bad smells or even attract pests. Also, stuck debris can make the drawer hard to open and close. Removing it helps your oven last longer and work better.
Understanding Different Oven Drawer Types
Before you start, you should know your oven’s drawer type. Not all bottom drawers are the same, and the removal method can vary.
- Storage Drawer – The most common in electric ovens. Used for pans and trays.
- Warming Drawer – Found in some higher-end or modern ovens. Used to keep food warm. Sometimes has a moisture control knob.
- Broiler Drawer – Typical in gas ovens. Used for broiling food at high heat.
Check your oven’s manual if you’re unsure. If you don’t have it, look for a label inside the drawer or on the oven frame. This information often lists the model and type. If you remove the wrong screws or pull too hard, you might break a key part.
Tools And Supplies You May Need
Most oven drawers come out without special tools. However, having the right items ready can make the process smoother and safer:
- Work gloves (to protect your hands from sharp edges)
- Flathead screwdriver (for releasing clips or levers)
- Flashlight (to see into dark spaces)
- Towel or mat (to protect your floor)
- Vacuum cleaner (for cleaning once the drawer is out)
Not every drawer needs all these items, but they are handy, especially if your oven is older or the drawer is stuck.
Safety First: What To Do Before You Start
Ovens can be heavy and have sharp edges. Always put safety first. Here’s how:
- Turn off the oven and let it cool completely. Never work with a hot oven.
- If you have a gas oven, consider shutting off the gas valve for extra safety.
- Clear the area in front of your oven. Remove rugs or obstacles that could make you trip.
- Wear work gloves to prevent cuts from metal edges or rails.
- Place a towel or mat on the floor to catch dirt and protect your flooring.
A common mistake is forgetting the oven may still be hot, especially if you recently cooked. Wait at least 30 minutes after using the oven before starting.

Credit: www.youtube.com
Step-by-step: How To Remove The Bottom Drawer From Your Oven
Follow these steps to safely take out your oven drawer. Most models use a similar process, but always check for unique features.
1. Empty The Drawer
Remove all pans, trays, or items from the bottom drawer. This prevents damage and makes the drawer lighter.
2. Open The Drawer Fully
Pull the drawer all the way out until it stops. Most drawers have a “stop” that prevents them from coming out too far by accident.
3. Check For Drawer Stops Or Clips
Look at both sides of the drawer near the back. Most ovens use one of these systems:
- Stop tabs: Small metal or plastic tabs sticking out from the rails.
- Release levers: Small levers you push up or down to release the drawer.
- Screws: Rare, but some older models use screws to hold the drawer.
If you see a tab, gently lift (or push down) on it while pulling the drawer. If there’s a lever, move it as shown in your manual. If you see screws, use a screwdriver to remove them.
4. Lift And Pull
With the stops or clips released, slightly lift the front of the drawer and pull it straight out. Most drawers will come free at this point. If it feels stuck, double-check for missed stops or screws.
Pro Tip: If the drawer doesn’t move, gently wiggle it side to side. Do not force it or use tools to pry it out—this can bend the rails or break plastic parts.
5. Set The Drawer Aside
Place the drawer on your towel or mat. Avoid dropping it, as even small dents can prevent it from sliding back in smoothly.
6. Clean And Inspect
With the drawer removed, vacuum or wipe out crumbs and grease. Check for:
- Bent rails or tracks
- Broken wheels
- Loose screws
- Rust or corrosion
Fix any issues before reinstalling the drawer.
Reinstalling The Bottom Drawer
Putting the drawer back is usually easier than taking it out, but you need to align it correctly.
- Hold the drawer at a slight upward angle and slide the back corners into the tracks.
- Lower the front and push the drawer in. You should hear or feel the stops click into place.
- Open and close the drawer a few times to check for smooth movement.
If the drawer jams or feels rough, remove it and check for misaligned tracks or debris.
Credit: fredsappliance.com
Special Cases: Common Oven Brands And Designs
Not all ovens are made the same. Here’s how to handle some of the most popular brands:
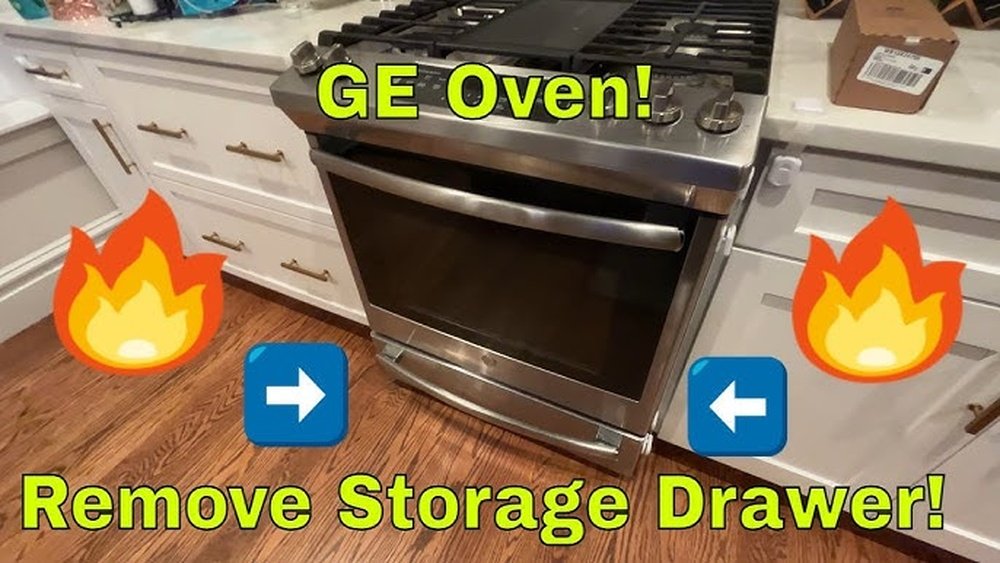
Ge Ovens
GE ovens often use plastic release levers near the back. Push both levers up at the same time while pulling the drawer out. Sometimes, the levers get stuck with food debris, so clean if needed.
Whirlpool And Maytag
These brands usually use metal stop tabs. Lift the drawer slightly while pulling out. If it doesn’t release, check for hidden screws under the front lip.
Samsung And Lg
Many modern Samsung and LG ovens have soft-close drawers with smooth glides. Look for levers on the rails that need to be pressed inwards before removal.
Frigidaire And Electrolux
Frigidaire drawers often need a gentle upward lift at the front while pulling out. Don’t force the drawer, as some rails bend easily.
Older Or Rare Models
Some older ovens use screws or pins to hold the drawer. These usually require a screwdriver. Take care not to lose small parts during removal.
If you’re unsure, check the brand’s official website for instructions. For example, GE Appliances has model-specific help.
Data Comparison: Drawer Removal Mechanisms By Brand
To clarify, here’s a comparison of common removal mechanisms across popular brands:
| Brand | Removal Mechanism | Tools Needed | Difficulty (1–5) |
|---|---|---|---|
| GE | Plastic release levers | None | 2 |
| Whirlpool | Metal stop tabs | None/Flathead screwdriver | 2 |
| Samsung | Soft-close rail levers | None | 3 |
| Frigidaire | Lift and pull | None | 2 |
| Older models | Screws or pins | Screwdriver | 4 |
The higher the “Difficulty” number, the more likely you’ll need patience or extra tools.
Troubleshooting: Drawer Won’t Come Out?
It’s common to hit a snag. Here are some issues and what to do:
1. Drawer Feels Jammed
- Check for bent rails or stuck food.
- Try gently wiggling the drawer side to side.
- Use a flashlight to spot obstructions.
2. Stops Or Levers Won’t Move
- Clean with a damp cloth to remove sticky residue.
- If parts are broken, you may need a replacement from a hardware store or the manufacturer.
3. Drawer Sags Or Drops
- This usually means a wheel is broken or a rail is bent.
- Remove the drawer, then inspect the wheels and rails for cracks or bends.
4. Still Stuck?
If the drawer simply will not budge, don’t force it. You could damage the oven. Instead, check your oven’s manual or search for your model number online for a video or PDF guide.
Cleaning Under The Oven Drawer
Once the drawer is out, you’ll probably find crumbs, dust, or even lost utensils. Use this time to clean thoroughly:
- Sweep or vacuum the area under the oven.
- Use a damp cloth and mild detergent to wipe away grease.
- Dry the area before replacing the drawer.
Cleaning under the drawer can prevent smoke or bad smells during cooking and keep your kitchen more hygienic.
When To Call A Professional
Some problems are best left to the experts. Call a technician if:
- The drawer is warped, rusted, or won’t go back in after several tries.
- You see broken parts you can’t fix.
- You smell gas (for gas ovens)—this could be a leak.
- You’re not confident about handling electrical or gas connections.
Professionals have the right tools and can often fix the issue without causing more damage.
Practical Tips For Easier Drawer Removal
Here are a few insights many beginners miss:
- Take a photo of the drawer and rails before removing. This helps with tricky reassembly.
- Label the parts if you remove screws or brackets. It’s easy to forget where each piece goes.
- Don’t force stuck parts—gentle rocking is better than heavy pulling.
- Check the floor for dropped screws or clips before you finish.
If you find broken or missing drawer wheels, they can often be replaced for under $10 at appliance parts stores.
Common Mistakes To Avoid
Many people get frustrated or damage their oven by making these mistakes:
- Pulling too hard on a stuck drawer, bending the rails or breaking the stops.
- Forgetting to empty the drawer before removing, causing items to fall and get damaged.
- Not wearing gloves and getting cut on sharp edges.
- Skipping the manual—model-specific instructions matter.
- Losing small parts like screws, which are hard to replace.
By being patient and methodical, you can avoid these headaches.
Table: Pros And Cons Of Removing The Bottom Drawer Yourself
For those considering DIY versus calling a pro:
| DIY Removal | Professional Removal |
|---|---|
|
|
|
|
Weigh the pros and cons based on your comfort with DIY projects.
How Often Should You Remove And Clean The Oven Drawer?
Most people only clean under their oven drawer once or twice a year. However, if you cook often or notice odors, you may want to do it every 3–4 months. If you store food or plastic items in the drawer, clean more often to prevent melting or smells.
What To Do If Drawer Rails Or Wheels Are Damaged
If you discover bent rails or broken wheels, you can usually replace them yourself. Here’s how:
- Find your oven’s model number (usually on the oven frame or inside the drawer).
- Search online for replacement parts.
- Remove the old part using a screwdriver.
- Install the new part and test the drawer.
If rails are badly bent or the frame is damaged, call a professional. Trying to bend metal back can make the problem worse.

Credit: www.reddit.com
Tips For Keeping The Drawer Running Smoothly
- Avoid overloading the drawer. Too many heavy pans can bend the rails or break wheels.
- Clean up spills quickly. Sticky residue makes drawers hard to slide.
- Lubricate metal rails with a tiny amount of cooking oil if they squeak, but never use too much.
These simple habits can extend the life of your oven drawer.
Table: Typical Drawer Problems And Solutions
Here’s a quick reference for the most common issues:
| Problem | Possible Cause | Solution |
|---|---|---|
| Drawer won’t open/close | Bent rail or stuck food | Remove and clean, realign rails |
| Drawer off track | Broken wheel or misalignment | Replace wheel, reinstall drawer |
| Drawer squeaks | Dry or dirty rails | Clean and lightly lubricate |
| Drawer drops down | Broken support | Replace support or call technician |
Frequently Asked Questions
How Do I Know If My Oven Has A Warming, Storage, Or Broiler Drawer?
Check your oven’s manual or look for a label on the drawer or inside the oven frame. Warming drawers often have temperature controls, broiler drawers have a metal tray or rack, and storage drawers are empty. If you’re unsure, search the model number online.
Can I Remove The Oven Drawer Without Any Tools?
Most modern oven drawers can be removed by hand, but some older models require a screwdriver for small screws or pins. Always inspect the sides and back of the drawer before pulling to see if any tools are needed.
Is It Safe To Clean Under The Oven With Water Or Cleaning Sprays?
Use a damp cloth with mild detergent, but do not flood the area with water. Too much moisture can damage floor surfaces or electrical parts. Always dry the area thoroughly before replacing the drawer.
What Should I Do If I Lose A Drawer Wheel Or Screw During Removal?
Check the area carefully, as small parts often fall on the floor. If lost, look up your oven model online and order replacement parts. Appliance parts stores usually carry common wheels and screws.
Why Does My Oven Drawer Keep Getting Stuck?
Common causes include food debris, sticky spills, bent rails, or worn-out wheels. Remove the drawer, clean all parts, and inspect for damage. Replace broken parts as needed to restore smooth movement.
Removing the bottom drawer from your oven is a useful skill for deep cleaning, repairs, or retrieving lost items. With the right approach, patience, and basic tools, you can do it safely and keep your oven in top condition. If you hit a snag, don’t hesitate to get help or check the manufacturer’s resources. This simple task can help your kitchen stay cleaner, more efficient, and a little more organized.