Painting your kitchen appliances can completely change the look and feel of your cooking space. Many people think their appliances are stuck with their original color or finish forever, but that’s not true. With the right tools, techniques, and a bit of patience, you can give your refrigerator, dishwasher, or oven a fresh, modern look without buying new ones.
This can save you hundreds or even thousands of dollars compared to replacing them. Plus, you get to choose the exact shade and finish you want, making your kitchen truly unique.
But painting kitchen appliances is not as simple as painting a wall. It requires careful preparation, the right products, and a smart approach to each step. Rushing or skipping steps often leads to peeling, uneven color, or sticky surfaces that attract dirt.
This guide will walk you through every detail, from choosing paint types to applying the final touches. Even if you’ve never painted anything before, you’ll find practical advice, real-life examples, and solutions to common problems. Let’s get started on transforming your kitchen appliances with confidence.
Why Paint Kitchen Appliances?
Most people paint their kitchen appliances for one of three main reasons. First, they want to update the look of their kitchen without spending a lot of money. New appliances can cost thousands, but a can of quality appliance paint is usually under $25.
Second, some appliances work perfectly but have yellowed, faded, or scratched surfaces. Painting can restore them to a like-new condition. Third, painting lets you match your appliances to your cabinets, countertops, or personal style, especially if you want a color that’s hard to find in stores.
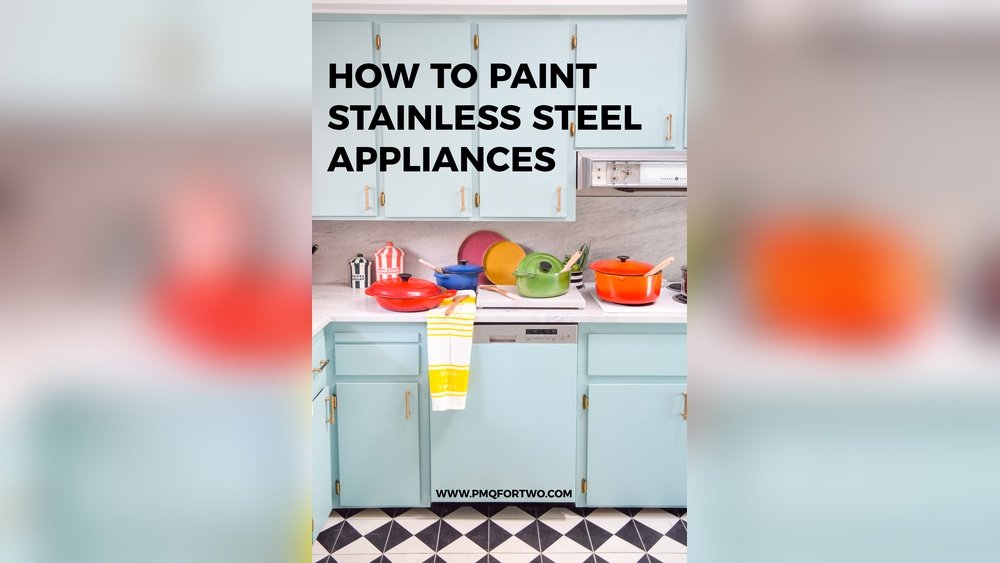
Painted appliances can make a kitchen look more coordinated, modern, or playful. For example, painting a fridge matte black can give your kitchen a high-end feel, while a bold red oven can add a fun, retro vibe. Many people are surprised by how much a simple color change can impact the overall mood of the kitchen.
What Appliances Can You Paint?
You can paint most kitchen appliances, but some are easier than others. Here’s a quick overview:
| Appliance | Best Paint Type | Difficulty |
|---|---|---|
| Refrigerator | Appliance epoxy or spray paint | Easy |
| Dishwasher | Appliance epoxy or liquid stainless steel | Medium |
| Oven/Stove | High-heat spray paint | Medium |
| Microwave (Exterior only) | Appliance spray paint | Easy |
| Range Hood | Appliance epoxy | Easy |
Not all parts should be painted. For example, don’t paint areas that get very hot (like the inside of an oven), moving parts, control panels, or food-contact surfaces. Painting these areas can be unsafe or cause the paint to fail quickly.
Choosing The Right Paint And Tools
Picking the right paint is the most important decision you’ll make in this project. Regular wall paint or craft paint won’t work—they’ll peel, chip, or melt. You need special paints made for appliances or metal surfaces.
Types Of Paint For Kitchen Appliances
1. Appliance Epoxy Paint
This is the most popular choice. It’s designed to stick to metal, resist moisture, and stay glossy. Epoxy comes in spray cans (best for a smooth finish) or brush-on formulas.
2. High-heat Paint
For ovens, stoves, and toasters, use paint rated for high temperatures (up to 1200°F). Regular appliance paint can bubble or burn near heat.
3. Liquid Stainless Steel Paint
This paint mimics the look of real stainless steel. It’s a bit pricier but gives a modern, brushed-metal effect.
4. Chalkboard Or Specialty Paint
Some people use chalkboard paint for a fun, writable fridge surface, or magnetic paint to hold magnets.
Other Supplies You’ll Need
- Sandpaper (220–320 grit): For scuffing the surface so paint sticks.
- Degreaser or ammonia-based cleaner: To remove kitchen grease.
- Masking tape and plastic sheets: To protect handles, logos, and nearby cabinets.
- Screwdriver: To remove handles and doors if needed.
- Paint sprayer or foam roller: For brush-on paint, use a foam roller for a smooth finish.
- Dust mask and gloves: For safety.
- Tack cloth: To wipe away dust after sanding.
Using the right tools makes a big difference in how professional your finished appliance looks. Beginners often skip cleaning or use the wrong roller, leading to rough or peeling paint.
Preparing Appliances For Painting
Preparation is where most paint jobs succeed or fail. If you rush this step, even the best paint will peel or bubble. Here’s how to get appliances ready:
1. Unplug And Move
Always unplug appliances before working on them. If possible, move them away from walls for better access and ventilation. For heavy appliances, ask a friend for help.
2. Remove Parts
Take off handles, knobs, doors, or kickplates. This helps you paint every surface evenly and avoid drips around hardware.
3. Clean Thoroughly
Kitchen appliances collect a lot of grease, dust, and fingerprints. Use a strong degreaser or ammonia-based cleaner to scrub every surface. Pay extra attention to edges, handles, and vents. Rinse with clean water and dry fully.
4. Sand The Surface
Lightly sand all surfaces you’ll paint. Use fine sandpaper (220–320 grit) to dull the gloss and help new paint stick. Wipe away all dust with a tack cloth.
5. Mask Off Areas
Use masking tape to cover logos, control panels, rubber gaskets, or areas you don’t want painted. Drape plastic sheets or old newspapers over floors and nearby cabinets.
6. Ventilation
Paint fumes are strong and can be dangerous. Open windows, use fans, and wear a mask. If possible, paint outside or in a well-ventilated garage.
Pro Tip: Many beginners forget to clean and sand areas at the bottom or sides. These spots are just as important as the front and will peel quickly if not prepped.
Step-by-step Guide To Painting Kitchen Appliances
Let’s break down the process for a typical appliance, like a refrigerator. The same steps work for dishwashers, microwaves, and range hoods, with minor adjustments.
1. Set Up Your Work Area
Lay down plastic sheets or drop cloths. Make sure you have good lighting. Keep your supplies within easy reach. If you’re using spray paint, shake the can for at least 1–2 minutes.
2. Apply Primer (if Needed)
Some appliance paints include primer. If not, or if your appliance is heavily scratched or a dark color, apply a metal primer first. Use thin, even coats. Let it dry fully (usually 1–2 hours).
3. Paint The Appliance
- Spray Paint: Hold the can 10–12 inches from the surface. Move in slow, even strokes, overlapping each pass slightly. Apply 2–3 thin coats, waiting 20–30 minutes between coats.
- Brush-On Paint: Use a high-quality foam roller for large surfaces and a small brush for edges. Apply thin, even coats. Avoid drips and roller marks.
4. Let It Dry
Allow the final coat to dry at least 24 hours before touching or reassembling. Humid or cold weather can slow drying. Some paints need up to a week to fully cure.
5. Reassemble And Reconnect
Once the paint is fully dry and hard, carefully remove all tape. Reattach handles, knobs, and other parts. Plug the appliance back in.
6. Final Touches
If you notice any uneven spots or dust, lightly sand and apply a final coat. Clean up your work area and enjoy your “new” appliance.
Non-obvious tip: Don’t rush reassembly. Paint that feels dry may still be soft underneath and can dent or smudge easily if handled too soon.
Special Considerations For Each Appliance
Every kitchen appliance has unique needs. Here’s how to handle some common ones:
Refrigerators
Refrigerators are usually painted with appliance epoxy or liquid stainless steel. Make sure the door seals and hinges are kept free of paint. If your fridge has a textured surface, use a foam roller for the smoothest finish.
Dishwashers
Many dishwashers have a removable front panel. Take it off and paint it separately for best results. Avoid getting paint on plastic or rubber seals.
Ovens And Stoves
Only paint the exterior surfaces, never the interior or the stovetop. Use high-heat paint rated for at least 500°F. Control panels and burner grates should not be painted.
Microwaves
Paint only the exterior metal shell. Do not paint vents, control panels, or any area that gets hot. Check that the microwave is unplugged and cool.
Range Hoods
Clean range hoods very well, as they collect grease. Appliance epoxy works best here. Let the paint cure fully before using the hood to avoid strong smells.
How Long Does Painted Appliance Last?
When done correctly, painted appliances can look good for years. Most appliance paints are tough and resist chipping, scratching, or fading. However, how long the finish lasts depends on:
- Quality of paint and primer
- Careful surface prep
- How often the appliance is used
- Exposure to heat, steam, and cleaning products
On average, a properly painted appliance will last 3–7 years before it needs touching up. Fridges and dishwashers usually last longer than ovens or stoves, which see more heat and cleaning.
Mistakes To Avoid When Painting Kitchen Appliances
Painting appliances is not difficult, but some common mistakes can ruin your results. Here’s what to watch out for:
- Skipping Prep: Not cleaning or sanding properly causes paint to peel or bubble.
- Using the Wrong Paint: Regular wall or spray paint will not last and can even be dangerous.
- Painting Hot or Moving Parts: Only paint exterior metal surfaces.
- Applying Thick Coats: Thick paint drips and takes much longer to dry.
- Ignoring Dry Time: Handling or using the appliance too soon will cause dents, smudges, or fingerprints.
- Poor Ventilation: Paint fumes can be harmful; always work in a well-ventilated area.
Non-obvious insight: Paint often looks uneven or streaky after the first coat. Don’t panic—most appliance paints need multiple thin coats to look smooth and even.
:max_bytes(150000):strip_icc()/kitchen-color-palette-TealGold-1023-877a03d461d04205aa0bc90e6f3786d8.jpg)
Credit: www.marthastewart.com
Comparing Appliance Paint Options
Different paints have different strengths. Here’s a side-by-side look at the main types:
| Paint Type | Finish | Heat Resistance | Ease of Use | Cost |
|---|---|---|---|---|
| Appliance Epoxy | Glossy, smooth | Up to 200°F | Easy | Low |
| High-Heat Paint | Satin or matte | Up to 1200°F | Moderate | Moderate |
| Liquid Stainless Steel | Brushed metal | Up to 300°F | Moderate | High |
| Chalkboard/Magnetic | Matte | Low | Easy | Low |
Experience-based tip: Appliance epoxy is best for most jobs, but if you want a stainless look, spend the extra money on liquid stainless steel paint—it looks much more realistic than spray paints labeled “stainless.”
Matching Appliance Color To Your Kitchen
Choosing the right color can be harder than the painting itself. Here are some ideas:
- For a modern look, use black, white, or metallic silver.
- For a retro kitchen, try bright colors like red, turquoise, or yellow.
- For a cozy farmhouse feel, use matte white or cream.
- To blend with cabinets, match the appliance to your cabinet color.
If you’re not sure, test a small area or use removable tape in your chosen color to see how it looks in different lights. Remember, glossy finishes show fingerprints more easily, while matte finishes hide small flaws.
Non-obvious insight: Lighting changes how paint looks. View your color in both day and night light before making a final choice.

Credit: ddtecdedetizacao.com.br
Caring For Painted Appliances
To keep your newly painted appliances looking good:
- Wait at least one week before cleaning or scrubbing the surface.
- Use gentle, non-abrasive cleaners and soft cloths.
- Avoid harsh chemicals like bleach or strong degreasers.
- Wipe up spills quickly to prevent staining.
- Don’t stick magnets or tape on the surface until the paint is fully cured.
If you scratch or chip the paint, lightly sand the area and touch up with a small brush. Most appliance paints are easy to repair without repainting the whole surface.
Practical Examples And Real-life Results
Many homeowners have shared their results online. For example, Sarah from Ohio painted her 15-year-old fridge with appliance epoxy in glossy white. She says, “Everyone asks if I bought a new fridge. It cost me under $40 and two afternoons.
”
John in Texas used liquid stainless steel paint on his old dishwasher. He says, “It’s not quite the same as real stainless, but it matches my other appliances and saved me from buying new. ”
A surprising number of people use chalkboard paint on fridge doors for shopping lists, kid drawings, or reminders. This turns the appliance into a practical family message center.
Cost Comparison: Painting Vs. Replacing
Painting an appliance is almost always cheaper than replacing it. Here’s an example:
| Option | Average Cost | Time Needed | Lifespan |
|---|---|---|---|
| Painting | $20–$70 | 1–2 days | 3–7 years |
| Buying New | $700–$2,000+ | Delivery + install | 8–15 years |
| Professional Refinishing | $200–$400 | 1 day | 5–8 years |
Unless your appliance is very old or broken, painting is the most budget-friendly way to refresh your kitchen’s look.
When You Should Not Paint Appliances
Painting is a great solution for most people, but there are times when it’s not the best choice:
- The appliance is broken or near the end of its life.
- The surface is badly rusted, dented, or damaged.
- You want to sell your home soon and buyers expect new appliances.
- You want a factory look that’s hard to achieve with paint.
In these cases, replacement or professional refinishing may be a better option.

Credit: www.youtube.com
Where To Buy Appliance Paint
You can find appliance epoxy and high-heat spray paints at most hardware stores, home improvement centers, and online retailers. Brands like Rust-Oleum, Krylon, and Giani are reliable choices. Always read the label to make sure the paint is safe for your appliance type and intended use.
For more details about appliance-safe paints, you can check the Rust-Oleum official site.
Frequently Asked Questions
Can I Paint Plastic Parts On My Appliance?
Painting plastic is tricky. Some paints stick to plastic, but most appliance paints are made for metal. If you must paint plastic trim or handles, use a plastic-bonding primer first, then a matching appliance paint. For best results, replace plastic parts with new ones.
Is It Safe To Paint Inside My Oven Or Fridge?
No. Do not paint the inside of ovens, microwaves, or refrigerators. Appliance paint is not food-safe and can give off dangerous fumes when heated. Only paint exterior metal surfaces.
How Do I Fix Drips Or Runs In Appliance Paint?
Wait until the paint is dry to the touch. Lightly sand the area with fine sandpaper (320 grit) to smooth out the drip. Wipe away dust, then apply a thin, even touch-up coat. Don’t try to fix drips while the paint is still wet.
Can I Use Spray Paint Indoors?
It’s possible, but only with very good ventilation. Open windows, use fans, and wear a mask. Paint fumes are strong and can cause headaches or health problems. If possible, move the appliance outside or into a garage before spraying.
Will The Paint Smell After It’s Dry?
Most appliance paints have a strong odor while drying and curing, but the smell fades within a few days. Let the appliance “air out” as much as possible, and avoid using it for at least 24–48 hours after painting. The smell should be gone within a week.
Transforming your kitchen appliances with paint is a practical, budget-friendly project. With careful preparation, the right products, and a bit of patience, you can achieve professional-looking results—even if you’ve never painted before. Not only will you save money, but you’ll also enjoy a kitchen that reflects your style and creativity.