Polishing a knife blade is more than just making it shine. A well-polished knife not only looks impressive but also cuts cleaner, resists rust, and lasts longer. Many people believe polishing is something only professionals can do, but with the right guidance, anyone can learn this skill at home.
Whether you’re a home cook, outdoor enthusiast, or knife collector, knowing how to polish a knife blade properly can make a real difference. This article will walk you through every step, from understanding why polishing matters to choosing the right tools, and finally, achieving a mirror-like finish.
Along the way, you’ll discover insights even experienced users sometimes overlook.
Why Polishing A Knife Blade Matters
A polished blade is not just about appearance. Polishing affects the knife’s performance and safety. A smooth blade cuts through food and materials with less effort. It also reduces the chance for rust because fewer microscopic scratches mean fewer places for moisture to hide. If you ever noticed how a dull-looking blade drags or tears instead of slicing cleanly, surface roughness is often the cause.
Another reason is hygiene. Food or dirt can get stuck in tiny scratches and pits, making cleaning harder. Polishing creates a surface that is easier to wipe clean. For collectors, polishing is about restoring value and beauty. A mirror finish can turn an ordinary knife into a centerpiece.
Understanding Knife Blade Materials
Not all knife blades are the same. The material of your knife affects how you polish it.
Stainless Steel
Stainless steel is popular because it resists rust. Most kitchen knives are made from this material. It polishes well but can be tough if the steel is very hard.
High Carbon Steel
High carbon steel is often used in premium knives. It can take a sharper edge but rusts more easily. Polishing helps protect it, but you need to act quickly to avoid stains during the process.
Damascus Steel
Damascus steel is famous for its wavy patterns. It needs careful polishing to maintain its look. Aggressive polishing can damage the pattern, so gentle methods are best.
Coated Or Painted Blades
Some blades have a protective coating or paint. These should not be polished aggressively. Usually, only the exposed edge is polished.
Ceramics
Ceramic blades are rare but very hard. They are not usually polished at home because they can chip. If you have one, stick to cleaning rather than polishing.
Understanding your knife’s material lets you choose the right products and avoid mistakes that could ruin your blade.
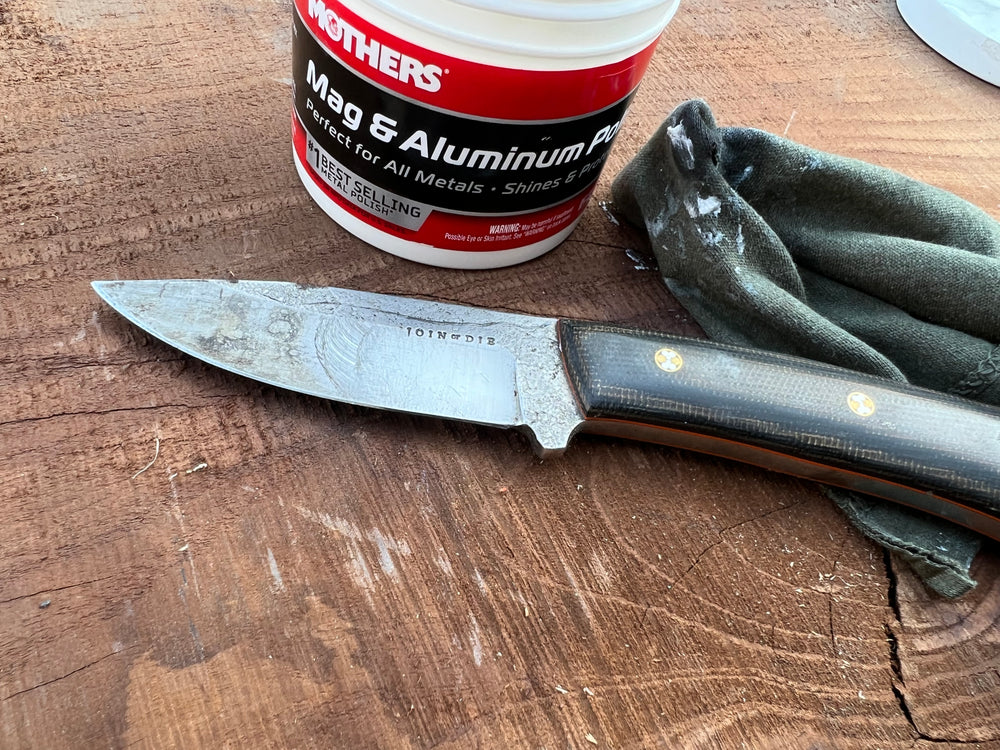
Credit: joinordieknives.com
Tools And Materials Needed For Polishing
Before starting, gather these tools. Having everything ready makes the process smoother and safer.
| Tool/Material | Purpose | Beginner-Friendly? |
|---|---|---|
| Microfiber Cloths | Wiping and buffing | Yes |
| Polishing Compounds | Removing scratches, adding shine | Yes (choose mild type) |
| Sandpaper (400 to 2000 grit) | Smoothing rough surfaces | Yes, with care |
| Metal Polish (e.g., Flitz, Maas) | Finishing shine and protection | Yes |
| Masking Tape | Protecting handle and edge | Yes |
| Gloves | Hand protection | Yes |
| Polishing Wheel or Dremel Tool | Speed up process (optional) | Not for beginners |
If you are just starting, focus on microfiber cloths, mild metal polish, and fine sandpaper. Power tools are helpful but can quickly damage a blade if used incorrectly.
Preparing The Knife For Polishing
Preparation is key to a good result. Rushing this step often leads to scratches or uneven finish.
- Clean the Blade: Wash the knife with warm, soapy water to remove oils, dirt, and food particles. Dry it completely with a soft cloth. Any dirt left can create scratches during polishing.
- Secure Your Workspace: Use a stable table with good lighting. Lay down an old towel to prevent slipping or scratching.
- Protect the Handle and Edge: Wrap the handle and, if possible, the sharp edge with masking tape. This prevents accidental cuts and protects materials like wood or plastic.
- Inspect for Damage: Look for deep nicks, rust spots, or other damage. Deep rust or pitting may require more sanding.
- Wear Gloves: Polishing can expose your hands to chemicals and sharp edges. Gloves add safety and grip.
Many beginners forget to tape the edge, leading to accidental cuts. Don’t skip this—safety always comes first.
Removing Rust And Surface Stains
If your knife has rust or stains, remove them before you polish. Polishing over rust only hides problems and can make them worse.
Rust Removal Steps
- Use Baking Soda Paste: Mix baking soda with a few drops of water to form a paste. Rub it gently onto rust spots using a soft cloth or toothbrush.
- Try White Vinegar: If baking soda fails, soak the blade in white vinegar for 5–10 minutes. Wipe away rust with a cloth.
- Stubborn Spots: For tougher rust, use fine steel wool (0000 grade) very gently. Rub in the direction of the blade’s grain.
- Rinse and Dry: Clean the blade thoroughly with water and dry it right away.
Important Tips
- Never use harsh acids or wire brushes—they can damage the steel.
- Always rub in the same direction as the blade’s grain to avoid visible scratches.
Removing rust before polishing ensures you don’t seal in damage or weaken the blade.
Sanding The Blade: Step-by-step
Sanding is the foundation of a great polish. It removes scratches, pits, and dullness, making the blade smooth.
Choosing Sandpaper Grits
Start with a grit that matches your blade’s condition. Lower numbers are rougher, higher numbers are finer.
| Grit | Best For | Effect |
|---|---|---|
| 400–600 | Deep scratches, rust pits | Removes material quickly |
| 800–1000 | General smoothing | Prepares for fine polish |
| 1500–2000 | Finishing | Creates mirror finish base |
How To Sand A Knife Blade
- Wrap Sandpaper Around a Block: A small wooden or rubber block helps keep pressure even. Avoid sanding with just your fingers, which can create waves.
- Wet or Dry Sanding: Wet sanding (dipping paper in water) reduces dust and gives a smoother finish. Most sandpaper lists if it’s safe for wet use.
- Sand Along the Grain: Move the sandpaper in the same direction as the lines on the blade, not across. This hides scratches.
- Progress Through Grits: Start with the coarsest grit needed and work up to the finest. Wipe the blade clean between each grit change.
- Check Progress: Hold the blade to the light. The surface should look even before moving to the next grit.
- Don’t Overdo It: Too much sanding can thin the blade or remove logos and patterns.
A common mistake is skipping grits or sanding in circles, which leaves swirl marks. Patience is your friend here—spend time at each grit for the best result.
Applying Polishing Compounds
After sanding, polishing compounds remove any tiny scratches and add shine.
Choosing The Right Compound
- Green Compound: Good for stainless steel; creates a bright finish.
- White Compound: Very fine, for final mirror finish.
- Blue or Red Compound: Used for softer metals; not ideal for most knife blades.
Applying By Hand
- Add Compound to Cloth: Rub a small amount onto a microfiber cloth.
- Polish in Straight Lines: Move along the blade’s grain, not in circles.
- Use Light Pressure: Let the compound do the work. Too much force can damage the finish.
- Buff With Clean Cloth: After polishing, use a clean cloth to remove residue.
Using A Polishing Wheel
If you use a Dremel tool or bench grinder with a polishing wheel:
- Start at low speed to avoid overheating the blade.
- Always move the wheel away from the edge, not into it.
- Hold the knife firmly, but don’t press hard.
Power tools make polishing faster, but they can easily overheat the steel or round off edges if you’re not experienced.
Achieving A Mirror Finish
A mirror finish means the blade reflects images clearly, with no visible scratches. This is the most challenging but satisfying polish.
Steps To A Mirror Finish
- Perfect the Surface: The blade must be perfectly smooth before final polishing. Any scratch left will show up clearly.
- Ultra-Fine Sandpaper: Use 2000 grit or higher for final sanding.
- Polish With White Compound: Apply gently and evenly.
- Buff With Microfiber: Use a clean, dry cloth to bring out the shine.
Realistic Expectations
Not every blade can achieve a perfect mirror finish, especially if it has deep pits or uneven surfaces. Some steels, like high-carbon, may develop a cloudy look if not finished carefully.
Many beginners stop too soon, thinking they are done when the blade is just shiny. True mirror finish takes patience and careful work at each stage.
Polishing The Edge Vs. The Flat
The edge of the knife is different from the flat sides.
- Edge: Needs to stay sharp. Do not sand or polish aggressively, or you’ll make it dull.
- Flat: Safe to polish and sand. Focus your efforts here.
If your knife is dull after polishing, you will need to sharpen it again using a whetstone or honing rod.
Some knife enthusiasts even tape the edge during all polishing steps, then do a final quick pass with a very fine compound at the end.
Cleaning And Protecting After Polishing
Once your blade is shiny, you want to keep it that way.
Cleaning
- Wipe off all polishing compound with a clean cloth.
- Wash the blade with mild soap and water if needed.
- Dry thoroughly to prevent water spots.
Protecting
- Apply a thin coat of mineral oil or knife oil. This protects against rust and fingerprints.
- Store knives in a dry place, away from moisture.
- For display knives, consider silica gel packs in storage boxes.
Many beginners forget to oil the blade, leading to new rust spots within days, especially on high carbon steel.
Common Mistakes And How To Avoid Them
Even experienced users make mistakes. Here are some to watch out for:
- Using the Wrong Grit: Too coarse can scratch permanently, too fine does nothing.
- Sanding Across the Grain: Leaves visible scratches that are hard to remove.
- Skipping Grits: Creates uneven finish; always progress step by step.
- Overheating With Power Tools: Can ruin the temper (hardness) of the blade.
- Neglecting Safety: Failing to tape the edge or wear gloves can lead to cuts.
- Not Cleaning Between Steps: Leftover compound or grit can scratch during later steps.
- Polishing Coated Blades: May remove protective layers, exposing to rust.
If you want to see more examples of mistakes and tips, the American Bladesmith Society has resources for knife care and finishing.
Special Considerations For Different Knife Types
Kitchen Knives
Most kitchen knives are stainless steel. Focus on hygiene and smoothness rather than a perfect mirror finish. Avoid aggressive compounds if the knife has any non-metal parts.
Outdoor And Survival Knives
These are often high-carbon steel. Polishing helps prevent rust, but always re-oil after polishing. Outdoor knives may have textured finishes for grip—don’t try to polish these smooth.
Collectible Or Antique Knives
Be extra careful not to over-polish, as you can remove valuable patina or damage rare markings. Sometimes, gentle cleaning is better than aggressive polishing.
Damascus Or Patterned Blades
Polish lightly to preserve the pattern. Heavy sanding or buffing can blur or erase the design. Use mild compounds and soft cloths only.

Credit: knifemaking.com
Comparing Home Polishing Vs. Professional Services
Some people wonder if they should polish knives at home or pay for professional service. Here’s a simple comparison:
| Factor | Home Polishing | Professional Service |
|---|---|---|
| Cost | Low (one-time for tools) | High (per knife) |
| Time Needed | 1–2 hours per knife | Usually 1 week turnaround |
| Skill Required | Moderate to high | Expert |
| Risk of Damage | Moderate (if careless) | Low |
| Custom Results | Yes, at your pace | Yes, but limited input |
For common kitchen knives, home polishing is usually enough. For expensive, rare, or sentimental knives, professional services may be safer.
Maintaining The Polish: Long-term Care
A polished blade needs regular care to stay beautiful.
- Clean after each use: Wipe down with a soft, dry cloth.
- Oil regularly: Especially in humid climates.
- Avoid dishwashers: The harsh chemicals and water can dull the finish.
- Store safely: Use blade covers or knife blocks.
- Touch up as needed: Minor scratches can often be buffed out with a soft cloth and polish.
Many people overlook the role of humidity. Even a well-polished blade can rust if left wet or stored in a damp place.
Environmental And Safety Concerns
Polishing creates dust and uses chemicals. Always:
- Work in a well-ventilated area.
- Wear gloves and eye protection.
- Dispose of used compounds and cloths safely.
- Store chemicals out of reach of children and pets.
Some metal polishes contain substances that can harm skin or lungs if used carelessly. Read labels and follow all safety warnings.
Real-world Example: Polishing A Vintage Chef’s Knife
Let’s look at a practical example. Imagine you found an old chef’s knife at a flea market. The blade is dull, stained, and rusty, but you want to restore it.
- Clean: Wash and scrub off loose dirt.
- Rust Removal: Use baking soda paste and gentle steel wool for deep stains.
- Sanding: Start with 600 grit, moving up to 2000 grit, always sanding along the blade.
- Polishing Compound: Apply green compound on a microfiber cloth and polish until shiny.
- Mirror Finish: Switch to white compound and buff.
- Protection: Oil the blade before storing.
After about 90 minutes of careful work, the knife looks almost new, with a reflective shine and no signs of rust. Many people skip the sanding step, but it’s what makes the biggest difference in restoring old blades.
Non-obvious Insights For Beginners
- Blade Geometry Changes: Every time you polish or sand a knife, you remove a tiny bit of metal. Over time, this can change the blade’s shape or thickness. Always polish as gently as possible, especially on valuable or thin knives.
- Humidity and Fingerprints: Even after polishing, touching the blade with bare hands can leave oils that cause rust. Always wipe down after handling, and consider wearing gloves if you live in a humid area.
Frequently Asked Questions
How Often Should I Polish My Knife Blade?
You don’t need to polish your knife every time you use it. For kitchen knives, polishing 2–3 times a year is usually enough unless you see rust or scratches. For collector or display knives, polish as needed to maintain shine.
Can I Use Toothpaste To Polish My Knife Blade?
Toothpaste can be used for minor polishing because it contains mild abrasives. However, it is not as effective as dedicated metal polishes or compounds for removing deeper scratches or rust.
Is It Safe To Polish A Serrated Knife Blade?
Serrated blades are tricky to polish because of their grooves. You can polish the flat sides carefully, but avoid sanding or buffing the serrations—they are difficult to sharpen if damaged. Use a soft cloth and mild polish only.
What Should I Do If My Blade Loses Its Edge After Polishing?
Polishing can dull the edge if you’re not careful. After polishing, use a whetstone or honing rod to restore sharpness. Always protect the cutting edge during sanding and polishing.
Where Can I Learn More About Knife Care And Polishing?
For deeper knowledge, visit the Wikipedia Knife page for resources on knife types, materials, and care.
Polishing a knife blade takes patience, care, and the right tools. By following these steps and avoiding common mistakes, you can restore almost any knife to a beautiful, functional shine—making your cutting tasks safer and more enjoyable for years to come.

Credit: www.youtube.com