Keeping your KitchenAid oven with a blue interior looking like new isn’t just about appearance—it also helps your oven work better and last longer. Many people love the beautiful blue enamel that lines the inside of their KitchenAid ovens. It’s elegant, but it also needs special care.
If you use the wrong cleaning tools or chemicals, you might scratch or damage this surface. That’s why cleaning it the right way is so important.
If you’ve just cooked a big meal and noticed spills or burnt spots inside your oven, you’re not alone. Many users feel unsure about how to clean their KitchenAid oven with a blue interior. You want to remove grease and food, but you also don’t want to ruin that unique blue enamel.
This guide will walk you through every step, from what cleaning products are safe, to how to use the self-cleaning cycle, and what mistakes to avoid. Whether you’re a new owner or just want to keep your oven in top shape, you’ll find clear advice here.
Understanding The Blue Interior Of Kitchenaid Ovens
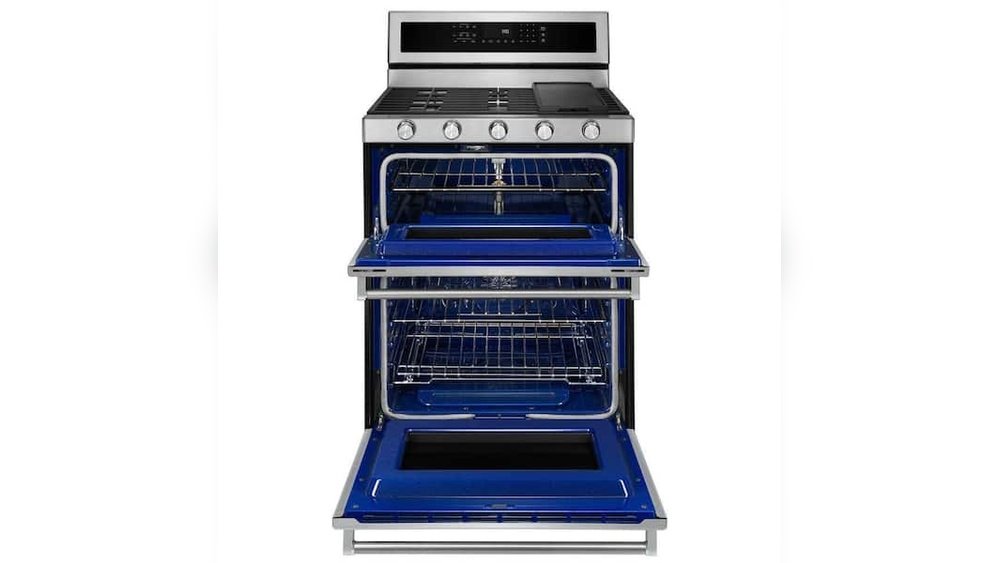
KitchenAid’s blue interior is more than just a stylish touch. The blue color comes from a porcelain enamel coating. This coating is tough and resistant to heat, but it can still be damaged by harsh chemicals or tools. The blue surface helps you spot food splatters easily, making it simpler to clean compared to darker interiors.
What makes this blue interior special is its non-stick quality. Food is less likely to bake on permanently, so regular cleaning can keep your oven looking almost new. However, because the enamel is glass-like, scratches from metal scouring pads or abrasive powders can leave permanent marks.
Safety First: Preparing To Clean
Before you start cleaning, always make safety your first priority. KitchenAid ovens can get extremely hot, and some cleaning chemicals can irritate skin or eyes. Here’s how to get ready:
- Turn Off and Unplug: Make sure the oven is off and cool to the touch. For added safety, unplug the oven if possible.
- Remove Racks and Accessories: Take out all oven racks, thermometers, and any pans.
- Wear Gloves: Use rubber gloves to protect your hands from cleaners and burnt food.
- Ventilate the Area: Open windows or turn on your kitchen fan to avoid breathing fumes.
Never skip these steps. Cleaning a hot oven or using the wrong cleaner can lead to burns or damage.
What Cleaning Products Are Safe For Blue Porcelain Enamel?
Choosing the right cleaning product is key to keeping your blue interior bright and undamaged. Unlike some stainless steel or black ovens, blue enamel needs gentle care.
Safe Cleaners
- Mild dish soap: Mix with warm water to create a gentle, effective cleaning solution.
- Baking soda paste: Combine baking soda with water. This is great for tough stains.
- White vinegar (diluted): Use only for light cleaning, not for heavy scrubbing.
- Non-abrasive sponges or microfiber cloths: Soft tools prevent scratches.
Avoid These Products
- Oven cleaners: Most spray-on commercial oven cleaners are too harsh.
- Abrasive powders: These can scratch the enamel.
- Steel wool or metal pads: These cause permanent damage.
- Scouring powders: Even “gentle” scouring powders are risky for blue enamel.
Why Gentle Matters
Using the wrong cleaner even once can leave a dull spot or scratch that won’t go away. Stick to mild, non-abrasive products to maintain the shine and integrity of the blue surface.
Step-by-step Guide: Manual Cleaning For Kitchenaid Ovens With Blue Interior
Manual cleaning is the safest way to keep your oven fresh, especially if you only have light spills or don’t want to use the self-cleaning cycle.
Step 1: Remove Loose Debris
With racks removed, use a soft brush or dry cloth to sweep out any crumbs or loose burnt pieces. Don’t use a metal scraper, which can leave deep scratches.
Step 2: Apply A Baking Soda Paste
Mix half a cup of baking soda with a few tablespoons of water. Spread the paste on stubborn stains or grease spots inside the oven using a soft sponge. Let it sit for at least 15–20 minutes. This step is important because baking soda breaks down burnt food without harming enamel.
Step 3: Wipe With A Damp Cloth
After the paste has loosened stains, use a damp microfiber cloth to wipe away residue. For sticky spots, repeat the baking soda treatment as needed.
Step 4: Clean With Dish Soap Solution
Fill a bowl with warm water and a few drops of mild dish soap. Dip a clean sponge in the soapy water and gently scrub the entire blue interior, paying extra attention to corners and door edges.
Step 5: Rinse And Dry
Wipe away all soap and baking soda with a damp cloth. Finish by drying the inside with a lint-free towel to avoid streaks or water spots.
Step 6: Clean The Oven Door
Don’t forget the glass! Use the same dish soap solution and a soft cloth to clean the inside of the oven door. Avoid letting water drip between the glass panels.
Step 7: Replace Racks
Only put the racks back when the oven is completely dry. This prevents rust and keeps the blue enamel spotless.
Example Cleaning Schedule
| Frequency | Cleaning Task |
|---|---|
| After Heavy Use | Wipe up spills, spot-clean stains |
| Once a Month | Deep clean with baking soda and dish soap |
| As Needed | Clean racks and door glass |
Following this routine keeps your oven in top condition.
Using The Kitchenaid Self-cleaning Cycle Safely
Many KitchenAid ovens with blue interiors offer a self-cleaning cycle. This feature heats the oven to a very high temperature, turning food debris into ash. However, using self-clean can be tricky if you don’t follow instructions.
How Self-cleaning Works
During the cycle, the oven heats up to around 900°F (480°C). All food and grease are burned to ash, which you can wipe away when the oven cools.
Safe Use Steps
- Remove oven racks: Self-cleaning heat can damage racks and their finish. Take out any accessories too.
- Wipe up big spills first: Large food spills can smoke or catch fire, so remove what you can before starting the cycle.
- Close the oven door securely: The door will lock for safety during the cycle.
- Set the self-cleaning time: Most ovens let you pick a cycle time (2, 3, or 4 hours). Longer cycles are for heavy stains.
- Ventilate your kitchen: Self-cleaning can produce smoke and smells.
After The Cycle
When the oven is cool, use a damp cloth to wipe up the ash. Don’t forget the door edges and corners.
Important Tips
- Never use chemical cleaners or baking soda before or during the self-cleaning cycle.
- Don’t try to open the door until the oven unlocks automatically.
- If you have asthma or breathing problems, stay out of the kitchen or ventilate very well during self-cleaning.
Self-cleaning Vs. Manual Cleaning Comparison
Here’s a quick look at the key differences:
| Feature | Self-Cleaning | Manual Cleaning |
|---|---|---|
| Effort Required | Very Low | Moderate |
| Time Needed | 2–4 hours (plus cool-down) | 30–60 minutes |
| Surface Safety | Safe if used as directed | Safe with gentle cleaners |
| Best For | Heavy, baked-on messes | Regular maintenance |
Cleaning Oven Racks And Accessories
Oven racks can collect grease and burnt food, but they need different care than the blue interior.
How To Clean Racks
- Remove Racks: Take them out before cleaning the oven interior.
- Soak in Warm, Soapy Water: Fill your sink or bathtub with warm water and a few drops of dish soap. Let the racks soak for 30 minutes.
- Scrub Gently: Use a soft brush or non-abrasive sponge. Avoid steel wool, which scratches the finish.
- Rinse and Dry: Rinse with clean water and dry completely before putting back in the oven.
What Not To Do
- Don’t leave racks in during self-cleaning; heat can discolor or warp them.
- Never use harsh cleaners or metal pads.
Tip
For tough stains, sprinkle baking soda on a damp rack and gently scrub. Rinse well.
Special Concerns: Dealing With Stubborn Stains And Burnt-on Food
Sometimes, food gets burnt onto the blue enamel and doesn’t come off easily. Here’s how to handle those situations without damaging the surface.
Stubborn Stain Removal
- Apply More Baking Soda Paste: Let it sit overnight if needed.
- Use a Plastic Scraper: Gently scrape off residue without pressing too hard.
- Repeat if Needed: Some stains may need two or three treatments.
If Stains Remain
If you’ve tried everything and stains are still visible, don’t use harsh chemicals. Over time, regular cleaning will fade most marks. Sometimes, small stains become permanent, but they won’t affect how the oven works.
Non-obvious Insight
Some people don’t realize that humidifying the oven can help loosen baked-on grime. Place an oven-safe bowl of water inside and heat the oven to 200°F for 15 minutes. The steam softens stuck food, making it easier to wipe away.
Avoiding Common Cleaning Mistakes
Even experienced cooks make mistakes when cleaning their blue interior KitchenAid ovens. Here’s what you should watch out for:
- Using Abrasive Tools: Metal pads and rough sponges scratch the enamel.
- Not Letting the Oven Cool: Cleaning a hot oven can cause burns and damage.
- Using Too Much Water: Excess water can leak into seams and damage electronics or insulation.
- Mixing Cleaners: Never mix baking soda with commercial oven cleaners.
- Leaving Racks During Self-Cleaning: This can ruin both the racks and the oven’s finish.
Being careful with your cleaning tools and methods keeps your oven looking new for years.

Credit: www.lowes.com
Cleaning The Oven Door: Glass And Gasket
The oven door needs special care, especially the glass window and the soft gasket that seals heat inside.
Cleaning The Glass
- Use a solution of warm water and dish soap.
- Wipe with a microfiber cloth, working from top to bottom.
- For hard water stains, use a little vinegar, but keep it away from the gasket.
Cleaning The Gasket
- Gently wipe with a damp cloth.
- Never scrub or pull on the gasket—it can tear easily.
- Don’t use chemicals or baking soda on the gasket.
Pro Tip
If crumbs or spills get between the glass panels of the oven door, you’ll need to remove the door to clean it properly. Check your KitchenAid manual for safe instructions.
Keeping The Blue Interior Looking New: Maintenance Tips
The best way to keep your blue enamel oven interior beautiful is to prevent stains and damage before they happen.
- Wipe up spills right away. Don’t let food bake on.
- Use oven-safe mats or trays on lower racks to catch drips.
- Don’t slam the oven door. This can crack the enamel.
- Clean regularly, not just when the oven looks dirty.
Maintenance Schedule Comparison
Here’s an easy way to remember what to do and when:
| Task | How Often |
|---|---|
| Wipe up spills | After each use |
| Deep clean blue interior | Monthly |
| Clean oven racks | Monthly |
| Run self-cleaning cycle | Every 3–6 months |
Following this schedule means less effort and better results.
When To Call A Professional
Most cleaning tasks can be done at home, but sometimes you need expert help.
- If there’s a strange smell that won’t go away.
- If you see cracks or chips in the blue enamel.
- If you suspect electrical problems from a spill.
A professional can check for damage and make sure your oven is safe to use. Don’t ignore problems—small issues can become big repairs.
Eco-friendly Cleaning Ideas
If you want to avoid chemicals, you can still clean your blue interior safely.
- Lemon juice: Mix with water for a fresh, safe cleaner.
- Steam cleaning: Use a bowl of water to loosen grime.
- Baking soda and vinegar: Use baking soda for scrubbing, and vinegar for wiping down, but don’t mix them in the oven.
These methods are gentle and safe for your family and the environment.
How To Clean Other Parts Of Your Kitchenaid Oven
Don’t forget the outside! The oven’s exterior also needs attention.
Control Panel
- Wipe with a damp cloth and a little dish soap.
- Never spray cleaner directly onto buttons.
Knobs And Handles
- Remove knobs if possible, wash with mild soap, and dry before replacing.
- Polish handles with a microfiber cloth.
Oven Vents
- Dust regularly to avoid buildup.
- Never block vents—they release heat and keep your oven working well.
Non-obvious Insights: What Most Owners Miss
- Enamel can chip from sudden temperature changes. Don’t pour cold water into a hot oven or vice versa. This thermal shock can crack the blue coating.
- Tiny scratches may dull the shine but don’t affect cooking. Many users worry about small marks, but these are usually just cosmetic.

Credit: www.appliancecity.info
Where To Find More Help
Your KitchenAid oven’s manual has cleaning tips designed for your specific model. You can also check the official KitchenAid website or contact their customer support for advice. For more in-depth information about oven cleaning and care, visit the KitchenAid official maintenance page.
Frequently Asked Questions
How Often Should I Clean My Kitchenaid Oven With A Blue Interior?
It’s best to wipe up spills after each use and do a deep clean once a month. Run the self-cleaning cycle every 3–6 months for heavy use.
Can I Use Commercial Oven Cleaners On The Blue Interior?
No, most commercial oven cleaners are too harsh and can damage the blue porcelain enamel. Stick with mild dish soap, baking soda, and water.
Is It Safe To Use The Self-cleaning Cycle Often?
Yes, but don’t overuse it. Running the self-cleaning cycle every few months is safe. Remove racks and accessories before starting, and ventilate your kitchen well.
My Oven Has Stubborn Stains That Won’t Come Off. What Should I Do?
Try a baking soda paste and let it sit overnight. Use a plastic scraper for tough spots. Avoid harsh chemicals or metal tools. If stains remain, they’re usually just cosmetic.
What If My Oven Smells After Cleaning?
If you notice a smell after using the self-clean or cleaning manually, ventilate your kitchen and wipe all surfaces again with a damp cloth. Persistent smells may mean food is stuck in vents or under the oven—consider calling a professional for help.
Maintaining your KitchenAid oven with a blue interior doesn’t have to be hard. By using the right products, cleaning regularly, and avoiding common mistakes, you’ll enjoy a spotless oven that works well and looks beautiful for years.

Credit: www.reddit.com