
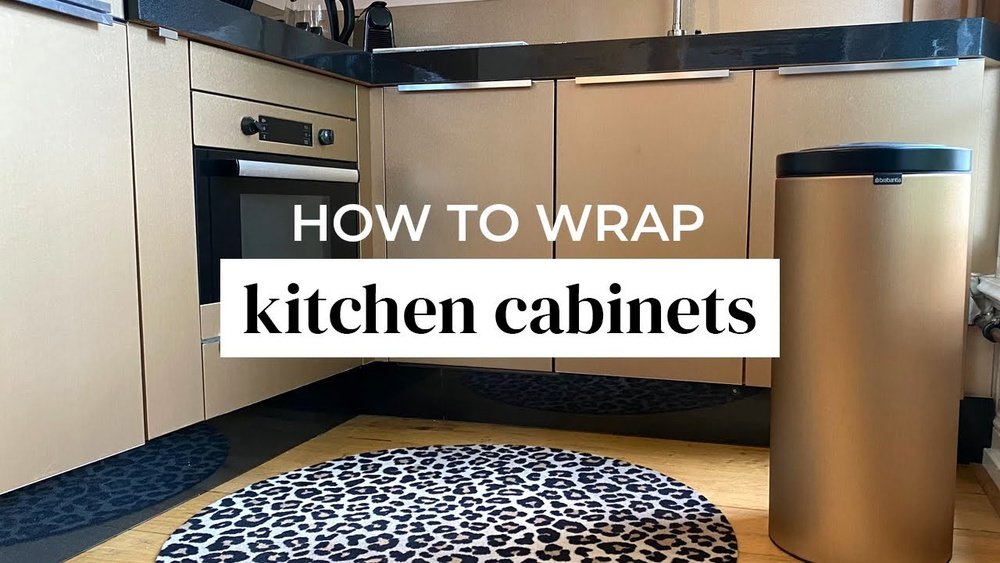
Transforming your kitchen doesn’t always need a big budget or a full renovation. Many people are discovering how simple it can be to give old cabinets a fresh new look using vinyl paper. This modern material, also known as self-adhesive vinyl or peel-and-stick film, lets you update your kitchen’s style in just a weekend, with no need for special tools or professional help. But getting a smooth, long-lasting finish takes more than just sticking on some paper. If you want to cover your kitchen cabinets with vinyl paper—and do it right—this guide will walk you through every step, from picking the right vinyl to achieving a seamless look that lasts for years.
Why Use Vinyl Paper For Kitchen Cabinets?
Vinyl paper is popular for kitchen upgrades because it offers a unique mix of benefits. First, it’s budget-friendly. Instead of paying thousands for new cabinets, you can spend a fraction of the price and still get a fresh appearance. Vinyl also comes in many designs—wood, marble, solid colors, and even metallics—so you can match any style.
Another big reason is easy installation. You don’t need to remove your cabinets or use harsh chemicals. Most vinyl papers are peel-and-stick, so you simply cut, peel, and press them onto the cabinet surface.
Durability matters, too. Modern vinyl is water-resistant, easy to clean, and stands up to heat, steam, and everyday kitchen messes. If you make a mistake or want to change styles later, it’s much easier to remove than paint or traditional contact paper.
Still, not all vinyl is the same. Choosing the right type is the first key to success.
Choosing The Right Vinyl Paper
Not all vinyl papers are suitable for kitchen use. When choosing, look for these features:
- Thickness: Thicker vinyl (usually 0.2mm or more) is easier to apply without bubbles and lasts longer.
- Finish: Matte hides fingerprints, while glossy is easier to wipe clean.
- Adhesive quality: Good adhesive won’t peel at the edges with steam or heat.
- Water and heat resistance: Essential for humid kitchen environments.
- Pattern repeat: Some patterns, like wood grain, look more realistic if the repeat is subtle.
- Size: Make sure the roll is wide enough to cover cabinet doors with minimal seams.
Here’s a quick comparison of common vinyl types for kitchen cabinets:
| Vinyl Type | Best For | Durability | Ease of Application |
|---|---|---|---|
| Matte Finish | Modern, low-glare look | High | Easy |
| Glossy Finish | Easy cleaning, bright look | Medium-High | Medium |
| Textured (Woodgrain) | Classic or rustic style | High | Medium |
| Metallic | Modern, industrial kitchens | Medium | Medium-Hard |
Pro tip: Order small samples to see how each type looks and feels in your actual kitchen light before buying larger rolls.
Tools And Materials You’ll Need
Before you start, gather everything you need for a smooth installation. Having the right tools prevents mistakes and saves time.
- Vinyl paper rolls (measure your cabinets and add 20% extra for mistakes)
- Sharp utility knife or craft knife
- Metal ruler (for straight cuts)
- Measuring tape
- Squeegee or credit card (to smooth out air bubbles)
- Mild cleaner (like dish soap)
- Sponge or microfiber cloth
- Screwdriver (to remove handles and hinges)
- Sandpaper (fine grit, 220)
- Primer (optional, for glossy or damaged surfaces)
- Hairdryer or heat gun (for corners and edges)
- Painter’s tape (to hold vinyl in place while positioning)
Two insights beginners miss:
- Using a sharp blade is essential. A dull knife will tear the vinyl and leave rough edges.
- A hairdryer can make vinyl more flexible, helping it wrap neatly around corners and edges.
Measuring And Planning
Rushing into the job without a plan is one of the most common mistakes. Accurate measurements and planning ensure you buy the right amount of vinyl and avoid visible seams.
How To Measure Your Cabinets
- Remove hardware: Take off handles and hinges. Label each piece so you can reinstall them easily.
- Measure each door and drawer separately: Note width and height. Vinyl should cover the front and slightly wrap around the edges for a neat look.
- Add extra margin: Add 1-2 inches to each measurement to allow for trimming and mistakes.
- Calculate total vinyl needed: Multiply the area of each piece, add together, and buy 20% more.
Here’s an example calculation:
| Cabinet Part | Width (inches) | Height (inches) | Area (sq in) |
|---|---|---|---|
| Door 1 | 16 | 28 | 448 |
| Drawer 1 | 12 | 8 | 96 |
| Door 2 | 16 | 28 | 448 |
Sum the areas, convert to square feet (divide by 144), and add 20% extra. This helps avoid running short or mismatched patterns.
Planning The Application
- Decide if you want to cover only the fronts, or also the sides and frames.
- Plan to apply vinyl in one direction for all pieces to keep the pattern consistent.
- For patterned vinyl, align the grain or pattern for a professional look.
Pro tip: Label each piece of vinyl after cutting so you know where it goes.
Preparing The Cabinets
Preparation is often rushed, but it’s the foundation for a smooth finish. Clean, smooth surfaces help the vinyl stick better and last longer.
Cleaning
- Mix a few drops of mild dish soap with warm water.
- Use a sponge or microfiber cloth to remove grease, dust, and dirt.
- Dry thoroughly with a clean towel.
Don’t skip this step! Even small traces of grease can cause vinyl to peel or bubble later.
Sanding And Repairing
- Lightly sand glossy or painted surfaces with fine-grit sandpaper. This helps the adhesive bond.
- Fill deep scratches or holes with wood filler and let dry.
- Wipe away all sanding dust.
Expert tip: If your cabinet fronts are very glossy or damaged, wipe them with a little rubbing alcohol after sanding for extra grip.
Removing Hardware
- Take off all handles, knobs, and hinges. This lets you cover the full surface for a seamless look.
- Store hardware in labeled bags for easy reassembly.
Cutting And Fitting The Vinyl
Cutting vinyl accurately is key. Rushing this part leads to wasted material and uneven edges.
Cutting Tips
- Measure twice, cut once. Mark lightly on the backing paper, not the vinyl side.
- Use a metal ruler and sharp knife for straight lines.
- Cut pieces slightly larger than your cabinet doors. Trim excess after applying.
Fitting Around Obstacles
For corners, hinges, or curves:
- Make small relief cuts (tiny slits) in the vinyl.
- Use a hairdryer to warm the vinyl before stretching around curves.
- For detailed areas, cut a template from cheap paper first, then copy to the vinyl.
Beginner’s mistake: Trying to cover all sides at once. Instead, cover the main surface first, then wrap the edges for best results.

Credit: www.amazon.com
Applying The Vinyl Paper
Now for the most important part—sticking the vinyl to the cabinet.
Step-by-step Application
- Peel a few inches of backing from the top edge of the vinyl.
- Align carefully before sticking. Use painter’s tape to help position if needed.
- Press the top edge in place, then slowly peel and stick downwards.
- Smooth as you go with a squeegee or credit card, working from center outward.
- Work slowly to avoid bubbles and wrinkles.
- Use a hairdryer to soften vinyl for corners and edges.
- Wrap the edges to the back for a neat finish, trimming excess with a sharp knife.
If you get a bubble:
- Lift the vinyl gently and reapply, or
- Prick a tiny hole with a needle and smooth out the air.
Pro tip: Do not stretch the vinyl too much—it can shrink back over time, causing edges to peel.
Working With Patterns
If your vinyl has a pattern (like wood grain or tile), align each piece before sticking. Slight misalignments are very noticeable on large surfaces.
For best results:
- Dry-fit all pieces before peeling the backing.
- Use painter’s tape to mark the correct positions.
Handling Corners, Edges, And Hardware Holes
The trickiest parts are corners, edges, and places where handles or hinges go.
Corners
- Use a hairdryer to gently heat the vinyl.
- Pull and smooth the vinyl around the corner, making small relief cuts if needed.
- Press firmly to seal.
Edges
- Wrap at least 1/2 inch of vinyl around the back for a secure hold.
- Trim with a sharp knife for a crisp line.
Hardware Holes
- Poke through the vinyl from the back with a sharp tool after applying.
- Trim excess around the hole with a craft knife.
Expert insight: Wrapping edges and corners well means the vinyl won’t lift, even with daily use.
Credit: www.youtube.com
Reinstalling Cabinet Doors And Hardware
Once the vinyl is in place:
- Wait 24 hours before reinstalling hardware, to let the adhesive bond fully.
- Reattach handles and hinges, using the original screws.
- Check that no edges are lifting. Press down again with a squeegee if needed.
Tip: If you find small air bubbles after a day or two, prick them with a pin and smooth them out.
Cleaning And Maintenance
Vinyl-covered cabinets are easy to care for, but some habits will help them last even longer.
- Wipe with a soft, damp cloth. Most spills clean up with water.
- Use mild dish soap for greasy spots—never harsh cleaners or bleach.
- Dry surfaces after cleaning to prevent water from seeping under the edges.
- Avoid scrubbing with abrasive pads, which can scratch the vinyl.
Data point: Quality vinyl, when properly installed, can last 5-10 years in a kitchen before needing replacement.
Troubleshooting Common Problems
Most issues come from rushing or skipping steps. Here’s how to solve them:
Air Bubbles
- Cause: Not smoothing as you go, or dust under the vinyl.
- Solution: Prick with a pin and press out the air, or lift and reapply.
Peeling Edges
- Cause: Grease, poor cleaning, or not wrapping edges.
- Solution: Clean, reheat the edge with a hairdryer, and press down firmly. Use a small amount of glue if needed.
Wrinkles
- Cause: Stretching the vinyl, or not smoothing from the center.
- Solution: Peel back and reapply, or gently heat and stretch out.
Pattern Misalignment
- Cause: Not aligning pieces before sticking.
- Solution: Always dry-fit and mark positions before final application.
Pro insight: Small mistakes often go unnoticed, but large bubbles or peeling edges will only get worse over time. Fix them right away for best results.
When To Avoid Vinyl Paper
Vinyl isn’t right for every situation. Consider these limits:
- Heavily textured or damaged cabinets: Vinyl won’t stick well to rough or peeling paint.
- Extreme heat: Cabinets near ovens or toasters may cause vinyl to lift.
- High humidity: In very humid kitchens, cheap vinyl may peel faster.
If your cabinets are in very poor shape, a new paint job or replacement might be better.
Comparing Vinyl Paper To Other Cabinet Coverings
It’s smart to know how vinyl stacks up against other popular options.
| Covering Type | Cost | Durability | Ease of Application | Removability |
|---|---|---|---|---|
| Vinyl Paper | Low | 5-10 years | Easy | Easy |
| Paint | Medium | 5-7 years | Medium | Hard |
| Laminate Sheets | Medium-High | 10-15 years | Hard | Hard |
| Contact Paper | Low | 2-4 years | Easy | Easy |
Vinyl paper is the best balance of price, durability, and style for most DIY kitchen makeovers.
Real-world Examples And Inspiration
Many homeowners have transformed their kitchens with vinyl paper. Here are a few inspiring ideas:
- Cover upper cabinets with white marble vinyl for a bright, modern look.
- Use woodgrain vinyl on lower cabinets for a cozy, classic feel.
- Try matte black vinyl for a sleek, dramatic effect.
- Add a stainless steel look to accent cabinets for a professional chef vibe.
Online forums and DIY communities are full of before-and-after photos. You can see more inspiration and real-life examples on the Reddit DIY community.

Credit: www.domino.com
Saving Money And Time
Covering cabinets with vinyl paper is one of the most affordable kitchen updates you can do. On average:
- Materials for a small kitchen cost $40–$120.
- The whole project can be done in 1–2 days, depending on cabinet count.
- No need to hire a contractor.
Tip: Buy in bulk or during sales, and reuse tools like squeegees and knives for future projects.
Final Touches And Long-term Tips
To keep your cabinets looking their best:
- Check edges every few months and press down if needed.
- Avoid hanging heavy items from handles, which can stress the vinyl.
- If a piece gets damaged, cut a new patch and apply—it’s easy to match most patterns.
Remember, vinyl allows you to change your kitchen’s look as trends or your tastes change. Unlike paint or new cabinets, it’s easy to update or remove.
Frequently Asked Questions
How Long Does Vinyl Paper Last On Kitchen Cabinets?
Quality vinyl paper, when properly installed and maintained, typically lasts 5 to 10 years. Factors like cleaning habits, humidity, and how much you use the kitchen can affect this. Cheap vinyl may peel sooner, while thicker, high-grade brands last longer.
Can Vinyl Paper Cover Damaged Or Old Cabinets?
Vinyl can hide small scratches and faded surfaces, but it won’t stick well to heavily textured, cracked, or peeling cabinets. Surfaces should be smooth and clean for best adhesion. Fill any holes and sand rough areas before applying.
Is Vinyl Paper Safe For Kitchens?
Yes, most modern vinyl papers are non-toxic and safe for kitchen use. Make sure to choose brands labeled as water-resistant and heat-resistant. Avoid using vinyl too close to direct heat sources like ovens or stovetops.
Can I Remove Vinyl Paper Later Without Damage?
In most cases, yes. Good-quality vinyl is designed to be removable and leaves little or no residue. However, if the cabinets were not properly cleaned before application, or if the vinyl is left for many years, some adhesive may remain. Any residue can usually be cleaned with rubbing alcohol.
What If I Make A Mistake During Application?
Don’t panic! Vinyl paper is forgiving. If you spot a bubble or wrinkle, carefully lift the vinyl and reapply. For small bubbles, use a pin to release the air, then smooth out. If a whole piece is ruined, cut a new one and start over. Always buy extra vinyl for this reason.
Bringing new life to your kitchen cabinets with vinyl paper is a project anyone can tackle with patience and care. It’s affordable, flexible, and can totally change the feel of your space—often in just a weekend. With the right prep and these step-by-step tips, you’ll enjoy cabinets that look fresh and stylish for years to come.