If you own a SmartThings stove, you know it’s not just an appliance—it’s a smart hub for your kitchen. But like any device, it needs correct settings to work its best. One small detail, the time, can have a big impact. Why does the clock matter? Because timed cooking, scheduled cleaning, and even basic notifications often depend on your stove’s time being accurate. If the clock is wrong, you might burn dinner, miss an alert, or lose sync with other smart devices.
Many people find changing the time on their SmartThings stove confusing, especially if they’re new to smart appliances or the SmartThings app. Some models have touch screens, others use knobs and buttons. And sometimes, the app and the stove seem out of sync. This guide covers every method for setting the clock, no matter your model or smart home setup. By the end, you’ll know not just how to change the time, but also how to troubleshoot problems, avoid common mistakes, and keep your stove running smoothly.
Understanding Your Smartthings Stove
Before you start, it’s important to know which SmartThings stove you have. Samsung and other brands produce several models, each with their own controls. Some have:
- Touchscreen panels
- Physical buttons and dials
- Wi-Fi or Bluetooth connectivity
- Integration with the SmartThings app
The clock can be set directly on the stove, through the app, or even by syncing with your phone or home network. Each method has its own steps.
Why Accurate Time Settings Matter
Many users underestimate the importance of the correct time on their smart stove. Here’s why it matters:
- Automated Cooking: Timed bake, delay start, and self-cleaning all use the internal clock.
- Remote Control: Schedules set via the app rely on synced time between your phone and stove.
- Energy Efficiency: Off-peak cooking (to save energy) requires precise scheduling.
- Notifications: Reminders and alerts are triggered based on the clock.
If your time is off, recipes can fail, and safety features may not work as intended.
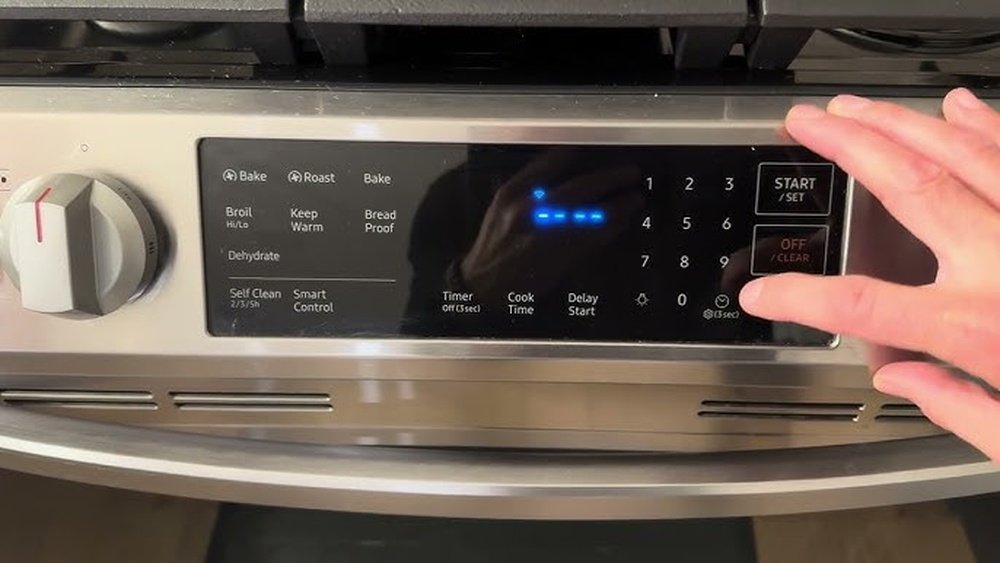
Setting The Time Directly On The Stove
Most SmartThings stoves allow you to set the clock using the control panel. This is the most basic method and works even if your Wi-Fi is down.
Step-by-step: Manual Clock Adjustment
- Wake the Control Panel: Touch the screen or press any button to wake up the display.
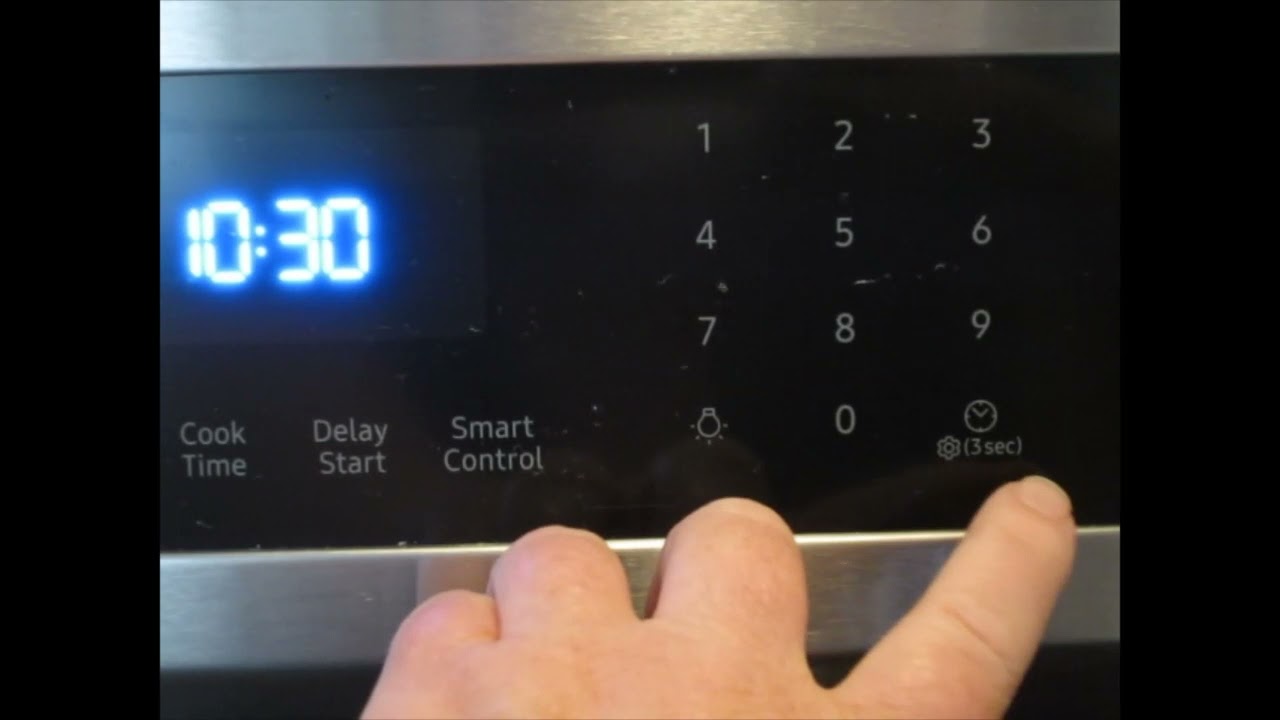
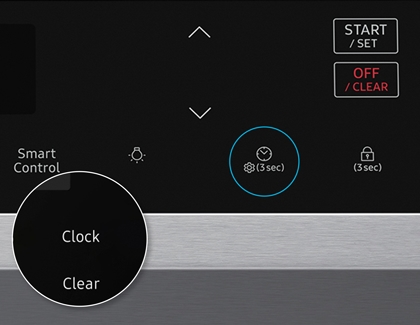
- Find the Clock/Settings Button: Look for a button labeled Clock, Time, or Settings. On some models, you may need to press and hold a key for 3 seconds.
- Enter Clock Mode: If prompted, select Clock or Set Time from the menu.
- Adjust Hours: Use the +/- buttons or turn the dial to set the hours. Pay attention to AM/PM if your model uses 12-hour format.
- Set Minutes: Move to the minutes field and adjust accordingly.
- Confirm: Press Start, OK, or another confirmation button to save your changes.
- Exit Settings: The display should return to the main screen with the updated time.
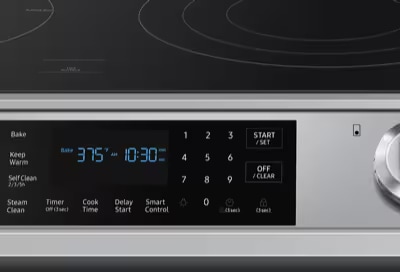
Example: Samsung Ne63t8951ss
On this popular model, you press Settings > Clock > adjust time with arrows > Start to confirm.
Common Issues When Setting Time Manually
- Buttons not responding: Child lock may be active. Disable it before adjusting.
- AM/PM confusion: Some models default to 24-hour time; check your display format.
- Time not saving: Power interruptions can reset the clock. Confirm your stove is plugged in securely.
Credit: www.samsung.com
Changing Time Using The Smartthings App
If your stove is connected to Wi-Fi and linked to your SmartThings app, you can set the time remotely. This is especially helpful if you prefer using your phone or have multiple smart devices.
How To Link Your Stove To The App
Before changing the time, make sure your stove is registered in the app:
- Download the SmartThings App from the App Store or Google Play.
- Sign in with your Samsung or SmartThings account.
- Add Device: Tap the + icon, select Device, then Range or Stove.
- Follow on-screen prompts to connect via Wi-Fi.
Setting The Time In The App
- Open the SmartThings app and select your stove from the device list.
- Access Settings: Tap the gear icon or More options.
- Find Clock/Time Settings: Some models show Clock in the main menu; others hide it in submenus.
- Sync Time: Choose Sync with phone or Set manually. If syncing, your stove will match your smartphone’s time.
- Confirm Changes: Save or apply the new time. Your stove should update in a few seconds.
Example: Syncing With Phone
If you travel between time zones, syncing with your phone ensures your stove’s clock always matches your local time. However, note that if your phone’s clock is wrong, your stove will also be wrong.
Benefits Of Setting Time Via App
- Convenience: No need to bend or reach the stove.
- Accuracy: Syncs with phone or internet time.
- Remote Control: Adjust time even when not at home.
Advanced Settings: Automatic Time Sync
Some SmartThings stoves support automatic time updates. This means your stove’s clock adjusts itself using your Wi-Fi network or the SmartThings cloud.
How Automatic Sync Works
- When enabled, the stove checks the internet for the correct time.
- Updates happen daily or after power interruptions.
- Works best if your home Wi-Fi is stable.
How To Enable Automatic Time Sync
- Open the SmartThings app and select your stove.
- Go to Settings.
- Find Auto Time Sync: This may be labeled Set time automatically or Sync with network.
- Toggle On.
- Confirm: The stove will check for updates and set the time.
Pros And Cons Of Automatic Sync
| Advantage | Drawback |
|---|---|
| Always accurate time | Needs stable internet |
| No manual updates needed | May not work if Wi-Fi is down |
| Syncs after power outage | Depends on correct time zone |
Non-obvious Insight
If your Wi-Fi router is set to the wrong time zone (for example, after moving or factory reset), your stove could display the wrong time even with auto sync. Always check your router and app settings after changing locations.
Credit: www.youtube.com
Changing Time After A Power Outage
A common problem: after a power cut, your SmartThings stove loses the correct time. Some stoves restore time automatically, but others require manual reset.
Why The Clock Resets
- Non-volatile memory: Not all models store the clock during outages.
- Battery backup: Few models have this feature.
Steps To Restore Time
- Wait for Power Return: Some models wait a few minutes before restoring functions.
- Check Display: If the clock flashes or shows 12:00, it needs to be set.
- Set Time: Use the manual or app method described earlier.
- Enable Auto Sync: If available, turn on automatic time updates to avoid future resets.
Practical Tip
If your area has frequent outages, consider a small uninterruptible power supply (UPS) for your stove (if supported) or keep the SmartThings app ready for quick reset.
Time Zone And Daylight Saving Changes
It’s easy to forget about daylight saving time or time zone changes when moving houses or traveling. Your stove’s clock can quickly become incorrect.
Adjusting For Time Zone
- Manual Method: Set the time on the stove or app to match your current zone.
- Automatic Method: If using auto sync, check that your home Wi-Fi and phone are set to the right location.
Adjusting For Daylight Saving Time
- Some stoves adjust automatically if auto sync is enabled.
- For manual models, change the clock forward or back one hour as needed.
Non-obvious Insight
If your phone or router is set to a city that doesn’t use daylight saving, your stove won’t change automatically even with sync enabled. Double-check both your phone and router settings during daylight saving transitions.
Troubleshooting: When The Clock Won’t Change
Sometimes, you do everything right but the time on your SmartThings stove still won’t update. Here’s how to solve common problems.
Problem: Buttons Don’t Work
- Check Child Lock: Look for a lock symbol on the display. Disable it by holding the Child Lock or Control Lock button for 3–5 seconds.
- Reset the Stove: Power off at the breaker for 30 seconds, then try again.
Problem: App Can’t Connect
- Check Wi-Fi: Make sure your stove and phone are on the same network.
- Restart Router: Sometimes, a simple router reset can fix connection issues.
- Re-add Device: Remove the stove from the app and add it again.
Problem: Time Resets Randomly
- Firmware Updates: Some updates can reset the clock. Check for pending updates in the app.
- Unstable Power: Use a surge protector to prevent brief outages.
Problem: Wrong Time After Sync
- Check Phone/Router Time Zone: The stove will follow your network’s time zone, not just your location.
- Manual Override: Some models let you turn off sync and set time manually if sync is unreliable.
Comparing Methods To Change Time
Each method for changing the time on a SmartThings stove has its strengths and weaknesses. This comparison helps you choose what’s best for your situation.
| Method | Best For | Limitations |
|---|---|---|
| Manual (on stove) | No internet or simple changes | Must be physically present |
| SmartThings app | Remote updates, syncing with phone | Needs Wi-Fi and app setup |
| Auto sync | Frequent travelers, daylight saving | Relies on correct network time |
Common Mistakes And How To Avoid Them
Even experienced users make errors when setting the time on their SmartThings stove. Here are some to watch for:
- Ignoring AM/PM: Double-check the time format. Cooking at 8 PM instead of 8 AM could ruin your plans.
- Not Saving Changes: Always confirm your new time with the Start or OK button.
- Forgetting Daylight Saving: Set reminders for the spring and fall change.
- Skipping Firmware Updates: Outdated software can cause sync issues.
- Assuming Auto Sync Is Always Right: Double-check after power outages or travel.
Practical Example
Suppose you schedule a delayed bake for a roast at 5 PM. If your stove’s clock is an hour off, your food could be undercooked or overcooked. Always check the clock before using timed features.
Keeping Your Stove’s Time Accurate Long-term
To avoid repeated problems, set up your SmartThings stove for long-term reliability.
Regular Checks
- Check the clock monthly, especially after power interruptions.
- Review app and firmware updates quarterly.
- Sync with your phone after major travel.
Update Settings After Major Changes
If you move to a new time zone or change Wi-Fi networks, update your stove’s clock and sync settings immediately.
Use Reminders
Set phone reminders for daylight saving transitions and periodic clock checks.
Advanced Tip
If you use multiple SmartThings devices, group them in the app. This way, you can update all devices’ clocks at once, keeping your entire smart kitchen in sync.
Special Cases: Multi-user Households
If several people use the SmartThings stove, confusion can happen when:
- More than one person sets the time
- Different phones have different time zones
- Multiple SmartThings accounts are linked
Avoiding Conflicts
- Designate one “admin” for time changes.
- Agree on time settings for the household.
- Use the same time zone on all phones and the app.
Example Scenario
If one roommate travels and their phone syncs a different time, the stove could shift unexpectedly. Set rules about who can adjust smart home settings.
What To Do If Time Features Don’t Work
If your stove’s timed bake, delay start, or self-clean features won’t activate, the problem often lies with the clock.
Diagnosis Steps
- Check if the clock displays the correct time.
- Test a simple timer (e.g., set for 5 minutes).
- Review app notifications for errors.
- Restart the stove and try again.
- Contact support if problems persist.
When To Call Support
If your clock resets frequently, won’t save changes, or time features always fail, reach out to the manufacturer or your retailer. There may be a hardware or firmware issue.
Credit: www.samsung.com
How Smartthings Stoves Compare To Other Smart Appliances
Modern kitchens often have several smart devices. How does the SmartThings stove’s clock system compare?
| Appliance | Clock Setting Methods | Sync Capabilities |
|---|---|---|
| SmartThings Stove | Manual, App, Auto Sync | Yes, with app/phone |
| Smart Microwave | Manual, Some app control | Rarely auto syncs |
| Smart Refrigerator | Manual, App | Sometimes auto syncs |
| Traditional Stove | Manual only | No sync |
Security And Privacy When Syncing Time
When you connect your SmartThings stove to the internet, some data is transmitted. While setting the clock is low risk, it’s smart to follow basic privacy steps.
- Use a secure Wi-Fi password.
- Update firmware regularly to protect against bugs.
- Set privacy options in the SmartThings app to control data sharing.
For more on smart device privacy, visit the Federal Trade Commission.
Real-world Examples And User Stories
Example 1: Busy Parent
Samantha, a busy parent, uses her SmartThings stove’s delayed start to have dinner ready after work. The clock was an hour off after a power outage—her roast was still raw at dinner time. Now, she checks the clock weekly and enabled auto sync.
Example 2: Frequent Traveler
David travels often for work. After syncing his stove with his phone, the clock changed to a different time zone when he returned home. He now sets his phone to local time before syncing the stove.
Example 3: Multi-user Home
In a shared apartment, three roommates use the SmartThings app. The stove’s clock kept changing because each user had a different time zone. They decided only one person should control the smart home settings.
Future Trends: Smarter Clock Features
Smart kitchen appliances are evolving quickly. In the future, you may see:
- Voice control for setting time (using Bixby, Alexa, or Google Assistant)
- Geo-fencing to auto-adjust time when you travel
- Integration with calendars for even smarter scheduling
These features will make managing your smart kitchen even easier.
Frequently Asked Questions
How Do I Know If My Smartthings Stove Supports Automatic Time Sync?
Check your stove’s manual or the SmartThings app. If you see options like Set time automatically or Sync with network, your model supports auto sync. If unsure, search your model number on the manufacturer’s website.
Why Does My Stove’s Clock Keep Resetting After A Power Outage?
Some models do not store clock settings during outages unless connected to Wi-Fi with auto sync enabled. If your stove resets often, enable auto sync or set the time manually after each outage.
Can I Set The Stove’s Clock If I Don’t Have Wi-fi?
Yes, you can always set the clock manually on the stove’s control panel. The app and auto sync features are optional but provide extra convenience.
Will The Smartthings Stove Adjust For Daylight Saving Time Automatically?
If auto sync is enabled and your Wi-Fi/network is set to the correct time zone, your stove will update for daylight saving time. Otherwise, you’ll need to change it manually.
What Should I Do If The Smartthings App Won’t Connect To My Stove?
First, check your Wi-Fi connection and restart both the stove and your router. Remove the stove from the app and add it again if needed. If problems persist, contact customer support or check for firmware updates.
Setting the right time on your SmartThings stove may seem like a small detail, but it makes a big difference in daily life. Whether you prefer manual controls, the app, or automatic updates, now you have the tools and tips to keep your kitchen running smoothly—no more burnt dinners or missed schedules. With a little routine maintenance, your smart stove will always be right on time.