
Every kitchen tool works best when it’s clean, and this is especially true for a Breville juicer. If you’ve ever used one, you know how quickly pulp, juice, and tiny fruit fibers can build up inside. A dirty juicer doesn’t just look bad—it can affect the taste of your juice, slow down your machine, and even shorten its life. But cleaning a Breville juicer doesn’t have to be hard or time-consuming. With the right steps and a little know-how, you can keep your juicer spotless and running like new.
This guide will show you exactly how to clean your Breville juicer, step by step. You’ll learn what tools you need, which parts to focus on, and how to avoid the mistakes that many new owners make. Whether you’re a daily juicer or just starting out, you’ll discover smart tips that save time and protect your machine.
Let’s get into the best ways to keep your Breville juicer clean and ready for your next glass of fresh juice.
Why Cleaning Your Breville Juicer Matters
A clean juicer does more than just look good on your kitchen counter. Regular cleaning keeps your juicer working smoothly, helps your juice taste fresh, and protects your health. Even one missed cleaning can leave pulp and juice to dry inside, creating a home for bacteria and mold. Over time, buildup can block the mesh filter and slow down the motor. This not only makes juicing harder but can also reduce the life of your Breville juicer.
Many people don’t realize that leftover juice and pulp can stain plastic parts and leave behind smells. These odors can mix with the taste of your next juice. A well-cleaned juicer also means you won’t have to deal with tough, stuck-on stains later.
In short, cleaning your juicer after every use is the easiest way to get the best juice and the longest life from your machine.
Understanding Your Breville Juicer Parts
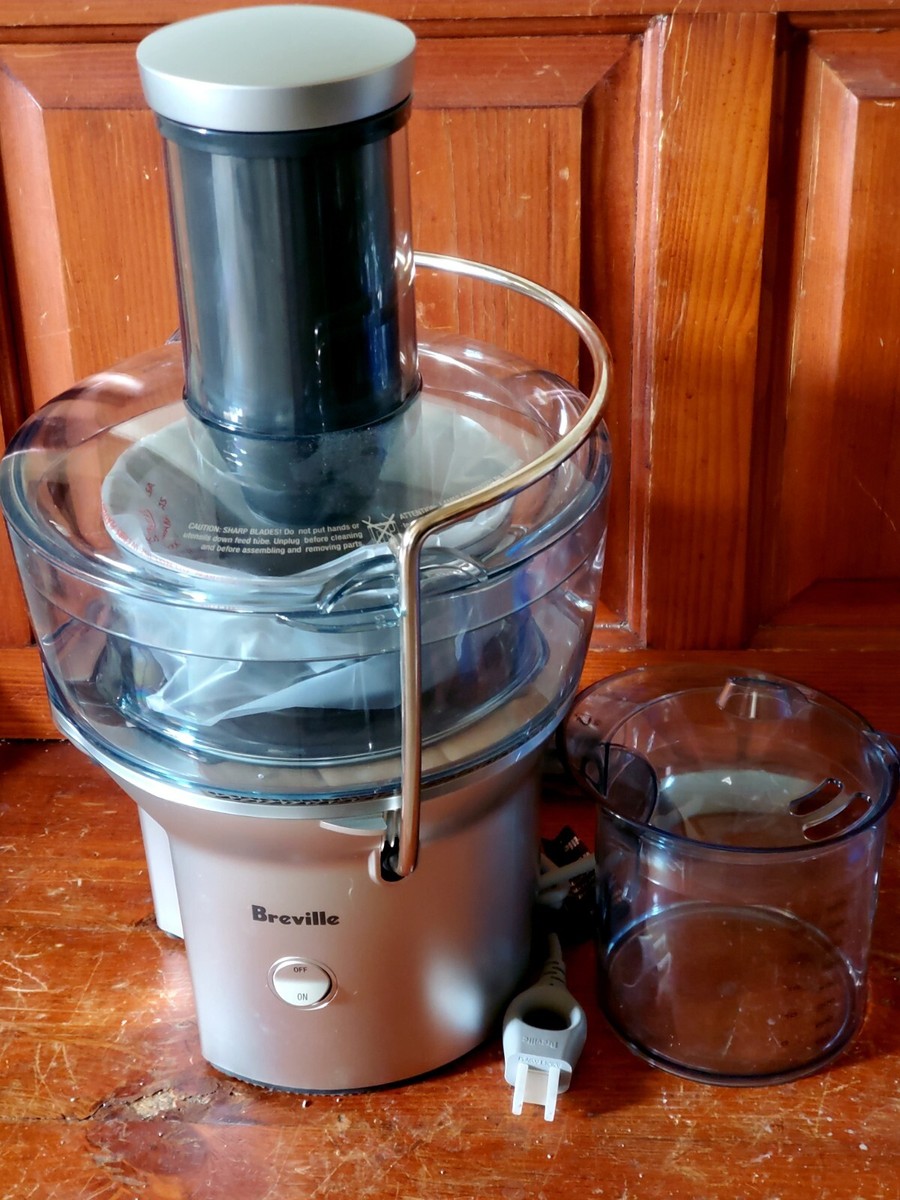
Before you start cleaning, it helps to know the main parts of your Breville juicer. While there are different models, most have similar pieces. Here’s a quick overview:
- Pusher: The part you use to push fruits and veggies down the chute.
- Lid with feeding chute: The cover where food enters.
- Juicing bowl: Holds the mesh filter and collects juice.
- Mesh filter basket: Separates juice from pulp with a fine screen.
- Pulp container: Collects the leftover pulp.
- Juice jug: Where the juice is collected.
- Motor base: The main body, which contains the motor.
Knowing where pulp and juice travel makes it easier to clean every part. The mesh filter, for example, is where most of the fine pulp and juice fibers get stuck, so it needs extra attention.
Tools And Supplies You Will Need
Cleaning your Breville juicer is easier when you have the right tools. Here’s what you’ll want to gather:
- Soft brush (Breville often includes one, or use a toothbrush)
- Mild dish soap
- Non-abrasive sponge or cloth
- White vinegar (for deep cleaning)
- Warm water
- Microfiber towel or soft cloth for drying
- Toothpick or small brush for tight spaces
Some people also use baking soda for tough stains. Avoid using steel wool or harsh scrubbers, as these can scratch plastic and metal parts.
Step-by-step Guide: How To Clean Your Breville Juicer
The best way to clean your juicer is right after you use it. Waiting lets pulp and juice dry, which makes cleaning harder. Here’s how to do it step by step.
1. Turn Off And Unplug The Juicer
Safety first. Always unplug your juicer before cleaning. Even if you’re only wiping down parts, this keeps you safe from electric shocks.
2. Disassemble The Juicer
Take apart your juicer as much as the manual allows. Usually, this means removing the pusher, lid, mesh filter basket, pulp container, and juice jug. Most parts lift off easily. If you’re not sure, check your user manual for your model.
3. Remove Pulp And Rinse Right Away
Empty the pulp container into your compost or trash. Rinse all parts under running water to remove juice and loose pulp. Doing this immediately makes the rest of the cleaning much faster.
4. Soak And Wash Each Part
Fill your sink with warm water and a few drops of mild dish soap. Soak all removable parts (except the motor base) for 5-10 minutes. This helps loosen fibers and sticky juice.
- Mesh filter basket: Use the soft brush to scrub the tiny holes. Move in circles and rinse often. This is where most pulp gets stuck.
- Juicing bowl, lid, pusher, juice jug: Wash with a sponge or cloth.
- Pulp container: Check corners for stuck pulp.
5. Rinse Thoroughly
Soap left on your juicer can affect the taste of your juice. Rinse each part with clean water until all soap is gone. Look for bubbles—if you see any, rinse again.
6. Dry All Parts
Use a microfiber towel or air-dry on a rack. Make sure all parts are fully dry before reassembling. This helps prevent mold and smells.
7. Wipe The Motor Base
Never put the motor base in water. Instead, use a damp cloth to wipe down the base. Dry with a clean towel. Check for juice spills near buttons or the cord.
8. Reassemble The Juicer
Once everything is dry, put the juicer back together. This keeps all parts safe and ready for next time.
Deep Cleaning Your Breville Juicer
Even with regular cleaning, your juicer can build up stains, odors, or mineral deposits. Deep cleaning once a week (or more often if you juice daily) keeps your machine in top shape.
How To Deep Clean The Mesh Filter
Over time, the fine holes in the mesh filter can clog with pulp. This is the most important part to deep clean.
- Soak in Vinegar Solution: Mix one part white vinegar and one part water. Soak the filter for 20-30 minutes.
- Scrub Gently: Use the soft brush to clean the mesh. Be patient—don’t press too hard.
- Rinse and Dry: Rinse well with water and let air dry.
If you see stubborn stains, sprinkle baking soda on the brush and scrub again.
Removing Odors And Stains
Plastic parts can sometimes hold onto strong smells, especially after juicing beets or carrots.
- Lemon Juice: Rub a cut lemon on stained areas, let sit for 5 minutes, then rinse.
- Baking Soda Paste: Mix a little baking soda with water, spread on stains, wait 10 minutes, then scrub and rinse.
Cleaning The Pulp Container And Juice Jug
These parts are often dishwasher-safe (check your manual), but hand washing prevents warping and keeps them clear. If you notice a cloudy look, soak in vinegar for 10 minutes, then scrub and rinse.
Cleaning Schedule: What To Clean And When
Not every part of your juicer needs the same attention every time. Here’s a simple schedule:
| Part | After Each Use | Weekly | Monthly |
|---|---|---|---|
| Mesh Filter Basket | Yes | Deep Clean | Check for Damage |
| Pulp Container | Yes | Deep Clean | Check for Odors |
| Juicing Bowl & Lid | Yes | Deep Clean | Check for Stains |
| Motor Base | Wipe | Wipe Thoroughly | Inspect Cord |
| Juice Jug | Yes | Deep Clean | Check for Cloudiness |
Following this schedule helps prevent buildup and keeps your juicer working its best.
Troubleshooting Common Cleaning Problems
Sometimes, even with regular cleaning, you might run into some common problems.
Stuck Pulp In Mesh Filter
If pulp won’t come out of the mesh filter, try soaking it longer in vinegar or using a toothpick to gently poke out stubborn bits. Never use sharp tools that can damage the mesh.
Cloudy Plastic Parts
Cloudy or white streaks often come from minerals in your water or juice stains. Soak these parts in a mix of vinegar and water, then rinse and dry. For very tough stains, repeat the process.
Bad Smells
If you notice a sour or musty smell, it likely means something wasn’t fully cleaned or dried. Disassemble your juicer and clean every part again, paying close attention to corners and the pulp container.
Important Dos And Don’ts
Here are some key tips to keep your Breville juicer safe and clean for years:
Dos:
- Do clean all removable parts after each use.
- Do use the brush for the mesh filter every time.
- Do dry parts fully before reassembling.
Don’ts:
- Don’t let pulp or juice sit overnight.
- Don’t use harsh cleaners, bleach, or steel wool.
- Don’t put the motor base in water.

Credit: www.youtube.com
Dishwasher Safety For Breville Juicer Parts
Some Breville juicer parts are dishwasher-safe, but not all. Here’s a quick comparison for popular models:
| Model | Mesh Filter | Pulp Container | Juice Jug | Motor Base |
|---|---|---|---|---|
| Breville Juice Fountain Plus | Top Rack | Top Rack | Top Rack | Never |
| Breville Compact Juicer | Top Rack | Top Rack | Top Rack | Never |
| Breville Cold XL | Hand Wash | Top Rack | Top Rack | Never |
Tip: Always check your specific model’s manual before using the dishwasher. High heat can warp or crack plastic parts over time.
How To Store Your Breville Juicer After Cleaning
Proper storage helps your juicer stay clean and last longer. After drying, reassemble your juicer and keep it in a dry place. Avoid covering with cloths or plastic while parts are damp, as this can trap moisture and cause mold.
If you juice daily, leaving your juicer assembled on the counter makes it easier to use. If you only juice sometimes, store all parts together so nothing gets lost.
Credit: www.breville.com
Non-obvious Insights That Make Cleaning Easier
Many first-time juicer owners miss a few practical tricks that make cleaning much simpler:
- Line the pulp container with a compostable bag or even a paper towel. This makes emptying pulp easier and cuts down on cleaning time.
- Clean the mesh filter first before the pulp dries. This part is the hardest to clean if you wait.
- Juice citrus fruits last if you’re making mixed juices. The acidity of lemon or orange juice helps break down sticky fruit fibers, making cleaning smoother.
These small changes can save you time and help your Breville juicer work better for longer.
The Cost Of Not Cleaning Your Juicer
Ignoring cleaning can lead to more than just bad-tasting juice. Over time, leftover pulp and juice can:
- Cause mold and bacteria to grow inside your juicer.
- Block the mesh filter, slowing down juicing and making the motor work harder.
- Damage plastic parts, leading to cracks or stains that can’t be removed.
- Void your Breville warranty if parts break due to poor care.
A study by the National Sanitation Foundation found that kitchen appliances with food residue can have up to 2,000 times more bacteria than a toilet seat—a good reminder to keep your juicer clean!
When To Replace Juicer Parts
Even with the best care, some parts wear out over time. Watch for these signs:
- Mesh filter basket: Holes get bigger, mesh is bent, or juice flow slows down.
- Plastic parts: Cracks, deep stains, or warping.
- Juicing bowl or jug: Cloudiness that won’t come out with cleaning.
Most parts can be replaced from Breville or online. Replace damaged parts to keep your juice safe and your machine working well.
Cleaning Mistakes To Avoid
Beginners often make these mistakes:
- Waiting too long to clean after juicing.
- Using harsh scrubbers that scratch plastic or metal.
- Forgetting to clean under the mesh filter or around the base.
- Not drying parts fully before storage.
Avoiding these mistakes will help your juicer last much longer and keep your juice tasting fresh.
Credit: www.ebay.com
Cleaning Juicer After Tough Ingredients
Some fruits and vegetables leave more mess than others. Beets, carrots, and leafy greens, for example, can stain and stick inside your juicer.
- Beets and carrots: Rinse immediately to stop stains. Use lemon juice or vinegar if stains appear.
- Leafy greens: Check the filter for tiny fibers, and soak for a few extra minutes.
- Apples and pears: Their sticky pulp can clog the mesh. Scrub the filter basket well.
If you juice these foods often, deep clean your juicer more frequently.
Using Eco-friendly Cleaning Methods
You don’t need strong chemicals to clean your Breville juicer. Simple solutions work well:
- Vinegar and baking soda: Both are safe and break down stains and smells.
- Lemon juice: Natural and helps remove stains from plastic.
- Compostable bags: Line your pulp container to reduce waste and cleaning.
These methods are gentle on your juicer and the environment.
How To Clean Hard-to-reach Areas
Some areas in your juicer are tricky to reach, like the corners of the pulp container or the edge of the mesh filter. Use a small brush, toothpick, or even a cotton swab for these spots. Take your time—rushing can leave behind pulp that causes problems later.
Comparing Cleaning Effort: Breville Juicer Vs. Other Brands
How does cleaning a Breville juicer compare to other popular brands? Here’s a quick look:
| Brand | Number of Parts | Mesh Filter Size | Average Cleaning Time |
|---|---|---|---|
| Breville | 5-7 | Large | 8-10 min |
| Omega | 7-9 | Medium | 12-15 min |
| Hurom | 6-8 | Small | 15-18 min |
| Hamilton Beach | 4-6 | Medium | 7-9 min |
Insight: Breville juicers are designed for easy cleaning compared to many slow juicer models, but the mesh filter still needs careful brushing every time.
Extending The Life Of Your Breville Juicer
Good cleaning habits do more than just keep your juicer looking nice—they protect your investment. Here’s how to make your juicer last:
- Clean after every use, even if you’re in a hurry.
- Deep clean once a week, especially the mesh filter.
- Dry all parts fully before putting away.
- Replace worn parts as soon as you notice damage.
These habits can help your Breville juicer last for many years and keep your juices tasting fresh.
Frequently Asked Questions
How Often Should I Clean My Breville Juicer?
You should clean your Breville juicer after every use. This prevents pulp and juice from drying, which makes cleaning much harder and can lead to bacteria growth. A deep clean once a week is also a good idea if you use your juicer daily.
Can I Put Breville Juicer Parts In The Dishwasher?
Many Breville juicer parts are top-rack dishwasher safe, including the mesh filter, pulp container, and juice jug. However, always check your model’s manual. The motor base should never be washed in the dishwasher.
What Should I Do If My Mesh Filter Is Clogged?
If your mesh filter is clogged, soak it in a mix of white vinegar and water for 20-30 minutes, then scrub gently with a soft brush. For very tough clogs, repeat the process or use a toothpick to clear the holes. Never use sharp or hard tools.
How Do I Remove Stains From My Juicer?
To remove stains from juicer parts, rub a cut lemon or a baking soda paste on the stains, wait 5-10 minutes, then wash and rinse. Vinegar soaks can also help with cloudy plastic parts.
Where Can I Buy Replacement Parts For My Breville Juicer?
You can buy replacement parts directly from the official Breville website or from authorized sellers. Make sure to choose parts that fit your exact juicer model for the best results. For more information, visit the official Breville parts page.
Keeping your Breville juicer clean doesn’t have to be a chore. With these steps and tips, you’ll enjoy fresh, healthy juice and a machine that lasts for years. A little care goes a long way—happy juicing!