Changing the clock on your AEG stove might seem like a small task, but getting it right can make your kitchen experience smoother. Whether you need to adjust for daylight savings, set the correct time after a power cut, or program your oven for automatic cooking, knowing how to set the clock is essential. Many people struggle with this because AEG stoves have different models and button layouts. This guide will walk you through every step, answer common questions, and help you avoid mistakes that could cause frustration or incorrect settings.
You’ll find everything you need here: step-by-step instructions, troubleshooting tips, and advice for both new and older AEG models. If you’re not confident with kitchen technology, don’t worry—this article uses simple language and gives clear explanations. By the end, you’ll know exactly how to change your AEG stove clock and keep it accurate, no matter what model you own.
Why Setting The Aeg Stove Clock Matters
Many people overlook the importance of the stove clock. But having the right time on your AEG stove offers more than just convenience. Here’s why it really matters:
- Automatic Cooking Functions: Modern AEG ovens let you set timers for delayed starts or automatic shut-off. If your clock is wrong, your oven may start or stop at the wrong time.
- Safety and Precision: Accurate timing means your food cooks perfectly. Overcooking or undercooking can happen if the clock is off.
- Reset After Power Cuts: A power outage usually resets the clock. If you don’t update it, you lose the benefit of timed cooking or reminders.
- Error Codes and Settings: Some AEG models show error messages if the clock isn’t set, and you may not be able to use all functions until you set the time.
A common insight that many miss: if you see the display flashing or an error message like “—:—”, this usually means the clock needs to be set before you can use the oven.
Understanding Aeg Stove Clock Interfaces
AEG stoves come with several types of clock displays. Understanding your model helps you set the time faster.
Basic Digital Display
- Usually shows time in 24-hour format
- Has simple “+” and “–” buttons, sometimes marked as arrows
- Found on older or entry-level AEG models
Touch Control Panel
- Uses touch-sensitive buttons instead of physical ones
- Sometimes has icons for “clock,” “timer,” or “settings”
- Common in mid-range to high-end AEG stoves
Multifunction Timer Clocks
- Offer extra features like delay start, end of cooking, or minute minder
- May include a rotary knob or several buttons
- Found on premium models
Table: Key Differences In Aeg Clock Types
| Clock Type | Typical Controls | Common Models | Main Features |
|---|---|---|---|
| Basic Digital | + / – Buttons | AES131, B2100 | Time Only |
| Touch Control | Touch Icons | BPB331020M, BPE742320M | Time, Timer, Delayed Start |
| Multifunction | Rotary & Buttons | BPK556220M, BPE556320M | Full Programmability |
Non-obvious insight: Some newer AEG ovens allow you to set the clock via their mobile app, but only after initial setup with the physical buttons.
Preparation: Before You Begin
To avoid mistakes, follow these quick checks before changing your AEG stove clock:
- Identify your exact model number. You’ll find this on a label inside the oven door or in your user manual.
- Check for a power supply. The stove must be plugged in and have a working display.
- Reset after a power cut. If the display is blinking or blank, you must set the clock before other functions work.
- Clean and dry hands. This is important if your stove uses a touch panel.
- Unlock the panel. Some AEG stoves have a lock feature (often a key icon). Hold the lock button for 3–5 seconds to unlock.
If you’re unsure about your model, search for your manual online or visit the AEG official support page.
Step-by-step: How To Change Aeg Stove Clock
AEG stoves have different clock-setting methods. This guide covers the most common types, with clear examples for each. Always check your user manual for extra details.
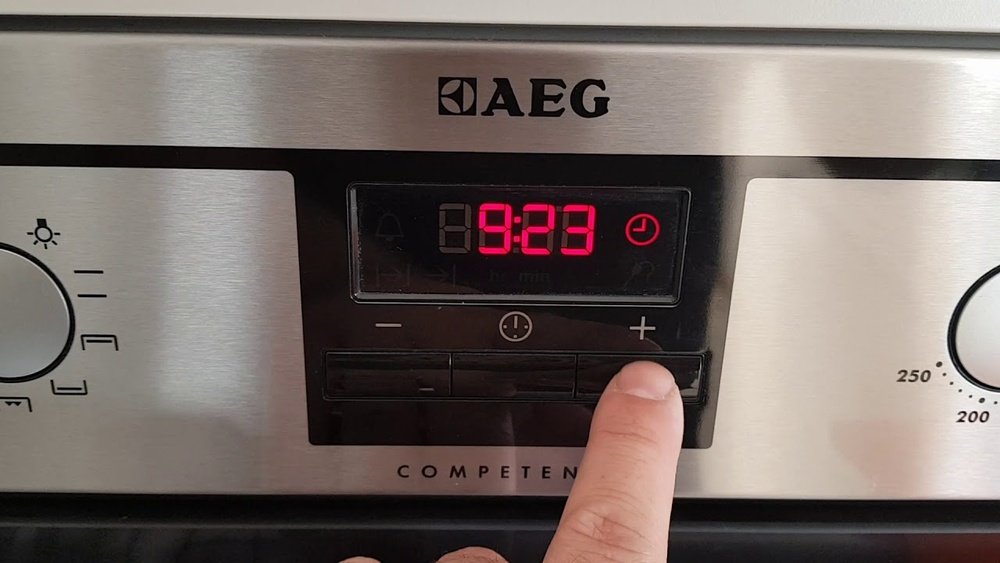
Method 1: Basic Digital Clock (push Buttons)
- Locate the clock display. Look for “+” and “–” buttons below or beside the display.
- Enter clock setting mode. Press and hold the “clock” or “timer” button for 2–3 seconds until the hour digits flash.
- Set the hour. Use “+” and “–” to adjust the hour. The display may be in 24-hour format.
- Confirm hour. Press the “clock” button again, or wait 5 seconds for it to move to minutes.
- Set the minutes. Use “+” and “–” to choose the correct minutes.
- Save settings. Press “clock” or wait until the display stops flashing.
Example: If you want to set 3:45 PM, set “15” for hours, then “45” for minutes.
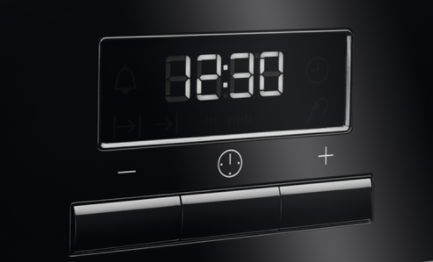
Method 2: Touch Control Panel
- Activate the panel. If asleep, touch any button to wake up the display.
- Find the clock icon. This might look like a small clock or be labeled “Menu.”
- Touch and hold the clock icon. Wait until the time digits start flashing.
- Adjust hours. Tap “+” or “–” or slide your finger if it’s a slider bar.
- Select minutes. Touch the “minutes” area or press the “clock” icon again to switch.
- Confirm. Either press “clock” again or leave untouched for a few seconds.
Note: If your display is locked (shows a key), unlock first. Hold the lock icon for 3–5 seconds.
Method 3: Multifunction Timer Clock
- Press the “clock” or “time” button. This may be a physical button or part of a menu.
- Use rotary knob (if present). Turn to set the hour, then push the knob to confirm.
- Repeat for minutes.
- Confirm with “OK” or “clock” button.
Extra tip: Some models let you set the clock only after a power cut. If you can’t enter the clock setting mode, switch the oven off and on again at the wall.
Table: Typical Button Names And Icons
| Function | Icon / Label | What It Does |
|---|---|---|
| Clock Set | Clock Icon / “Menu” | Enters time setting mode |
| Increase | “+” / Up Arrow | Adjusts numbers up |
| Decrease | “–” / Down Arrow | Adjusts numbers down |
| Lock | Key Icon | Locks/unlocks panel |
For Ovens With No Clock Button
Some basic AEG ovens do not have a separate clock button. Instead, use the minute minder or timer:
- Press the “minute minder” or “timer” button.
- Hold for 5 seconds until the time display flashes.
- Adjust using “+” and “–”.
- Wait for display to stop flashing.
Non-obvious insight: If nothing happens when you press buttons, your oven may be in “demo mode.” Check your manual for how to exit demo mode.
Setting The Clock For Daylight Savings Or After Power Outage
Every spring and autumn, you may need to adjust your AEG stove clock. Here’s how to do it quickly:
- Start from standby. If the display is blank or flashing, follow the steps above to set the time.
- Add or subtract one hour. Use the “+” or “–” buttons or touch controls.
- Always confirm. If you do not press “OK” or “clock,” changes may not save.
After a power cut, the display usually flashes “00:00” or “—:—”. You MUST set the clock before the oven works again. Follow the same method as above.
Tip: Write down your model’s clock-setting steps on a sticky note and keep it inside a kitchen drawer.
Using The Aeg Stove Clock For Timed Cooking
Once your clock is set, you can use advanced features for cooking:
- Delayed Start: Set the oven to start cooking at a specific time.
- Automatic End: Program when cooking should finish.
- Minute Minder: Set a countdown timer separate from the main clock.
Here’s a basic example for delayed start:
- Set the clock to the correct time.
- Place food in the oven.
- Use the “End Time” or “Duration” function to set when you want cooking to finish or how long to cook.
- The oven will start and stop automatically.
Caution: Always double-check the AM/PM or 24-hour format to avoid mistakes.
Troubleshooting Common Problems
Sometimes, changing your AEG stove clock is not straightforward. Here are the most frequent issues and what to do:
The Clock Won’t Change Or Is Stuck
- Possible causes: Panel is locked, demo mode is on, or the oven is in an error state.
- Solution: Unlock the panel, exit demo mode, or reset the oven by turning power off and on.
Buttons Don’t Respond
- Possible causes: Child lock is on, power supply issue, or buttons are faulty.
- Solution: Unlock panel, check power supply, or call a technician if buttons are physically stuck.
Display Flashes Non-stop
- Cause: The clock needs to be set after power cut.
- Solution: Enter clock-setting mode and adjust time.
Oven Does Not Work After Power Cut
- Cause: Most AEG ovens require the clock to be set before cooking functions will work.
- Solution: Set the clock first.
Table: Quick Fixes For Common Clock Problems
| Problem | Likely Cause | Quick Fix |
|---|---|---|
| Clock flashing | Power cut or reset | Set clock using steps above |
| Buttons not working | Panel locked | Hold lock icon for 3–5 sec |
| Can’t access clock mode | Demo mode or error | Check manual, reset power |
Experienced advice: If you have persistent problems, try a full reset: unplug the oven for 30 seconds, then plug back in. This often clears electronic glitches.
How To Change The Clock On Older Aeg Ovens
Many older AEG ovens have mechanical timer dials instead of digital displays. Here’s how to set these:
- Turn the dial clockwise until the current time lines up with the marker.
- Set any cooking duration by turning the “minute minder” dial.
- Make sure the oven function is set to “manual” if you don’t want the timer to control the oven.
Tip: If your oven has both a mechanical and a digital clock, always set both to the same time to avoid confusion.

Credit: www.youtube.com
What To Do If You’ve Lost The Manual
If you can’t find your AEG stove manual, don’t panic. Here are a few ways to get the information you need:
- Look for the model number. It’s usually inside the oven door or on the back.
- Visit the AEG official support page and search for your manual using the model number.
- Check YouTube. Many users upload video guides for specific AEG models.
- Contact AEG support. They can email you a manual or give direct advice.
Practical insight: Many AEG ovens share similar clock-setting steps, so even if your model is not listed, try the methods above.
Cleaning And Maintaining The Clock Display
A clean clock display is easier to read and less likely to malfunction.
- Use a soft, damp cloth to wipe the display.
- Avoid abrasive cleaners or rough sponges.
- For touch panels, always dry hands before use.
- If the display fogs up after heavy cooking, let it air dry.
Hidden tip: Grease or dirt on touch controls can cause them to misread your touches. Clean regularly for best results.
Credit: support.aeg.co.uk
When To Call A Technician
Most clock problems can be solved at home. However, call an AEG technician if:
- The display is completely dead, even with power.
- Buttons are physically damaged or missing.
- Clock resets every time you use the oven, which may mean a deeper electrical problem.
- You see error codes that won’t clear.
Example: If your oven shows “F10” or similar codes, a technician’s help is needed.
Comparing Aeg Clock Features With Other Brands
Some users wonder if AEG clocks are harder or easier to set than other brands.
AEG clocks are known for:
- Straightforward controls on most models
- Good reliability (rarely lose time unless after a power cut)
- Multiple setting methods (buttons, touch, rotary)
However, some users find Bosch or Siemens clocks slightly more intuitive, especially for older people.
Table: Aeg Vs. Bosch Vs. Siemens Clock Setting
| Brand | Ease of Use | Number of Steps | Touch/Physical |
|---|---|---|---|
| AEG | Easy to Moderate | 3–6 | Both |
| Bosch | Easy | 2–4 | Both |
| Siemens | Moderate | 3–5 | Both |
Practical advice: No matter the brand, always read your manual for the exact button sequence. The process is usually quick once you know the correct steps.

Credit: applianceworldonline.com
Frequently Asked Questions
How Do I Unlock The Control Panel To Set The Clock?
Most AEG ovens have a lock feature to prevent accidental changes. Look for a key icon on the display or panel. Hold this button for 3–5 seconds until the icon disappears. Now you can set the clock.
What Should I Do If The Clock Display Is Flashing After A Power Cut?
A flashing display means the clock is unset. Follow the clock-setting steps for your model (usually pressing the “clock” or “menu” button, then adjusting with “+” and “–”). The oven won’t work until you set the time.
Can I Set The Clock On My Aeg Stove Using A Mobile App?
Some high-end AEG ovens support remote control via an app, but you usually need to set the clock manually the first time. After that, some adjustments may be possible through the app, but not all models have this feature.
Why Does My Oven Not Work Until The Clock Is Set?
This is a safety and usability feature. Many AEG ovens require the clock to be set before other functions work, to ensure correct timing and to avoid errors in automatic programs.
Where Can I Find My Aeg Stove’s Model Number To Look Up The Manual?
Open the oven door and look around the frame for a sticker or metal plate. The model number is usually a mix of letters and numbers. Enter this on the AEG support site to download your user manual.
Getting your AEG stove clock set is more than just a detail—it’s key to using all the smart functions of your oven. With the simple steps in this guide, you’ll avoid common errors and have confidence every time you cook. If you ever get stuck, check your user manual or use the official AEG support page for help. With the right time set, your kitchen will run smoother, and your meals will always come out just as you planned.