Braising ribs in the oven is a kitchen technique that delivers tender, flavorful meat with minimum fuss. If you’ve tried ribs before and found them tough or dry, don’t worry—oven braising can change everything. This method is perfect for home cooks who don’t have access to a grill or smoker but still want restaurant-quality results.
The process is straightforward, but there are a few secrets and practical tips that can make a world of difference. Whether you’re making beef or pork ribs, learning how to braise them in the oven will open the door to rich, melt-in-your-mouth meals for friends and family.
In this guide, you’ll discover every step of braising ribs in the oven. You’ll learn how to choose the right ribs, prep them for cooking, build amazing flavor with dry rubs and liquids, control oven temperature, and finish with a beautiful glaze.
Along the way, you’ll get answers to the most common questions, practical troubleshooting tips, and ways to personalize your dish. Braising is not only about following a recipe—it’s about understanding the science of low, slow cooking and making it work for your kitchen.
What Does It Mean To Braise Ribs?
Braising is a classic cooking technique that combines two steps: searing meat at high heat and then slow-cooking it in a covered pan with a small amount of liquid. The goal is to break down tough connective tissue so that the meat becomes soft and juicy. For ribs, this means getting that fall-off-the-bone tenderness everyone loves.
When you braise ribs in the oven, you’re taking advantage of gentle, steady heat. The oven acts like a big, even heat source that surrounds your meat from all sides. By covering the ribs tightly, you trap steam and keep moisture inside, so the ribs don’t dry out.
The result is ribs that are easy to eat and full of rich, complex flavors.
Choosing The Best Ribs For Oven Braising
Picking the right cut is the first step toward perfect braised ribs. There are several types of ribs, and each one offers a different experience.
| Type of Ribs | Description | Best For |
|---|---|---|
| Baby Back Pork Ribs | Small, curved, very tender; less fat | Quick-cooking, mild flavor |
| Spare Pork Ribs | Larger, flatter, more fat and cartilage | Rich flavor, classic BBQ |
| Beef Short Ribs | Thick, meaty, lots of marbling | Deep, beefy flavor, slow braising |
| Beef Back Ribs | Long bones, less meat, more bone | Strong flavor, needs careful cooking |
Non-obvious insight: Baby back ribs cook faster but can dry out if left in the oven too long. Spare ribs have more fat, so they stay moist during longer cooks. For beef lovers, short ribs are the top choice for braising.
Tip: Look for ribs with a good amount of meat and some fat. The fat will help keep the meat moist and add flavor as it melts during cooking.
Preparing Ribs For The Oven
Before you start cooking, a little prep work will make your ribs taste even better.
Removing The Membrane
Most racks of ribs have a thin, shiny membrane (called the silver skin) on the bone side. This membrane can turn chewy after cooking. Here’s how to remove it:
- Flip the ribs bone-side up.
- Use a knife to loosen a corner of the membrane.
- Grab the membrane with a paper towel (for grip) and pull it off in one piece.
If you skip this step, the membrane will block flavors from reaching the meat and make the ribs harder to bite.
Trimming Excess Fat
Trim any thick pieces of fat from the ribs. Some fat is good for flavor and moisture, but too much will make your dish greasy.
Practical tip: Don’t remove all the fat—just the large, hard chunks.
Seasoning The Ribs
Good seasoning is the foundation of great ribs. You can use just salt and pepper, or build a more complex dry rub.
Basic Dry Rub Ingredients:
- 2 tablespoons brown sugar
- 1 tablespoon paprika
- 1 teaspoon garlic powder
- 1 teaspoon onion powder
- 1 teaspoon salt
- 1/2 teaspoon black pepper
- 1/2 teaspoon chili powder (optional)
Mix the spices and rub them all over the ribs. Let the seasoned ribs sit for at least 30 minutes (or up to overnight in the fridge) to help the flavors soak in.
Non-obvious insight: If you season the ribs a day ahead, the salt will start to tenderize the meat—a process called dry brining. This gives you juicier, more flavorful ribs.
Building Flavor: Marinades, Rubs, And Aromatics
While a dry rub gives flavor on the outside, a marinade can add even more depth. A marinade is a mix of liquids, herbs, and spices that you soak the ribs in before cooking.
Simple Marinade Example:
- 1/2 cup soy sauce
- 1/4 cup apple cider vinegar
- 2 tablespoons honey or maple syrup
- 2 cloves garlic, smashed
- 1 teaspoon grated ginger
Combine and pour over the ribs. Marinate in the fridge for 1–4 hours. Pat the ribs dry before braising.
Aromatics like onions, garlic, carrots, celery, bay leaves, and fresh herbs can be added to the braising liquid. They’ll perfume the meat as it cooks.
Selecting The Right Braising Liquid
The braising liquid is what makes this method special. You don’t need much—just enough to come about one-third of the way up the ribs. Here are some good options:
- Stock or broth (chicken, beef, or vegetable)
- Apple juice or cider
- Beer or wine (for deeper flavor)
- Water with added soy sauce, Worcestershire, or balsamic vinegar
Tip: Combine liquids for more complex flavor. For example, use half broth and half apple juice.
Common mistake: Adding too much liquid. You’re not boiling the ribs—just gently steaming and infusing them.
The Essential Equipment For Oven Braising
You don’t need special tools, but the right equipment can make things easier.
Roasting Pan Or Dutch Oven
A heavy pan with a tight-fitting lid is ideal. A large roasting pan covered tightly with foil also works.
Aluminum Foil
If your pan doesn’t have a lid, seal it tightly with two layers of foil. This traps steam and keeps the ribs moist.
Wire Rack (optional)
Placing a wire rack in the pan lets the ribs sit above the liquid, so they steam instead of boil.
Basting Brush
Useful for applying sauce or glaze near the end.
Non-obvious insight: Using a cast iron Dutch oven can help keep temperature stable and prevent hot spots.
Step-by-step: How To Braise Ribs In The Oven
Let’s break down the whole process, from start to finish.
1. Preheat The Oven
Set your oven to 300°F (150°C). This low temperature lets the ribs cook slowly and break down tough fibers.
2. Sear The Ribs (optional)
Searing means browning the ribs in a hot pan before braising. This adds a deeper flavor and a nice color.
- Heat a little oil in a skillet over medium-high heat.
- Sear each side of the ribs for 2–3 minutes until browned.
- Transfer ribs to your braising pan.
Note: Searing is optional but recommended for beef ribs or if you want a richer flavor.
3. Add Aromatics And Liquid
Scatter sliced onions, garlic, or other aromatics in the pan. Place the ribs on top. Pour in your braising liquid so it comes up about one-third of the way up the ribs.
4. Cover Tightly
Seal the pan with a lid or double layer of foil. This is key for keeping moisture in.
5. Cook Low And Slow
Place the pan in the oven and let the ribs cook for 2.5 to 3 hours (pork ribs) or 3 to 4 hours (beef ribs). The exact time depends on the type and size of ribs.
Check for doneness: The meat should be very tender—almost falling off the bone—but not mushy.
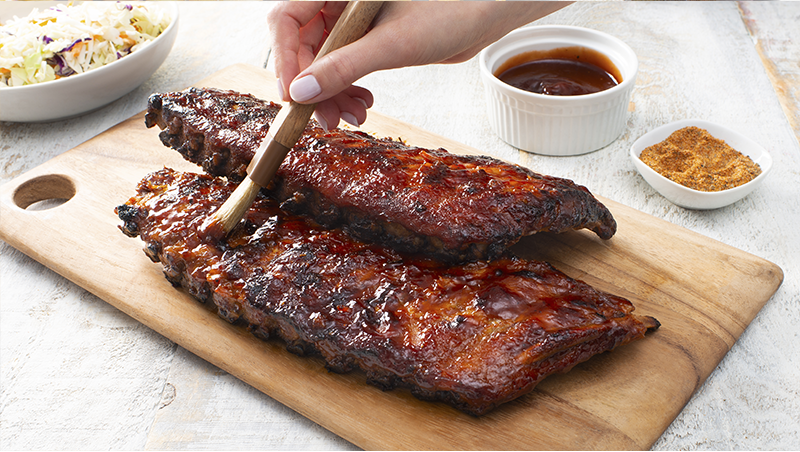
6. Glaze And Broil (optional)
For caramelized, sticky ribs, brush them with your favorite BBQ sauce or glaze. Return to the oven, uncovered, and broil for 3–5 minutes until bubbly and browned.
7. Rest And Serve
Let the ribs rest for 10–15 minutes before slicing. This helps the juices settle so the meat stays moist.
Example timeline:
- 20 minutes prep
- 3 hours braising
- 10 minutes glazing
- 10 minutes resting
Total Time: About 3.5 To 4 Hours
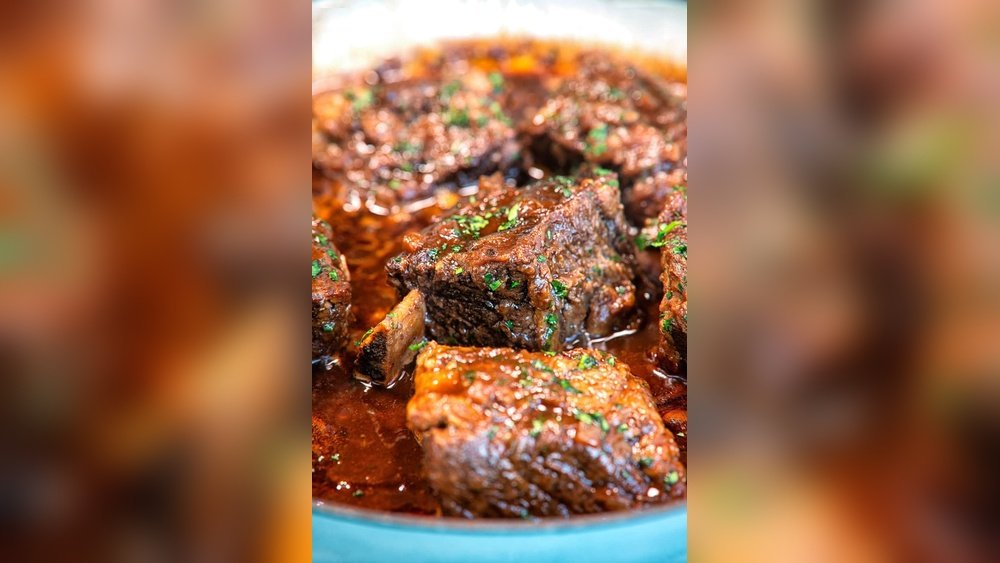
Flavor Variations And Customizations
Braising is flexible. Here are a few ways to change up your ribs:
- Asian-style: Use soy sauce, ginger, garlic, and a splash of hoisin or five-spice powder.
- Mexican: Add chipotle peppers, orange juice, and cumin.
- Classic BBQ: Stick to a smoky dry rub and finish with BBQ sauce.
- Mediterranean: Try oregano, lemon, and rosemary in the braising liquid.
Feel free to experiment with spices and liquids to match your taste.
Credit: healthyrecipesblogs.com
Troubleshooting Common Problems
Even with a great recipe, things can go wrong. Here’s how to fix the most common issues:
Ribs are dry:
Likely cooked too long or at too high a temperature. Make sure your pan is sealed tightly and check for doneness after 2. 5 hours.
Ribs are tough:
Not cooked long enough. Return to the oven for another 30–45 minutes and test again.
Ribs are greasy:
Too much fat left on the ribs, or too much liquid in the pan. Skim off fat from the braising liquid before serving.
No flavor:
Try a stronger dry rub, marinate longer, or add more aromatics to the liquid next time.
Burnt edges:
Ribs were not covered tightly, or oven was too hot. Always double-check your seal.
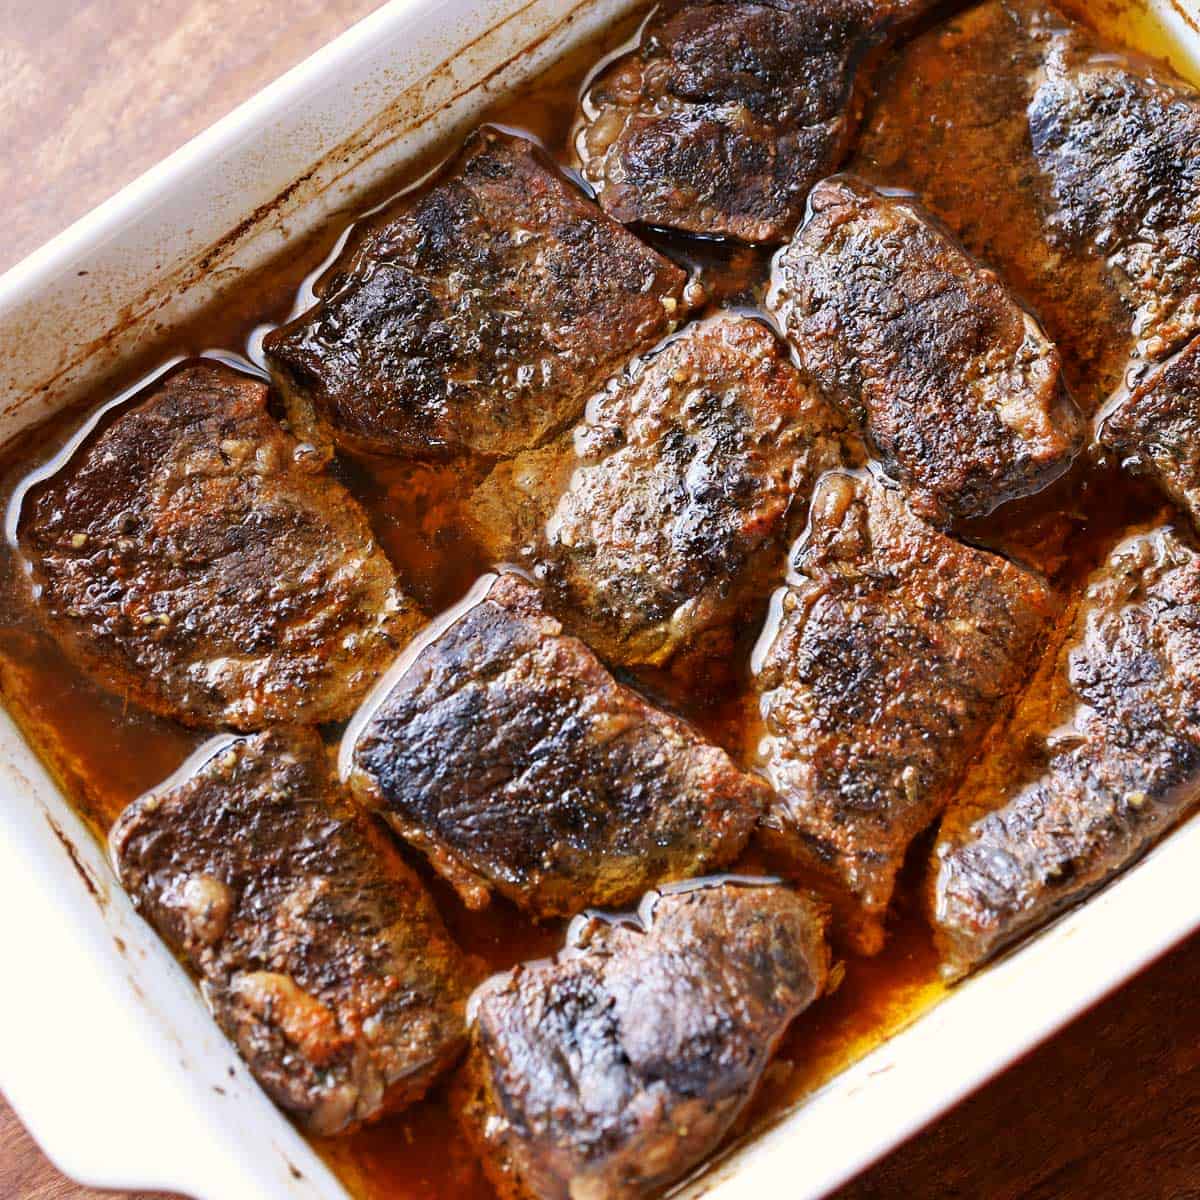
Serving Braised Ribs
Braised ribs are rich, so they pair best with simple sides. Here are a few ideas:
- Mashed potatoes or roasted root vegetables
- Steamed rice or crusty bread (to soak up juices)
- Coleslaw or fresh salad for crunch
- Pickles or pickled onions to cut the richness
Pro tip: Spoon some of the reduced braising liquid over the ribs for extra flavor.
Credit: www.betterthanbouillon.com
Storing And Reheating Braised Ribs
If you have leftovers, here’s how to keep them tasty.
Refrigeration:
Cool ribs completely. Wrap tightly in foil or store in an airtight container. Ribs last 3–4 days in the fridge.
Freezing:
For longer storage, freeze ribs (with or without sauce) for up to 3 months. Thaw overnight in the fridge before reheating.
Reheating:
Best method: Place ribs in a covered pan with a splash of broth. Heat at 300°F (150°C) until warmed through (about 20–30 minutes). This keeps them from drying out.
Braised Ribs Vs. Other Cooking Methods
How does oven-braising compare to grilling, smoking, or boiling? Let’s look at the differences.
| Method | Texture | Flavor | Time Needed | Special Equipment |
|---|---|---|---|---|
| Braising (Oven) | Very tender, moist | Deep, infused with liquid | 3–4 hours | Pan, foil/lid |
| Grilling | Chewy, sometimes dry | Smoky, charred | 1–2 hours | Grill |
| Smoking | Very tender, smoky | Strong smoke flavor | 5–7 hours | Smoker |
| Boiling | Soft, sometimes mushy | Mild, diluted | 1–2 hours | Pot |
Braising gives you a reliable way to get tender ribs without special tools or outdoor space.
:max_bytes(150000):strip_icc()/oven-braised-beef-short-ribs-recipe-3051365-hero-01-3919932614454748989170d737276dd9.jpg)
Credit: www.thespruceeats.com
Nutrition And Health Considerations
Ribs are delicious but can be high in fat and calories. Here’s what you need to know for healthier eating.
| Type of Ribs | Serving Size (100g) | Calories | Protein | Fat |
|---|---|---|---|---|
| Pork Baby Back | 100g | 290 | 20g | 23g |
| Pork Spare | 100g | 320 | 19g | 26g |
| Beef Short | 100g | 330 | 19g | 28g |
| Beef Back | 100g | 310 | 17g | 25g |
Tips for lighter ribs:
- Trim visible fat before cooking.
- Use leaner cuts (baby back over spare ribs).
- Serve with lots of vegetables or salads.
- Go easy on sugary sauces.
For more details on nutrition and healthy cooking, you can check resources like Eat Right.
Cleaning Up After Braising
After a meal like this, cleaning up can be a chore. Here’s how to make it easier:
- Line your pan with foil for easy cleanup.
- Soak pans with hot water and baking soda to loosen stuck-on bits.
- Degrease the braising liquid by chilling it and scraping off fat.
Non-obvious insight: Saving leftover braising liquid can make a great soup base or sauce.
Frequently Asked Questions
How Long Does It Take To Braise Ribs In The Oven?
Most pork ribs take about 2. 5 to 3 hours at 300°F (150°C). Beef ribs may need 3 to 4 hours. Always check for tenderness with a fork—if the meat pulls away easily from the bone, they’re done.
Do I Have To Sear The Ribs Before Braising?
Searing adds flavor and color, but it’s not required. If you’re short on time, you can skip this step and still get delicious results.
Can I Braise Ribs Ahead Of Time?
Yes, braised ribs reheat well. Cook them a day ahead, cool, and refrigerate. Reheat gently in the oven with a bit of extra liquid to keep them moist.
What’s The Best Liquid For Braising Ribs?
Broth, apple juice, beer, or wine are all good choices. Mixing two types (like broth and cider) can add more depth. Just avoid too much sugar, which can burn during cooking.
How Do I Get A Sticky Glaze On My Braised Ribs?
After braising, brush the ribs with BBQ sauce or glaze. Broil in the oven, uncovered, for 3–5 minutes until bubbly and caramelized. Watch carefully to prevent burning.
Learning how to braise ribs in the oven is a skill that rewards you every time you use it. The process is simple, forgiving, and produces results that impress even picky eaters. With the right cut, a flavorful rub, a splash of liquid, and a little patience, you can turn tough ribs into a meal worth sharing.
Don’t be afraid to experiment with spices or sauces to match your tastes. Once you master the basics, you’ll find endless ways to make this dish your own—no grill or smoker required.