Wiring a 3 prong stove outlet is one of those jobs that looks simple but requires careful planning, safety awareness, and the right tools. Whether you’re replacing an old outlet, installing a new one, or renovating your kitchen, understanding how to wire a 3 prong outlet can save money and offer a sense of achievement. But it’s not just about following steps—it’s about knowing why each step matters, how to work safely, and what details can trip up even a careful DIYer. Let’s walk through this process from start to finish so you gain the confidence to tackle this essential home wiring project.
What Is A 3 Prong Stove Outlet?
A 3 prong stove outlet is a heavy-duty electrical outlet designed for ranges and ovens. It supplies 240 volts using three wires: two “hot” wires and one neutral. This type of outlet was standard in the US for decades but has now been replaced in new installations by the safer 4-prong version, which adds a separate ground wire. Still, many older homes have 3 prong outlets in use.
The three prongs are:
- Left prong: Hot (usually black wire)
- Right prong: Hot (usually red wire)
- Bottom (L-shaped) prong: Neutral (usually white wire)
Understanding this wiring is the first step toward a safe installation.
Why Wiring A Stove Outlet Matters
The stove is one of the highest power-consuming appliances in your home. Poor wiring can lead to dangerous problems:
- Electrical shock
- Fire hazards
- Code violations
Proper installation ensures:
- Reliable power
- Appliance longevity
- Family safety
It’s also important to know that local codes may require updating to a 4 prong outlet during renovations. Always check before starting work.
Tools And Materials Needed
Before starting, gather the following tools and materials. Having everything ready will make the process smoother and safer.
- Voltage tester (non-contact or multimeter)
- Screwdrivers (flat and Phillips)
- Wire stripper/cutter
- Electrical tape
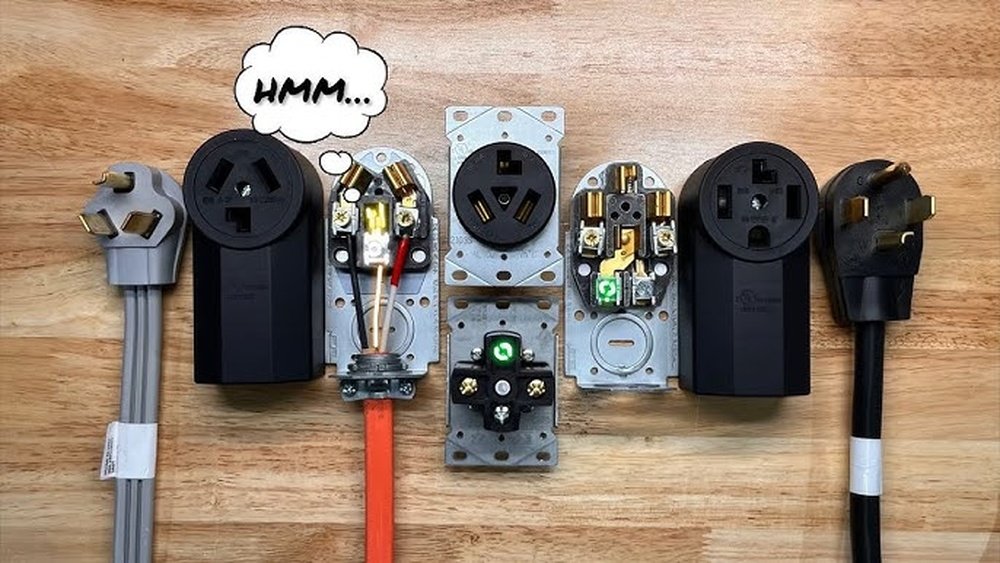
- 3 prong stove outlet (rated for 50A, 125/250V)
- Stove power cord (3 prong, heavy duty)
- Wire connectors (if splicing)
- Cable clamp/strain relief
- Appropriate gauge wire (usually 6 AWG for 50A circuit)
- Circuit breaker panel access
- Work gloves and safety goggles
A few practical tips: Always use copper wire (not aluminum) for kitchen appliances. Double-check that your breaker matches your wire size and outlet rating.
Understanding Your Electrical Circuit
Before wiring, you must know what’s behind your walls. The circuit for a stove is usually dedicated and runs directly from your electrical panel.
Typical Stove Circuit Specifications
| Specification | Value |
|---|---|
| Voltage | 240 volts |
| Amperage | 40–50 amps |
| Wire Gauge | 6 AWG (for 50A), 8 AWG (for 40A) |
| Breaker Type | Double-pole |
Double-pole breakers are necessary to deliver 240V by connecting to both sides of your panel’s power supply.
Credit: www.reddit.com
Safety First: Preparation Steps
Working with 240 volts can be fatal. Take these steps before touching any wires:
- Turn off power at the breaker. Lock it out if possible.
- Test for power. Use a voltage tester on all wires, not just the ones you’ll touch.
- Clear the work area. Remove flammable materials, water, and clutter.
- Wear protective gear. Gloves and goggles can prevent injury.
- Have a partner nearby. Don’t work alone in case of emergency.
Never assume wires are safe just because a breaker is off. Double-check every step.
Step-by-step Guide: Wiring A 3 Prong Stove Outlet
Now, let’s break down the wiring process. This section covers the three key items in every 3 prong stove outlet:
- The two hot wires
- The neutral wire
- The outlet itself
Each has its own connections and safety requirements.
1. Connecting The Two Hot Wires
The two hot wires (usually black and red) are what deliver 240 volts to your stove.
- Locate the wires: In your junction box, find the black and red (or sometimes black and black) wires.
- Strip the insulation: Expose about 3/4 inch of bare wire at the ends.
- Connect to the outlet: Match each hot wire to a terminal on the outlet (left and right prongs). Most outlets are labeled, but if not, either side works for hot wires.
- Tighten the screws: Make sure connections are snug but do not overtighten, which can damage the wire.
- Double-check: Ensure no loose strands are sticking out.
Common mistake: Accidentally swapping hot and neutral wires can damage your stove or cause a shock hazard. Always confirm with your voltage tester.
2. Connecting The Neutral Wire
The neutral wire (usually white) completes the circuit for 120V components in your stove, like lights or timers.
- Strip insulation: As with the hot wires, strip about 3/4 inch of insulation.
- Connect to the L-shaped terminal: This is the bottom prong of the outlet.
- Secure the wire: Tighten the terminal screw firmly.
- Inspect the connection: The wire should not pull out or have loose strands.
Non-obvious insight: In older homes, the neutral may also act as a ground. This is not as safe as modern wiring but is allowed if your local code permits.
3. Installing The Outlet
With wires connected, you can mount the outlet in the box.
- Attach the cable clamp/strain relief: This keeps the thick wires from pulling out if someone yanks on the cord.
- Push wires gently into the box: Be careful not to kink or break them.
- Secure the outlet: Use the provided screws to fix it to the box.
- Attach the outlet cover: This protects from accidental contact and finishes the look.
Tip: If the box feels crowded, check that you’re using the correct box size for your wire gauge and outlet. Overstuffed boxes can overheat.

Credit: www.youtube.com
Connecting The Stove Cord To The Range
Now that your outlet is wired, you need to connect the stove’s 3 prong power cord to the appliance itself.
How To Wire The 3 Prong Cord To The Range
- Unplug the range and pull it away from the wall.
- Remove the rear panel to access the terminal block.
- Identify the three terminals: Left (hot), center (neutral), right (hot).
- Attach the cord wires: Black and red go to the two outer terminals; white goes to the center.
- Install the strain relief: This prevents the cord from wiggling or being pulled out.
- Check for bonding strap: On older ranges, a metal strap connects neutral to the frame. For a 3 prong cord, this strap should stay in place.
Important detail: The bonding strap connects the metal frame to the neutral wire, providing a return path for stray current. In a 4 prong setup, this strap must be removed.
Example: Terminal Block Connections
| Terminal | Wire Color | Function |
|---|---|---|
| Left | Black | Hot #1 (120V leg) |
| Center | White | Neutral |
| Right | Red | Hot #2 (120V leg) |
Testing Your Installation
Before plugging in the range, always test your work.
- Inspect all connections: No loose wires, no exposed metal.
- Check outlet voltage: Use a multimeter:
- Between left and right prongs: 240V
- Between each hot and neutral: 120V
- Turn power on at the breaker.
- Plug in the stove and test all functions.
- Look for issues: No tripped breakers, sparks, or burning smells.
If you notice anything unusual, turn off power and double-check your wiring.
Upgrading To A 4 Prong Outlet: Should You Do It?
Many electricians recommend upgrading from a 3 prong to a 4 prong outlet during renovations. The 4 prong version separates ground and neutral, which is safer.
Comparison: 3 Prong Vs. 4 Prong Stove Outlets
| Feature | 3 Prong | 4 Prong |
|---|---|---|
| Number of wires | 3 (hot, hot, neutral) | 4 (hot, hot, neutral, ground) |
| Ground connection | Combined with neutral | Separate ground wire |
| Safety | Less safe by modern standards | Safer, code-compliant |
| Allowed in new homes? | No | Yes |
Non-obvious insight: If your kitchen wiring is accessible and you’re doing major work, upgrading to 4 prong can increase home value and future-proof your installation.
Common Mistakes And How To Avoid Them
Even careful DIYers can make errors. Here are the most frequent mistakes and how to prevent them:
- Not shutting off the correct breaker: Always test wires even after switching off the breaker.
- Loose connections: Make sure all terminal screws are tight. Loose wires can cause arcing and fires.
- Using the wrong wire gauge: A 50A circuit needs 6 AWG copper wire. Undersized wires can overheat.
- Forgetting the strain relief: Without it, the cord can be pulled out, exposing live wires.
- Confusing neutral and ground: In 3 prong outlets, the neutral does double duty. In 4 prong, it doesn’t.
- Ignoring local code: Some areas do not allow 3 prong outlets anymore. Always check before starting.
- Not using a dedicated circuit: Stoves must have their own breaker and wiring.
Tip: Always label your breaker clearly for future safety.
Troubleshooting Problems
Sometimes, after wiring a 3 prong stove outlet, things don’t work as planned. Here’s what to check:
Stove Does Not Power On
- Breaker is off or tripped: Reset and check.
- Loose connection at outlet or terminal block: Inspect and retighten.
- Faulty cord or plug: Try a different cord.
Stove Trips The Breaker
- Short circuit in wiring: Inspect for bare wires touching.
- Overloaded circuit: Ensure no other appliances share the circuit.
- Defective appliance: If wiring is correct, the stove may have an internal fault.
Outlet Feels Hot
- Loose wires or poor connections: Heat is a sign of resistance. Fix immediately.
- Undersized wire: Upgrade to the proper gauge.
If these steps don’t solve the problem, consult a licensed electrician.
Legal And Code Considerations
Electrical codes exist to protect you and your home. Here’s what you should know:
- The National Electrical Code (NEC) has prohibited new 3 prong stove outlets since 1996. Existing outlets can remain, but upgrades require a 4 prong outlet.
- Local codes may be stricter. Some areas require all renovations to use 4 prong outlets.
- Permits are often required for major electrical work.
- Inspections ensure safety and code compliance.
Pro tip: Always keep a record of your work and the date of installation for insurance and resale purposes.
For more details, you can reference the National Electrical Code (NFPA 70).

Credit: diy.stackexchange.com
When To Call A Professional
Wiring a stove outlet is not a beginner’s project. Here’s when to call an electrician:
- You’re unsure about any step
- The wiring in your home is old or confusing
- You need to upgrade from 3 to 4 prong
- The stove or outlet shows signs of damage
- You need to pull a permit or pass inspection
Remember, electrical mistakes can be deadly. Hiring a professional can provide peace of mind and protect your investment.
Maintenance And Long-term Safety
After installation, maintain your outlet for long-term safety.
- Check the outlet annually for signs of wear, discoloration, or heat.
- Vacuum around the outlet to keep dust and debris out.
- Test the breaker every six months to ensure it trips properly.
- Replace cords that show cracks or damage.
- Do not overload the circuit with additional appliances.
Non-obvious insight: Even if the outlet is rarely used, copper wires can loosen slightly over years due to thermal cycling. Quick checks can prevent problems.
Frequently Asked Questions
What Is The Difference Between A 3 Prong And A 4 Prong Stove Outlet?
A 3 prong outlet has two hot wires and one neutral, with the neutral also serving as the ground. A 4 prong outlet adds a separate ground wire, making it safer and required by modern codes. The 4 prong version reduces shock risk in case of a wiring fault.
Can I Change A 3 Prong Outlet To A 4 Prong Outlet Myself?
You can, but it’s not just a matter of swapping outlets. You must run a new 4-wire cable from your breaker panel to the outlet location. This job is best left to a licensed electrician, as it requires knowledge of code, proper materials, and may need a permit and inspection.
Is It Legal To Install A New 3 Prong Stove Outlet?
No, the National Electrical Code has banned new 3 prong outlets for stoves and dryers since 1996. You can keep an existing 3 prong outlet, but all new installations must use the 4 prong type, which includes a separate ground wire.
How Do I Know If My Stove Needs A 3 Prong Or 4 Prong Cord?
Check the stove’s installation manual or the label near the terminal block. Most modern stoves require a 4 prong cord, but some older models are designed for 3 prong. If you have a 4 prong outlet, always use a 4 prong cord and remove any bonding strap between the frame and neutral.
What Should I Do If I’m Not Comfortable Working With Electricity?
If you’re unsure about any part of the process, stop and call a licensed electrician. Working with 240 volts is dangerous. Mistakes can cause shock, fire, or appliance damage. It’s always safer to get professional help than to risk injury or property loss.
Wiring a 3 prong stove outlet may seem like a straightforward task, but it demands respect for safety, attention to detail, and knowledge of electrical codes. By following these guidelines and knowing when to seek professional help, you can keep your kitchen running safely and efficiently for years to come.