Making espresso at home can feel complicated, especially if you don’t own a big, expensive espresso machine. Luckily, the Aeropress offers an affordable and simple way to create rich, espresso-like coffee with just a few basic tools. Many coffee lovers use Aeropress for their daily brew, but not everyone knows it can make a drink similar to traditional espresso—strong, concentrated, and great for milk-based drinks like lattes and cappuccinos.
In this article, you’ll learn exactly how to use an Aeropress for espresso. We’ll explore what makes Aeropress different from an espresso machine, the best Aeropress recipes for espresso-style coffee, and the techniques to get the most out of your device.
You’ll find practical tips, step-by-step instructions, and real-world examples. Whether you’re a beginner or a seasoned Aeropress user, you’ll discover new insights and ways to improve your coffee game.
What Is Aeropress Espresso?
Most people think of espresso as a coffee made by forcing hot water under high pressure through finely ground beans. An Aeropress doesn’t reach the same pressure as a traditional espresso machine, but with the right method, it can create a concentrated, rich coffee that’s close to espresso. This drink is sometimes called “Aeropresso” or “pseudo-espresso.”
Aeropress espresso is:
- Strong and bold, but not as bitter as machine espresso
- Less crema (foam) on top, but thick and smooth
- Perfect for milk drinks or to enjoy as a shot
The Aeropress is popular because it’s affordable, portable, and easy to clean. It also lets you experiment with recipes and find the taste you love.
How Aeropress Differs From Espresso Machines
Understanding the difference helps you set realistic expectations. The Aeropress and an espresso machine both make strong coffee, but they use different methods.
| Feature | Aeropress | Espresso Machine |
|---|---|---|
| Pressure | Manual (0.3–0.5 bar) | High (9 bar+) |
| Grind Size | Fine to medium | Very fine |
| Brewing Time | 1–2 minutes | 25–35 seconds |
| Crema | Little to none | Thick layer |
| Cost | Low (under $40) | High ($200+) |
| Portability | Very portable | Not portable |
While Aeropress doesn’t create the same pressure, you can still achieve a strong, syrupy coffee. Many coffee experts use Aeropress when traveling or as a backup at home.
What You Need To Make Aeropress Espresso
Before you start, gather the right tools and ingredients. This helps you avoid mistakes and makes the process smoother.
- Aeropress (original or Go version)
- Aeropress paper filters (or metal filter for a stronger body)
- Fresh coffee beans (espresso roast works best)
- Burr grinder (for even grinding)
- Kettle (ideally with temperature control)
- Scale (for measuring coffee and water)
- Timer
- Spoon or stirrer
- Mug or shot glass
You don’t need an expensive grinder, but a burr grinder gives more control. Freshly ground beans make a big difference in taste.
Choosing The Right Coffee Beans And Grind
Bean selection is more important with Aeropress espresso than with regular drip coffee. For the best results:
- Choose espresso roast or medium-dark beans for a classic taste
- Use fresh beans roasted within the past 2–4 weeks
- Grind just before brewing for the fullest flavor
For grind size, use a setting slightly finer than table salt, but not as powdery as for an espresso machine. Too fine, and the Aeropress will be hard to press; too coarse, and the coffee will be weak.
Pro tip: If your Aeropress is very hard to press, your grind is likely too fine. If it presses too easily and the coffee is watery, try a finer grind.
The Classic Aeropress Espresso Recipe
Let’s start with a classic, easy-to-follow method. This makes one shot (about 50–60 ml) of strong, espresso-style coffee.
Ingredients
- 18 grams of coffee (about 2.5 Aeropress scoops)
- 60 ml hot water (about 200°F / 93°C)
Steps
- Grind the beans to a fine setting, just a bit coarser than espresso.
- Insert a paper filter into the Aeropress cap. Rinse with hot water to remove paper taste.
- Assemble the Aeropress in the inverted position (plunger down, chamber on top).
- Add the ground coffee to the chamber.
- Start your timer. Pour 60 ml hot water over the grounds.
- Stir quickly and thoroughly for about 10 seconds.
- Secure the filter cap. Let the coffee steep for 30–45 seconds.
- Carefully flip the Aeropress over your mug and press down slowly. Use steady pressure for about 20–30 seconds.
- Stop pressing when you hear a hissing sound.
You’ll have a small, strong shot. Taste it: if it’s too bitter, try a coarser grind next time. If it’s too weak, use a finer grind or add a few more grams of coffee.
Advanced Aeropress Espresso Recipes
Once you master the basics, experiment with advanced recipes. Here are three popular methods for richer, more complex espresso-style coffee.
1. Double Filter Method
This recipe uses two paper filters. The extra resistance increases pressure, creating a thicker coffee with more crema.
- Use two filters in the cap.
- Add 20 grams of coffee.
- Use 60–70 ml water.
- Brew and press as usual, but press more slowly.
This method gives a shot closer to traditional espresso, with a heavier body.
2. The Fellow Prismo Method
The Fellow Prismo is a metal filter and pressure-activated valve that attaches to your Aeropress. It lets you build up more pressure, increasing crema and boldness.
- Use 20 grams fine coffee.
- Add 50 ml hot water.
- Stir well, lock the Prismo on, and let steep for 60 seconds.
- Press firmly.
Prismo shots are thicker and have more foam. It’s a great upgrade if you use Aeropress often.
3. The “bloom And Steep” Method
This method extracts more flavor by blooming the grounds before full immersion.
- Add 18 grams coffee, pour 20 ml water to bloom for 10 seconds.
- Add remaining 40 ml water (total 60 ml).
- Stir and steep for 60 seconds.
- Press slowly.
Blooming releases trapped gas and helps extract bright, complex flavors.
Inverted Vs Standard Method
The inverted method means you assemble the Aeropress upside down, with the plunger at the bottom. The standard method is right-side-up, as shown in the instructions.
Inverted:
- More control over steep time
- Less risk of water dripping early
- More popular for espresso-style
Standard:
- Safer, less risk of accidents
- Simpler for beginners
- Faster clean-up
For espresso, many prefer the inverted method because it allows longer steeping and full saturation of grounds. But both methods work—try both and see which you like.
Water Temperature And Quality
Water quality affects flavor. Use filtered or bottled water if your tap water tastes off. The ideal temperature is 195–205°F (90–96°C). Water that’s too hot can make coffee taste bitter; too cool, and the extraction will be weak.
A basic electric kettle is enough, but if you want precise results, use a thermometer or a kettle with temperature control.
How To Press For Maximum Flavor
Pressing is not just about strength; it’s about control. Here’s how to press correctly:
- Use steady, gentle pressure. Don’t rush.
- Pressing should take 20–40 seconds.
- If it’s too hard, your grind is too fine.
- If it’s too easy, your grind may be too coarse.
Some people use their body weight for extra force, but don’t overdo it—you might break the Aeropress.
Cleaning Up
Aeropress is famous for easy cleaning:
- Remove the cap, push out the used coffee “puck” into the trash or compost.
- Rinse the plunger and chamber under water.
- Let everything dry before reassembling.
Quick cleaning keeps flavors fresh and your Aeropress working well for years.
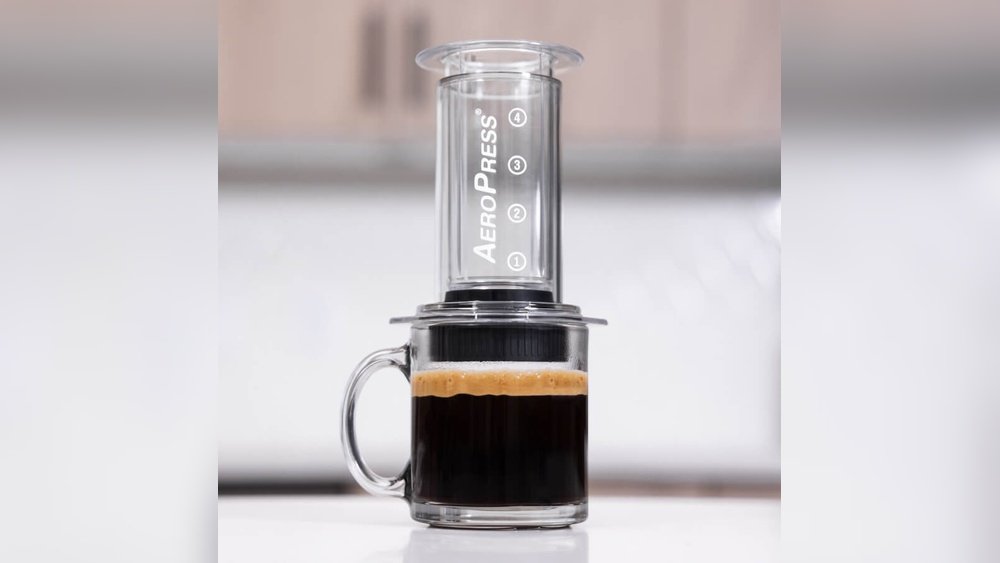
Credit: aeropress.com
Making Milk Drinks With Aeropress Espresso
Aeropress espresso is great for making lattes, cappuccinos, and more. Here’s how to do it:
- Make a strong Aeropress shot using one of the recipes above.
- Steam or froth milk. You can use a French press, milk frother, or even a jar with a lid (shake and microwave).
- Pour the espresso into your cup.
- Add steamed milk and spoon foam on top.
| Drink | Espresso | Milk | Foam |
|---|---|---|---|
| Latte | 1 shot | 6 oz steamed | Thin layer |
| Cappuccino | 1 shot | 2 oz steamed | 2 oz thick foam |
| Macchiato | 1 shot | Spoonful | Thick dollop |
Tip: Aeropress shots are less bitter, so you might need less sugar or syrup.
Troubleshooting: Common Aeropress Espresso Problems
Even experienced users sometimes get weak or bitter results. Here’s how to fix common issues:
- Coffee is too weak: Use more coffee, a finer grind, or less water.
- Coffee is too bitter: Use a coarser grind, lower temperature, or reduce steep time.
- Hard to press: Grind is too fine, or you’re using too much coffee.
- Not enough crema: Try the double filter or Prismo method, or use fresher beans.
- Coffee tastes flat: Use fresher beans, bloom grounds, or try different water.
Non-obvious tip: If your Aeropress squeaks or leaks when pressing, check that the rubber seal is clean and undamaged. Replace if needed for a better seal and more pressure.
Tips For Better Aeropress Espresso
- Use a scale for accuracy. Guessing leads to inconsistent results.
- Weigh your water if possible. A scale is more accurate than eyeballing.
- Preheat your Aeropress and mug with hot water before brewing.
- Experiment with recipes. Small changes in grind, dose, or time can make a big difference.
- Try different filters. Metal filters give more body; paper filters create a cleaner taste.
Beginner insight: Many new users forget to stir well after adding water. Good agitation ensures even extraction and better flavor.
Real-world Example: Making Aeropress Espresso At Home
Let’s walk through a real example for one person:
- Jane wants a strong shot for her homemade latte.
- She uses 18 grams medium-dark beans, ground fine.
- She heats 60 ml water to 200°F.
- Using the inverted method, she adds coffee, pours water, and stirs for 10 seconds.
- She steeps for 40 seconds, flips, and presses slowly for 25 seconds.
- The result: A 55 ml espresso-style shot, which she pours over steamed milk.
Jane’s tip: “If you want more flavor, try a little less water or a finer grind. Clean your Aeropress right away for best taste.”

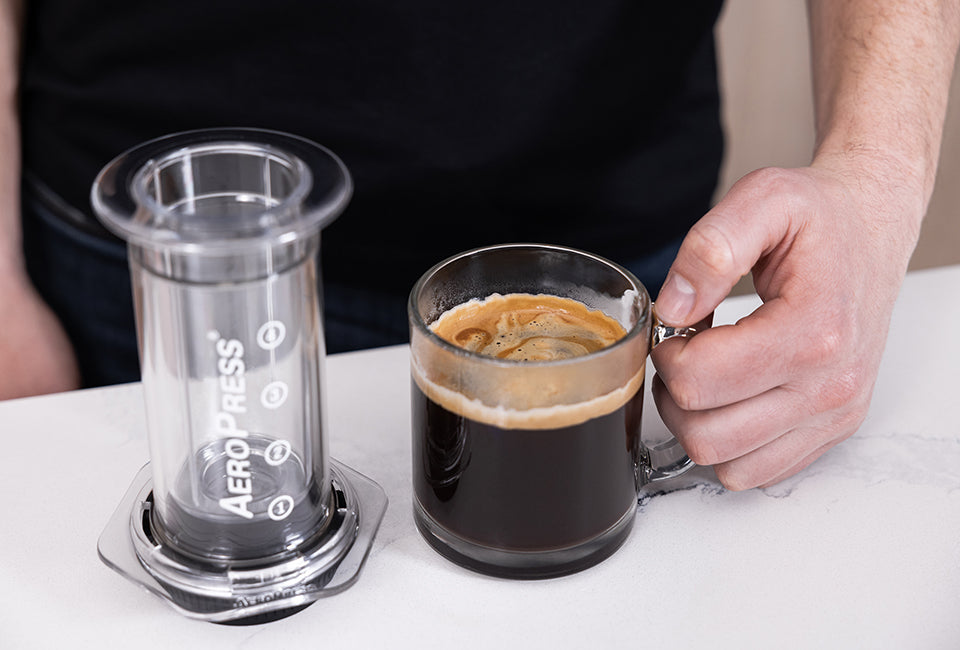
Credit: www.youtube.com
Why Aeropress Espresso Is Popular
Aeropress espresso is loved for its flexibility, speed, and affordability. Unlike big espresso machines, it travels easily and costs under $40. It’s used by baristas and beginners alike, and even features in the World Aeropress Championships. The device’s design encourages experimentation, making it a favorite for coffee geeks and everyday drinkers.
Experimenting With Ratios And Techniques
The Aeropress is unique because you can easily adjust your recipe. Here are ways to experiment:
- Change the coffee dose: Try 15–20 grams for different strengths.
- Adjust water amount: Less water = stronger shot.
- Vary steep time: Shorter for brighter coffee, longer for deeper flavor.
- Try different filters: Metal for more oils, paper for clarity.
Advanced tip: Some users pre-infuse with just a little water for 10 seconds, then add the rest. This helps with even extraction, especially for fresher beans.

Credit: aeropress.com
How To Get Crema With Aeropress
Crema is the golden foam on top of real espresso. Aeropress can’t make as much crema, but you can increase it:
- Use very fresh beans (roasted in last 10 days)
- Try the double filter method or Fellow Prismo
- Use a finer grind, but not too fine
- Press quickly at the end to force air through
Note: The crema will be lighter and disappear faster than from a machine, but you’ll notice a difference.
Cleaning And Maintenance For Best Flavor
To keep your Aeropress working well:
- Rinse all parts after each use
- Wash with soap every few days
- Dry completely before storing
- Replace rubber plunger if it gets sticky or cracked
Non-obvious insight: If your Aeropress plunger gets hard to move, rub a little vegetable oil around the rubber seal. This keeps it flexible and air-tight.
Using Accessories To Improve Aeropress Espresso
There are several accessories that can boost your results:
- Metal filters (Able, Prismo): For more oils and body
- Stainless steel stirrers: For even mixing
- Gooseneck kettle: For better pouring control
- Coffee scale: For accuracy
Accessories aren’t required, but they give you more control and consistency.
How Aeropress Espresso Compares To Other Methods
Here’s a quick look at how Aeropress espresso compares to moka pot and French press coffee:
| Method | Strength | Body | Ease of Use | Clean-up |
|---|---|---|---|---|
| Aeropress Espresso | High | Medium-thick | Easy | Very easy |
| Moka Pot | Medium-high | Thick | Medium | Medium |
| French Press | Medium | Heavy | Easy | Easy |
Aeropress espresso is cleaner than moka pot, stronger than French press, and easier to clean than both.
Mistakes To Avoid When Making Aeropress Espresso
- Using pre-ground coffee: Fresh grinding is key for flavor and crema.
- Ignoring water temperature: Too hot or cold ruins extraction.
- Not stirring enough: Incomplete mixing = uneven taste.
- Overfilling water: Makes weak coffee.
- Forgetting to rinse filters: Paper taste can ruin your shot.
- Wrong grind size: Too fine or coarse affects pressure and flavor.
- Rushing the press: Fast pressing leads to sour coffee.
- Not cleaning properly: Old grounds can make coffee taste stale.
Beginner insight: Some think more coffee always means better taste. Actually, too much can make pressing impossible and coffee muddy.
Is Aeropress Espresso Right For You?
Aeropress espresso is a great choice if you want:
- Affordable, strong coffee at home
- Portable brewing for travel or work
- Control over your recipe
- Easy clean-up
If you need perfect crema or want to pull true espresso shots for professional drinks, a real espresso machine may be better. But for most people, Aeropress offers 90% of the experience at a fraction of the cost.
Resources For Learning More
If you want to dive deeper into Aeropress techniques or competitions, check out the official Aeropress site for tips, recipes, and user guides. There are also communities on Reddit and YouTube with videos and advice for all skill levels.
Frequently Asked Questions
What Grind Size Should I Use For Aeropress Espresso?
Use a fine grind, slightly coarser than espresso machine grind but finer than for drip coffee. It should feel like table salt. If pressing is too hard, go a bit coarser. If coffee is weak, try finer.
Can I Make Real Espresso With Aeropress?
Aeropress can’t create the full pressure of a commercial espresso machine, so you won’t get the same crema and intensity. But it makes a rich, strong coffee that’s close to espresso, great for milk drinks and sipping.
How Much Coffee And Water For Aeropress Espresso?
For one shot, use 18–20 grams coffee and 50–70 ml water. Adjust to taste: more coffee or less water for a stronger drink.
Can I Use Aeropress Espresso For Iced Drinks?
Yes. Brew a strong shot, pour over ice, and add milk or sweetener. The bold flavor stands up well in iced lattes and iced Americanos.
How Do I Get More Crema With Aeropress?
Use fresh coffee, try double paper filters or a Prismo, and press quickly at the end. Crema will be lighter than real espresso, but these tricks help.
Aeropress espresso opens up a world of coffee without the cost or complexity of a big machine. With practice, you’ll create delicious, strong coffee at home, and have fun experimenting along the way.