Sharpening a meat grinder blade is a task many home cooks and butchers overlook. When the blade gets dull, grinding meat becomes slow and tough, and the result is often mushy, uneven mince. But with a sharp blade, you save time, enjoy better texture, and make your grinder last longer.
If you want to prepare sausages, burgers, or pet food at home, knowing how to sharpen a meat grinder blade is a valuable skill. This guide will walk you through every step, from understanding your grinder parts to troubleshooting common issues.
Even if you’re new to home butchery, you’ll learn how to keep your grinder in top shape, and you’ll discover tips that even some professionals miss.
Why A Sharp Meat Grinder Blade Matters
It might surprise you, but a dull blade does more than slow down your work. It can damage your grinder, waste meat, and even affect the safety of your kitchen. When you force meat through a dull grinder, you put strain on the motor and gears. This can lead to breakdowns or expensive repairs.
A sharp blade ensures:
- Consistent cuts for better meat texture
- Faster grinding with less effort
- Less heat buildup, keeping meat fresh
- Safer operation, since you don’t need to force the meat
Many first-timers don’t realize that a dull blade pushes meat rather than slicing it. This leads to smearing, where fat and meat mix in a way that ruins texture and flavor. Sharpening your blade restores the clean, precise cut you need.
Understanding Meat Grinder Parts
Before you sharpen, it helps to know the main parts involved. Most meat grinders, whether manual or electric, have similar basic components:
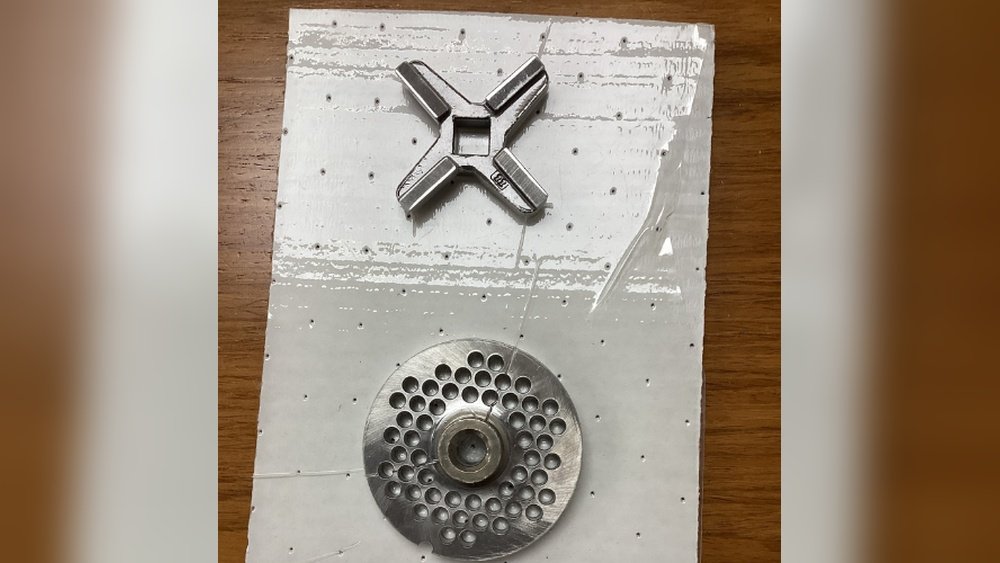
- Blade/Knife: The sharp, flat piece with cutting edges.
- Grinding Plate: The round disc with holes, where meat exits.
- Auger: The spiral piece that pushes meat forward.
- Retaining Ring: Holds everything in place.
The focus here is on the blade and the grinding plate. Both need to be flat and sharp for best results. A common mistake is sharpening only the blade, but the plate’s surface must also be smooth and flat. If either is warped or pitted, grinding will never be efficient.
Here’s a quick comparison between the two critical parts:
| Part | Main Function | When to Sharpen/Flatten |
|---|---|---|
| Blade/Knife | Cuts meat against plate | When meat looks smeared or grinder slows down |
| Grinding Plate | Holes shape final grind, must be flat | If grooves or dents appear, or after every few sharpenings |
Tools And Materials You’ll Need
You don’t need expensive equipment to sharpen a meat grinder blade. In fact, many people use items found in a typical kitchen or workshop. Here’s what you should have on hand:
1. Sharpening Stones (whetstones)
Medium (around 400–800 grit) for rough sharpening, and fine (1000–3000 grit) for finishing.
2. Wet/dry Sandpaper
Grits from 400 to 2000, useful if you don’t have stones.
3. Flat Surface
A glass pane, ceramic tile, or thick cutting board works well.
4. Lubricant
Water or honing oil, depending on your stone or sandpaper.
5. Cleaning Brush
For removing meat residue and filings.
6. Protective Gloves
To avoid cuts—grinder blades can be very sharp.
7. Screwdriver Or Wrench
To disassemble the grinder.
8. Towel Or Cloth
For drying parts after cleaning.
Optional but helpful:
- Caliper or Ruler for checking flatness.
- Magnifying Glass to inspect edges.
Many beginners don’t realize the importance of a truly flat sharpening surface. If your stone or sandpaper sits on a warped board, you’ll end up with an uneven blade that won’t grind properly.
Preparing For Sharpening
Before you start, proper preparation will make the process safer and more effective.
Disassemble The Grinder
Unplug your electric grinder, or ensure your manual grinder is secure. Carefully remove all parts, paying attention to the order. Lay out the blade and grinding plate. If you’re unsure, take a photo at each step. This helps with reassembly.
Clean All Parts
Even a small amount of old meat or fat can affect sharpening. Use warm, soapy water and a stiff brush to remove all debris. Dry thoroughly. A wet or greasy blade can slip and cause injury.
Inspect Blade And Plate
Hold the blade up to the light. Look for:
- Nicks or chips on the edge
- Rust spots or pitting
- Bent or warped metal
Check the grinding plate’s surface. It should be flat and smooth, with no deep grooves or dents. If you see serious damage, consider replacing the part.
Check For Flatness
Place the blade and plate on a flat surface. Try to rock them gently. If they wobble, they are not flat. This is a common beginner mistake—sharpening a warped blade will not solve grinding problems. Use a caliper or feeler gauge if you want to check for high spots.

Credit: www.youtube.com
Step-by-step Guide To Sharpening A Meat Grinder Blade
Let’s break down the sharpening process into clear steps. Patience is key. Rushing leads to uneven edges and poor results.
1. Secure Your Sharpening Surface
Place your whetstone or sandpaper on a perfectly flat base. If using sandpaper, tape it down so it doesn’t move. A glass pane or ceramic tile works best because they are very flat.
2. Choose The Right Grit
If your blade is very dull or has nicks, start with a coarser grit (400–600). For routine maintenance, begin with 800 or 1000 grit. Always finish with a finer grit for a polished edge.
3. Lubricate The Stone Or Sandpaper
Add water or honing oil (as recommended for your sharpening tool). This helps prevent metal shavings from clogging the surface and reduces friction.
4. Sharpen The Blade
Hold the blade flat against the stone or sandpaper. Use gentle, even pressure. Move in a circular or figure-eight motion. The goal is to keep the blade perfectly flat—do not tilt it or focus only on the edges.
Sharpen for about 2–3 minutes, then check your progress. You should see a uniform, shiny surface. If the blade was very dull, it might take longer.
A common error is applying too much pressure. This can round the edges or create dips, making the blade less effective. Let the abrasive do the work.
5. Flip And Repeat
If your blade has two sides (some do, some don’t), repeat the process on the other side. Most standard blades only require sharpening on the flat side that contacts the plate.
6. Polish The Edge
Switch to a finer grit (1000–2000) and repeat the sharpening process. This removes scratches and creates a razor-sharp edge. The blade should reflect light evenly and feel smooth to the touch.
7. Flatten And Sharpen The Grinding Plate
Just like the blade, the plate must be perfectly flat. Place it on the stone or sandpaper, holes facing down. Move it in a figure-eight pattern, applying gentle pressure.
Check for a uniform, shiny finish. If some areas remain dull, keep going until the entire surface is flat. This step is critical—many people skip it, leading to poor grinding even with a sharp blade.
8. Clean All Parts Thoroughly
Rinse off all metal filings and abrasive residue. Dry each part completely to prevent rust.
9. Reassemble The Grinder
Carefully put all parts back in the correct order. Make sure the blade sits flat against the plate, with no gaps. Tighten the retaining ring firmly, but don’t overtighten.
10. Test Your Work
Grind a small piece of meat or even a slice of bread (bread cleans out remaining filings). The grinder should work smoothly, with no smearing or hard turning. If the result isn’t right, check assembly and repeat sharpening if needed.
Comparing Sharpening Methods
Different approaches have their pros and cons. Here’s a quick comparison of the most common sharpening tools:
| Method | Pros | Cons | Best For |
|---|---|---|---|
| Whetstone | Accurate, reusable, fine control | Requires practice, needs flat surface | Most users |
| Sandpaper on Glass | Cheap, easy to find, versatile grits | Sandpaper wears out, must keep flat | Beginners, occasional sharpening |
| Electric Grinder Jig | Fast, easy, professional results | Expensive, risk of overheating | High volume, commercial |
| Manual File | Quick for minor touch-ups | Hard to keep flat, not for deep sharpening | Emergency fixes |
Safety Tips For Sharpening
Sharpening blades means handling sharp metal and fine abrasives. Here are some key safety tips:
- Always wear protective gloves to avoid cuts.
- Work on a stable, uncluttered surface.
- Keep your fingers away from the edge during sharpening.
- Do not rush—slow, steady movements are safer and more effective.
- Wipe up all metal filings to keep your workspace clean.
- Store the blade safely after sharpening.
A tip many people miss: even a dull blade can suddenly catch and cut your finger during cleaning. Always treat the blade as if it’s razor-sharp.
How Often Should You Sharpen?
The answer depends on how much you use your grinder. For most home cooks, sharpening every 6–12 months is enough. If you grind large amounts of meat weekly, check the blade every 1–2 months.
Two signs it’s time to sharpen:
- Meat comes out smeared or mushy, not clean strands.
- Grinding becomes noticeably harder or slower.
If you notice rust, pitting, or damage, address it before sharpening. Never grind with a damaged blade—replace it instead.

Credit: www.amazon.com
Mistakes To Avoid When Sharpening A Meat Grinder Blade
Even experienced users make common mistakes. Avoid these for the best results:
1. Sharpening Only The Blade
If the plate isn’t flat, a sharp blade won’t help.
2. Using Too Much Pressure
Heavy force rounds edges and ruins flatness.
3. Skipping Cleaning
Debris or grease on the blade affects sharpening and can cause accidents.
4. Sharpening At An Angle
Always keep the blade flat on the stone or sandpaper.
5. Not Drying Parts
Wet parts rust quickly. Dry everything immediately after cleaning.
6. Ignoring Blade Direction
Some blades have a bevel—check your manual and sharpen the correct side.
7. Overlooking Plate Wear
Deep grooves in the plate can’t be fixed by sharpening—replace badly worn plates.
8. Improper Reassembly
If the blade isn’t installed flat against the plate, it won’t cut properly.
9. Neglecting Safety Gear
Cuts are common—always wear gloves.
Advanced Tips For A Razor-sharp Edge
If you want professional results, try these extra steps:
- After sharpening, use a leather strop or a piece of old denim with metal polish to remove any tiny burrs from the blade.
- For heavily used plates, consider lapping them with a diamond plate for perfect flatness.
- Use a magnifying glass to check the edge. It should be smooth, with no chips or rough spots.
- Test sharpness by gently slicing a piece of paper or thin plastic. A sharp blade should cut cleanly.
- Keep a record of sharpening dates and results. This helps you track performance and plan maintenance.

Credit: www.youtube.com
Troubleshooting: When The Blade Won’t Stay Sharp
Sometimes, even after sharpening, your grinder still struggles. Here are possible causes:
- Blade and plate are not perfectly flat. Re-flatten both parts.
- Blade is installed backward. Double-check assembly.
- Plate holes are worn. Replace the plate if they look oval or damaged.
- Poor-quality blade. Some cheap aftermarket blades never hold an edge—invest in a good one.
- Motor is weak (electric grinders). If sharpening doesn’t help, your grinder may need repair.
If problems persist after several sharpening attempts, it may be time to replace worn-out parts. For more on grinder maintenance, see resources like Wikipedia’s meat grinder page.
How To Store Your Grinder Blade
Proper storage extends the life of your sharpened blade:
- Dry the blade and plate completely before storing.
- Wipe with a thin layer of food-safe mineral oil to prevent rust.
- Wrap in a clean cloth or store in a sealed bag.
- Keep parts in a dry, cool location, away from moisture.
Many users forget this step and find their blade rusted or pitted next time they need it.
Signs You Need A Replacement, Not Sharpening
Sometimes, no amount of sharpening will revive a blade. Replace your blade or plate if:
- There are deep chips or cracks in the metal.
- The blade is bent or warped and can’t be flattened.
- The grinding plate holes are deformed or enlarged.
- The blade is too thin from repeated sharpening.
Trying to use worn-out parts risks damaging your grinder and can be dangerous.
Maintaining A Sharp Blade For Longer
To keep your blade sharp between sharpenings:
- Grind cold meat—warm fat smears and dulls the blade faster.
- Clean the grinder immediately after use.
- Avoid grinding bones or sinew unless your grinder is designed for it.
- Lubricate moving parts as recommended in your manual.
Some people run a piece of stale bread through the grinder at the end of each session. This cleans out debris and helps keep the blade sharp.
Frequently Asked Questions
How Do I Know If My Meat Grinder Blade Is Dull?
If you notice meat coming out smeared or mushy, or if grinding takes much more effort than before, your blade is likely dull. A sharp blade produces clean, even meat strands with little resistance.
Can I Sharpen The Blade With A Regular Kitchen Knife Sharpener?
Most kitchen knife sharpeners are not suitable. Meat grinder blades need to be kept flat and even. Use a whetstone, sandpaper on glass, or a specialized grinder sharpening kit for best results.
How Often Should I Replace My Grinder Blade?
With proper care and sharpening, a grinder blade can last many years. Replace it if you see chips, cracks, warping, or if it becomes too thin from repeated sharpening. For home use, many people get 5–10 years from one blade.
Can I Sharpen Both The Blade And The Plate?
Yes, and you should. Both the blade and the grinding plate must be flat and smooth for efficient grinding. Neglecting the plate is a common mistake that affects performance.
Is It Safe To Sharpen My Own Grinder Blade?
With proper precautions, it is safe. Wear gloves, work slowly, and keep your workspace clean. If you feel unsure, consider taking the blade to a professional or a local butcher shop for sharpening.
Keeping your meat grinder blade sharp is a simple skill that pays off with better food and less frustration. Take your time, follow these steps, and your grinder will serve you well for years to come.