If you’ve opened your kitchen cupboards and noticed the surface is bubbling or peeling away, you’re not alone. Many homes have particle board cabinets covered with veneer. This thin layer gives cabinets a wood-like look at a much lower cost. But over time, veneer can peel, crack, or bubble—especially in areas with moisture or heavy use. It can make your kitchen or bathroom look old and uncared for. The good news? You don’t always need to replace your cabinets. With some time, the right tools, and this guide, you can repair peeling veneer and make your cabinets look almost new again.
This article will explain everything you need to know about repairing peeling veneer on particle board cabinets. We’ll cover why veneer peels, how to prepare for the repair, step-by-step instructions, practical tips, and how to avoid future problems. If you’re a DIY beginner or just want to save money, these tips will help you succeed.
Why Veneer Peels On Particle Board Cabinets
Veneer is a thin layer of real wood or plastic glued to a particle board base. Particle board is made by pressing wood chips and glue together. This makes it less expensive but also more vulnerable to moisture, heat, and impact than solid wood. Over time, these factors cause the glue holding the veneer to fail.
Here are the most common causes:
- Moisture exposure: Kitchens and bathrooms have high humidity. Water can seep into small cracks or unfinished edges and weaken the glue.
- Heat: Cabinets near stoves or dishwashers get exposed to heat, which can soften the glue and cause veneer to bubble or peel.
- Physical damage: Scratches, bumps, or impacts can loosen the veneer layer.
- Poor quality glue: Some cabinets use low-quality adhesive that breaks down faster.
- Age: Even the best cabinets will eventually show wear as glue and materials age.
Understanding the cause helps you prevent future problems and choose the right repair method.
Tools And Materials You’ll Need
Having the right tools and supplies is important for a smooth repair. Here’s what you’ll need for most veneer repairs:
- Putty knife or scraper (plastic or metal)
- Utility knife with a sharp blade
- Wood glue (or contact cement for large areas)
- Syringe or small brush (for applying glue)
- Clamps (spring clamps or C-clamps)
- Wax paper or plastic wrap
- Sanding block and fine-grit sandpaper (220 grit)
- Wood filler or putty (for missing veneer spots)
- Matching wood stain or paint
- Clean cloths
- Painter’s tape
- Heavy books or blocks (if you don’t have enough clamps)
- Protective gloves and mask
Optional but helpful:
- Hair dryer or heat gun (for softening old glue)
- Touch-up marker (for small color fixes)
Not all repairs need every item, but it’s best to have them ready so you’re not interrupted halfway through.
Credit: www.handhillscabinets.com
Assessing The Damage
Before you start, examine the cabinets closely:
- How big is the peeling area? Small chips or large loose panels?
- Is the particle board underneath damaged or swollen?
- Is the veneer missing, cracked, or just loose?
You may find:
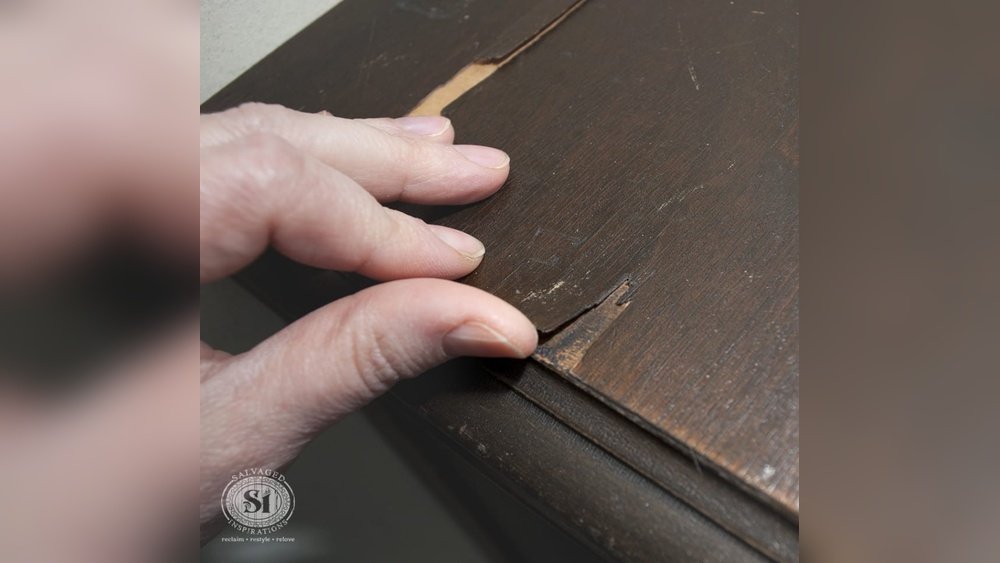
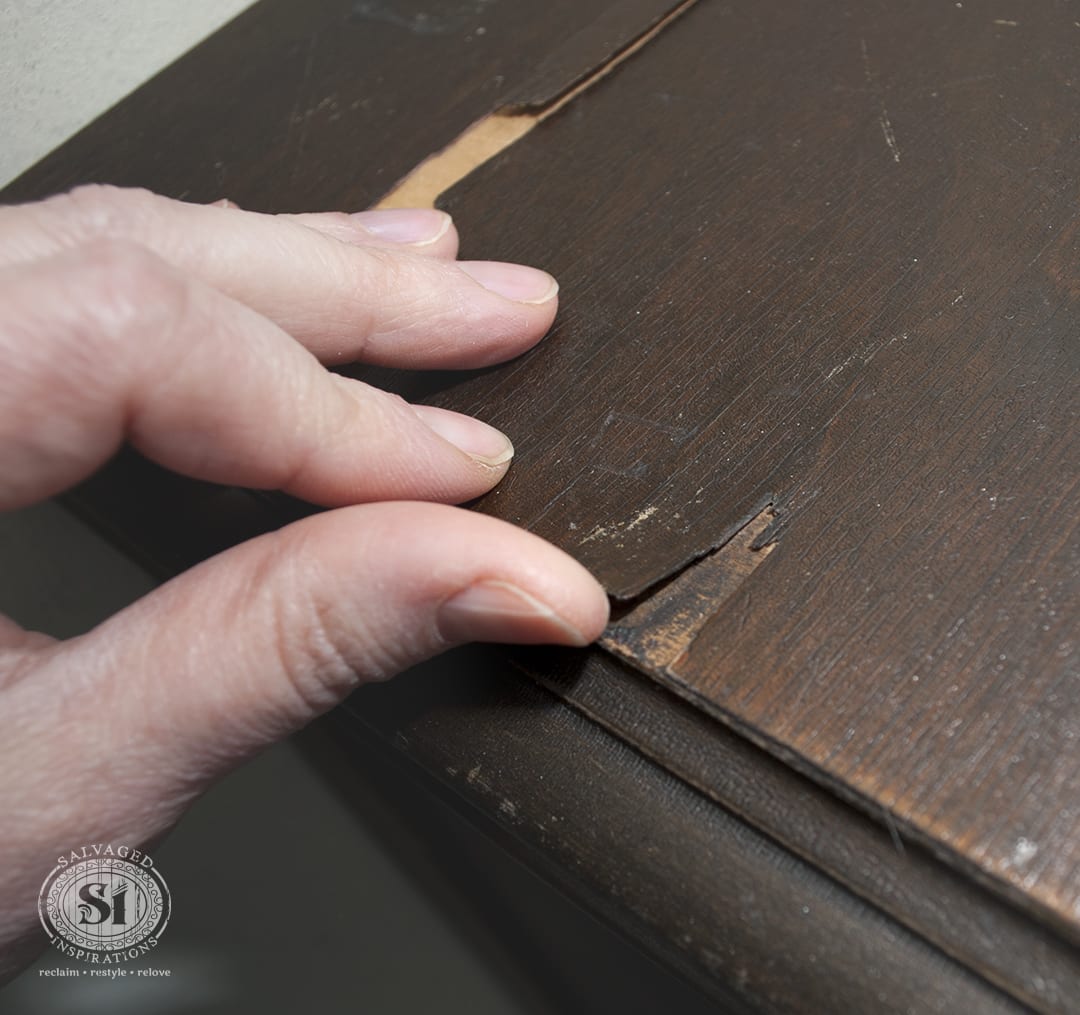
- Loose veneer: The layer is lifted but not broken.
- Bubbled veneer: The veneer looks swollen but is not torn.
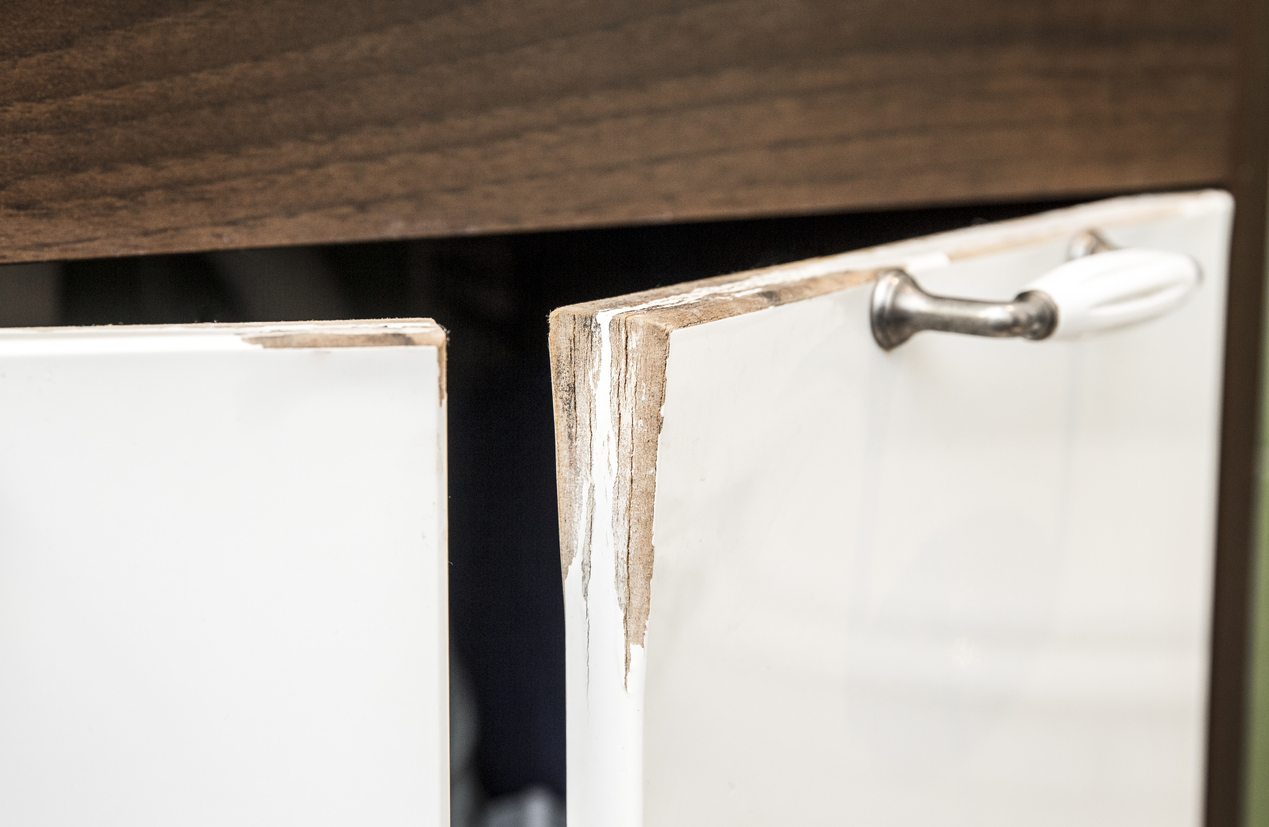
- Missing veneer: Small chips or sections are completely gone.
- Damaged particle board: The base is soft, swollen, or crumbling.
Each type of damage requires a slightly different repair.
Step-by-step Repair For Peeling Veneer
Let’s break down the repair process for each problem you may face.
Fixing Loose Or Peeling Veneer
This is the most common and easiest repair. The veneer is still there but has lifted from the particle board.
- Lift the loose veneer gently.
- Use a putty knife or utility knife to carefully pry the veneer away from the surface just enough to apply glue underneath.
- Go slowly to avoid breaking the veneer.
- Clean the area.
- Remove any old glue or dust from both the veneer and particle board with a dry brush or cloth.
- Apply glue.
- Use wood glue for most repairs. For larger areas, contact cement can work better.
- Inject glue under the veneer using a small brush, toothpick, or syringe.
- Apply enough glue to cover the entire loose area, but don’t flood it.
- Press and clamp.
- Place wax paper or plastic wrap between the veneer and your clamp (or heavy books) to prevent sticking.
- Clamp the area tightly. If the spot is large, use several clamps or objects to spread pressure evenly.
- Wipe away any glue that squeezes out.
- Let it dry.
- Follow the glue manufacturer’s directions (usually 4–12 hours).
- Remove clamps and clean up.
- Sand lightly with 220-grit sandpaper to smooth any rough edges or dried glue.
- Wipe with a clean cloth.
Pro tip: If the veneer won’t stay flat, use a hair dryer to soften it gently before clamping.
Repairing Bubbled Veneer
Bubbles form when moisture or heat causes the veneer to lift, but it’s not torn.
- Slice the bubble.
- Use a sharp utility knife to make a small slit along the grain of the veneer. Don’t cut across the grain or you may cause more damage.
- Inject glue.
- Squeeze wood glue or contact cement under the bubble using a syringe, toothpick, or small brush.
- Press and clamp.
- Use wax paper and clamp as before, pressing down on the bubble until the glue dries.
- Sand and finish.
- Once dry, sand gently and touch up with stain or paint if needed.
Non-obvious tip: For small bubbles, try using a hot iron (covered with a cloth) for a few seconds. The heat can reactivate old glue. Press firmly and let cool.
Fixing Missing Or Chipped Veneer
If a corner or section is missing, you need to fill or patch it.
- Clean the damaged area.
- Remove any loose bits and sand the particle board to make it smooth.
- Apply wood filler.
- Use a putty knife to fill the missing spot with wood filler or putty. Overfill slightly because filler will shrink as it dries.
- Let it dry.
- Check the filler’s instructions; drying usually takes 1–2 hours.
- Sand smooth.
- Sand with 220-grit sandpaper until the patch is level with the surrounding surface.
- Color match.
- Use matching stain, paint, or a touch-up marker to blend the repair.
Advanced patch: For large missing sections, cut a new piece of matching veneer and glue it in place. Clamp and finish as above.
Repairing Swollen Or Damaged Particle Board
If moisture has caused the particle board itself to swell or crumble, repairs are harder but still possible for small spots.
- Remove loose material.
- Use a putty knife to scrape away all soft, swollen, or crumbling board.
- Dry the area completely.
- Point a hair dryer or fan at the spot for several hours to make sure there is no moisture left.
- Fill with wood hardener or epoxy.
- Apply a wood hardener to strengthen the particle board. For larger holes, use a two-part epoxy filler.
- Sand smooth.
- Once dry, sand the repair until level.
- Apply veneer or filler.
- Either glue new veneer over the spot or use wood filler and color as described above.
Non-obvious insight: Particle board repairs usually don’t last if the swelling is large or the area stays damp. Sometimes, replacing the panel is a better long-term fix.
Comparing Repair Methods
The right repair depends on the type and size of the damage. Here’s a quick comparison of the main methods:
| Type of Damage | Best Repair Method | Tools Needed | Difficulty |
|---|---|---|---|
| Loose veneer | Reglue and clamp | Glue, clamps, putty knife | Easy |
| Bubbled veneer | Slice, inject glue, clamp | Knife, glue, clamp | Medium |
| Missing veneer | Wood filler or patch | Filler, putty knife, sandpaper | Medium |
| Damaged particle board | Remove, fill, seal | Hardener, filler, sandpaper | Hard |
Matching Color And Finish
A good repair isn’t just strong—it should also look natural. Here’s how to match the repaired area to the rest of your cabinet:
- Identify the finish.
- Is it stained wood, painted, or a plastic veneer?
- Test color on a hidden spot.
- Try your stain, paint, or touch-up marker in an out-of-sight area first.
- Blend edges.
- Feather paint or stain beyond the repair for a seamless look.
- Protect the repair.
- Finish with a clear coat (like polyurethane) for extra durability and shine.
Non-obvious insight: Lighting affects color. Check your repair under both natural and artificial light before you finish.
When To Patch Vs. Replace Veneer
Not Every Problem Is Worth Fixing. How Do You Decide?
- Small chips or loose edges: Patch or glue.
- Large missing sections: Patch if you can match the veneer, otherwise consider replacing the panel.
- Swollen, crumbling particle board: Replace the whole door or panel if damage is widespread.
Practical tip: If more than 25% of a cabinet panel is damaged, replacement is usually faster and looks better.
Preventing Future Peeling
Repairing veneer takes effort—so keep it from peeling again with these strategies:
- Control moisture.
- Use a dehumidifier in kitchens or bathrooms.
- Wipe up spills quickly.
- Seal edges.
- Use a clear sealer or paint on unfinished edges, especially under sinks or near dishwashers.
- Don’t hang wet towels or clothes on cabinet doors.
- This adds moisture and weight.
- Avoid harsh cleaners.
- Use a damp cloth, not abrasive or soaking cleaners.
- Check hinges and hardware.
- Loose screws or sagging doors can pull on veneer.
- Handle with care.
- Don’t slam doors or use them as ladders or supports.
Non-obvious insight: Even small leaks under the sink can cause major veneer problems over time. Check for leaks regularly.
Cost Comparison: Diy Vs. Hiring A Pro
Is it worth doing the repair yourself? Let’s see how the costs stack up.
| Repair Method | DIY Cost (Approx.) | Professional Cost | Time Needed |
|---|---|---|---|
| Small glue repair | $10–$25 | $75–$150 | 1–2 hours |
| Patching missing veneer | $15–$40 | $100–$250 | 2–4 hours |
| Panel replacement | $40–$100 | $250–$500 | 4–8 hours |
DIY is cheaper, but only if you have time and basic tools. For large or visible repairs, a professional may give a better finish.
Common Mistakes To Avoid
Many first-time repairs fail because of small errors. Watch out for these:
- Not removing all loose material.
- Old glue or dust stops new glue from sticking.
- Using too much or too little glue.
- Too much: Messy and hard to clamp. Too little: won’t hold.
- Clamping unevenly.
- Use enough pressure over the whole area.
- Skipping the drying time.
- Don’t rush—glue needs time to set.
- Poor color matching.
- Always test in a hidden spot.
- Ignoring the real cause.
- Fix leaks or humidity problems before repairing, or the veneer will peel again.
Non-obvious insight: Don’t use nails or screws to hold veneer—they’ll split the thin wood and look bad.

Credit: www.reddit.com
Advanced Tips For A Professional Finish
Want your repair to look as good as new? Try these:
- Feather sand the edges of the repair to blend with the surrounding veneer.
- Use a veneer roller (available at hardware stores) to press out bubbles evenly.
- Tint your glue with a drop of stain for invisible seams.
- Apply finish coats (polyurethane or lacquer) after staining to match sheen.
If you’re serious about DIY, learning to patch with new veneer sheets can save cabinets that most people would throw out.
How To Replace A Veneer Panel (if Needed)
Sometimes, repairing isn’t enough. If a whole panel is ruined, you may need to replace the veneer.
- Remove old veneer.
- Use a heat gun or hair dryer to soften glue. Peel off the old veneer with a putty knife.
- Clean and sand the surface.
- Make sure the particle board is smooth and free of old glue.
- Cut new veneer.
- Buy matching pre-glued veneer or cut from a sheet. Cut slightly larger than needed.
- Apply glue (if not pre-glued).
- Brush a thin, even coat of contact cement on both the particle board and the back of the veneer.
- Position and press.
- Lay the veneer in place. Press with a roller or block to remove air bubbles.
- Trim edges.
- Use a sharp utility knife to trim excess.
- Clamp or weight.
- Let the adhesive dry under pressure.
- Finish as needed.
- Sand edges, stain, and seal.
Replacing veneer isn’t hard, but it does require patience and careful measuring. For a step-by-step video guide, see this Family Handyman tutorial.
How Long Will Repairs Last?
A well-done repair can last for many years if you control moisture and avoid abuse. However, particle board cabinets have a limited lifespan (often 15–20 years). If your cabinets are very old or have repeated problems, it may be time to consider upgrading.
Real-world Example
Let’s say you have a kitchen cabinet where the veneer is peeling at the bottom due to a leaky dishwasher. Here’s a summary of how you’d fix it:
- Turn off the water and fix the leak first.
- Lift the loose veneer with a putty knife.
- Clean out any old glue or swollen particle board.
- Inject wood glue and press the veneer back in place.
- Clamp overnight.
- Sand lightly and color match with stain.
- Seal the edges with polyurethane.
This process takes about 2–3 hours (plus drying time) and costs under $20 in materials.
Credit: salvagedinspirations.com
Frequently Asked Questions
How Do I Know If My Cabinets Are Worth Repairing?
If the damage is small, and the particle board is solid, repairs can add years to your cabinets. However, if the particle board is swollen, soft, or crumbling in many places, it may be better to replace the doors or cabinets.
Can I Use Super Glue To Fix Peeling Veneer?
Super glue is not recommended. It dries too fast and doesn’t allow time for proper positioning or clamping. Use wood glue or contact cement for the best results.
What If The Color Doesn’t Match After Repair?
You can use a touch-up marker, stain, or even custom-mixed paint to blend small repairs. For large or visible areas, consider refinishing the whole door for a consistent look.
Will Painting Over Peeling Veneer Fix The Problem?
Painting alone does not fix peeling veneer. The loose veneer will continue to lift. Always glue or patch the veneer first, then paint if you want to change the color.
How Do I Prevent Future Peeling?
Keep cabinets dry, seal exposed edges, and avoid heavy impacts. Regularly check for leaks and use gentle cleaning methods to protect the veneer.
Making your cabinets look great doesn’t require a full remodel. With the right steps, you can repair peeling veneer on particle board cabinets and enjoy a fresh, clean kitchen or bathroom for years to come.