If you have cherry wood cabinets, you probably appreciate their rich color and classic look. But over time, tastes change. Maybe your kitchen feels too dark, or you want a modern update. Painting cherry cabinets is a smart way to refresh your space without the high cost of replacement. Many people worry that painting cherry wood is hard because of its smooth finish and deep color. The truth is: with the right steps, tools, and patience, you can get a beautiful, long-lasting result.
This guide covers everything you need to know about painting cherry cabinets. You’ll learn how to prepare the wood, pick the best paint, avoid common mistakes, and get a professional finish—even if you’re a beginner. Along the way, you’ll find practical tips, expert advice, and solutions to problems people often miss.
If you want to give your kitchen a new look and boost your home’s value, this article will help you do it right.
Why Paint Cherry Cabinets?
Cherry cabinets are known for their strong grain and deep reddish-brown color. While beautiful, these features can also limit your kitchen style. Painting the cabinets gives you more options. Let’s look at why homeowners choose to paint cherry cabinets:
- Modernize your kitchen: Dark cherry can make a room feel dated. Light paint colors can open up the space and make it look bigger and brighter.
- Match your style: If you like coastal, farmhouse, or minimalist design, painted cabinets work better than dark wood.
- Increase resale value: Neutral painted cabinets appeal to more buyers. According to real estate studies, kitchens with updated cabinets can sell for up to 7% more.
- Hide wear and tear: Scratches, faded spots, or water marks are easy to cover with paint.
- Save money: Painting costs much less than replacing cabinets, which can run $10,000–$20,000 for a medium kitchen.
Painting is not the only option. Staining or refacing are alternatives, but painting offers the most dramatic change for the lowest cost.
Understanding Cherry Wood: Challenges And Advantages
Before you start, it’s important to understand cherry wood’s unique properties. This will help you avoid mistakes and choose the right products.
Challenges
- High tannin content: Cherry has natural oils and tannins. These can bleed through paint, causing yellow or pink stains.
- Smooth, closed grain: Paint may not stick well unless the surface is prepared properly.
- Dark color: It takes more coats to cover cherry than lighter woods.
- Color changes over time: Cherry wood darkens with age, which can affect the final look.
Advantages
- Hard and durable: Cherry cabinets are strong and last many years with proper care.
- Takes paint well (with prep): If you sand and prime correctly, cherry holds paint evenly.
- Stable: Cherry wood doesn’t warp easily, so paint is less likely to crack or peel.
Understanding these points helps you plan each step and choose the right materials.
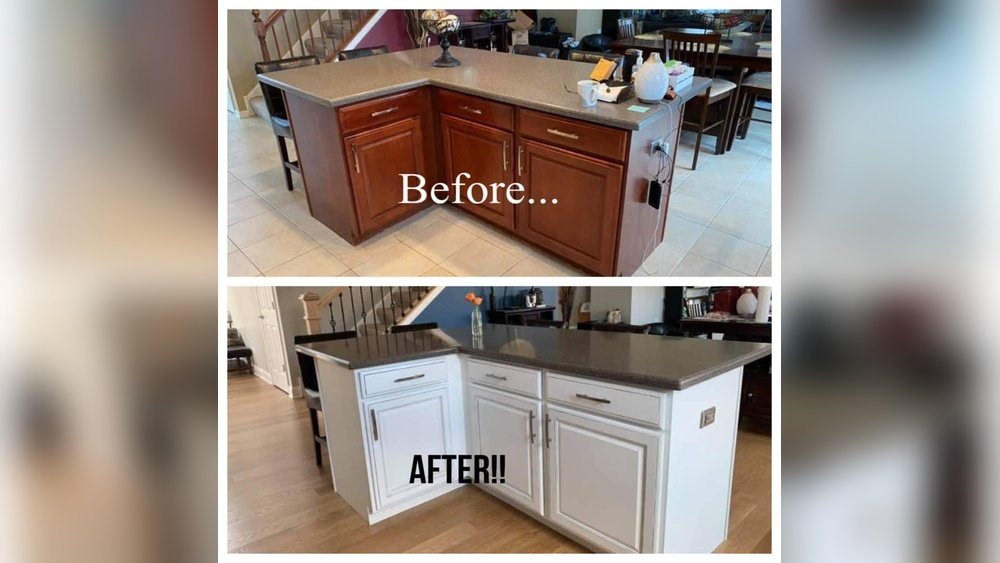
Credit: dfrancowallpaper.com
Tools And Materials You’ll Need
Getting the right tools from the start will save time and frustration. Here’s what you need for the best results:
Basic Supplies
- Painter’s tape
- Drop cloths
- Screwdriver or drill
- Plastic bags or containers for hardware
- Cleaning sponge
Preparation Supplies
- Degreaser or TSP (trisodium phosphate)
- Fine-grit sandpaper (120, 180, and 220 grit)
- Sanding block or orbital sander
- Wood filler (for holes or dents)
Priming and Painting
- High-quality bonding primer (stain-blocking)
- Cabinet paint (acrylic, alkyd, or hybrid)
- Paintbrush (2–2.5” angled)
- Foam roller (4–6”)
- Paint tray
- Tack cloth
Safety Gear
- Gloves
- Mask or respirator
- Safety glasses
Optional
- Caulk (for gaps)
- Small artist brush (for corners)
- Power sander (for large kitchens)
Buying good-quality tools pays off. Cheap brushes can leave bristles in the paint, and low-grade primers won’t block stains.
Choosing The Right Paint And Primer For Cherry Cabinets
Picking the correct primer and paint is crucial for cherry cabinets. Not all products work well on this wood type.
Best Primer For Cherry Cabinets
Look for a bonding, stain-blocking primer. The primer should:
- Stick well to smooth surfaces
- Block tannins to prevent bleed-through
- Dry quickly and sand smoothly
Popular options include:
- Zinsser B-I-N Shellac Primer (excellent stain-blocking)
- Benjamin Moore INSL-X Stix (strong bonding)
- KILZ Original (blocks stains and odors)
Best Paint For Cherry Cabinets
Cabinet paint needs to be durable, washable, and smooth. The main types are:
- Acrylic (water-based): Easy to clean, low odor, dries fast.
- Alkyd (oil-based or hybrid): Harder finish, resists scratches, but more fumes.
- Urethane-modified: Combines benefits of both types.
Choose a semi-gloss or satin finish for kitchens. These reflect light and are easier to clean than flat or matte.
Paint Colors That Work Well
Some paint colors cover cherry better than others. Light shades may need extra coats. Popular choices:
- White: Classic and bright, but needs the best primer.
- Gray: Modern and hides minor flaws.
- Navy: Trendy, but may need more coats.
- Greige (gray-beige): Warm, neutral, hides dust.
Pro tip: Always buy a sample and test it on the back of a cabinet door before painting everything.
Step-by-step Process: How To Paint Cherry Cabinets
Let’s break down the process into clear, manageable steps. Don’t rush—proper prep is the secret to great results.
1. Remove Cabinet Doors And Hardware
Take off all doors, drawer fronts, and hardware. Label each piece and its screws with painter’s tape or in bags. This makes reassembly much easier.
- Use a screwdriver or drill.
- Place hardware in labeled bags.
- Lay doors flat on a covered surface.
2. Clean All Surfaces
Cherry wood is often found in kitchens, where grease and grime can build up. Clean cabinets thoroughly with a degreaser or TSP.
- Scrub every surface, especially around handles.
- Rinse with clean water and let dry.
- Don’t skip this step—paint won’t stick to grease.
3. Repair And Fill Holes
Inspect for dents, scratches, or holes. Fill with wood filler and let dry. Sand smooth with 180 or 220 grit sandpaper. Wipe away dust with a tack cloth.
- Fill old handle holes if changing hardware.
- Check edges and corners for chips.
4. Sand The Cabinets
This is the most important step for cherry wood. Sanding creates a rough surface for primer to grip.
- Use 120–180 grit sandpaper for initial sanding.
- For a smooth finish, follow with 220 grit.
- Sand in the direction of the wood grain.
- Don’t sand too deep—just enough to remove shine.
After sanding, always wipe down with a tack cloth.
5. Caulk And Mask
Fill any gaps between cabinets and walls with paintable caulk. Mask off countertops, walls, and floors with painter’s tape and drop cloths.
- Smooth caulk with a wet finger.
- Wait for caulk to dry before priming.
6. Apply Primer
Use a high-quality, stain-blocking primer. This is key for cherry wood.
- Start with corners and details using a brush.
- Use a foam roller for flat areas.
- Allow to dry (follow label times—usually 1–2 hours).
- Lightly sand with 220 grit between coats for a smooth finish.
- Wipe away dust before painting.
One coat is often enough if you use a strong primer, but two coats may be needed for dark cherry.
7. Paint The Cabinets
Stir paint well before starting. Apply in thin, even coats.
- Brush corners and edges first.
- Use a foam roller for flat surfaces.
- Apply 2–3 thin coats, letting each dry fully.
- Lightly sand between coats for a perfect finish.
Take your time—rushing causes drips and brush marks. For best results, paint in a dust-free area.
8. Cure And Reassemble
Let the paint cure for at least 24–48 hours before reattaching doors and hardware. Full hardness may take up to 7 days.
- Reinstall doors and drawers carefully.
- Add bumpers to prevent sticking.
- Clean up and enjoy your new look.
Comparing Paint Types For Cherry Cabinets
Understanding the differences between paint types can help you choose the best one for your project. Here’s a quick comparison:
| Paint Type | Dry Time | Durability | Odor | Best For |
|---|---|---|---|---|
| Acrylic (water-based) | 1-2 hours | Good | Low | DIYers, low-fume needs |
| Alkyd (oil-based) | 6-8 hours | Excellent | High | High-traffic kitchens |
| Hybrid/Enamel | 4-6 hours | Very Good | Medium | Balance of easy use and strength |
Pro tip: For most homes, hybrid enamel paints give the best mix of easy cleanup and durability.
How Long Does It Take To Paint Cherry Cabinets?
Painting cabinets is not a one-day job. Here’s what to expect for a medium-sized kitchen (20–30 cabinet doors):
| Step | Time (Hours) |
|---|---|
| Removing doors/hardware | 1–2 |
| Cleaning | 2–3 |
| Filling/sanding | 3–5 |
| Priming (2 coats) | 3–5 (plus drying) |
| Painting (2–3 coats) | 4–8 (plus drying) |
| Reassembly | 2–3 |
Total project time: 15–25 hours over 3–5 days. Drying between coats is the main delay, so plan for multiple days.
Common Mistakes When Painting Cherry Cabinets
Many homeowners make small mistakes that lead to poor results. Here are the most common, and how to avoid them:
- Skipping cleaning: Even a small amount of grease will cause paint to peel.
- Not sanding enough: Cherry’s smooth finish needs to be roughed up for paint to stick.
- Using the wrong primer: Regular wall primer won’t block cherry’s tannins.
- Applying thick coats: Thick paint drips and takes longer to cure.
- Not waiting between coats: Rushing leads to sticky or damaged paint.
- Poor prep and masking: Paint on hinges, floors, or walls looks unprofessional.
- Skipping label and organization: Unlabeled doors may get mixed up during reassembly.
Avoiding these mistakes can be the difference between a DIY success and a project you regret.

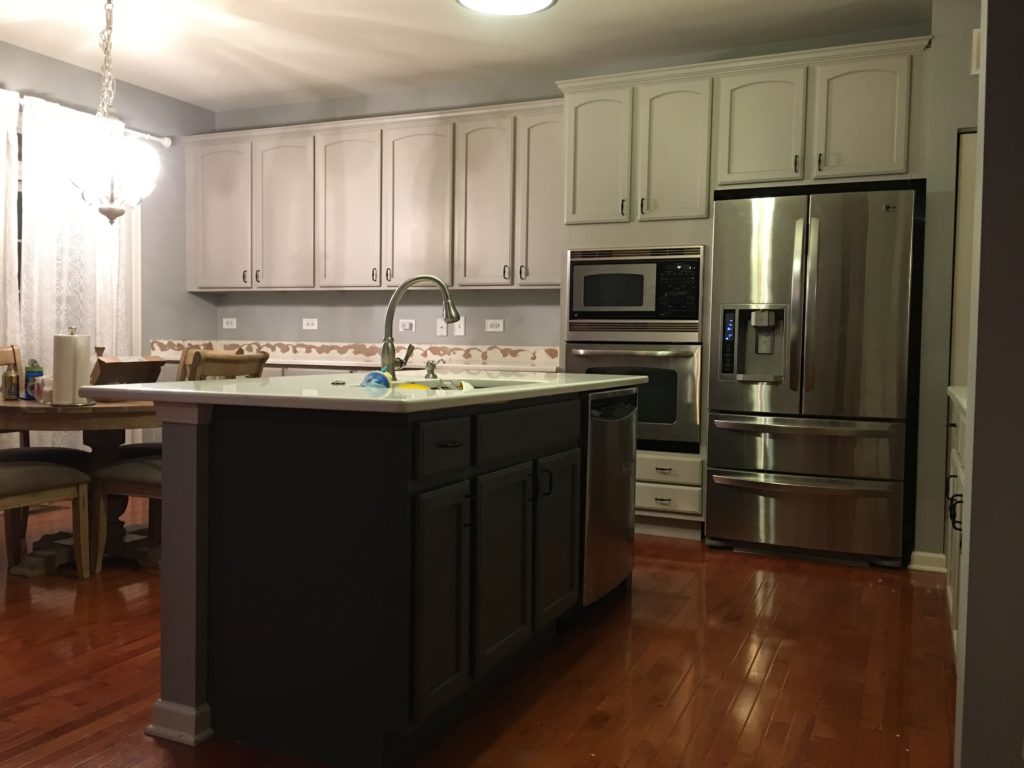
Credit: pnpcraftsmen.com
Two Insights Most People Miss
- Cherry’s color can change after painting: Even with primer, the wood underneath can affect the final color, especially with whites and light grays. This is called “bleed-through.” If you see pink or yellow spots after priming, add a second coat of primer before painting.
- Curing time matters more than dry time: Paint may feel dry in a few hours, but it takes 7–30 days to fully cure (harden). Avoid cleaning or heavy use during this time to prevent damage. Many people start using their kitchen too soon and end up with sticky, peeling doors.
Real-life Example: Transforming A Dark Kitchen
Let’s look at a real-world scenario. Jennifer, a homeowner in Ohio, had cherry cabinets that made her kitchen feel small and dark. She wanted a fresh, open look. Jennifer chose a soft gray paint and did the work herself over two weekends.
Her steps:
- Removed all doors and labeled each one.
- Used TSP to clean every surface.
- Sanded with 180 grit, then 220 grit for a smooth finish.
- Applied two coats of Zinsser BIN shellac primer.
- Painted with Benjamin Moore Advance in “Gray Owl.”
The result: Her kitchen looked twice as big, and the paint held up well even after a year of use. She shared, “The key was not rushing. Each step mattered for a smooth finish.”
Should You Spray Or Brush Paint Cherry Cabinets?
Both methods can give great results, but each has pros and cons.
Spraying:
- Pros: Super smooth, no brush marks, faster for large kitchens.
- Cons: Needs special gear, more prep and masking, more mess.
Brushing and Rolling:
- Pros: Easy for beginners, less masking, simple clean-up.
- Cons: May show some brush marks, slower.
For most DIYers, a combination works best: brush for corners and a foam roller for flat areas. If you want a factory finish and have space, consider renting a paint sprayer.
Cleaning And Caring For Painted Cherry Cabinets
After all your hard work, you want your new cabinets to last. Here’s how to keep them looking fresh:
- Wait before cleaning: Don’t wash painted cabinets for at least 2 weeks after finishing.
- Use gentle cleaners: Mild soap and water only. Avoid harsh chemicals or abrasive pads.
- Wipe spills quickly: Water and food left too long can damage the paint.
- Touch up as needed: Keep a small jar of leftover paint for quick fixes.
- Add felt bumpers: These prevent chips when closing doors.
With these habits, your painted cabinets can look great for 10 years or more.
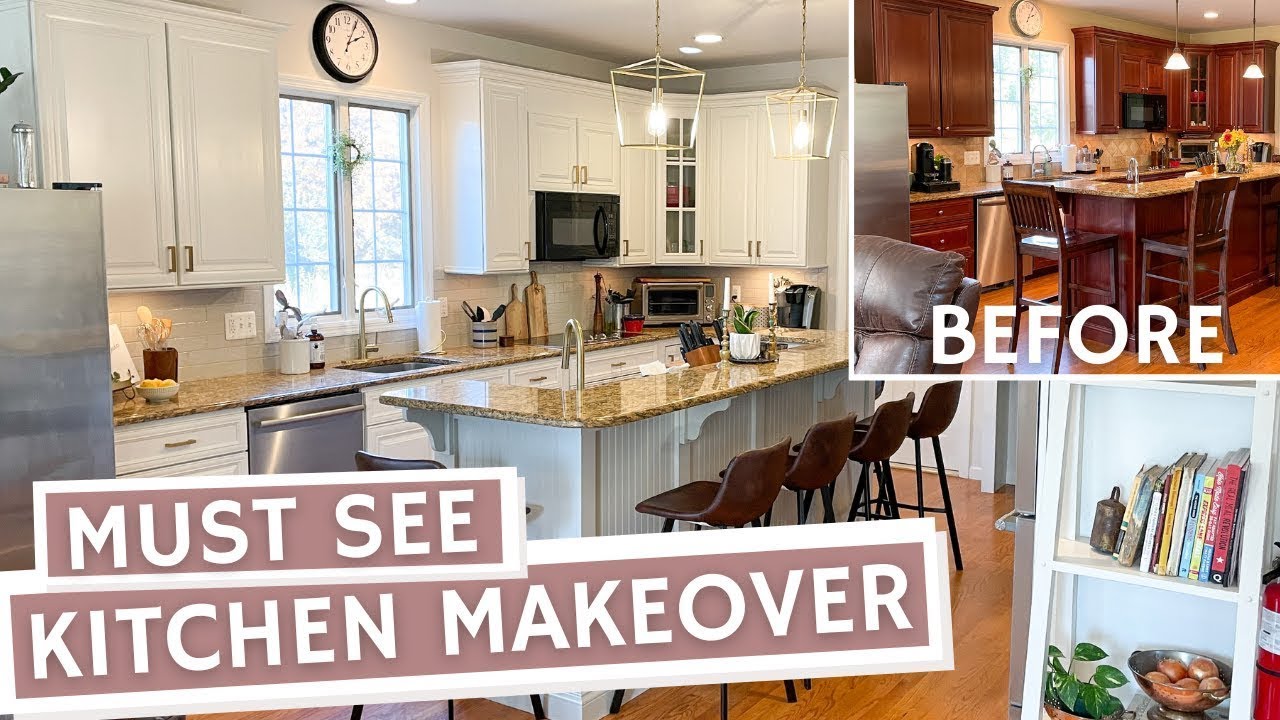
Credit: www.youtube.com
Cost Breakdown: Diy Vs. Hiring A Pro
Wondering about the price? Here’s a rough cost breakdown:
| Item | DIY Cost | Pro Cost |
|---|---|---|
| Supplies (paint, primer, tools) | $200–$400 | Included |
| Labor | Your time | $2,000–$6,000 |
| Total for 20 cabinets | $400–$800 | $2,500–$7,000 |
DIY saves thousands but takes more time. Professionals offer speed and experience but cost much more.
When Not To Paint Cherry Cabinets
Painting is a great option for most homes, but there are cases when it’s not the best choice:
- Antique or high-value cabinets: Painting can reduce the value of rare or antique cherry wood.
- Heavy water damage: Paint won’t fix warped or rotted wood.
- If you want a wood look: Paint hides grain completely. If you love the natural look, consider restaining or just refinishing.
If you’re unsure, test paint on a hidden spot or talk to a pro before making a final decision.
Extra Tips For A Flawless Finish
- Work in good light: Painting in a dark room can hide drips and missed spots.
- Keep dust away: Paint in a clean, closed space. Avoid running fans that stir up dust.
- Check humidity: High humidity slows drying. Ideal range is 40–60%.
- Label everything: Doors, drawers, even screws—this makes reassembly much easier.
- Use new hardware: Swapping old handles for modern ones can boost your kitchen’s style.
Where To Find More Help
If you want to see step-by-step videos, many painting pros share their methods online. One reliable resource is the This Old House website, which shows both DIY and pro techniques.
Frequently Asked Questions
How Long Will Painted Cherry Cabinets Last?
With proper prep and care, painted cabinets can last 8–10 years before needing touch-ups. Using quality primer, paint, and gentle cleaning will extend their life.
Do I Need To Sand Cherry Cabinets Before Painting?
Yes, sanding is critical. Even if you use a strong primer, sanding removes gloss and gives the primer something to stick to. Skipping this step can cause peeling.
What Is The Best Paint Finish For Kitchen Cabinets?
Semi-gloss and satin are the best finishes. They’re easy to clean, resist moisture, and don’t show fingerprints as much as glossy paint.
Will Painting Cherry Cabinets Lower My Home’s Value?
No, in most cases, painting can increase value by making your kitchen look updated and appealing to buyers. The exception: if your home has rare or historic cherry wood, paint may reduce its value.
Can I Paint Over Cherry Cabinets Without Removing The Doors?
It’s possible, but not recommended. Removing doors gives a smoother, more professional finish and prevents paint drips on hinges. If you must paint in place, mask carefully and work slowly.
Painting cherry cabinets can feel like a big project, but with patience and attention to detail, you can completely transform your kitchen. Take your time, follow each step, and enjoy your fresh new space for years to come.