Measuring your cabinets correctly is the first and most important step if you want to install pull out shelves. These smart storage solutions can make your kitchen, bathroom, or pantry much more organized and accessible. But if you guess or measure the wrong way, your new shelves might not fit—or worse, they might not even work at all. Whether you’re a homeowner planning a DIY upgrade or just trying to understand what a professional installer needs, knowing how to measure cabinets for pull out shelves will save you time, money, and frustration.
Many people think measuring cabinets is simple. Just grab a tape measure and get the width, right? Not quite. Cabinet interiors can be tricky, with hinges, face frames, and even sloping walls affecting the fit of your new shelves. There are also different types of cabinets—frameless, framed, base, pantry—and each one requires a slightly different approach.
The details matter a lot. A shelf that’s just a half-inch too big won’t fit. One that’s too small will waste valuable storage space.
In this guide, you’ll learn exactly how to measure your cabinets for pull out shelves, step by step. You’ll discover which tools to use, what mistakes to avoid, and the hidden details that most beginners miss. By the end, you’ll be able to confidently order or build pull out shelves that fit perfectly and transform your storage.
Let’s get started on making your cabinets work smarter for you.
Why Accurate Measurement Matters
When it comes to pull out shelves, precision is everything. Even a small error can make your new shelves impossible to install or use. If the shelf is too wide, it will bump into the cabinet sides or hinges. If it’s too narrow, it will slide around and waste space. Worse, you might end up returning products or paying for costly modifications.
A study from the National Kitchen and Bath Association shows that poor measuring is one of the top three reasons for cabinet installation problems. This can lead to delays, extra costs, and sometimes even damage to your cabinets. Accurate measuring ensures:
- Proper fit for the pull out shelf
- Smooth operation without sticking or scraping
- Maximum use of available space
- Easier and faster installation
It’s better to spend a few more minutes measuring carefully than hours fixing mistakes later.
Tools You Need For Measuring Cabinets
Before you begin, gather the right tools. This makes the process faster and helps you get precise numbers.
- Steel tape measure (at least 12 feet long, preferably locking)
- Paper and pencil (for sketching and notes)
- Level (optional, but helps with uneven cabinets)
- Flashlight (for seeing inside dark cabinets)
- Camera or smartphone (to take pictures for reference)
- Masking tape (for marking measurements on the cabinet)
- Straight edge or ruler (for checking flatness)
Double-check your tape measure for accuracy. Old, bent, or stretched tapes can cause errors.
Understanding Your Cabinet Type
Not all cabinets are the same. The way you measure depends on whether your cabinet is framed or frameless. Identifying your cabinet style is the first step to getting the right measurement.
Framed Cabinets
These have a face frame—a border made from wood—that runs around the front of the cabinet box. The doors are attached to this frame. Framed cabinets are common in the US and often found in older homes.
Key points for measuring framed cabinets:
- The frame reduces the width you can use for the shelf.
- Hinges can stick out into the cabinet opening.
- You usually measure from inside edge to inside edge of the frame opening.
Frameless Cabinets
Also called European style, these have no front frame. The doors attach directly to the sides of the cabinet box. Frameless cabinets offer a wider opening and are common in modern kitchens.
Key points for measuring frameless cabinets:
- Openings are usually wider because there’s no face frame.
- You measure the full interior width, but watch out for hinges.
Base Cabinets Vs Pantry Cabinets
Base cabinets are the standard under-counter cabinets in kitchens and bathrooms. Pantry cabinets are tall and often have multiple shelves.
- Base cabinets usually have one or two doors and a single shelf.
- Pantry cabinets can have several shelves at different heights.
Knowing your cabinet type will guide how and where you measure.
Step-by-step: How To Measure For Pull Out Shelves
Now, let’s walk through the measuring process for most cabinet types. Each step is important, so don’t skip any.
1. Empty The Cabinet
Remove all items from the cabinet. This gives you clear access to all corners and sides. Wipe down the inside so dust or debris doesn’t block your tape measure.
2. Check Cabinet Condition
Before measuring, inspect the cabinet for damage, warping, or loose hinges. If the cabinet isn’t square (corners not at 90 degrees), note this. Use a level and straight edge to check. Slight unevenness is common, especially in older homes.
Tip: If the cabinet is very out-of-square, consider adjusting your pull out shelf size, or choose shelves with adjustable widths.
3. Measure The Cabinet Opening Width
This is the most important measurement. The opening width is the space your shelf must fit through.
- For framed cabinets: Measure from the inside edge of one frame to the inside edge of the other, at the narrowest point.
- For frameless cabinets: Measure the full interior width, at the front of the cabinet.
Write down the measurement in inches, to the nearest 1/16 inch. Measure in three places: top, middle, and bottom. Use the smallest number.
Example: If the top is 23 1/8″, middle is 23″, and bottom is 23 1/16″, use 23″.
4. Measure The Cabinet Opening Height
Measure the height of the opening from the inside bottom to the inside top (or shelf above). This tells you how tall your pull out shelf can be.
- For base cabinets, measure from the cabinet floor to the bottom of the face frame (or next shelf).
- For pantry cabinets, measure each section separately.
Again, measure at both sides and the center. Use the smallest number.
5. Measure The Cabinet Depth
Depth is the distance from the back wall to the inside of the cabinet front.
- Place the tape measure at the back wall and pull it straight out to the inside edge of the face frame (framed) or to the front edge (frameless).
- Watch for pipes, outlets, or other obstacles that could block the shelf.
For most pull out shelves, you want to maximize depth but leave a small gap (usually 1/2″ to 1″) at the back.
6. Check For Obstacles
Look for any hinges, shelf supports, pipes, or drawer glides inside the cabinet.
- Measure how far they stick out into the space.
- Mark their position on your sketch.
- If your shelf needs to fit around them, subtract this from your width or depth.
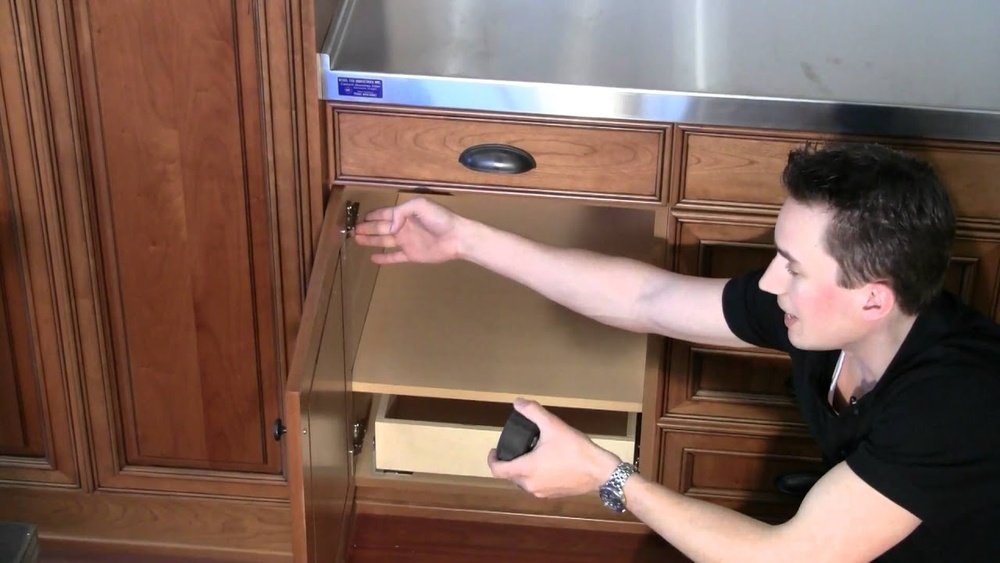
7. Measure The Door Swing And Hinge Clearance
Pull out shelves need to clear the cabinet door and hinges as they slide in and out.
- Open the door fully and measure how much space you have before the hinge or door edge is in the way.
- If the door doesn’t open all the way, your shelf might hit it.
- Some hinges can be moved or replaced with low-profile versions if space is tight.
8. Measure For Multiple Shelves
If you want more than one pull out shelf, you need to measure the vertical spacing between shelves.
- Measure from the floor or bottom shelf to the next shelf or the top of the opening.
- Make sure there’s enough space for tall items if needed.
Tip: Leave at least 2 inches of space above the tallest item you plan to store for easy access.
9. Record All Measurements Clearly
Use a sketch or chart to record your numbers. Label each dimension and location. A clear record helps you or your installer avoid mistakes later.
Here’s a simple example of how your measurements might look:
| Cabinet Location | Opening Width | Opening Height | Depth | Notes |
|---|---|---|---|---|
| Base Cabinet Left | 22 7/8″ | 13″ | 23 1/4″ | Hinge protrudes 3/8″ |
| Base Cabinet Right | 23″ | 13″ | 23″ | No obstacles |

Credit: www.amazon.com
Calculating Your Pull Out Shelf Size
You never want to order or build a shelf that’s exactly the size of your cabinet opening. You need to allow for clearance so the shelf slides smoothly and doesn’t get stuck.
General Sizing Rule
- Subtract at least 1 inch from the width of your opening (1/2 inch per side for slides and easy movement).
- Subtract 1/2 to 1 inch from the depth to allow for the back of the shelf and slides.
- For height, shelf sides are usually 2-4 inches tall, but make sure there’s enough room above for your items.
Example Calculation:
- Opening width: 23″
- Shelf width: 23″ – 1″ = 22″
- Opening depth: 22″
- Shelf depth: 22″ – 1/2″ = 21 1/2″
Adjust For Obstacles
If you have a hinge or pipe inside the cabinet, subtract its thickness from the width or depth. For example, if a hinge sticks out 3/8″, subtract that from your shelf width.
Special Cases
- If your cabinet is very out-of-square, consider reducing the shelf width a bit more for safety.
- For deep cabinets (over 24″), consider using full extension slides so you can reach the back.
Common Mistakes To Avoid
Many first-timers make the same errors when measuring for pull out shelves. Avoid these to save time and money.
- Not accounting for face frames: Framed cabinets reduce the usable opening—measure at the frame, not the inside box.
- Ignoring hinges and obstructions: Hinges, pipes, and shelf supports can block the shelf. Always check for these.
- Measuring only once: Cabinets may not be perfectly square. Measure at top, middle, and bottom. Use the smallest number.
- Not leaving enough clearance: Pull out shelves need room on the sides and back. If you order the shelf the same size as your opening, it won’t fit.
- Forgetting about shelf slides: Slides add thickness. Most need at least 1/2 inch per side.
- Overlooking door swing: If your cabinet door doesn’t open fully, your shelf may not slide out.
- Confusing exterior and interior dimensions: Always measure the inside opening, not the outside of the cabinet.
- Mixing up width and depth: Write down which is which—many people swap them by accident.
Pro Tip: Mark your measurements directly on masking tape inside the cabinet. This avoids confusion when ordering or installing.
Measuring Special Cabinet Types
Some cabinets have unique layouts or features. Here’s how to handle those situations.
Corner Cabinets
Corner cabinets often have angled or L-shaped interiors. Measuring these takes extra care.
- Measure both legs of the L, as well as the depth to the back corner.
- For rotating or kidney-shaped pull outs, use the manufacturer’s template if available.
- Make sure the shelf won’t hit the door or other hardware as it swings out.
Under-sink Cabinets
Under-sink cabinets have pipes and sometimes a garbage disposal inside.
- Measure the space on both sides of the pipes.
- Check the height under the sink—some sinks dip down more than expected.
- Sketch the location of pipes on your measurement sheet.
- You may need two smaller shelves rather than one large one.
Drawers Vs Pull Out Shelves
Not all pull out storage is the same. Some cabinets have drawers, some have trays, and some have deep pull out shelves.
- For shallow drawers, measure the inside of the drawer box.
- For deep pull out shelves, measure like a regular cabinet, but check for any supports underneath.
Pantry Cabinets With Fixed Shelves
Many pantry cabinets have fixed (non-removable) shelves.
- Measure the opening for each section separately.
- If the shelf can’t be removed, your pull out shelf must fit through the opening and assemble inside.
Ordering Or Building Your Pull Out Shelves
Once you have all your measurements, you’re ready to order or build.
- Most manufacturers will ask for width, depth, and sometimes height.
- Choose the type of slide: Standard, full-extension, or soft-close.
- Decide on shelf material (wood, metal, plastic).
- If ordering custom, provide a clear sketch with all measurements and notes.
Tip: Some companies offer online tools or printable guides. Double check your numbers before submitting.
Installation Prep: What To Do After Measuring
Getting your measurements right is just the start. Here’s what to do next.
- Double-check measurements: Before ordering, re-measure and confirm all numbers.
- Clear the area: Remove items and clean the cabinet.
- Mark mounting points: Use your sketch to mark where the slides and shelf will go.
- Gather tools: Drill, screwdriver, level, and hardware (usually provided with the shelf).
If you’re hiring a professional, provide your measurement sheet and photos. This helps them plan the install and avoid surprises.
Real-world Example: Measuring A Typical Kitchen Base Cabinet
Let’s walk through a real example for a standard kitchen base cabinet.
- Empty the cabinet.
- Check for obstructions: There’s a shelf support and a hinge inside.
- Measure opening width: Top = 24″, middle = 23 7/8″, bottom = 23 3/4″. Use 23 3/4″.
- Measure opening height: 12″ (from floor to shelf).
- Measure depth: 24″ (from back to inside of frame).
- Shelf support protrudes 1/2″ on left side.
- Subtract for shelf slide clearance: 1/2″ per side.
- Final shelf size: Width: 23 3/4″ – 1″ (slides) – 1/2″ (support) = 22 1/4″. Depth: 24″ – 1/2″ = 23 1/2″.
Order a pull out shelf at 22 1/4″ wide x 23 1/2″ deep.
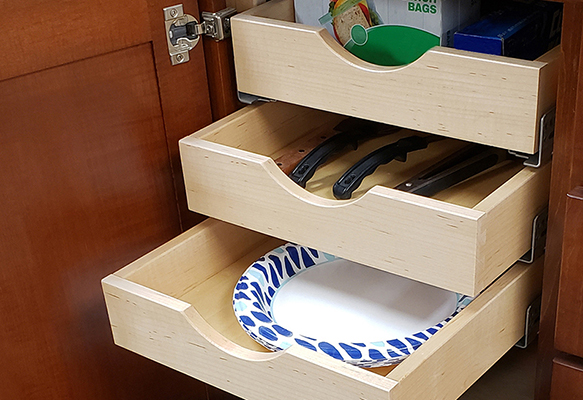
Comparing Pull Out Shelf Types
Different pull out shelf types have different fit requirements. Here’s a comparison of common options:
| Type | Best For | Typical Clearance Needed | Key Features |
|---|---|---|---|
| Single Tray | Simple storage | 1″ width, 1/2″ depth | Low cost, easy install |
| Double Stacked | Tall cabinets | 1″ width, 1/2″ depth | Maximizes space |
| Wire Basket | Pantries, airy storage | 1 1/4″ width, 1″ depth | Breathable, modern look |
| Custom Drawer | Heavy items | 1 1/2″ width, 1″ depth | Sturdy, high weight limit |
Tip: Always check the installation instructions for your specific shelf type.
Advanced Tips For A Perfect Fit
For those who want a truly professional result, here are some advanced techniques:
- Shim for out-of-square cabinets: Use thin shims to level the slides if your cabinet isn’t perfectly square.
- Test-fit with cardboard: Cut a piece of cardboard to your shelf size and test the fit inside the cabinet before ordering or building.
- Label everything: If measuring multiple cabinets, number each sketch and measurement.
- Photograph obstacles: Take clear photos of hinges, pipes, or supports and attach them to your measurement sheet.
- Leave room for adjustments: Order your shelves just a bit smaller if you’re unsure—most slides and installers can adjust for small gaps, but not for shelves that are too big.

Credit: slideoutshelvesllc.com
Practical Insights Most Beginners Miss
- Cabinet floors aren’t always flat. Sometimes the bottom panel bows or sags, especially in older cabinets. Check with a level and measure at the front and back.
- Face frames can be uneven. The left and right sides might not align perfectly. Always use the smallest width for your shelf.
- Not all slides are equal. Some require more side clearance than others. Read the product specs before ordering.
- You can replace hinges. If your hinges block the shelf, consider switching to low-profile or European-style hinges.
- Measure twice, cut/order once. It’s cheaper and faster to double check before you buy than to fix mistakes later.
Sample Measurement Worksheet
Here’s a sample worksheet you can copy for your own project:
| Cabinet | Location | Width | Height | Depth | Obstacles | Notes |
|---|---|---|---|---|---|---|
| Base 1 | Left of sink | 22 3/8″ | 13″ | 23″ | Pipe on right | Order narrower shelf |
| Base 2 | Right of stove | 24″ | 14″ | 24″ | None | Standard size |
When To Call A Professional
Measuring for pull out shelves is a straightforward DIY project for most people. However, you should consider hiring a professional if:
- Your cabinets are custom or unusually shaped
- You have very old or damaged cabinets
- You want to install heavy-duty shelves for large appliances
- You’re not comfortable using tools or hardware
A pro can ensure everything fits perfectly and works smoothly. If you do hire someone, give them your measurements and notes—they’ll appreciate your preparation.
Where To Find More Help
Many cabinet hardware companies offer downloadable guides and videos. You can also check resources like the National Kitchen and Bath Association for additional tips.
For a detailed, illustrated guide, see this helpful resource from Family Handyman.
Credit: keystonewood.com
Frequently Asked Questions
How Much Clearance Do I Need For Pull Out Shelves?
You need at least 1 inch less width than your cabinet opening (1/2 inch per side for the slides). For depth, subtract 1/2 inch from the interior depth. Always check your shelf or slide manufacturer’s instructions for exact numbers.
Can I Install Pull Out Shelves In Any Cabinet?
Most standard cabinets can accept pull out shelves. The main exceptions are cabinets that are too narrow, have fixed obstacles, or are severely out-of-square. Under-sink cabinets, corner cabinets, and pantries may need special types of pull outs.
What If My Cabinet Isn’t Square?
If your cabinet is not perfectly square, always use the smallest measurement you find. This ensures the shelf will fit in the tightest spot. If the difference is large (over 1/4 inch), consider shimming the slides or ordering a custom-sized shelf.
Do I Measure The Inside Or Outside Of My Cabinet?
Always measure the inside opening of your cabinet. The outside dimensions are not useful for shelf sizing because the cabinet walls, frames, and doors reduce the usable space inside.
Should I Remove The Doors To Install Pull Out Shelves?
Usually, you don’t need to remove the doors. However, if the doors or hinges block the opening and prevent the shelf from sliding in or out, you may need to remove or adjust them during installation.
—
Measuring for pull out shelves may seem intimidating at first, but with care and attention to detail, you can get it right every time. Take your time, double check your numbers, and don’t rush the process. The result will be shelves that fit perfectly, operate smoothly, and make your cabinets more useful than ever.
With these steps, you’re ready to transform your storage—one shelf at a time.