Removing a kitchen sink strainer can feel like a big task, especially if you’ve never done it before. Maybe your sink is draining slowly, or you see water leaking around the edges. Sometimes, you just want to upgrade to a newer or better strainer.
Whatever your reason, taking out the old strainer is a job you can handle with the right guidance. This article will walk you through every step, explain what tools to use, and share tips from real experience. You’ll also find advice on what to do if things don’t go as planned, how to avoid common mistakes, and when it’s better to call a professional.
By the end, you’ll feel confident about removing your kitchen sink strainer safely and smoothly.
Understanding The Kitchen Sink Strainer
Before you get your hands dirty, it helps to know what a kitchen sink strainer is and how it works. The strainer is the metal basket that sits in the drain opening. It catches food scraps and debris, so only water flows down the pipes. Under the sink, the strainer connects to the plumbing with a nut, washer, and sometimes plumber’s putty. Over time, gunk and mineral buildup can make the strainer hard to remove.
There are several types of strainers:
- Drop-in strainers: The most common, held by a locknut underneath.
- Screw-in strainers: These have screws on top or underneath.
- Push-fit strainers: Less common, often in newer sinks.
Knowing your type will help you choose the right tools and method.
Tools And Materials You’ll Need
Having the right tools makes the job much easier. Most kitchen sink strainers use similar fasteners, but sometimes you’ll need a special tool if the nut is stubborn or corroded. Gather these items before you start:
- Adjustable wrench or channel-lock pliers
- Slip-joint pliers
- Flathead screwdriver
- Putty knife
- Bucket or small bowl
- Old towels or rags
- Penetrating oil (like WD-40)
- Plumber’s putty (if you plan to install a new strainer)
- Gloves (optional but recommended)
- Flashlight (if your cabinet is dark)
You don’t need every tool for every sink, but having them handy saves time if you hit a tough spot.
Preparing The Area
A little preparation goes a long way to keep your work clean and safe. Start by clearing out everything under your sink. This gives you room to move and prevents damage to cleaning products or supplies. Place a towel or old blanket under the pipes to catch water drips and protect the cabinet.
Next, place your bucket under the drain. When you remove the strainer or pipes, water will spill out—even if you haven’t run the faucet recently. The bucket catches this water and keeps your cabinet dry.
Finally, gather your tools and keep them within reach. Good lighting helps, so use a flashlight or work light if needed.
Step-by-step Guide: How To Remove Kitchen Sink Strainer
The main process involves loosening the connections, removing the strainer, and cleaning up. Here’s a detailed breakdown:
1. Turn Off The Water Supply (optional But Smart)
You don’t have to shut off water for this task, but it’s a good idea if you’re worried about leaks. Look for the shut-off valves under the sink and turn them clockwise. If you can’t find them, just avoid running water during your work.
2. Remove The P-trap
The P-trap is the curved pipe under your sink. It connects the drain to the rest of the plumbing. You need to remove it to reach the strainer locknut.
- Place your bucket directly below the trap.
- Use channel-lock pliers or your hands to loosen the slip nuts on both ends of the P-trap.
- Carefully pull the trap down and away. Water will spill out—this is normal.
- Set the P-trap aside and keep the nuts in a safe place.
3. Loosen The Strainer Locknut
Above the P-trap, you’ll see a large metal or plastic nut holding the strainer to the sink. This is the locknut.
- Spray the nut with penetrating oil if it looks rusty or stuck. Wait a few minutes.
- Grip the locknut with your channel-lock pliers or adjustable wrench.
- Turn the nut counterclockwise. It might take a lot of force if it’s old or corroded.
- If the whole strainer turns with the nut, ask a friend to hold the strainer basket from above, or wedge a screwdriver in the holes to keep it still.
Pro Tip: On very old sinks, the locknut may break apart as you turn it. If this happens, use a flathead screwdriver and hammer to gently tap the pieces loose.
4. Remove The Rubber Gasket And Metal Washer
With the locknut off, you’ll see a rubber gasket and a metal washer (sometimes more than one). Slide these off the strainer body and keep them for reference or replacement.
5. Push Out The Strainer
Go to the top of the sink. Grab the strainer basket and gently wiggle it. Most will lift out easily now. If it’s stuck, run a putty knife around the edge to break the seal of plumber’s putty. Push up from below while pulling from above.
Sometimes, mineral deposits or old putty act like glue. In that case:
- Work the putty knife around the edge a few times.
- Tap the bottom of the strainer gently with the handle of your screwdriver.
Avoid using too much force, as this can damage your sink.
6. Clean The Sink Opening
Once the strainer is out, you’ll see old plumber’s putty or grime around the opening. Use your putty knife to scrape off all residue. Wipe the area clean with a damp cloth. A clean surface is important if you plan to install a new strainer.
7. Inspect For Damage
Check the sink opening and the strainer body for cracks, chips, or rust. If you see any damage to the sink itself, you may need to repair it before installing a new strainer. Most modern sinks are tough, but cast iron or porcelain models can chip if hit too hard.
What To Do When The Strainer Won’t Budge
Even with the right tools, some strainers are stubborn. Years of water, soap, and minerals can “glue” the strainer in place. Here’s what you can try:
- Soak the locknut in penetrating oil: Spray generously and wait 10–15 minutes.
- Tap gently: Use the handle of your pliers or a small hammer to tap the locknut. This can help break the corrosion.
- Use heat: Apply a hair dryer (not a torch!) To the locknut area to expand the metal slightly. This can loosen the bond.
- Cut the locknut: As a last resort, use a hacksaw blade or a locknut removal tool to carefully cut through the nut. Protect the sink with a towel as you work.
Important: Never use fire or a blowtorch under your sink. Heat can damage pipes, putty, and the sink material.
Comparing Removal Methods
Sometimes, the best way to remove a strainer depends on its type and condition. Here’s a comparison of common methods:
| Method | Best For | Tools Needed | Pros | Cons |
|---|---|---|---|---|
| Standard Unscrewing | Most drop-in strainers | Pliers, wrench | Quick, easy | Not effective if badly corroded |
| Penetrating Oil | Rusty or stuck nuts | Oil, pliers | Loosens corrosion | Takes extra time |
| Cutting the Nut | Severely stuck strainers | Hacksaw blade | Works when all else fails | Risk of damaging sink |
Choose the method that fits your situation. If you’re unsure, start with the least aggressive option.
Common Mistakes And How To Avoid Them
Even handy people make mistakes during this job. Here’s what to watch for:
- Forgetting the bucket: Water always spills when you remove the P-trap or strainer. Placing a bucket saves you from a wet, smelly mess.
- Using too much force: Forcing a stuck strainer can bend or crack your sink. Try oil or gentle tapping first.
- Losing small parts: Keep washers, nuts, and gaskets in a bowl so nothing rolls away.
- Not cleaning the opening: Old putty or dirt can prevent a new strainer from sealing well, leading to leaks.
- Skipping inspection: Always check for cracks or chips after removal. Small problems now can grow into big leaks later.
Tips For A Smooth Strainer Removal
A few expert tips can turn a tough job into an easy one:
- Take pictures: Snap photos of each step. This helps you remember how things fit together, especially if you’re installing a new strainer.
- Label parts: If you remove more than one washer or nut, label them or keep them in order.
- Check your tools: Channel-lock pliers with worn-out jaws slip easily. Make sure yours grip well.
- Use gloves: Old strainers have sharp edges. Gloves protect your hands from cuts and grime.
- Have extra towels: Even with a bucket, water sometimes escapes. Towels catch drips and keep cabinets dry.
- Don’t rush: Take your time, especially if it’s your first try. Rushing leads to mistakes and damage.

Credit: www.reddit.com
What To Do After Removing The Strainer
Once your strainer is out, you have a few choices:
- Install a new strainer: If your old strainer was leaking or rusty, now’s the time to put in a new one.
- Repair the sink: If you see chips, cracks, or rust, repair these before installing a new strainer.
- Clean the pipes: Check inside the P-trap and drain pipes for buildup. Clean them with a bottle brush or rinse with hot water.
If you’re replacing the strainer, follow the manufacturer’s instructions for installation. Most new strainers come with all the parts you need.
When To Call A Professional
Most people can remove a kitchen sink strainer with basic tools and patience. But sometimes, it’s better to call a plumber:
- If the strainer is heavily corroded and won’t budge after all your efforts.
- If you see cracks in the sink around the drain hole.
- If you notice leaking water even after installing a new strainer.
- If your plumbing is very old or unusual, and you’re unsure about the connections.
Plumbers have special tools and experience with tough jobs. Paying for help can save you from expensive mistakes.
Cost And Time Estimates
Removing a kitchen sink strainer doesn’t have to be expensive. Here’s what most people can expect:
- Time required: 30 minutes to 1 hour for most jobs; longer if the strainer is stuck
- Tools cost: $20 to $40 if you need to buy pliers or wrenches
- Replacement strainer: $10 to $30 for a standard model
If you call a plumber, expect to pay $100 to $200 for removal and installation, depending on your location.
Kitchen Sink Strainer Removal: Diy Vs Professional
Should you remove the strainer yourself, or pay for help? Here’s a quick comparison:
| Option | Pros | Cons | Best For |
|---|---|---|---|
| DIY | Cheaper, satisfying, learn a new skill | Risk of mistakes, may take longer | Simple, accessible jobs |
| Professional | Fast, less risk, expert results | Higher cost, scheduling needed | Complicated or stuck strainers |
For most homeowners, DIY removal is safe and affordable if you take your time.

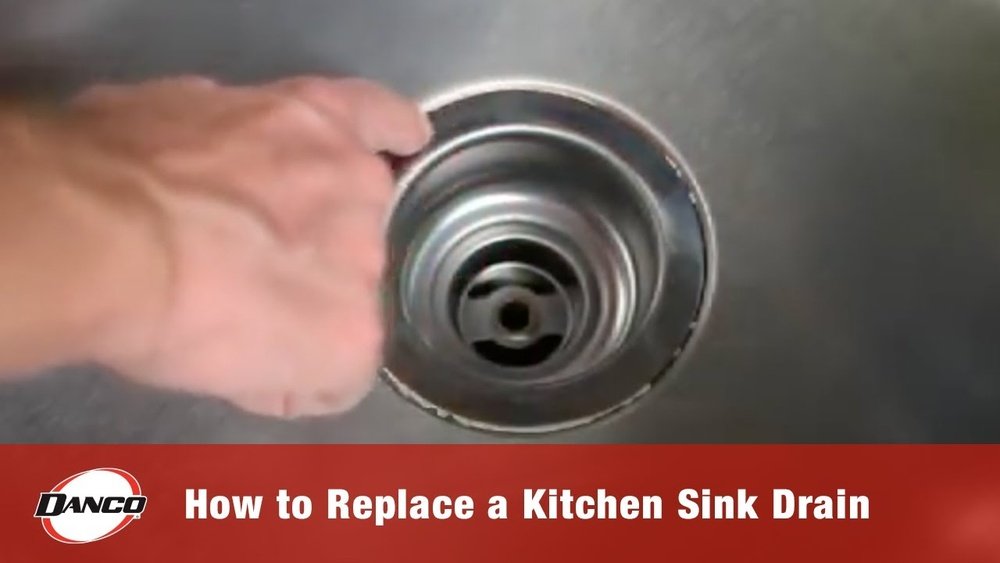
Credit: www.youtube.com
Environmental Considerations
When you remove your old kitchen sink strainer, think about disposal. Most strainers are metal, and many local recycling centers accept them. Check your area’s rules before throwing the strainer in the trash.
If you used chemical cleaners or penetrating oil, avoid pouring them down the drain. Wipe up spills with rags and dispose of them in the garbage.
Upgrading Your Kitchen Sink Strainer
Many people use strainer removal as a chance to upgrade. New strainers come with features like:
- Better sealing: Stops leaks and odors.
- Stainless steel: Resists rust and staining.
- Easy-clean baskets: Makes cleaning food scraps simple.
- Push-button stoppers: Modern look and function.
Installing a new strainer uses the same process as removal, just in reverse. Follow the included instructions, or find a guide that matches your model.
Troubleshooting Common Problems
Sometimes, things don’t go as planned. Here are solutions for common issues:
Strainer Spins But Won’t Loosen
If the whole strainer turns when you loosen the nut:
- Hold the strainer in place from above using a screwdriver or helper.
- Try gripping the top with pliers (protect with a cloth).
Locknut Won’t Move
If the locknut is frozen:
- Apply more penetrating oil and wait longer.
- Tap the nut lightly with a hammer.
- Cut the nut as a last resort.
Strainer Won’t Lift Out
If the strainer basket is stuck in the sink:
- Run a utility knife or putty knife around the edge.
- Tap the bottom gently from below.
- Spray with penetrating oil and try again after 10 minutes.
Sink Leaks After Installation
If you see leaks after installing a new strainer:
- Check that all washers and gaskets are in place.
- Make sure the locknut is tight, but not overtightened.
- Use plumber’s putty to seal gaps.
Safety Precautions
Working under the sink involves tight spaces and sharp edges. Follow these safety tips:
- Wear gloves to avoid cuts and protect your skin.
- Use eye protection if you’re cutting or hammering.
- Keep the area well-lit to see all parts clearly.
- Avoid using strong chemicals unless necessary.
If you feel unsure or uncomfortable at any step, stop and ask for help.
Real-world Example: Success Story
Mark, a homeowner in Ohio, noticed water pooling under his kitchen sink. He checked the strainer and saw rust around the edges. Following the steps above, he removed the P-trap, sprayed oil on the locknut, and waited 20 minutes. The nut was stuck, but gentle tapping with a wrench finally loosened it. Mark cleaned the old putty from the sink and installed a new stainless steel strainer. The leak stopped, and his sink looks better than ever. Mark’s main advice: “Don’t rush, and keep old towels handy. The job is simple if you go step by step.”
Non-obvious Insights Most Beginners Miss
- Plumber’s putty dries out over time: Even if your strainer isn’t leaking now, old putty can crack and let water through later. Replacing it during removal saves you trouble down the road.
- Corrosion can hide problems: The outside of your strainer may look fine, but rust can build up inside the threads. Always inspect all parts closely after removal, not just what you can see from the top.
Maintenance Tips After Strainer Removal
Once your new strainer is in place, keep it working well:
- Clean the basket weekly to prevent buildup.
- Check under the sink for leaks every few months.
- Avoid using harsh chemicals that can damage seals.
- Reseal with plumber’s putty if you notice drips.
Regular care extends the life of your strainer and keeps your kitchen dry.
Useful Resources
For more help with plumbing tasks, visit Family Handyman. Their guides include photos and tips for all skill levels.

Credit: www.wikihow.com
Frequently Asked Questions
How Do I Know If My Kitchen Sink Strainer Needs To Be Replaced?
If you see leaks, rust, or cracks around the drain, or if water drains slowly even after cleaning, it’s time to replace the strainer. A worn-out strainer can cause more serious plumbing problems if ignored.
Can I Remove A Kitchen Sink Strainer Without Special Tools?
For most jobs, channel-lock pliers and a wrench are enough. However, stubborn or old strainers may require penetrating oil or a hacksaw blade. Having the right tool can save time and frustration.
How Long Does It Take To Remove A Kitchen Sink Strainer?
For a standard strainer, removal usually takes 30 minutes to 1 hour. If the strainer is corroded or stuck, it may take longer, especially if you need to cut the locknut.
Is Plumber’s Putty Necessary When Installing A New Strainer?
Yes, plumber’s putty helps seal the new strainer to the sink and prevents leaks. Some newer strainers use rubber gaskets instead, but putty is still recommended for a watertight seal.
What Should I Do With My Old Kitchen Sink Strainer?
Most old strainers are made of metal and can be recycled. Check with your local recycling center for rules. If recycling isn’t available, dispose of it in your household trash.
Removing a kitchen sink strainer is a practical DIY project that can save you money and prevent leaks. With patience and the right steps, you’ll have a fresh, leak-free sink in no time.