Testing your Instant Pot may sound simple, but it’s a crucial step if you want to cook safely and get the best results. Many new owners feel unsure about what to do after unboxing their Instant Pot. Should you run water through it? How do you know the lid and sealing ring work? Is it normal for steam to escape? It’s normal to have these questions.
Learning how to test your Instant Pot properly can help you avoid cooking disasters, food safety risks, and even damage to your new appliance. In this guide, you’ll learn everything you need to know to test your Instant Pot. This includes the water test, safety checks, troubleshooting, and tips that even experienced users sometimes miss.
By the end, you’ll feel confident using your Instant Pot, whether you’re making rice, soup, or yogurt.
Why Test Your Instant Pot Before Cooking?
Most people buy an Instant Pot and want to start cooking right away. Skipping the initial test is tempting, but it’s not a good idea. Here’s why testing is important:
- Safety Check: The Instant Pot uses high pressure. Testing helps ensure the lid, seals, and valves work correctly. This reduces the risk of accidents.
- Learning Experience: The test lets you see how the Instant Pot reaches pressure, releases steam, and displays messages. You’ll feel more comfortable using it.
- Detecting Factory Issues: Sometimes, the pot may have a faulty seal or a missing part. Testing before cooking food helps you spot these problems early.
- Cleaning: The water test helps remove dust or manufacturing oils from the inner pot and lid.
If you’re new to electric pressure cookers, the test run also gives you a safe environment to practice. It’s like a dress rehearsal before the real cooking starts.
What You Need Before Starting
Before you begin testing, gather a few things. Here’s a simple checklist to make sure you’re ready:
- Instant Pot (with all included parts: Inner pot, lid, sealing ring, steam rack)
- Measuring cup (for water)
- Clean cloth or paper towel
- User manual (for your Instant Pot model)
- Timer or phone (for timing test steps)
Place the Instant Pot on a flat, dry, and stable surface. Make sure it’s near a power outlet and away from the edge of the counter.
Understanding Instant Pot Parts
Knowing the main parts of your Instant Pot helps you test it correctly. Here’s a quick overview of key components:
- Lid: Locks and seals the pot during cooking.
- Sealing ring: A silicone ring inside the lid that helps build pressure.
- Float valve: Pops up when the pot is pressurized.
- Steam release handle/valve: Lets steam escape; used for quick or natural pressure release.
- Inner pot: Removable stainless steel cooking pot.
- Base unit: Contains the heating element and control panel.
- Condensation collector: Catches extra water during cooking.
Check that all these parts are included and properly installed.
The Water Test: Step-by-step
The water test is the main way to check your Instant Pot’s function. It’s safe, easy, and takes about 25 minutes. Here’s how to do it:
Step 1: Wash And Inspect
- Wash the inner pot, lid, and steam rack with warm, soapy water. Rinse and dry.
- Inspect the sealing ring for tears or gaps. Make sure it sits evenly inside the lid.
Step 2: Assemble The Pot
- Place the inner pot into the base unit.
- Insert the steam rack (not required but recommended for the test).
- Fit the sealing ring inside the lid.
- Attach the condensation collector to the back of the unit.
Step 3: Add Water
- Pour 3 cups (24 ounces) of water into the inner pot.
- Do not add food or seasoning.
Step 4: Close The Lid
- Align the lid with the pot and turn clockwise to lock.
- Ensure the steam release handle is set to “Sealing,” not “Venting.”
Step 5: Select Pressure Cooking
- Plug in the Instant Pot.
- Press the “Pressure Cook” or “Manual” button.
- Set the time for 5 minutes at high pressure.
- Wait a few seconds; the display should show “On.”
Step 6: Building Pressure
- The pot will start heating and building pressure. This takes about 5–10 minutes.
- The float valve will rise, and the countdown timer will start.
Step 7: Wait For Cycle To Finish
- The pot will beep when the 5-minute cycle is done.
- It switches to “Keep Warm” mode automatically.
Step 8: Quick Release
- Move the steam release handle to “Venting” to release pressure quickly.
- Steam will shoot out—keep your hands and face away.
- Wait until the float valve drops.
Step 9: Open And Check
- Turn the lid counterclockwise and lift it off.
- Check for any error messages, leaks, or odd smells.
This process proves your Instant Pot can build and release pressure properly.
What To Expect During The Water Test
Many first-timers wonder what’s normal during a water test. Here’s what you’ll likely see:
- Some steam may escape from the lid as pressure builds (a little is normal).
- The float valve will pop up; this means the pot is pressurized.
- The display will count down after pressure is reached.
- When you open the lid, you’ll find hot water inside.
If you notice hissing, water leaking from the sides, or error codes, do not use the Instant Pot for food until you fix the issue.
Common Issues And Solutions
Not every test goes perfectly. Here are common Instant Pot test problems and how to solve them:
Float Valve Doesn’t Rise
- Cause: Not enough water, sealing ring not in place, or lid not closed correctly.
- Fix: Check water level, reinstall the sealing ring, and close the lid tightly.
Steam Escapes From Sides
- Cause: Sealing ring is missing, damaged, or not fitted.
- Fix: Remove the lid, check the ring, and reinstall or replace if needed.
Display Shows Error Code
- Cause: Often a misaligned lid, blocked steam release, or electrical problem.
- Fix: Unplug, check for blockages, and try again. If the error persists, contact support.
Lid Won’t Open After Cooking
- Cause: Pot is still pressurized.
- Fix: Wait for the float valve to drop. Never force the lid open.
Water Leaks From Condensation Collector
- Cause: Collector not attached or full.
- Fix: Empty and reattach the collector.
These issues are usually easy to solve. If you keep having trouble, check your user manual or reach out to Instant Pot customer service.
Safety Features You Should Test
The Instant Pot is popular partly because of its safety design. During the water test, check these features:
- Lid Lock: The lid should lock firmly and not open while pressurized.
- Float Valve: It should rise and fall smoothly.
- Steam Release: The handle should move easily between “Sealing” and “Venting.”
- Sealing Ring: Should not leak steam from the sides.
- Automatic Shutoff: The pot should beep and switch to “Keep Warm” at the end of the cycle.
If any of these don’t work, do not cook food until you resolve the problem.
Table: Instant Pot Model Comparison For Testing
Many models exist. Here’s a quick comparison of three popular models for the water test:
| Model | Water Test Steps | Notable Differences |
|---|---|---|
| Instant Pot Duo | Standard (as described above) | Manual steam release handle |
| Instant Pot Ultra | Standard + dial interface | Custom pressure settings, altitude adjustment |
| Instant Pot Pro | Standard + upgraded controls | Improved lid, steam release switch |
Most models use the same water test, but the control panel and steam release method may differ.
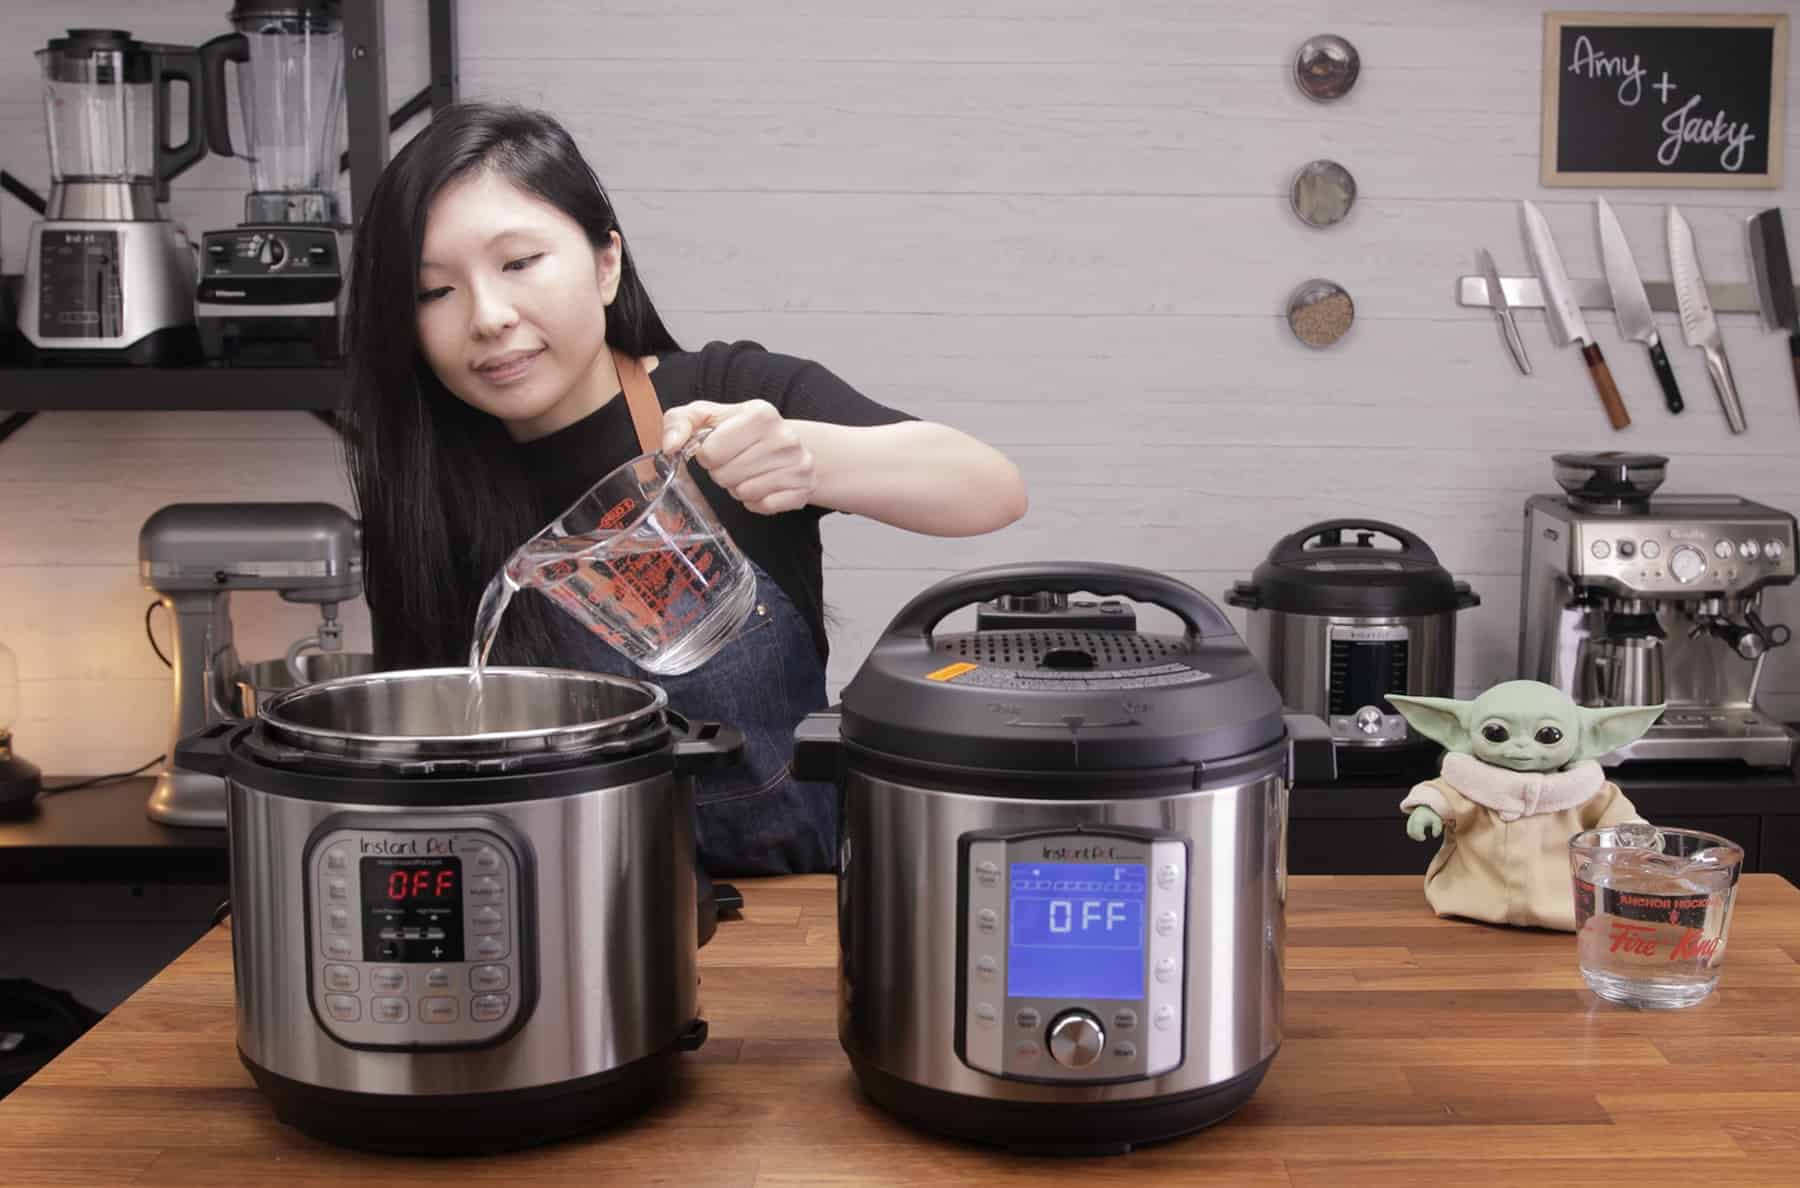
Credit: www.pressurecookrecipes.com
How To Test Less Obvious Features
Some Instant Pot features are easy to miss during a basic water test. Here’s how to check them:
Sauté Function
- Remove the lid and inner pot.
- Select “Sauté.”
- The display should say “On.”
- Add a few drops of water; they should sizzle quickly.
- Press “Cancel” after a minute.
Keep Warm Function
- After the pressure cooking cycle, the pot should switch to “Keep Warm.”
- Leave it for 10 minutes, then touch the inner pot. It should feel warm, not hot.
Delay Start
- Set a timer for a delayed start (e.g., 10 minutes).
- The pot should not begin heating until the timer counts down.
These features aren’t required for basic cooking, but testing them helps you use the Instant Pot to its full potential.
What Should Not Happen During The Test
A safe Instant Pot will NOT:
- Leak water from the base or sides
- Show error codes (like “Lid,” “Burn,” or “C6”)
- Have a stuck or jammed float valve
- Smell of burning plastic or chemicals
- Fail to heat or pressurize
If any of these happen, unplug the Instant Pot and contact the manufacturer.
Cleaning Up After The Test
After the water test, unplug the Instant Pot and let it cool. Pour out the water and dry all parts with a clean cloth. Wash the inner pot, lid, and sealing ring again if you notice any residue or smell.
Let the sealing ring air dry before reassembling.
This is also a good time to check for any leftover packaging or stickers on the base or lid.
Mistakes Beginners Often Make
Many new users make small mistakes during the Instant Pot test. Avoid these to save time and stress:
- Forgetting the Sealing Ring: The Instant Pot cannot pressurize without it.
- Not Setting the Steam Release to “Sealing”: The pot will vent steam and never build pressure.
- Not Adding Enough Water: The Instant Pot needs at least 1 cup of water to build pressure.
- Standing Over the Steam Release: Always keep your face and hands away when venting.
- Using the Wrong Inner Pot: Only use the stainless steel or approved nonstick pot—not a stove-top pot.
These are easy to fix, but catching them early builds confidence.

Credit: shop.americastestkitchen.com
Table: Instant Pot Water Test Troubleshooting
Here’s a handy troubleshooting guide for common problems:
| Problem | Possible Cause | Solution |
|---|---|---|
| Does not reach pressure | Not enough water, sealing ring not in place, steam release not set to “Sealing” | Add water, reinstall sealing ring, check steam release setting |
| Steam leaks from sides | Damaged or misplaced sealing ring, lid not closed properly | Replace sealing ring, close lid tightly |
| Float valve stuck | Dirty valve or food debris | Clean float valve with warm water |
| Error code on display | Electrical or sensor issue | Unplug, wait, retry; contact support if needed |
Keep this table handy for quick fixes.
How To Test For Odors Or Residue
Sometimes, new Instant Pots have a plastic or oily smell. This is normal but should fade after the water test. If it doesn’t:
- Wash the lid, inner pot, and sealing ring with white vinegar and water.
- Run a second water test with a splash of vinegar or lemon juice.
- Air out the lid and ring in a sunny spot.
The sealing ring can hold odors, but regular washing and airing will help.
Tips To Get The Most From Your Instant Pot Test
- Take Notes: Write down any odd messages, leaks, or noises during the test.
- Practice Pressure Release: Try both “Quick Release” and “Natural Release” to understand how they differ.
- Check All Buttons: Test each button on your model so you know where everything is.
- Join a User Group: Search for Instant Pot forums or groups online for extra help.
- Read the Manual: Even experienced cooks can learn something new from the official guide.
Most Instant Pot issues are easy to fix if you spot them early.
Testing After Storage Or Long Gaps
If you haven’t used your Instant Pot for a while, repeat the water test before cooking. This checks for:
- Sealing ring cracks or wear
- Valve blockages from dust
- Proper electrical function
It’s a quick way to avoid surprises before you cook for guests or family.
:max_bytes(150000):strip_icc()/sea-instant-pot-pro-6qt-multi-use-pressure-cooker-nsimpson-45-d681866ba9e24b70bb732bd3a580b861.jpeg)
Credit: www.seriouseats.com
Upgrades And Accessories: Should You Test Them?
Many people buy extra accessories, like a glass lid, steamer basket, or extra sealing rings. Here’s how to test them:
- Glass Lid: Use for slow cook or sauté; check for a tight fit (not for pressure cooking).
- Extra Sealing Rings: Test with the water test to check for leaks or odors.
- Steamer Basket/Egg Rack: Place in the pot during water test to check fit and stability.
Not all accessories need testing, but checking fit and function avoids disappointment later.
Table: Key Points To Remember When Testing
Here’s a summary table of things you should always check:
| Test Item | What to Look For | Action |
|---|---|---|
| Sealing ring | No tears, fits snugly | Replace if damaged |
| Lid | Locks and unlocks smoothly | Clean and check latch |
| Float valve | Rises and falls freely | Clean if stuck |
| Steam release | Moves easily, not blocked | Wipe and test function |
| Inner pot | No dents or residue | Wash and dry |
Keep these checks in mind every time you use your Instant Pot.
When To Contact Support
If your Instant Pot fails the water test and you cannot solve the problem with the manual, it’s best to contact Instant Pot customer service. Common reasons to call support include:
- Repeated error codes
- Electrical smells or sparks
- Physical damage to parts
- Missing or broken components
Most Instant Pots come with a warranty. Have your receipt and model number handy when you call.
For more details on pressure cooker safety, you can read the official guidance from the USDA Food Safety and Inspection Service.
Frequently Asked Questions
How Often Should I Test My Instant Pot?
Test your Instant Pot when it’s new, after long storage, or if you notice problems with sealing or pressure. A water test before major cooking sessions gives extra peace of mind.
What If My Instant Pot Doesn’t Seal During The Test?
Check the sealing ring is installed correctly, the lid is locked, and the steam release is set to “Sealing. ” If it still won’t seal, try replacing the sealing ring or contacting support.
Can I Use Soap Or Vinegar For The Water Test?
Yes, adding a splash of vinegar can help remove odors from a new Instant Pot. Avoid using soap in the water test itself, but do clean all parts with soap before and after.
Is It Normal For Steam To Come Out During The Test?
A little steam from the float valve as pressure builds is normal. If you see lots of steam escaping from the sides, the sealing ring may not be in place.
Do I Need To Test Every Instant Pot Accessory?
No, but it’s a good idea to check the fit and function of key accessories, especially new sealing rings and racks. This ensures safe and smooth operation.
Testing your Instant Pot is the first step to safe, stress-free cooking. With this guide, you’re ready to enjoy everything your Instant Pot can do. A little time spent testing now prevents bigger problems later and gives you confidence for every recipe.