When you want to give your kitchen or bathroom a fresh look without spending much, contact paper on cabinets is a smart choice. But what if your cabinets have grooves, panels, or decorative lines? Many people think it’s too difficult. In reality, with the right steps, you can create a smooth, professional look—even on cabinets with grooves. This guide walks you through every detail you need to know, from choosing the right contact paper to solving the most common problems. You’ll learn practical tips that save time, reduce waste, and help your cabinets look great for years.
Why Use Contact Paper On Cabinets With Grooves?
Many homes have cabinets with grooves or raised panels. These designs look beautiful, but they can be hard to paint or refinish. Contact paper offers a fast way to change the look, hide damage, or add a new style. It comes in many colors, patterns, and textures, including options that look like real wood, marble, or tile.
Contact paper is also affordable, easy to clean, and removable. If you rent your home, it’s a good way to update cabinets without making permanent changes. But applying contact paper on grooved cabinets takes more effort than flat ones. It’s important to know the challenges before you start:
- Grooves create air pockets where contact paper can lift or wrinkle.
- Detailed shapes need careful cutting and smoothing.
- If not done well, edges can peel or look messy.
Learning the correct method helps you avoid these problems and get a finish that looks like it was done by a pro.
What You Need Before You Start
Before you begin, gather the right tools and materials. Good preparation makes the job easier and results better.
Essential Tools And Supplies
- Contact paper – Buy extra, especially for practice and mistakes. Choose a thick, durable type (often called “self-adhesive vinyl”).
- Utility knife or sharp scissors – For cutting clean, straight lines.
- Plastic smoothing tool – A credit card or a real squeegee helps press contact paper into grooves.
- Measuring tape and ruler – For precise measurements.
- Pencil – To mark cut lines on the backing.
- Cleaner (mild soap or degreaser) – Cabinets must be free of grease and dust.
- Microfiber cloths – For cleaning and drying surfaces.
- Hair dryer or heat gun – Softens the contact paper, making it more flexible in grooves.
- Needle or pin – For popping air bubbles.
- Painter’s tape – To hold paper in place while working.
Optional Items
- Primer: If your cabinets are extra slick, a primer can help contact paper stick better.
- Spray adhesive: For tricky areas where the paper won’t stay down.
Pro Tip: Thicker contact paper is easier to work with on grooves. Ultra-thin types wrinkle easily and don’t hide imperfections.

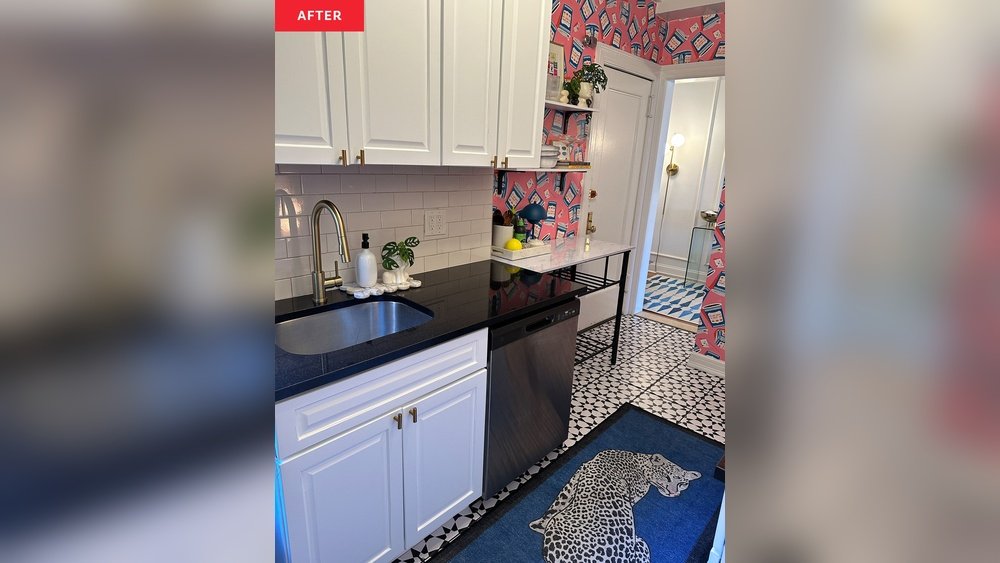
Credit: www.domino.com
Measuring And Planning: The Foundation Of Success
A common mistake is to cut contact paper without a plan. On grooved cabinets, careful measuring and planning are even more important.
Measuring Each Cabinet Door And Drawer
- Remove one door or drawer at a time. Lay it flat on a clean surface.
- Measure the width and height of both the flat and grooved areas.
- Add 1–2 inches to all sides. This gives you extra material to wrap around edges and fix mistakes.
Deciding Your Application Style
There are two main ways to use contact paper on grooved cabinets:
- Full-coverage wrap: Cover the entire door, grooves and all, with one piece of contact paper.
- Inset panel method: Cover only the flat center panel, leaving the grooved frame exposed, or use separate pieces for each section.
Full-coverage creates a more modern, seamless look but is trickier on deep grooves. Inset panel is easier but may show edges.
Planning For Pattern Direction
If your contact paper has a pattern (like wood grain or marble), plan the direction before you cut. Patterns should flow the same way across all cabinets for a natural look.
Insider Insight: Test with a small piece first. Stick it into a groove and see how well it holds and bends. This helps you decide if you need extra adhesive or heat.
Preparing Cabinets For Contact Paper
The best results start with proper surface preparation. Even small bits of grease or dust can ruin the bond.
Cleaning Steps
- Remove all cabinet doors and drawers if possible. Label them so you know where each one goes.
- Scrub all surfaces with warm, soapy water. For kitchens, use a degreaser.
- Rinse with clean water and dry with a microfiber cloth.
- Pay extra attention to grooves. Use an old toothbrush to clean inside lines and corners.
- Let everything dry completely. Moisture under contact paper causes bubbles and peeling.
Repairing Damaged Surfaces
- Fill deep scratches, holes, or chips with wood filler.
- Sand rough spots smooth.
- Wipe away dust with a clean cloth.
Removing Hardware
Take off handles, knobs, and hinges. This makes it easier to wrap contact paper around edges. If you can’t remove them, protect with painter’s tape.
Advanced Tip: If your cabinets have a high-gloss finish, lightly sand them with fine sandpaper. This gives the surface “tooth” so contact paper sticks better.
Cutting Contact Paper For Grooved Cabinets
Cutting contact paper for grooved cabinets is more detailed than for flat ones. Mistakes here cause wasted material and frustration.
Making Accurate Cuts
- Lay the door or drawer face down on the backing side of the contact paper.
- Trace the outline with a pencil, adding 1–2 inches to each side.
- Mark the location of grooves or panels if you want to cut separate pieces.
Cutting Around Grooves And Corners
- For a full wrap, cut slits at each corner (like making a “gift wrap” fold). This lets you fold paper neatly around edges.
- If grooves are deep, lightly score the contact paper (do not cut all the way through) at the groove lines. This helps it bend without wrinkling.
Dealing With Patterns
- If your contact paper has a pattern, cut pieces so the design lines up from cabinet to cabinet.
- Lay pieces out before sticking to check the look.
Hidden Insight: Always cut pieces slightly larger than needed. It’s easier to trim away extra than to fix a gap.
Applying Contact Paper: The Step-by-step Method
Now comes the most important part: applying contact paper smoothly, even into tricky grooves. Take your time—rushing leads to bubbles and crooked lines.
Step 1: Position And Dry Fit
- Peel back about 2–3 inches of the backing from the top edge of your contact paper.
- Align the sticky side with the top of your cabinet door.
- Use painter’s tape to hold the paper in place if needed.
- Double-check that patterns line up and the piece covers all edges.
Step 2: Stick And Smooth
- Slowly press the sticky edge onto the cabinet. Work from the center outward.
- As you pull away more backing, use a plastic smoothing tool to press the paper down.
- Move slowly, an inch at a time, to avoid wrinkles.
Step 3: Working Into Grooves
- When you reach a groove, pause and use the hair dryer on low heat for a few seconds.
- The heat softens the contact paper, making it more flexible.
- Use your fingers or a squeegee to press the paper into the groove. Go slowly so you don’t tear or stretch the material.
- For deep grooves, use the edge of a credit card to push the paper all the way in.
Step 4: Wrapping Edges And Corners
- At corners, gently pull and fold the paper, smoothing out any wrinkles.
- Trim excess with a sharp utility knife.
- Wrap extra paper around the back of the door or drawer for a secure hold.
Step 5: Handling Bubbles And Wrinkles
- If bubbles appear, lift the paper gently and reapply. For small bubbles, prick with a needle and smooth flat.
- Wrinkles can often be removed with a hair dryer and gentle stretching.
Step 6: Final Trimming
- Run a sharp knife along the edges for a crisp finish.
- For inset panels, cut along the groove line, then press the paper firmly into the groove.
Pro Tip: Never stretch the contact paper too much; it can shrink back and cause gaps later.

Credit: www.reddit.com
Dealing With Deep Grooves And Raised Panels
Grooved cabinets come in many styles. Some have shallow lines, while others have deep, decorative panels. Each type needs a special approach.
Applying To Shallow Grooves
- Most contact paper will bend easily into shallow grooves with light pressure.
- Use a little heat and a flexible smoothing tool for best results.
Applying To Deep Grooves Or Raised Panels
- For deep grooves, consider making relief cuts. This means making small cuts at the corners of the groove so the paper can lay flat.
- Alternatively, cover the flat panel and frame separately, then use a craft knife to cut away excess.
The “inset Panel” Method
- Cut one piece for the flat center panel and smaller strips for the frame.
- Apply the center piece first, then the strips into the grooves. Overlap slightly for a seamless look.
Advanced Tip: If grooves are very deep, line them first with a thin strip of contact paper, then cover the whole door. This creates a base that helps the outer layer stick better.
How To Avoid Peeling And Lifting Over Time
Many people worry that contact paper will peel, especially in grooves. A few extra steps make your finish last longer.
Best Practices
- Always clean and dry surfaces before applying.
- Press the paper firmly into grooves, using heat if needed.
- Wrap edges around the back when possible.
- If you see a loose corner, add a dot of clear glue or spray adhesive.
Sealing The Edges
- For kitchens and bathrooms (high moisture), seal edges with a clear, water-based sealant.
- Apply carefully with a small brush.
Avoiding Common Mistakes
- Rushing the process: Working too fast leads to bubbles and crooked lines.
- Not using enough pressure: Press hard into grooves.
- Skipping cleaning: Even a little grease or dust will ruin the bond.
Cleaning And Maintaining Contact Paper Cabinets
With the right care, contact paper can look good for years—even in busy kitchens.
Daily Cleaning
- Wipe with a damp, soft cloth.
- Mild soap is safe, but avoid strong chemicals.
Avoiding Damage
- Don’t scrub with abrasive pads.
- Don’t let water sit on edges.
- Fix any peeling spots right away.
Pro Tip: If you need to remove stains, use a little baking soda on a damp cloth.
Removing And Replacing Contact Paper
Contact paper isn’t permanent. If you want a new style or need to move, you can remove it.
How To Remove Contact Paper
- Start at one corner and slowly peel away.
- If the paper is stubborn, warm with a hair dryer.
- Remove any sticky residue with rubbing alcohol.
Preparing For A New Application
- Clean off all old adhesive.
- Let the surface dry completely before adding new contact paper.
Hidden Insight: Sometimes, removing contact paper from grooves leaves behind bits of glue. Use a soft toothbrush and alcohol to clean these areas.
Troubleshooting: Real-life Problems And Solutions
Even with careful work, problems can happen. Here’s how to fix the most common issues when using contact paper on grooved cabinets.
Air Bubbles Won’t Go Away
- Prick the bubble with a needle and press out the air.
- Reheat with a hair dryer and smooth again.
Paper Lifts In Grooves
- Add a tiny amount of spray adhesive or clear glue under the lifted area.
- Press firmly and let dry.
Wrinkles At Corners
- Lift and stretch gently with heat.
- If wrinkles remain, cut them out and patch with a small piece. Patterns help hide patches.
Uneven Pattern Lines
- Carefully trim and reposition before pressing down fully.
- For multi-door cabinets, lay out all pieces before sticking.
Pro Tip: Always keep extra contact paper for repairs and patches.
Real-world Examples: Success Stories
Many DIYers have used contact paper to transform old cabinets with grooves. Here are some examples:
- Small Apartment Kitchen: A renter used wood-grain contact paper on 12 grooved cabinet doors. She wrapped each door fully, using a hair dryer in grooves. After 18 months, the finish still looks new.
- Bathroom Vanity Update: A homeowner covered deep-panel doors with marble-pattern contact paper. She used the “inset panel” method, and the seams are nearly invisible.
- Budget Remodel: In an older home, thick white contact paper was used over dark, grooved cabinets. The owner found that sealing the edges with clear nail polish stopped all peeling.
Non-obvious Insight: In very humid rooms, using a dehumidifier for a few days after applying contact paper helps the adhesive set fully.
Comparing Contact Paper Application Methods
When working with grooved cabinets, your method matters. Here’s a side-by-side look at the two most common approaches:
| Method | Pros | Cons |
|---|---|---|
| Full-Coverage Wrap | Seamless look, modern style, hides damage | Harder to apply in deep grooves, more prone to bubbles |
| Inset Panel + Frame | Easier in deep grooves, less waste, easier to repair | Seams may show, needs careful alignment |
If you’re a beginner, the Inset Panel + Frame method is less stressful and easier to fix if mistakes happen.
Comparing Contact Paper Types For Grooved Cabinets
Not all contact paper is equal. Here’s how the main types compare for grooved cabinet use:
| Type | Flexibility | Durability | Ease of Use |
|---|---|---|---|
| Standard Vinyl | Medium | Good | Easy |
| Thick Self-Adhesive Film | Low | Excellent | Best for flat areas |
| Textured/3D Patterns | High | Fair | Best for grooves/panels |
Non-obvious Insight: Textured contact paper bends into grooves more easily, but may be harder to clean.
Cost And Time Estimate
How much will this project cost, and how long will it take? Here’s a rough estimate for a typical kitchen with 12 cabinet doors:
| Item | Average Cost (USD) | Time Needed |
|---|---|---|
| Contact Paper (3 rolls) | $30–$60 | — |
| Tools (knife, squeegee, etc.) | $10–$20 | — |
| Labor (DIY) | Free | 6–10 hours (total project) |
Plan for one long weekend if you’re new to DIY work.
Safety And Environmental Tips
While contact paper is safe, a few simple practices protect your health and the environment.
- Work in a well-ventilated area.
- Keep sharp knives away from children.
- Recycle backing paper and empty rolls.
- Choose low-VOC or eco-friendly contact paper if possible.
For more information about safe home renovation materials, see the EPA Safer Choice program.
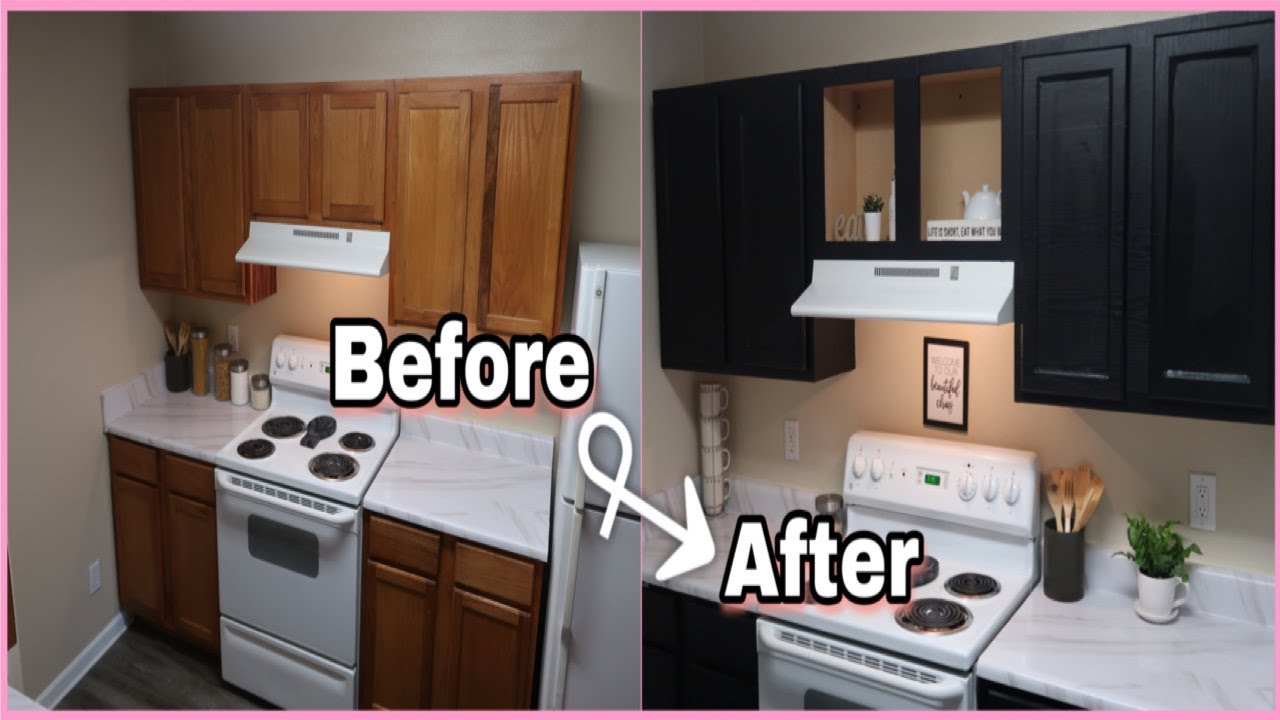
Credit: www.youtube.com
Frequently Asked Questions
How Long Does Contact Paper Last On Grooved Cabinets?
Most quality contact paper lasts 2–5 years on grooved cabinets, sometimes longer if you clean gently and avoid water on the edges. High-traffic areas may need touch-ups sooner, but careful application and edge-sealing help it last.
Can I Apply Contact Paper Without Removing Cabinet Doors?
Yes, you can, but removing doors makes it much easier to wrap edges and work in grooves. If you leave doors on, clean and tape around hinges and hardware to protect them. The results are usually neater if you remove at least the handles.
What Should I Do If My Contact Paper Won’t Stick In Grooves?
If contact paper lifts or won’t stick, use a hair dryer to warm the adhesive and press again. For stubborn areas, add a thin layer of spray adhesive or clear glue under the loose spot, then press firmly until dry.
Is Contact Paper Waterproof And Safe For Kitchens?
Most contact paper is water-resistant but not completely waterproof. Wipe up spills quickly and avoid soaking edges. For best results in kitchens or bathrooms, seal the edges with a clear sealer to prevent water damage.
Can I Reuse Contact Paper After Removing It?
Contact paper is not designed to be reused. Once removed, the adhesive loses its strength and the paper may tear or stretch. Always use new contact paper for a clean, smooth finish.
Bringing It All Together
Applying contact paper to cabinets with grooves isn’t just possible—it’s a practical, affordable way to update your kitchen, bathroom, or any room with old cabinetry. With careful planning, the right tools, and a little patience, you can create a professional look that lasts.
Remember to clean well, measure carefully, and use heat to work the paper into grooves. If you make a mistake, don’t worry—contact paper is easy to fix and replace. By following these tips, you’ll save money, avoid common problems, and enjoy a fresh new style that fits your home and life.