Storing a stand mixer may seem simple, but doing it the right way can make your kitchen safer, your appliance last longer, and your baking experience much smoother. Many people buy a stand mixer as a kitchen upgrade, but struggle with finding the best way to store it. If you leave it on the counter, it can take up valuable space. If you put it in a cabinet, it may be hard to reach or even get damaged. Not to mention, the mixer and its attachments need to be clean, organized, and ready for use.
This guide will help you learn everything you need to know about how to store a stand mixer. Whether you have a small kitchen or plenty of room, you’ll find tips, data, and expert advice. We’ll cover where to put your mixer, how to keep it safe, how to organize attachments, and even cleaning and maintenance tips. Along the way, you’ll get practical solutions for real-life kitchens, plus a few clever storage ideas you may not have thought of. By the end, you’ll feel confident your stand mixer is always ready—without being in the way.
Why Proper Stand Mixer Storage Matters
Stand mixers are heavy, often expensive, and can last for decades with good care. But poor storage can lead to problems:
- Dust and dirt can get inside, affecting performance.
- Moisture can cause rust or electrical problems.
- Cluttered accessories get lost or broken.
- Lifting injuries can happen if you store it in a bad spot.
According to appliance care studies, about 20% of stand mixer owners report losing attachments within the first year because of poor organization. Even more common is forgetting to clean or oil moving parts, simply because the mixer is out of sight.
Understanding Your Stand Mixer’s Size And Weight
Before you decide where to store your mixer, know its measurements and how much it weighs. Most stand mixers are between 14 and 17 inches tall, 8 to 12 inches wide, and weigh from 15 to 25 pounds. Larger models (like the KitchenAid Professional series) can weigh over 30 pounds.
Why does this matter? If your storage spot is too high or too low, you may strain your back lifting the mixer. If the shelf is too small, you could damage the mixer or the shelf itself.
Here’s a quick comparison of common stand mixer sizes:
| Brand/Model | Height (inches) | Width (inches) | Weight (lbs) |
|---|---|---|---|
| KitchenAid Artisan | 14 | 8.7 | 22 |
| KitchenAid Pro 600 | 17 | 9 | 29 |
| Cuisinart SM-50 | 15.2 | 7.9 | 18.8 |
| Hamilton Beach 63391 | 14 | 8 | 12.5 |
Tip: Always check your stand mixer’s manual for its specific size and weight.
Choosing The Right Storage Location
Where you put your mixer depends on your kitchen layout, how often you use it, and your physical strength. Here are the most common options:
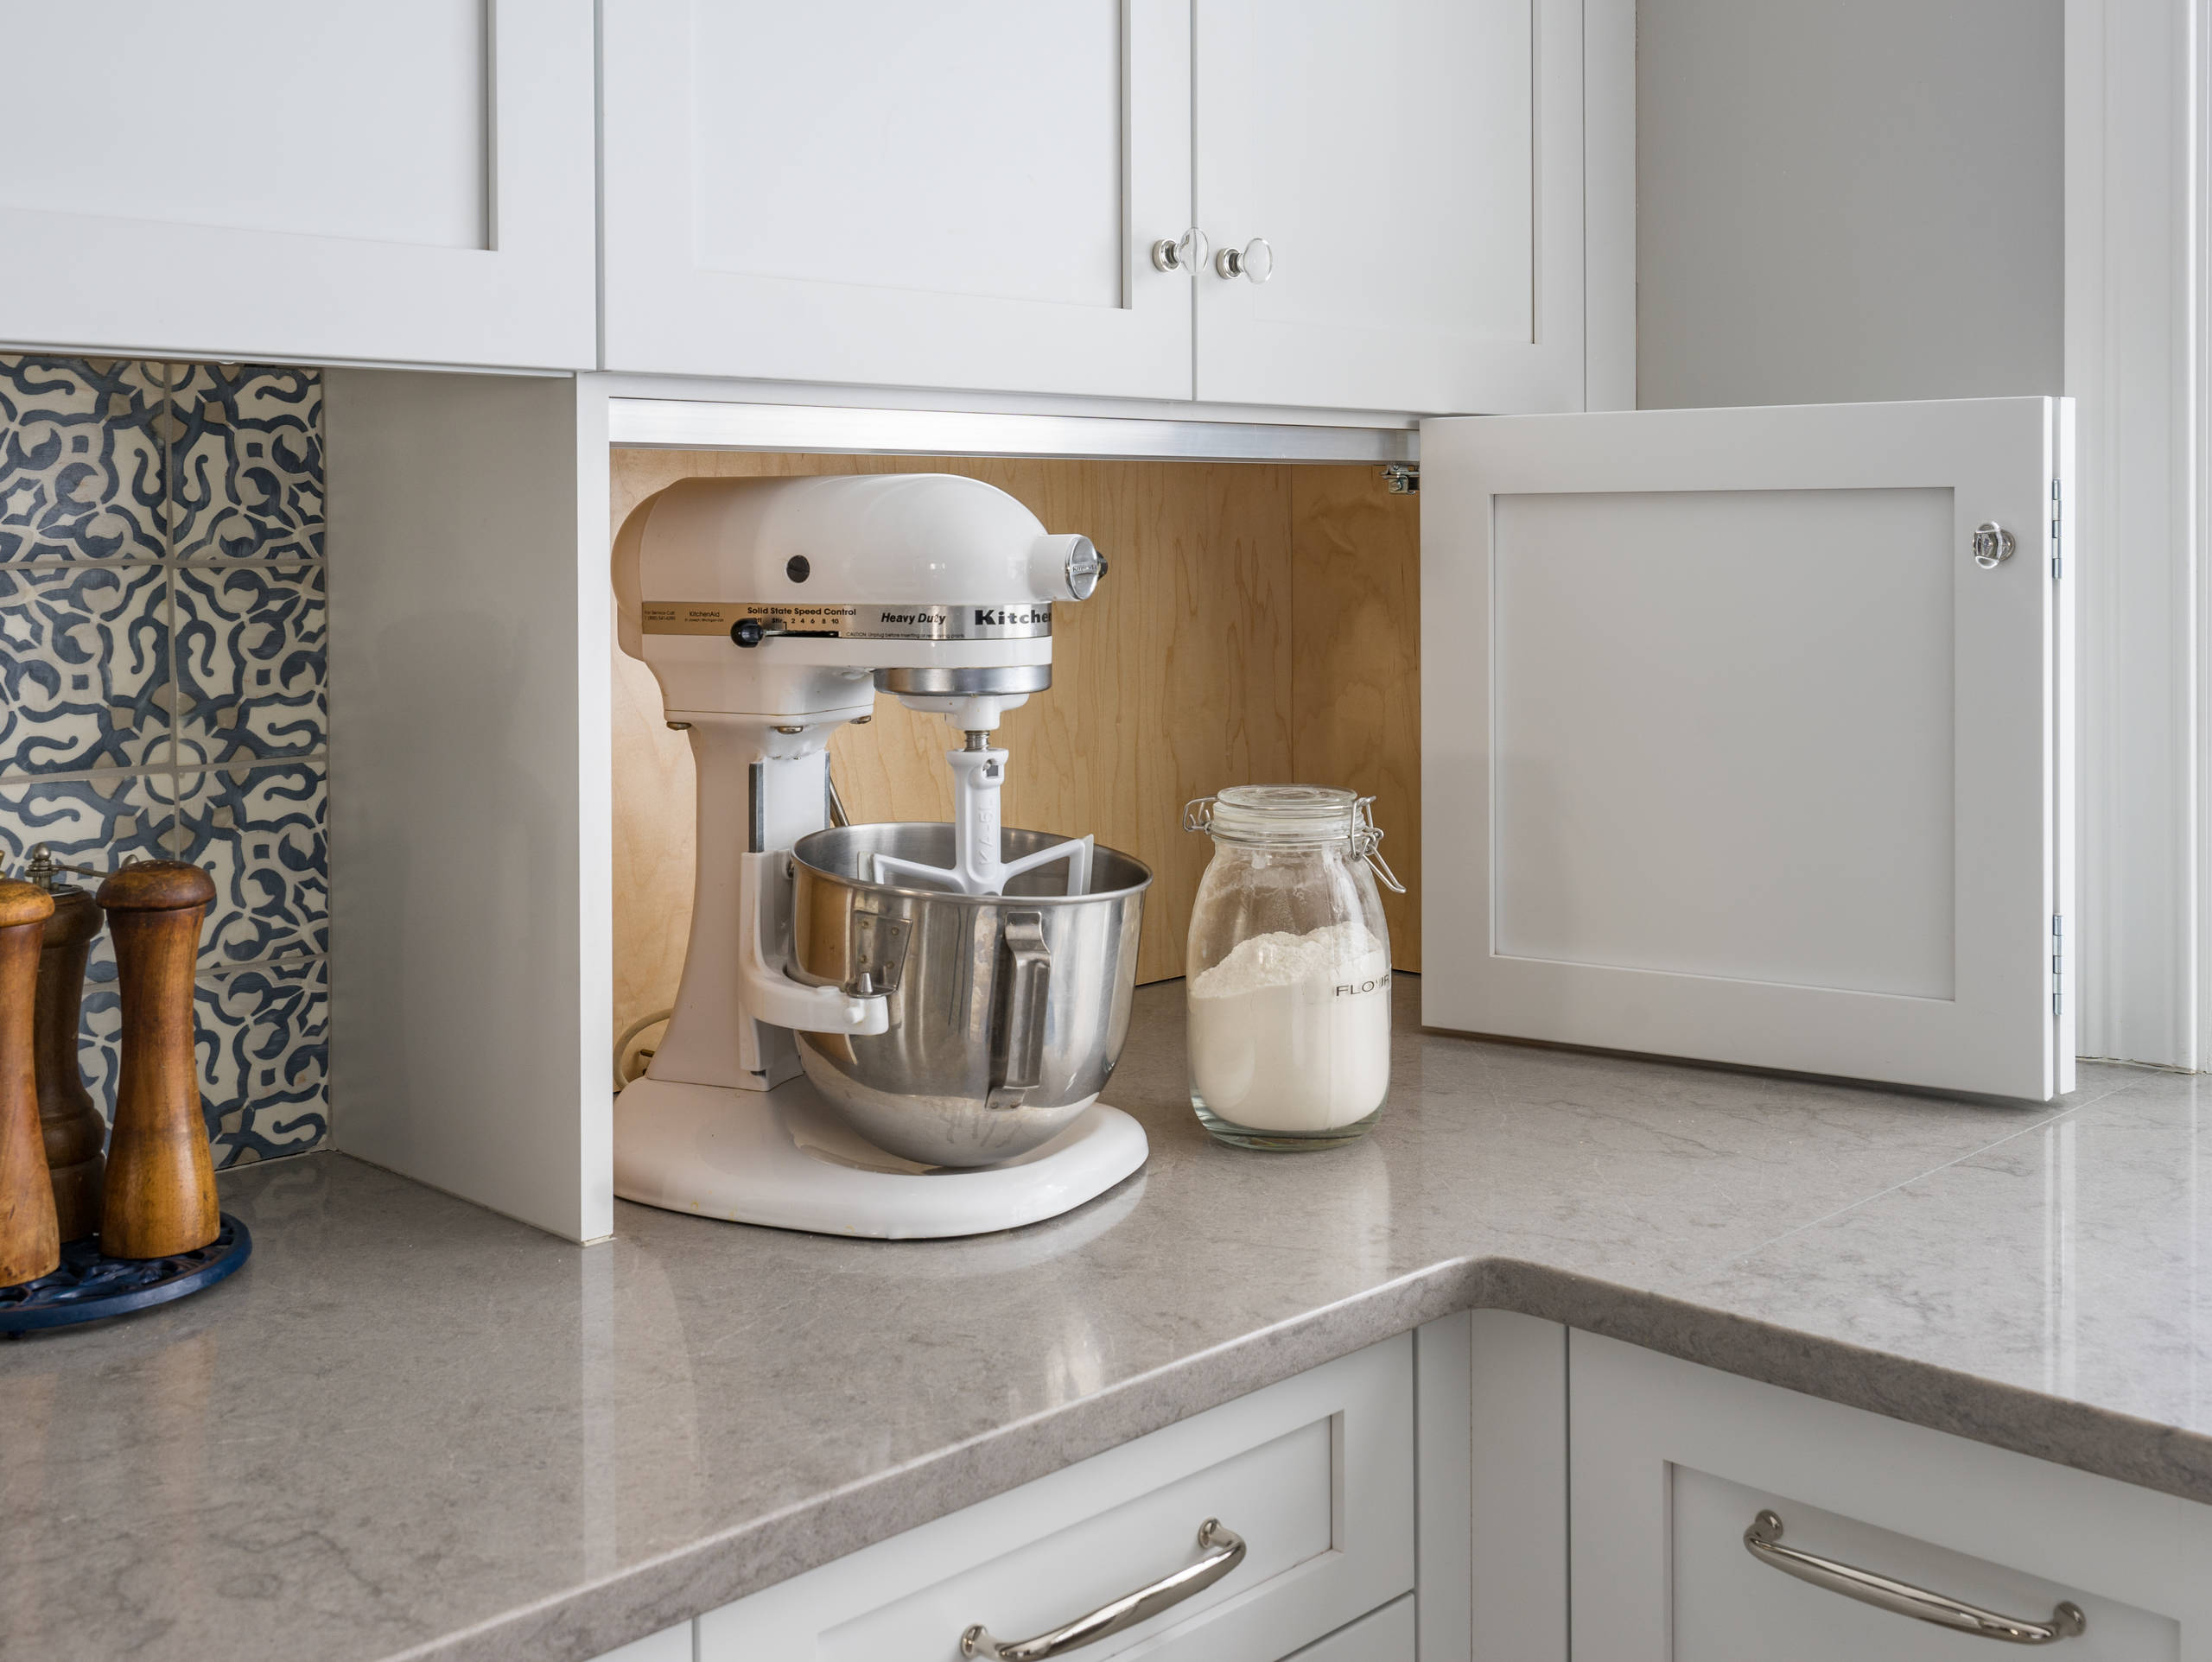
1. Countertop Storage
If you use your stand mixer often (at least once a week), keeping it on the countertop makes sense. It’s always ready and easy to access. But this works best if you have a large kitchen or an appliance garage—a special section of your counter with a cabinet door.
- Pros: Quick access, no lifting, can show off a stylish mixer.
- Cons: Takes up space, can get dusty or greasy if near the stove.
How to do it best: Place the mixer at the end of your counter, away from the sink and stove. If you have an appliance garage, use it to hide the mixer but keep it plugged in.
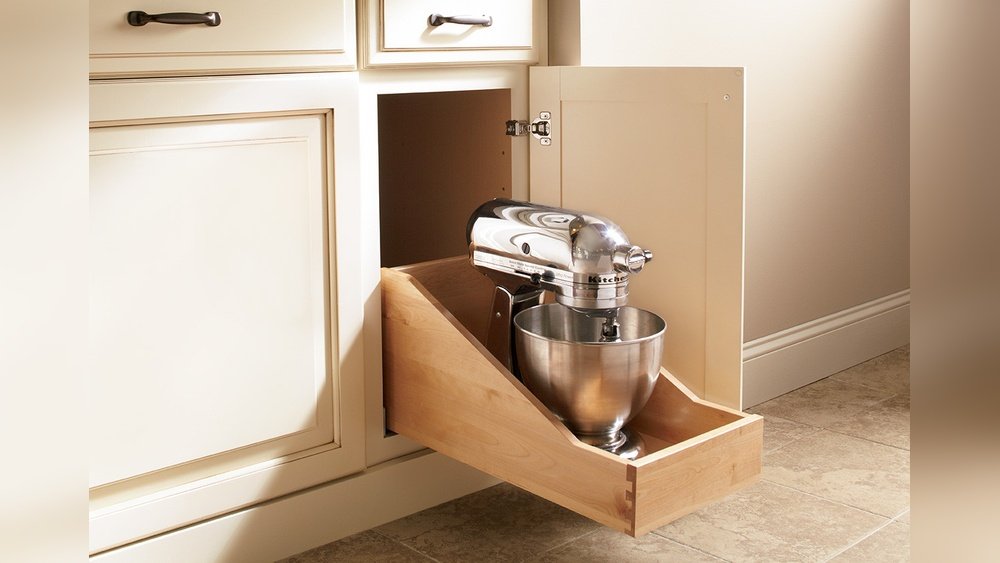
2. In A Cabinet
Many people prefer to store their stand mixer in a lower cabinet. This keeps it out of sight and safe from dust.
- Pros: Cleaner look, protects from dust and spills.
- Cons: Heavy to lift, can be hard to reach.
Practical tip: Use a cabinet near your prep area, so you don’t have to carry the mixer far. Install a pull-out shelf or a mixer lift—a special platform that brings the mixer up to counter height.
3. Pantry Storage
If you have a walk-in pantry, this is a great place for your stand mixer. Pantries are usually dry, cool, and safe from kitchen messes.
- Pros: Extra space, away from cooking splatters.
- Cons: May be far from your baking area.
Non-obvious insight: If your pantry has deep shelves, add a lazy Susan or rolling tray to make heavy mixers easier to pull out.
4. Kitchen Island
Some kitchen islands have deep drawers or special shelves for appliances. If you’re remodeling, consider adding a stand mixer cabinet to your island.
- Pros: Central location, can double as prep space.
- Cons: Needs planning, not all islands have enough space.
5. Open Shelving
This is a stylish option if you want to show off your mixer’s color. Strong, wide shelves can hold a stand mixer safely.
- Pros: Decorative, easy to grab.
- Cons: Needs regular dusting, less protection from kids or pets.
Safety tip: Make sure the shelf is strong enough for 25–30 pounds.
Organizing Mixer Attachments And Accessories
Every stand mixer comes with several attachments: a whisk, paddle, dough hook, and sometimes more. Keeping them organized is just as important as storing the mixer itself.
Attachment Storage Ideas
- Drawer Organizer: Use a deep drawer with dividers for each attachment.
- Hanging Hooks: Mount hooks inside a cabinet door for beaters and whisks.
- Accessory Bag: Store small parts in a labeled zippered bag or pouch.
- Magnetic Strip: For metal attachments, a magnetic strip (like for knives) can keep them visible and safe.
- Original Box: If you still have it, the mixer box is designed to hold all parts safely.
Pro insight: Attachments left loose in a drawer can chip, break, or even scratch the mixer. Using dividers or bags will help them last longer.
Storing Extra Bowls And Specialty Attachments
If you have more than one bowl or special attachments (like a pasta maker), you need a plan. Stack bowls with soft liners between them to avoid scratches. Store rarely used attachments in a labeled container, so you don’t lose them.
| Accessory | Best Storage Option | Notes |
|---|---|---|
| Dough Hook | Drawer Divider | Keep separate from whisk to avoid tangling |
| Wire Whisk | Hanging Hook | Don’t crush—whisk can bend |
| Pasta Roller | Labeled Box | Keep all small parts together |
| Extra Bowl | Stacked with Liner | Use felt or silicone pad between bowls |
Credit: www.thekitchn.com
Cleaning And Preparing Your Mixer For Storage
Before you store your stand mixer, always clean it first. Even if you plan to use it again soon, a quick wipe-down will prevent sticky messes and bad smells.
Cleaning Steps
- Unplug the Mixer: Safety first.
- Remove All Attachments: Wash beaters, bowls, and hooks in warm, soapy water. Dry completely.
- Wipe the Mixer Body: Use a damp cloth for the outside. For stubborn spots, a little baking soda works well.
- Clean the Underside: Crumbs can collect under the mixer head. Use a brush or a toothpick to gently remove debris.
- Check the Ventilation Holes: Dust can block vents. Use a dry brush or vacuum with a small attachment.
- Dry Everything Well: Moisture can cause rust or mold if you store attachments before they’re dry.
Overlooked detail: Many people forget to clean the attachment port (where you connect the beater or dough hook). Wipe this gently with a dry cloth.
Protecting Your Stand Mixer From Damage
Kitchen appliances can be damaged by bumps, spills, and even sunlight. Here are ways to keep your stand mixer safe:
Use A Dust Cover
A stand mixer cover keeps dust, grease, and moisture away. You can buy covers made of cloth, vinyl, or even hard plastic. Some have pockets for attachments.
Bonus tip: If you don’t want to buy a cover, a clean pillowcase works in a pinch.
Avoid Direct Sunlight
Long-term sunlight can fade plastic and paint. Store your mixer in a shaded spot away from windows.
Don’t Stack Heavy Items On Top
Never put heavy pots or pans on top of your mixer. This can damage the motor or scratch the finish.
Secure During Travel
If you need to move your mixer (for example, when moving houses), pack it in the original box with foam inserts. If you don’t have the box, wrap it in towels and use a sturdy bin.
Credit: www.houzz.com
Special Storage Solutions For Small Kitchens
Not everyone has a big kitchen. In fact, according to the National Kitchen & Bath Association, the average kitchen size in the US is just 161 square feet. Small kitchens need creative storage solutions.
Use Vertical Space
Install strong shelves high up for mixers you don’t use every week. Just make sure you can safely lift the mixer down (consider a step stool with a handle).
Rolling Carts
A kitchen cart with a sturdy top and shelves below can hold your stand mixer and attachments. Roll it out when you need to bake, then tuck it away.
Under-bench Storage
If you have a bench or window seat in your kitchen, consider adding a lift-top compartment for your mixer.
Overhead Appliance Lifts
Some modern kitchens have appliance lifts that lower from the ceiling. These are rare but can save a lot of space.
Practical example: One apartment baker keeps her stand mixer on a rolling cart in the hallway closet. When it’s time to bake, she just rolls it to the kitchen—no heavy lifting required.
Mixer Lifts And Pull-out Shelves: Are They Worth It?
Mixer lifts are special hardware devices installed inside cabinets. They work like a lever or spring, lifting your heavy stand mixer up to counter height and locking it in place. When you’re done, you push it back down and close the cabinet.
Advantages
- No heavy lifting
- Easy to use, even for older adults or people with injuries
- Keeps the mixer out of sight but ready to use
Disadvantages
- Cost: Hardware and installation can cost $150–$400
- Needs a deep, strong cabinet
Comparison
| Storage Option | Accessibility | Protection | Cost |
|---|---|---|---|
| Countertop | Excellent | Low | Free |
| Cabinet (no lift) | Medium | High | Free |
| Cabinet with Lift | Excellent | High | $$$ |
| Rolling Cart | High | Medium | $$ |
Non-obvious insight: If you bake often and have back or wrist problems, a mixer lift can make a huge difference in your comfort and safety.
Storing Your Mixer Long-term
If you won’t use your stand mixer for months (for example, if you’re traveling or storing it for the summer), take extra steps:
- Clean and dry every part carefully.
- Wrap cords loosely—never tightly, which can cause cracks.
- Place attachments in a sealed bag with a label.
- Store in a dry, cool place away from extreme temperatures.
- Check for pests—crumbs can attract insects or mice.
Expert note: If you live in a humid climate, add a small packet of silica gel to the bowl to absorb moisture.
Cord Management For Stand Mixers
Stand mixer cords can get tangled, cause tripping, or even damage the plug. Good cord management keeps your kitchen safer.
Tips For Cord Storage
- Wrap Loosely: Don’t wrap the cord tightly around the mixer. This can strain the wire.
- Velcro Straps: Use a reusable Velcro tie to keep the cord neat.
- Cord Clips: Stick-on cord clips can attach to the back of your mixer or the inside of a cabinet.
- Cord Bags: Some people store the cord separately in a small bag when not in use.
Common mistake: Many users wrap the cord under the mixer, which can trap moisture and cause mold. Always dry the cord before storing.
Regular Maintenance While In Storage
Even when your mixer is stored, it needs occasional care.
- Check for Dust: Every month, wipe down the mixer and attachments.
- Inspect the Cord: Look for cracks or fraying.
- Run the Mixer: Every few months, plug it in and run it for 30 seconds. This keeps the motor parts moving and prevents them from sticking.
- Oil Moving Parts: If your manual recommends oiling, follow the directions.
Extra tip: If you notice any strange smells or noises, have the mixer checked by a repair expert before using it for food again.
Safety Precautions For Storing Stand Mixers
Safety is important, especially with heavy, electrical appliances.
- Unplug before storing.
- Keep away from water—never store under a leaky sink or near a dishwasher vent.
- Child Safety: Store the mixer and sharp attachments out of reach of children.
- Label Boxes: If you’re storing the mixer in a box, label it clearly so nobody stacks heavy items on top.
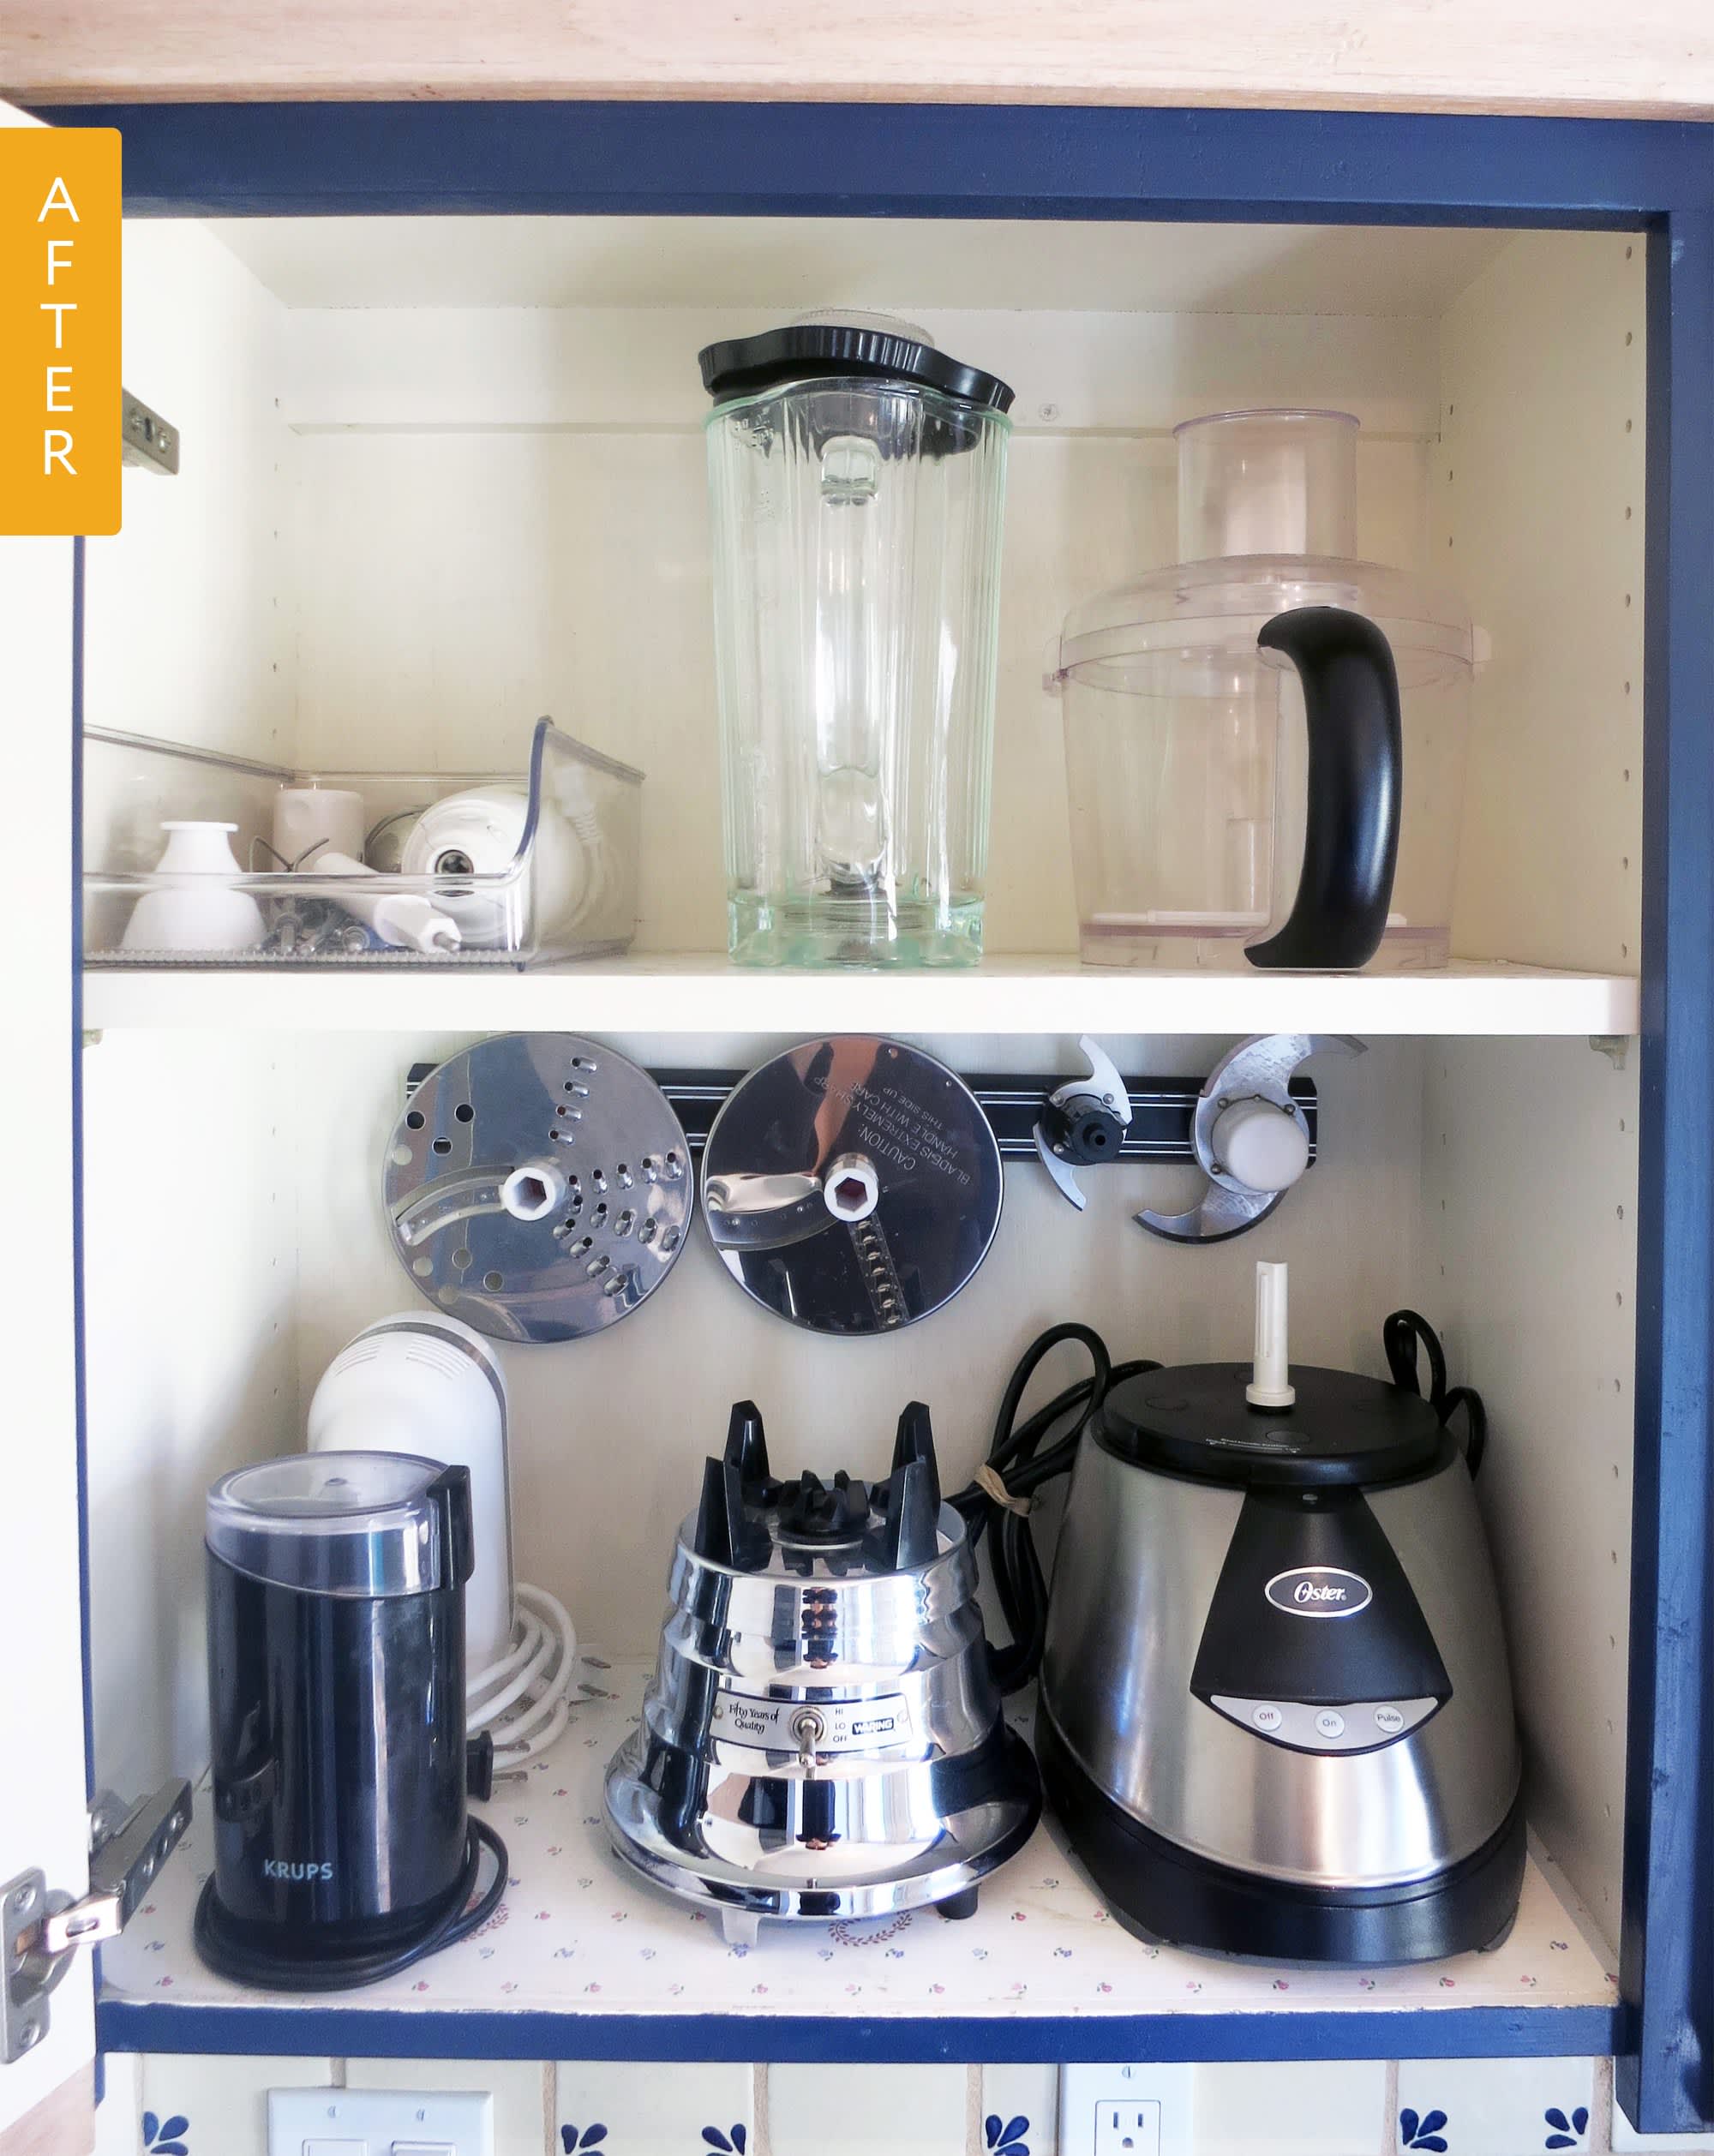
Keeping Your Kitchen Organized With Appliance Storage
A well-organized kitchen saves time and reduces stress. Here’s how your stand mixer fits in:
- Store similar appliances together (mixer, blender, food processor).
- Use clear bins for attachments and label them.
- Review your storage every 6–12 months—move appliances you don’t use often to less-accessible spots.
Personal example: One home baker keeps a “baking station” with her stand mixer, flour, sugar, and tools all in one cabinet. This makes baking faster and cleanup easier.
Eco-friendly And Sustainable Storage Tips
If you care about the environment, consider these tips:
- Use reusable storage bins instead of plastic bags.
- Choose dust covers made from organic cotton or recycled materials.
- Repurpose old boxes or baskets for attachment storage.
- Donate unused attachments or mixers to local charities.
Resource: To learn more about eco-friendly kitchen practices, check out the EPA’s recycling guide.
What To Avoid When Storing Your Stand Mixer
Mistakes can shorten the life of your mixer. Avoid these common problems:
- Storing while dirty: Dried batter or dough is hard to clean later.
- Wet attachments: Water can cause rust or mold.
- Stacking accessories unsafely: This can bend or break them.
- Forgetting attachments: Don’t leave beaters or whisks locked in the mixer—they can stick or rust.
Signs Your Storage Solution Needs An Update
How Do You Know If Your Current System Isn’t Working?
- You can’t find attachments when you need them.
- The mixer is hard to lift or reach.
- The mixer is dusty, greasy, or damaged.
- You avoid baking because getting the mixer out is a hassle.
If these sound familiar, try one of the new ideas above and see how much easier baking becomes.

Credit: masterpiececabinets.com
Frequently Asked Questions
How Do I Clean My Stand Mixer Before Storing It?
Always unplug your mixer first. Remove all attachments and wash them in warm, soapy water. Wipe the outside and underside of the mixer with a damp cloth. Dry all parts completely before putting them away. Don’t forget to check and clean the attachment port and ventilation holes.
Can I Store My Stand Mixer In The Garage Or Basement?
It’s best to avoid garages or basements unless they are dry and temperature controlled. Moisture and extreme temperatures can damage electrical parts and cause rust. If you must use these spaces, store the mixer in a sealed plastic bin with silica gel.
What’s The Safest Way To Lift My Stand Mixer Into A Cabinet?
Bend your knees and keep your back straight. Hold the mixer close to your body and lift with your legs, not your back. If your mixer is very heavy, ask for help or consider installing a mixer lift.
Should I Keep My Stand Mixer On The Counter Or Put It Away?
If you use your mixer often and have enough space, the counter is convenient. If your kitchen is small or you bake rarely, a cabinet, pantry, or rolling cart may be better. The key is to balance accessibility with protecting your mixer from dust and damage.
How Do I Organize All My Mixer Attachments?
Use drawer dividers, labeled bins, or hooks inside a cabinet door. Keep attachments clean, dry, and separated to avoid damage. For rare-use attachments, store them in a labeled box or bag in a less-used cabinet.
Storing your stand mixer well doesn’t just protect an expensive appliance—it makes baking and cooking more fun and less stressful. The right storage solution fits your kitchen, your habits, and your style. With these tips, you can keep your stand mixer safe, clean, and always ready to help create something delicious.