Seasoning a flat top grill is one of those skills that instantly changes how you cook. If you’ve just bought a new flat top, or you want to restore an old one, learning the right seasoning process is crucial. This is not only about getting a nice, non-stick surface—it’s also about protecting your investment, getting better flavor, and making clean up easier every time you cook.
Surprisingly, many people jump in without understanding the full process, or they miss important details that make a big difference over time.
Whether you’re setting up a backyard griddle, a Blackstone, or a commercial flat top, the seasoning process follows the same science. But there are some key decisions and steps along the way. In this guide, you’ll get a complete, step-by-step approach, plus tips from real-life experience and expert recommendations.
Let’s make sure your flat top gets seasoned right and stays that way.
What Does “seasoning” A Flat Top Mean?
Seasoning a flat top is not about adding spices. In the cooking world, “seasoning” means creating a hard, non-stick layer on the metal surface. This is done by heating oil so it bonds to the metal and forms a protective coating. The main benefits of seasoning are:
- Prevents rust by blocking moisture from reaching the metal
- Makes cooking easier because food sticks less
- Adds flavor over time as the layers build up
- Extends the life of your flat top
This is not a one-time job. The first seasoning session is the base. Every time you cook, you add thin layers that make your flat top better.
Why Proper Seasoning Matters
Many people do a quick oil wipe and call it done. But real seasoning is a chemical change called polymerization. Oil turns into a tough coating, not just a greasy film. If you skip or rush this step, you’ll face:
- Sticking and tearing food
- Uneven heating
- Rust patches
- Harder cleaning
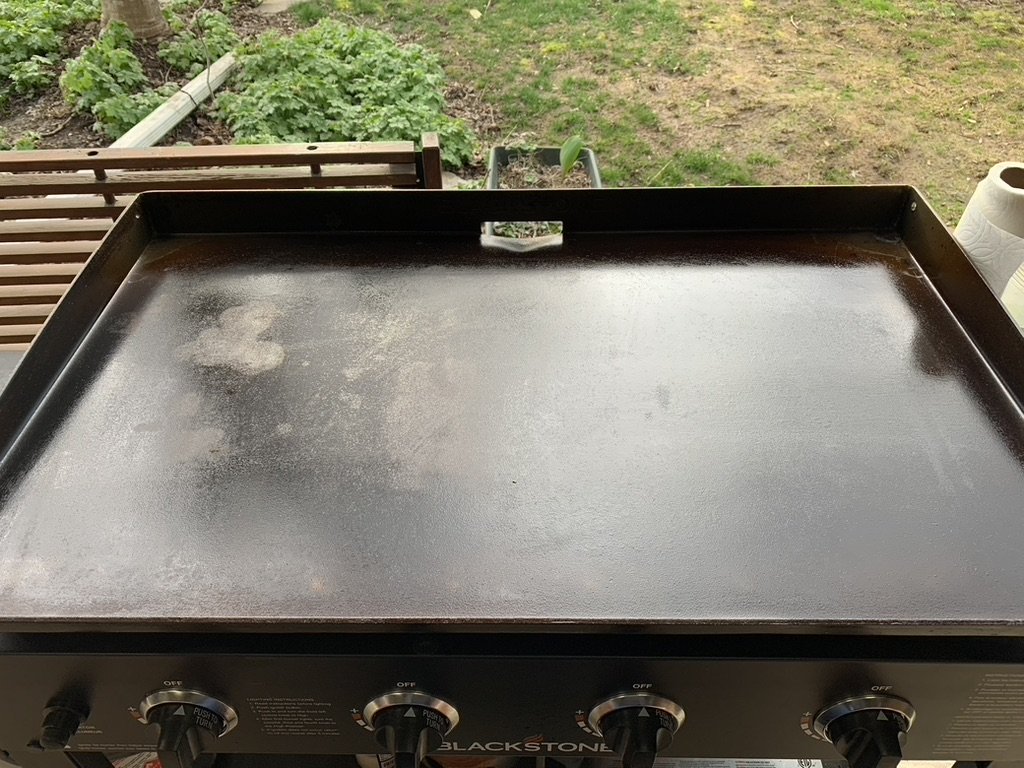
A well-seasoned flat top is dark, almost black, and smooth. If yours looks patchy or rusty, it’s time for another seasoning session.
Tools And Materials You’ll Need
Before you start, gather everything. Missing tools can cause uneven results or even injury. Here’s what you’ll need:
- High-smoke point oil (see comparison below)
- Paper towels or lint-free cloths
- Tongs (for holding towels)
- Scraper or spatula
- Heat-resistant gloves
- Water (for cleaning)
- Mild dish soap (only for first clean)
- Bucket or bowl (for dirty towels)
Best Oils For Seasoning
Not all oils are equal. Choose an oil with a high smoke point (over 400°F/205°C) so it won’t burn or taste bad. Here’s a quick comparison:
| Oil Type | Smoke Point (°F) | Flavor Impact | Cost |
|---|---|---|---|
| Flaxseed Oil | 450 | Neutral | High |
| Canola Oil | 400 | Neutral | Low |
| Grapeseed Oil | 420 | Neutral | Medium |
| Avocado Oil | 520 | Neutral | High |
| Vegetable Oil | 400 | Neutral | Low |
Flaxseed oil is often recommended by experts for the hardest, longest-lasting seasoning. But canola and vegetable oil are common and work well.
Pre-seasoning Preparation
Before adding oil, you need to make sure the flat top is perfectly clean. Any factory coating, dust, or rust will ruin your seasoning. Here’s what to do:
- Remove packaging and stickers. Check corners and edges.
- Wash with soap and water. This is the only time you should use soap. Scrub with a sponge or cloth to remove all oils and debris.
- Rinse and dry completely. Water left behind can lead to rust.
- Check for rust or rough spots. If you see any, scrub with a steel wool pad until smooth, then rinse and dry again.
Tip: Don’t forget the edges and corners—these often get missed and can start to rust.
Credit: streetphotographersfoundation.com
Step-by-step: How To Season A Flat Top
Let’s walk through the main steps for a perfect seasoning.
1. Preheat The Flat Top
Turn on your flat top to medium-high heat. Let it run for 10–15 minutes until it changes color (often dark gray or blue). This opens the metal’s pores so oil bonds better.
Non-obvious insight: If you rush preheating, the oil will not stick as well, leading to uneven spots.
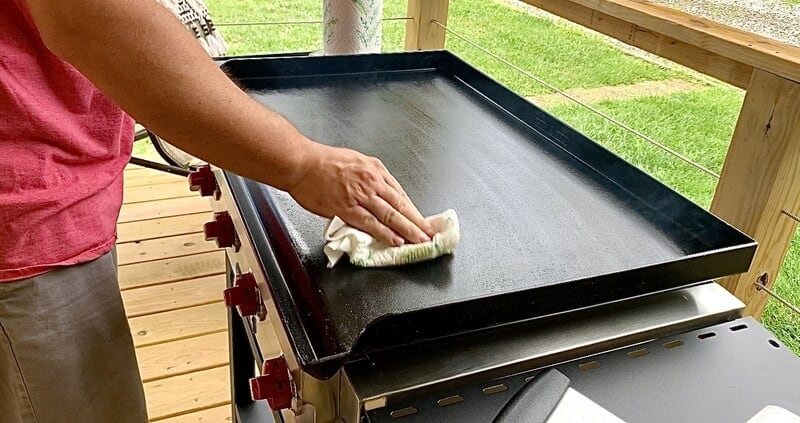
2. Apply A Thin Layer Of Oil
Pour a small amount of oil onto the hot surface. Fold a paper towel, grab with tongs, and spread oil over the entire cooking area, including corners and sides. It should look shiny but not pooled—wipe away excess.
Common mistake: Using too much oil causes sticky, uneven seasoning. Always wipe until there’s only a thin film.
3. Smoke And Set
Let the oil heat until it starts smoking. This means the oil is bonding with the metal. The smoke will be visible—this is normal. Keep the heat on until the smoke stops (about 10–15 minutes).
Practical tip: Ventilate your area well, especially indoors. Open windows or use a fan.
4. Repeat The Oiling Process
After the smoke stops, turn off the heat and let the surface cool slightly (just enough to touch with gloves). Repeat the oiling and smoking process 2–4 more times. Each layer makes the seasoning stronger and more even.
Non-obvious insight: The first layer often looks patchy or brown. This is normal. The color will even out after several layers and with cooking.
5. Final Cool Down
Let the flat top cool completely. The surface should now look dark and shiny. If you see sticky or wet spots, wipe with a dry towel and heat again to “fix” it.
6. Optional: Cook A Fatty Food
Some grill masters like to cook bacon or sausage as the first meal. The fat helps “fill in” the seasoning and adds flavor. This step is optional but adds a tasty touch.
Maintaining Your Seasoned Flat Top
Seasoning is not a one-time event. Every cook adds or removes a little oil. Here’s how to keep your flat top in great shape:
- After each use: Scrape off food bits while the flat top is still warm.
- Wipe with oil: Add a thin layer of oil before storing.
- Deep clean (rarely): Only use soap if you need to strip and reseason.
- Store covered: Keep dust and moisture off when not in use.
Common Problems And Solutions
| Problem | Cause | Solution |
|---|---|---|
| Sticky surface | Too much oil per layer | Heat until smoke stops, wipe excess |
| Rust spots | Not enough oil or water left on surface | Scrub rust, reseason area |
| Patches or flaking | Uneven oiling, old food bits | Strip with soap, start over |
| Bland taste | Not enough seasoning layers | Cook fatty foods, add more layers |
Choosing The Right Oil: In-depth Look
You might wonder why so many oils work. The answer is in their smoke point and how they “polymerize.” Flaxseed oil is a favorite for many because it creates a hard, smooth layer. But it’s more expensive and can be hard to find.
Canola oil is cheap, everywhere, and gives a neutral taste. Grapeseed and avocado oils are also excellent but cost more. Avoid butter or olive oil for seasoning—they have low smoke points and can turn sticky or burn.
Pro tip: Try different oils if you want to experiment with flavor. But always use high smoke point oils for the first few layers.
How Often Should You Reseason?
For home cooks, a full reseasoning is only needed if:
- You see rust
- Food starts to stick badly
- The surface looks dull or patchy
Otherwise, “touch up” seasoning happens every time you cook. Just add a thin oil layer at the end of each session.
Experience tip: Most commercial kitchens reseason fully every few months, but home users can go years if the flat top is cared for properly.
Cleaning After Each Use
Proper cleaning is key to long seasoning life. Here’s a routine:
- Scrape off food debris with a spatula while the surface is still warm.
- Wipe with a paper towel to remove grease and crumbs.
- Add a teaspoon of oil, spread with a towel for a thin layer.
- Let cool, then cover or store.
Never soak or submerge your flat top. Water causes rust and damages seasoning.
Dealing With Rust Or Old Flat Tops
If you inherit or buy a rusty flat top, don’t worry—it’s fixable. Here’s what to do:
- Scrub with steel wool or a grill stone to remove all rust and old seasoning.
- Wash with soap and water, then dry completely.
- Follow the full seasoning process as above.
Hidden detail: Sometimes, rust hides under the edges. Remove any screws or hardware and check underneath.
First Cook: What To Expect
Your first few cooks might not look perfect. Food might stick a bit, and the color might be patchy. This is normal. Each session will improve the surface.
Pro tip: Start with fatty foods like bacon, sausage, or burgers. Avoid acidic foods (like tomatoes) at first—they can strip seasoning.
Seasoning For Commercial Flat Tops
Commercial flat tops are often larger, with heavier steel. The process is the same but can take longer due to the bigger surface and thicker metal.
- Use more oil, but still in thin layers
- Heat may be uneven, so rotate your oiling pattern
- Some commercial units need extra time to reach full temperature
Industry insight: Some restaurants use beeswax or custom blends for extra-tough seasoning, but for home or small business use, regular oil is perfect.
Comparing Flat Top Seasoning Vs. Cast Iron Seasoning
While the process is similar, there are some differences between seasoning a flat top and a cast iron pan.
| Feature | Flat Top | Cast Iron Pan |
|---|---|---|
| Surface Area | Large, open | Small, curved |
| Oiling Method | Spread with towel, tongs | Use cloth or hand |
| Heat Distribution | May have hot/cold spots | Usually even |
| Layering | 3–5 thin layers | 2–3 layers |
| Maintenance | Wipe after each use | Wipe and dry after use |
Troubleshooting: When Things Go Wrong
Even with care, mistakes happen. Here’s how to fix common problems:
Sticky Or Gummy Surface
This happens if you use too much oil or don’t heat enough. To fix:
- Heat the flat top until it smokes again
- Wipe off any oil that pools or shines
- Repeat seasoning with less oil
Flaking Or Peeling Seasoning
This means the oil didn’t bond well or old food was trapped under layers. To fix:
- Scrub off the flaking area with a grill stone or steel wool
- Wash, dry, and reseason just that spot or the whole flat top
Persistent Rust
If rust keeps coming back, check your storage. Humidity or water left on the flat top is usually the cause. Always oil before storing and cover tightly.
Advanced Seasoning Techniques
Some cooks like to add extra layers for a super tough surface. Here’s how:
- Alternate oils: Use flaxseed for two layers, then canola for the next two. This can create a more complex, durable finish.
- Bake seasoning: For removable flat tops, you can place them in the oven at 450°F for one hour per layer (cool in oven). This is less common but creates a hard finish.
- Buff between layers: Let the surface cool slightly, then buff with a dry cloth before adding the next layer. This makes the surface shinier and smoother.
How Seasoning Affects Cooking
A good seasoning means:
- Eggs slide off without sticking
- Pancakes flip easily
- Steaks and burgers get a great sear
- Cleanup takes seconds
But, if your seasoning is thin or patchy, you’ll see food tearing or burning. That’s why the first seasoning is so important.
Credit: www.thegrillcoach.com
Seasoning For Different Flat Top Materials
Not all flat tops are the same. Most are made of steel or cast iron. Some cheaper models use chrome or stainless steel.
- Steel or cast iron: Follow the full oil seasoning process.
- Chrome or stainless steel: Usually do not need traditional seasoning. Just keep clean and add a little oil before cooking.
Warning: Never use heavy abrasives on chrome surfaces—they can scratch and ruin the finish.
Seasoning For Outdoor Vs. Indoor Flat Tops
- Outdoor flat tops (like Blackstone): More exposed to moisture and dirt. Always oil and cover after use.
- Indoor flat tops: Less risk of rust but still need regular oiling.
Pro tip: In humid areas, add an extra oil layer before long storage periods.

Credit: www.youtube.com
How To Strip And Reseason
If your flat top has years of buildup or sticky spots, start over:
- Scrub with grill stone or steel wool until bare metal shows.
- Wash with soap and water.
- Dry completely.
- Follow the seasoning steps above.
Experience tip: Stripping and reseasoning can bring old, rusty flat tops back to life. Don’t be afraid to start fresh if needed.
Comparing Popular Flat Top Brands
Some flat tops need more seasoning than others due to their finish or material. Here’s a look at three popular brands:
| Brand | Material | Factory Seasoning | User Reseasoning Needed? |
|---|---|---|---|
| Blackstone | Cold-rolled steel | No | Yes |
| Camp Chef | Steel | Light coating | Yes |
| Royal Gourmet | Steel | None | Yes |
Most flat tops come with only a light protective oil. Always do a full seasoning before first use.
Frequently Asked Questions
How Long Does Seasoning A Flat Top Take?
The whole process usually takes about 1–2 hours. Each oil layer needs 10–15 minutes to smoke and set, and you’ll need 3–5 layers for best results. Most of the time is waiting for the oil to bond and the surface to cool between layers.
Can I Use Olive Oil For Seasoning?
It’s not recommended. Olive oil has a low smoke point (about 350°F/177°C), so it can burn and turn sticky. Use oils with a smoke point above 400°F, like canola, flaxseed, or grapeseed oil.
What Should I Do If My Flat Top Gets Rusty?
Don’t panic. Scrub off the rust with steel wool or a grill stone, wash with soap and water, dry completely, and then repeat the seasoning process. Rust is common, especially in humid climates or after long storage.
Does Seasoning Affect The Taste Of Food?
A well-seasoned flat top adds a neutral, slightly savory flavor over time. It should not taste oily or strange. If you notice a bad taste, the oil may have gone rancid, or you used too much. Strip and reseason if needed.
Do I Need To Season A Stainless Steel Flat Top?
Usually not. Stainless steel does not react the same as regular steel or cast iron. Just keep it clean and use a little oil before cooking. However, some cooks like to add a light layer for extra non-stick effect.
For more science on seasoning, check out Wikipedia’s cookware seasoning page.
Seasoning your flat top is a simple process, but doing it right makes all the difference in your cooking. With care, your flat top will get better every time you use it—delivering flavor, performance, and years of enjoyable meals.