Sharpening knives keeps your kitchen running smoothly. But what if you don’t own a fancy sharpener? Maybe you’re cooking at a friend’s house, camping outdoors, or your sharpener simply broke. The good news: you can still get a sharp edge using everyday items. With the right technique, your knife can slice tomatoes, bread, and meat with ease—even without a professional tool. This guide shows you how to sharpen knives without a sharpener, using items you probably already have. You’ll learn safe, simple methods, understand what works (and what doesn’t), and discover secrets even some cooks miss.
Why Knife Sharpness Matters
A dull knife is more dangerous than a sharp one. When a knife is blunt, you have to push harder. This increases the risk of slipping and cutting yourself. Plus, dull knives bruise food instead of making clean cuts, which can ruin texture and taste.
In fact, professional chefs sharpen their knives almost daily. Studies show a sharp knife can reduce prep time by up to 30%, and accidents by nearly 50%.
You don’t need a chef’s skills to enjoy these benefits. Anyone can keep knives sharp with basic household items—if you know what to do.
How Knife Edges Work
Before using any sharpening method, it helps to know how knife edges dull. Knives lose sharpness because the blade edge bends, rolls, or gets tiny chips. To fix this, you need to realign the edge (called honing) or remove small amounts of metal to create a new edge (sharpening).
Honing straightens the edge without removing much material. Sharpening actually grinds away metal for a new, sharp line. Many household methods do both, but some are better for daily touch-ups while others fix serious dullness.
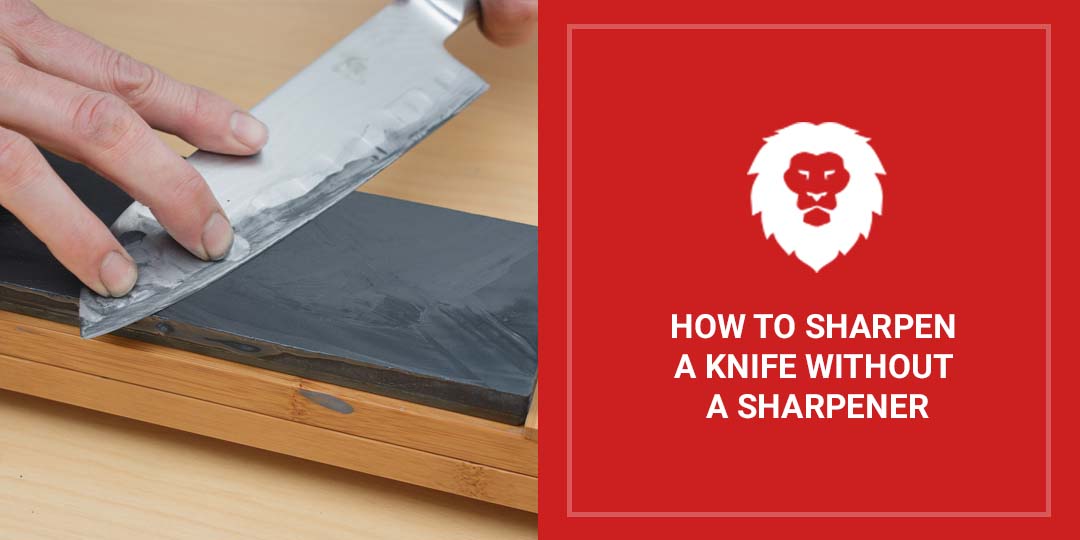
Credit: www.redlabelabrasives.com
Essential Safety Tips
Sharpening knives without proper tools can be risky. Here’s how to protect your hands:
- Stabilize the item you’re using. Place it on a flat surface, or hold it steady with a towel underneath.
- Keep your fingers away from the edge.
- Use gentle, controlled movements. Rushing leads to slips.
- Work in good lighting, so you can see the blade clearly.
If you feel uncomfortable with a method, try a different one. Never force the blade.
Methods To Sharpen Knives Without A Sharpener
There are several proven ways to bring back a sharp edge using common items. Each method has pros and cons. Some are fast but only offer a quick fix; others can restore a very dull blade.
1. Using A Ceramic Mug
The unglazed ring on the bottom of a ceramic mug works like a sharpening stone. Here’s how:
- Flip the mug over to expose the rough, unglazed rim.
- Hold the mug steady on a towel.
- Hold the knife at a 15-20 degree angle.
- Draw the blade across the rough edge, moving from the base to the tip.
- Repeat 8-10 times per side.
Why does this work? The rough ceramic gently grinds metal, creating a fresh edge. This method is safe for most kitchen knives and gives a noticeable improvement. However, it’s less effective for very thick or serrated blades.
Pro Tip
Don’t press too hard. Let the weight of the knife do the work.
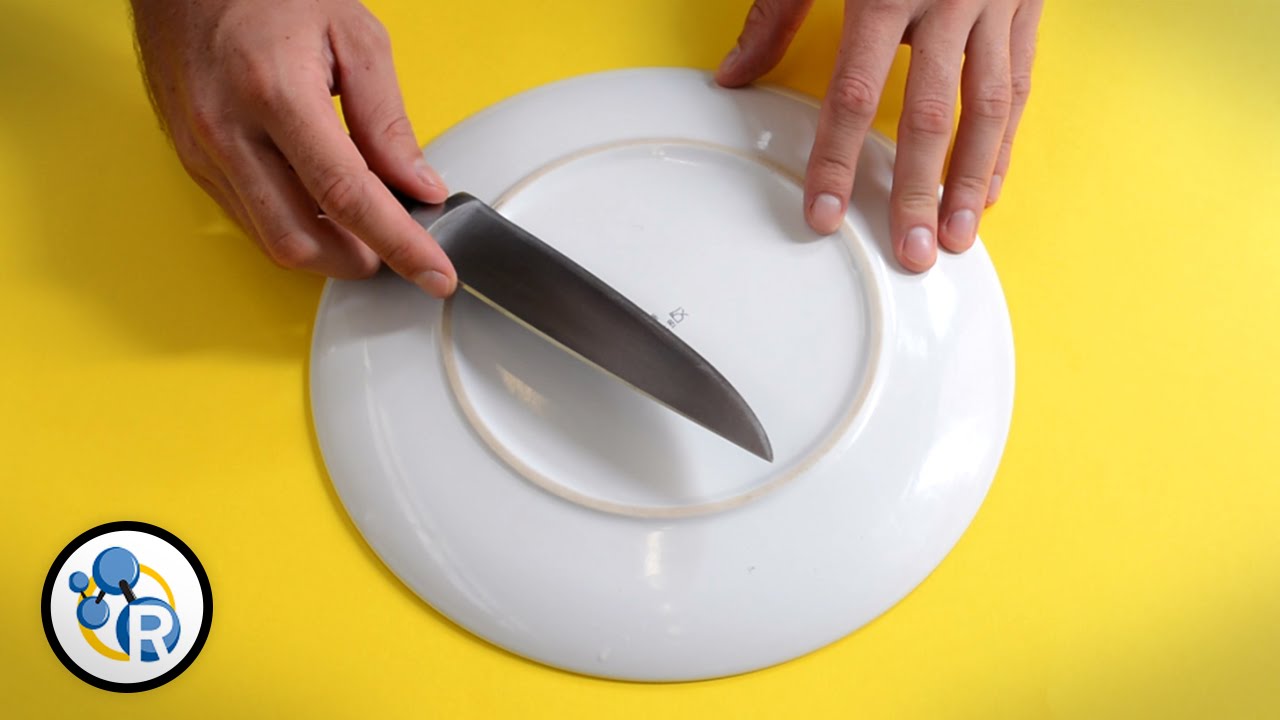
2. Using The Bottom Of A Plate
Similar to a mug, most plates have an unglazed ring underneath. The process is almost identical:
- Turn the plate upside down.
- Secure it with a towel.
- Hold the knife at a 15-20 degree angle and draw the blade across the rough edge.
- Do 8-10 strokes per side.
Plates offer a longer surface, which is useful for larger knives. Just be careful not to scratch your countertop.
3. Using A Honing Rod (if Available)
While not technically a “sharpener,” a honing rod straightens the edge. Many people have one without realizing it—some knife sets include them.
- Hold the rod vertically, tip on a towel.
- Place the knife at a 15-20 degree angle.
- Swipe each side of the blade from base to tip, alternating sides.
- Repeat 6-8 times.
Honing rods don’t remove much metal, but they work wonders for edges that are bent, not chipped.
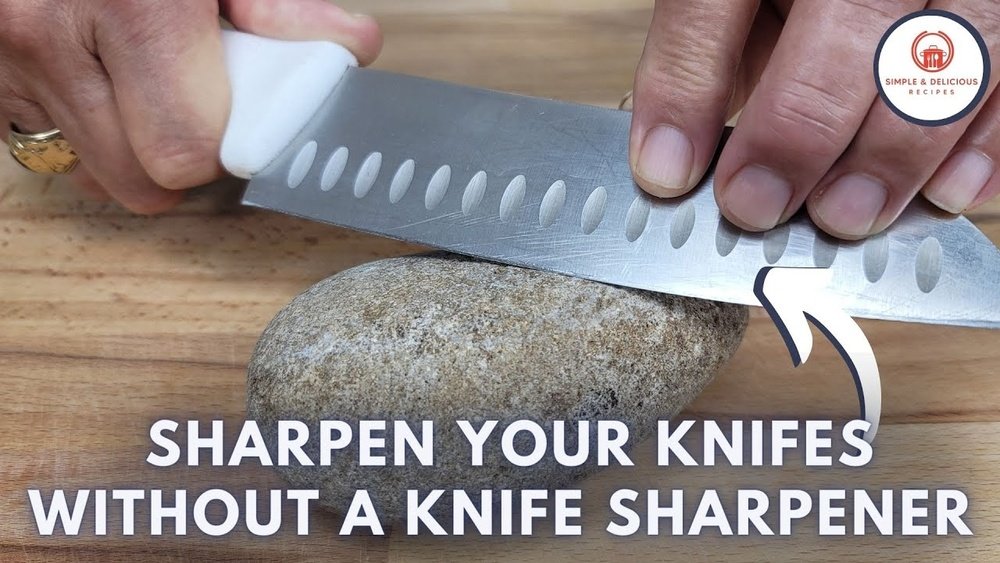
4. Using A Flat River Rock
If you’re outdoors or camping, a smooth flat stone can save the day. The best rocks are fine-grained and not too rough.
- Rinse off any dirt.
- Splash water on the rock for lubrication.
- Hold the knife at a 15-degree angle.
- Slide the blade across the stone, base to tip, 10-15 times per side.
This method is slow but effective. It’s been used for thousands of years. Avoid rocks with visible grit—they can scratch or chip your knife.
5. Using Sandpaper
Fine sandpaper (400-1000 grit) can sharpen knives well. Here’s how:
- Lay a sheet of sandpaper on a flat surface.
- Hold the knife at a 15-degree angle.
- Draw the blade across the sandpaper, base to tip.
- Repeat 8-12 times per side.
Sandpaper works for both honing and sharpening, depending on the grit. Finer grits are better for final polishing.
6. Using A Car Window
This trick is popular among outdoor enthusiasts. The uncoated edge at the top of a car window is slightly abrasive.
- Roll down the window halfway.
- Hold the knife at a 15-degree angle.
- Glide the blade along the top edge, as you would with a sharpening stone.
- Repeat several times per side.
Car glass is hard enough to sharpen steel, but be gentle—too much pressure can chip the blade.
7. Using The Spine Of Another Knife
This method is for emergencies only. The spine (thick, non-cutting edge) of a second knife can realign a bent edge.
- Hold one knife steady, spine up.
- Draw the dull blade along the spine at a 15-degree angle, as if honing.
- Use light, controlled strokes.
This doesn’t truly sharpen, but can restore some cutting ability.
8. Using A Leather Belt
A leather belt can “strop” a knife, polishing the edge after sharpening.
- Hang the belt or lay it flat.
- Hold the blade at a low angle (10 degrees).
- Draw the knife away from the edge (not cutting into the leather).
- Repeat 10-15 times per side.
Stropping removes tiny burrs and gives a razor-sharp finish. It’s especially useful after using sandpaper or a stone.
9. Using A Nail File (emery Board)
A nail file is a compact sharpening tool. Emery boards work best.
- Hold the file steady on a flat surface.
- Place the knife at a 15-degree angle.
- Draw the blade across the rough side, base to tip.
- Repeat on both sides.
This method is slow, but good for small pocket knives.
10. Using Concrete Steps Or Sidewalk
In a pinch, smooth concrete can sharpen a knife.
- Choose a clean, flat part of the sidewalk.
- Hold the knife at a 15-degree angle.
- Gently drag the blade across the concrete, base to tip.
- Do 5-8 strokes per side.
Concrete is very abrasive, so use a light touch. This method can remove a lot of metal quickly.
11. Using The Edge Of A Brick
Like concrete, the edge of a brick is rough enough to grind steel.
- Find a clean, flat brick.
- Hold the knife at a 15-degree angle.
- Slide the blade along the edge, both sides.
This works for very dull knives, but can leave a rough finish. Strop with leather or cloth afterward.
12. Using The Edge Of A Car Door Window (alternative To Car Glass)
Some car doors have a metal edge or trim that’s slightly rough. In an emergency:
- Roll down the window.
- Use the exposed metal or glass edge as a sharpening surface.
This is less effective than a ceramic mug but can help if you’re stuck outside.
13. Using Aluminum Foil
This method is more for scissors, but some people use it for knives.
- Fold a piece of aluminum foil several times.
- Cut through the layers with the knife.
- Repeat 10-20 cuts.
This helps remove burrs but doesn’t sharpen as well as other methods.
14. Using The Inside Of A Toilet Tank Lid
The unfinished ceramic inside the lid is similar to a mug’s bottom.
- Remove the lid carefully.
- Use the unglazed surface as a sharpening stone.
It’s an odd trick, but it works if you’re desperate.
15. Using A Flat Piece Of Tile
A ceramic tile with an unfinished edge can work like a mug.
- Find a tile with a rough, unglazed side.
- Draw the blade across at a 15-degree angle.
Good for kitchens with leftover tiles or construction sites.
16. Using The Bottom Of A Glass Jar
Many glass jars have a slightly rough base.
- Flip the jar over.
- Use the rough edge to sharpen the knife.
Not as effective as ceramic, but can help in a pinch.
17. Using A Shovel Blade (for Outdoor Use)
A shovel blade can work as a rough sharpening surface.
- Clean the blade first.
- Use the back edge, not the cutting side.
- Draw the knife across at a 15-degree angle.
This is common among gardeners and campers.
18. Using A Smooth Piece Of Steel
A steel rod or smooth metal bar can hone an edge, similar to a honing rod.
- Hold steady on a towel.
- Draw the knife at a 15-degree angle.
This method is more about straightening than grinding.
19. Using A Piece Of Cardboard
Cardboard is not abrasive enough to sharpen, but it’s great for stropping.
- Lay a piece of thick cardboard flat.
- Drag the knife blade backward (away from the edge).
This helps polish and realign, especially after using rougher methods.
20. Using A Professional’s Help
If all else fails, sometimes the best method is to visit a pro. Many hardware stores, butcher shops, or farmer’s markets offer knife sharpening for a small fee. This is especially wise for expensive or sentimental knives.
Comparing Common Household Sharpening Methods
It can be hard to know which method to choose. Here’s a comparison of four popular options:
| Method | Effectiveness | Ease of Use | Best For | Downside |
|---|---|---|---|---|
| Ceramic Mug | High | Easy | Kitchen knives | Small surface area |
| Sandpaper | Medium-High | Medium | All knife types | Needs replacement |
| Car Window | Medium | Easy | Pocket knives | Can chip blade |
| Concrete | High (Rough) | Medium | Very dull knives | Leaves rough edge |
Honing Vs. Sharpening: What’s The Difference?
Many people confuse honing with sharpening. Both are important, but they do different things.
| Action | What It Does | Tools/Methods | How Often |
|---|---|---|---|
| Honing | Straightens edge, fixes bends | Honing rod, steel, leather, cardboard | Every use or weekly |
| Sharpening | Removes metal, creates new edge | Ceramic, sandpaper, rock, plate | Monthly or as needed |

Credit: www.knafs.com
Step-by-step Guide: Sharpening Safely And Effectively
No matter which method you choose, follow these steps for the best results:
- Clean the knife before sharpening. Dirt can scratch the blade.
- Choose your method based on what’s available and the knife’s condition.
- Set the right angle. Most kitchen knives work best at 15-20 degrees.
- Use even strokes. Start at the base, finish at the tip.
- Repeat on both sides to keep the edge centered.
- Test sharpness by slicing a sheet of paper or a tomato.
- Strop with leather or cardboard for a polished finish.
- Wash the knife to remove metal particles.
Common Mistakes To Avoid
- Wrong angle: Too steep or shallow can dull the edge.
- Too much pressure: Can damage the knife or the surface.
- Uneven strokes: Leaves the blade lopsided.
- Skipping final polish: The edge won’t be as sharp or smooth.
When To Use Each Method
Some methods are better for quick fixes, others for deep sharpening.
- Quick touch-up: Leather belt, cardboard, honing rod, car window.
- Full sharpening: Ceramic mug, sandpaper, river rock, concrete.
- Emergency only: Knife spine, aluminum foil, car door, shovel.
If your knife is very expensive, avoid the roughest methods (concrete, brick, etc. ).
Knife Types And Which Methods Work Best
Not all knives are the same. Here’s a quick overview:
| Knife Type | Best Methods | Methods to Avoid |
|---|---|---|
| Chef’s knife | Ceramic mug, sandpaper, plate, honing rod | Concrete, brick, car door |
| Pocket knife | River rock, car window, sandpaper, nail file | Plate, tile |
| Serrated knife | Honing rod, sandpaper (edge only) | Ceramic mug, concrete, brick |
| Paring knife | Ceramic mug, plate, nail file | Shovel, brick |
Two Advanced Secrets Most People Miss
- Polishing after sharpening is as important as grinding the edge. Stropping with leather or cardboard removes tiny burrs, giving you a sharper, longer-lasting edge. Most beginners skip this step and wonder why their knife dulls quickly.
- Angle consistency beats pressure. Many people press hard, thinking this helps. In reality, keeping a steady, correct angle is much more important. Even light strokes at the right angle will sharpen better than heavy, uneven ones.
How To Test Knife Sharpness
After sharpening, always test your knife carefully.
- Paper test: Hold a piece of paper. Try slicing down—if the knife glides through, it’s sharp.
- Tomato test: Try cutting a tomato. A sharp knife cuts cleanly without crushing.
- Fingernail test: (Advanced) Gently rest the edge on your fingernail. If it “bites” slightly, it’s sharp. Be careful not to cut yourself.
If the knife fails these tests, repeat the sharpening process or use finer polish.
Caring For Your Knife After Sharpening
A sharp knife is a tool worth protecting. Here’s how to keep it sharp longer:
- Hand wash only. Dishwashers dull blades.
- Dry immediately. Water causes rust.
- Store safely. Use a knife block, sheath, or magnetic strip.
- Cut on soft surfaces. Use wood or plastic boards, not glass or stone.
- Regular honing. Touch up the edge every few uses.
Following these tips can keep your knife sharp for weeks, even with heavy use.
Credit: www.youtube.com
Times When You Should Not Sharpen Without A Sharpener
Some situations call for caution:
- Very expensive knives: Risk of damage is high. Seek a pro.
- Serrated knives: Most household methods can ruin the teeth.
- Damaged blades: If the knife is chipped, bent, or broken, professional repair is best.
If you’re unsure, it’s safer to wait and get expert help.
Sharpening Knives Without A Sharpener: A Real-world Example
Imagine you’re camping, and your only kitchen knife is dull. You can’t cut vegetables for dinner. There’s no sharpener, but you find a smooth river rock. You follow the steps above, using water for lubrication. After a few minutes, your knife slices carrots and potatoes easily.
You finish with a leather belt, and the blade shines.
At home, you use a ceramic mug for regular touch-ups, keeping your favorite chef’s knife ready for any meal. These simple methods can turn a frustrating cooking experience into a smooth, enjoyable one.
Frequently Asked Questions
What Is The Safest Household Item To Sharpen A Knife?
The ceramic mug is often the safest. Its unglazed base is abrasive enough to sharpen, but not so rough that it damages the knife. It’s stable, easy to use, and found in almost every kitchen.
How Often Should I Sharpen My Knife Without A Sharpener?
For home cooks, once a month is a good rule if you cook regularly. Touch up with honing methods (leather, steel, or cardboard) every week or after a heavy cooking session. If the knife feels dull while cutting, it’s time to sharpen.
Can I Use These Methods For Expensive Knives?
You can, but be careful. Avoid rough methods like concrete or brick for high-end knives. Stick to ceramic, plate, leather, or sandpaper. If in doubt, let a professional handle your best knives.
Is It Possible To Over-sharpen A Knife?
Yes. Removing too much metal shortens the knife’s life. Use gentle, controlled strokes and stop once the blade is sharp. Polishing with leather or cardboard is safe and won’t damage the blade.
Are There Any Items I Should Never Use To Sharpen A Knife?
Avoid glass cutting boards, granite counters, and very rough stones. These can chip or severely dull the blade. Also, never use the knife’s own edge for sharpening—use the spine or another tool instead.
For more about knife sharpening history and techniques, see this Wikipedia page on sharpening.
A sharp knife is a joy to use—and with these simple methods, you never have to struggle with a dull blade again. Whether you’re at home, outdoors, or in an emergency, you can restore your knife’s cutting power safely and effectively.
Happy cooking!