

Floating shelves in the kitchen have become more than just a trend—they’re a smart solution for both storage and style. When done right, these open shelves can make your kitchen look bigger, brighter, and more inviting. But many people struggle to decorate floating shelves without making them look cluttered or awkward.
The good news? With some simple strategies, anyone can turn their kitchen shelves into a beautiful, organized feature.
If you’ve ever scrolled through home design sites and wondered how those picture-perfect kitchens get their open shelving just right, you’re not alone. Styling floating shelves is a mix of creativity, practicality, and a little bit of planning. Whether you have a small kitchen or a spacious one, open shelving gives you a chance to show off your favorite dishes, add personality, and keep everyday items within reach.
This guide will walk you through everything you need to know about decorating floating shelves in your kitchen. You’ll learn how to choose the right items, arrange them for maximum impact, and avoid common mistakes. You’ll also discover clever tips that even experienced decorators sometimes miss.
Let’s dive in and transform your kitchen shelves from plain to stunning.
Why Choose Floating Shelves For Your Kitchen?
Floating shelves are popular for good reason. Unlike traditional cabinets, they open up wall space and make your kitchen feel airier. They’re also flexible: you can use them for storage, for display, or both.
One of the biggest benefits is visibility. With open shelves, you can see everything at a glance. This makes it easier to grab what you need and also encourages you to keep things tidy. Plus, floating shelves are often less expensive than full cabinetry, making them a budget-friendly way to upgrade your kitchen.
Another advantage is customization. You can install shelves at any height, in any length, and in almost any finish you want. Whether your style is modern, farmhouse, or classic, floating shelves can fit right in. And because they’re open, you can easily change up the look whenever you want—just swap out the items on display.
Key Principles Of Floating Shelf Decoration
Before you start decorating, it helps to understand a few basic principles. These guidelines will help your shelves look balanced and intentional, not random or messy.
Balance And Symmetry
When you look at a well-designed shelf, you might notice it feels “just right.” That’s often because of balance. Try to spread visual weight evenly across the shelves. For example, if you put a tall vase on one side, balance it with something similar in height or visual weight on the other side.
Symmetry can work well, but it’s not always necessary. Sometimes, a slightly off-center arrangement feels more relaxed and natural. The goal is to make sure one side doesn’t look much heavier than the other.
Layering And Depth
Flat arrangements look boring. Add depth by placing items in front of each other. For example, put a plate or cutting board at the back, then layer smaller items like cups or spice jars in front. This gives your shelves a three-dimensional look that’s much more interesting.
Repetition And Rhythm
Repeating shapes, colors, or materials helps tie everything together. For example, use several white dishes or a few wooden accents across the shelves. This repetition creates a rhythm that’s pleasing to the eye.
Functionality
Remember, kitchen shelves aren’t just for looks. They should be practical, too. Place items you use often within easy reach. Reserve the top shelves for things you use less often or just want to display.
Choosing The Right Floating Shelves
Not all floating shelves are created equal. The shelves you choose will affect both the look and the strength of your kitchen setup. Here’s what to consider:
Material
- Wood: Warm, classic, and fits with most kitchen styles. Solid wood shelves are strong but may need sealing to handle moisture.
- Metal: Sleek and modern. Good for an industrial or contemporary look. Metal shelves are sturdy and easy to clean.
- Glass: Makes a small kitchen look open and light. However, glass requires more cleaning and isn’t suitable for heavy items.
Size And Thickness
The depth of the shelf matters. For kitchen use, shelves between 8 to 12 inches deep are ideal. They’re deep enough to hold plates and bowls but not so deep that items get lost at the back.
Thickness also affects the shelf’s strength. Thicker shelves can support more weight and look more substantial, but they may need stronger wall anchors.
Brackets And Mounting
True floating shelves have hidden brackets, but some designs show the supports as a style feature. Make sure your shelves are properly mounted. Kitchen items can be heavy, so use wall anchors or mount into studs for safety.
Finish
Choose a finish that fits your kitchen. For example, a natural wood shelf can warm up a white kitchen. Painted shelves can match or contrast with your walls or cabinets.
Planning Your Shelf Layout
Before you start putting items on your shelves, take a few minutes to plan. This step saves time and helps prevent overcrowding.
Measure Your Space
Use a tape measure to check the length, depth, and distance between each shelf. This helps you choose the right items and avoid buying things that won’t fit.
Think About Zones
Divide your shelves into zones: one for everyday dishes, one for display, one for cooking essentials, etc. This keeps your kitchen organized and helps you find things faster.
Sketch Your Arrangement
Draw a quick sketch of your shelves and try different layouts. Move items around on paper before you start placing them on the shelves. This small step can help you spot problems before they happen.
What To Put On Floating Kitchen Shelves
The best kitchen shelves are a mix of practical and decorative items. Here are some ideas to get you started:
- Plates and Bowls: Stack neatly for easy access.
- Cups and Glasses: Arrange in rows or clusters.
- Mugs: Hang from hooks under the shelf or stack them.
- Cookbooks: Prop up a few favorites.
- Jars and Canisters: Store dry goods like pasta, rice, or flour.
- Spices: Line up small jars or use a tiered rack.
- Cutting Boards: Lean against the wall for texture.
- Serving Trays: Stack or stand on end.
- Vases: Fill with fresh or dried flowers.
- Plants: Add greenery for life and color.
- Art Prints or Photos: Stand small frames at the back.
- Bowls of Fruit: Adds color and makes snacks easy to grab.
- Teapots or Coffee Makers: Display pretty or vintage pieces.
- Candles: Use unscented candles for a cozy touch.
- Mixing Bowls: Nest together for a tidy look.
Try to mix materials—ceramic, glass, wood, metal—for more visual interest. Don’t feel like you need to fill every inch. Negative space helps your shelves breathe and makes each item stand out.
How To Arrange Items For Style And Function
Arranging your shelves is where the magic happens. Here’s a step-by-step process to get it right:
Start With Larger Items
Place your biggest items first, such as plates, cutting boards, or large canisters. These anchor the arrangement and set the tone for the rest of the shelf.
Add Medium-sized Objects
Next, add items like mugs, bowls, or jars. Place them beside or slightly in front of your larger items. Try to avoid lining everything up in a straight row; stagger heights and depths for a more natural look.
Fill In With Small Accessories
Use small pieces—like salt cellars, tiny vases, or spice jars—to fill gaps and add detail. These should be the last things you add, as they’re easy to move around.
Use The Rule Of Thirds
Designers often use the rule of thirds: divide your shelf visually into three parts and group items in odd numbers. For example, place three mugs together, or two bowls and a vase.
Leave Space
Don’t overload your shelves. Leave some open areas to let the eye rest. This also makes it easier to take items on and off the shelf.
Create Layers
Layer items from back to front. For example, lean a serving tray or art print against the wall, then place a stack of plates in front and a small vase off to the side.
Alternate Heights And Shapes
Mix tall and short, round and square. This makes your shelves look more dynamic and less stiff.
Real-life Example Shelf Arrangements
Let’s look at two sample shelf setups—one for a small kitchen, one for a large kitchen.
Small Kitchen: Practical And Pretty
- Top Shelf: Two small plants on each end, a stack of three bowls, and a framed art print in the center.
- Bottom Shelf: Everyday plates stacked to one side, clear canisters of rice and pasta, and a row of three mugs.
This setup keeps daily items within reach but also adds personality through art and plants.
Large Kitchen: Display And Storage
- Top Shelf: Large ceramic pitcher, a stack of cookbooks, and a wooden cutting board leaning at the back.
- Middle Shelf: Glass canisters of flour, sugar, and coffee; a small vase of flowers; and a row of wine glasses.
- Bottom Shelf: Mixing bowls, a fruit bowl, and a teapot.
With more space, you can show off collections and keep ingredients handy.
Common Mistakes To Avoid
Even the best ideas can go wrong with a few simple mistakes. Here’s what to watch out for:
Overcrowding
It’s tempting to use every inch, but crowded shelves look messy and stressful. Less is often more.
Ignoring Function
Pretty shelves are great, but not if you can’t reach what you need. Make sure essentials are easy to grab.
Inconsistent Style
Too many colors or styles can look chaotic. Try to stick to a color palette or repeat materials for harmony.
Forgetting About Weight
Kitchen items can be heavy. Make sure your shelves and brackets can support what you put on them. Avoid putting heavy appliances or lots of stacked plates on a single shelf.
Not Cleaning Regularly
Open shelves collect dust and grease quickly. Wipe them down often to keep everything looking fresh.
Creative Styling Ideas For Kitchen Floating Shelves
If you want your shelves to stand out, try these creative ideas:
Color Coordination
Pick a main color and use it in several items. For example, use blue dishes, a blue vase, and a blue art print. This ties the look together and makes your shelves look planned.
Seasonal Decor
Change up your shelves for each season. In summer, add fresh flowers and citrus fruits. In winter, use pinecones, small wreaths, or holiday mugs.
Personal Touches
Include something personal, like a family photo, a souvenir from a trip, or your grandmother’s teapot. These items make your kitchen feel truly yours.
Themed Arrangements
Try a coffee shelf with mugs, a French press, and coffee beans. Or a baking shelf with mixing bowls, a rolling pin, and a cookbook.
Lighting
Install small LED strips under the shelves for a warm glow. This makes your kitchen cozier and helps you see better when cooking.
How To Maintain And Clean Floating Shelves
Shelves in the kitchen get dirty faster than in other rooms. Here’s how to keep them looking good:
- Wipe Down Weekly: Use a damp cloth to remove dust and grease. Avoid harsh cleaners that can damage wood or paint.
- Clean Items Regularly: Wash dishes, jars, and vases often to keep them shiny.
- Check for Damage: Once a month, check that shelves are still secure and that brackets are tight. Fix any loose parts right away.
- Rotate Display Items: Move things around every few months. This prevents dust buildup and keeps your kitchen feeling fresh.
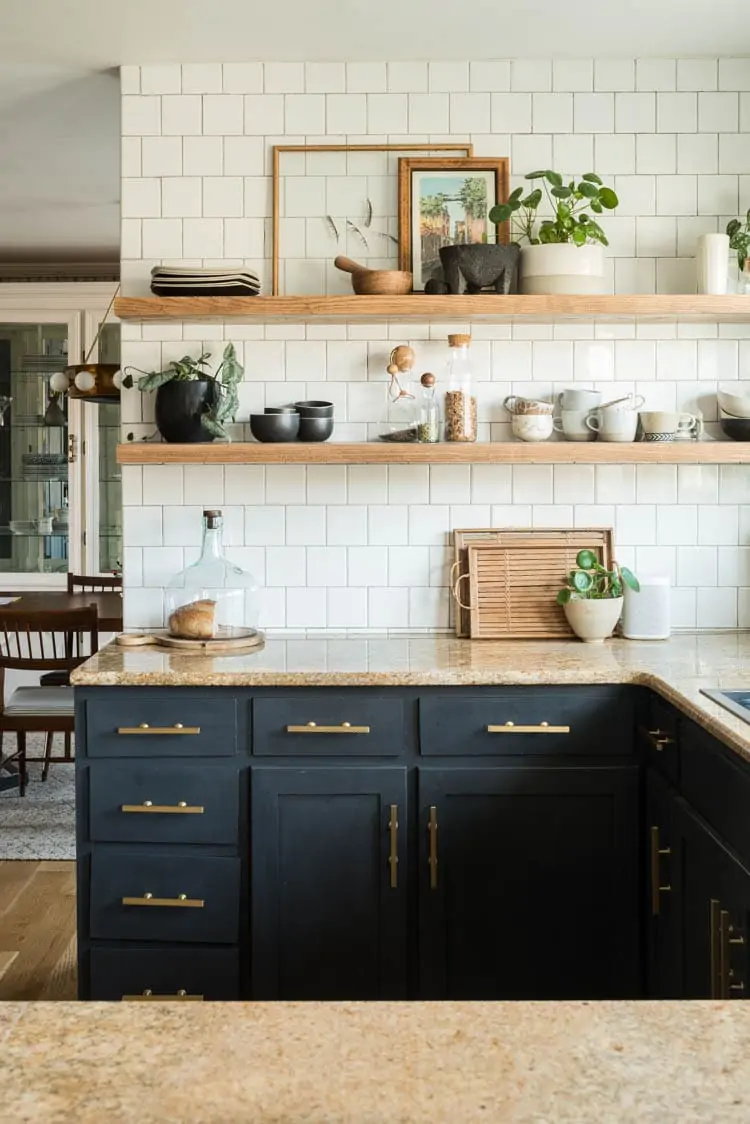
Credit: biggerthanthethreeofus.com
Mixing Open Shelves With Cabinets
You don’t have to choose between open shelves and closed cabinets. The best kitchens often mix both. Use floating shelves for items you use often or want to display, and keep less attractive or rarely used items behind closed doors.
A good mix might be: upper cabinets on one wall, floating shelves above the sink or stove, and lower cabinets for heavy pots and pans. This gives you the best of both worlds—practical storage and open, airy style.
Styling Floating Shelves For Different Kitchen Styles
Floating shelves fit many kitchen looks. Here’s how to adapt them to your style:
Modern Kitchens
Use shelves in white, black, or metal. Keep items minimal and stick to a simple color palette. Show off sleek dishes and glassware.
Farmhouse Kitchens
Choose wood shelves with a natural or distressed finish. Add vintage jars, ceramic pitchers, and woven baskets. Display everyday dishes and a few rustic accessories.
Minimalist Kitchens
Go for thin, simple shelves in a color that matches your walls. Only display what you use daily. Hide everything else.
Eclectic Kitchens
Mix and match shelves in different finishes or colors. Combine quirky mugs, colorful plates, and small art pieces. The key is to keep it fun but not chaotic.
Scandinavian Kitchens
Light wood shelves, lots of white, and a touch of greenery. Use simple dishes and a few natural materials like stone or clay.
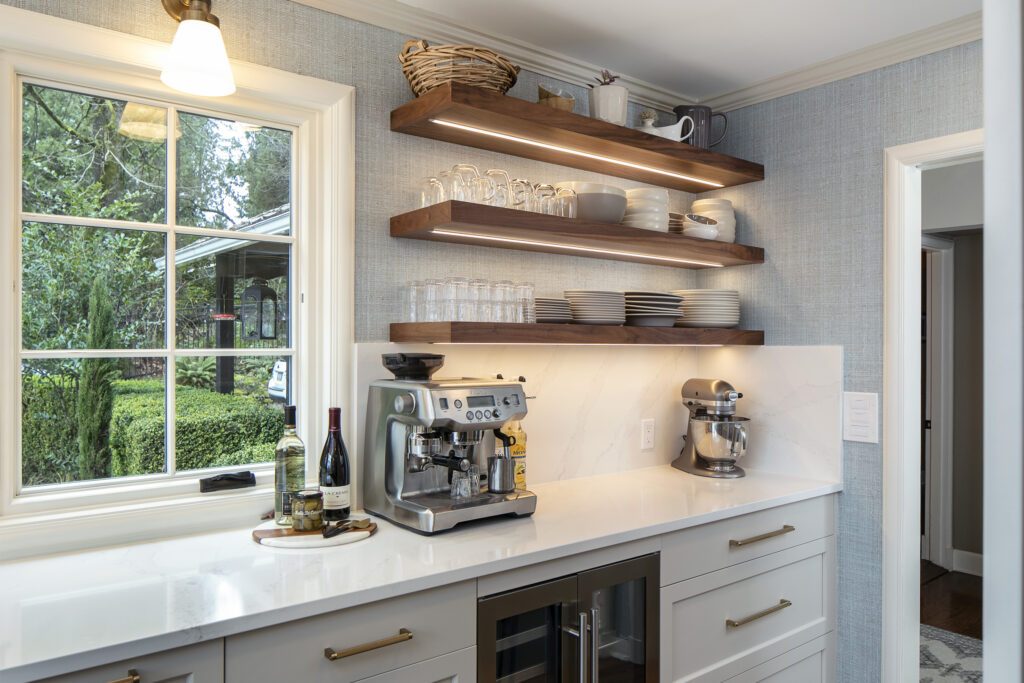
Credit: decorcabinets.com
Floating Shelf Safety: What You Need To Know
Safety matters, especially in the kitchen. Here are a few tips to keep your shelves secure and your kitchen safe:
- Install into Wall Studs: This gives your shelves the most support. Use a stud finder before drilling.
- Use the Right Hardware: Heavy-duty brackets or anchors are a must for kitchen shelves.
- Distribute Weight Evenly: Don’t put all your heavy items on one end. Spread them out.
- Don’t Overload: Check the manufacturer’s weight limit and stay under it.
- Keep Sharp Items Safe: Don’t store knives or dangerous tools on open shelves, especially if you have kids.
Comparing Floating Shelves To Other Kitchen Storage
To help you decide if floating shelves are right for you, here’s a comparison with other common storage options.
| Feature | Floating Shelves | Upper Cabinets | Open Racks |
|---|---|---|---|
| Visibility | High | Low | High |
| Cost | Low to Medium | Medium to High | Low |
| Customizability | High | Medium | Medium |
| Storage Space | Medium | High | Medium |
| Ease of Cleaning | Medium | High | Low |
Best Materials For Kitchen Floating Shelves
Different materials offer different looks and strengths. Here’s how some common options compare:
| Material | Pros | Cons |
|---|---|---|
| Solid Wood | Strong, classic look, can be stained or painted | Can warp with moisture, needs sealing |
| Plywood | Affordable, stable, easy to paint | Edges need covering, not as strong as solid wood |
| Metal | Modern, very strong, easy to clean | Can scratch, cold look |
| Glass | Makes space look open, elegant | Shows fingerprints, not for heavy items |
| Laminate | Budget-friendly, many colors | Less durable, can chip |
Floating Shelf Styling Tips From Designers
Professional designers use a few tricks to get that magazine-ready look. Here are some insider tips:
- Odd Numbers Work Best: Arrange items in groups of 3 or 5 for a more natural look.
- Mix Textures: Combine smooth ceramics, rough wood, shiny glass, and soft greenery.
- Go Vertical: Use tall items to draw the eye up and make the ceiling feel higher.
- Add Art: A small framed print or piece of pottery adds personality.
- Edit Often: Don’t be afraid to remove items. Sometimes less is more.
- Play with Negative Space: Empty spots make the shelf feel lighter and more modern.
Non-obvious Insights For Beginners
Many people miss these points when styling kitchen shelves:
- Use Shelf Liners: A thin, clear liner can protect wood shelves from scratches and spills. They’re almost invisible but add a layer of safety.
- Think About Lighting: Natural and artificial light can change how your shelves look. Try to place shelves near a window, or add under-shelf lighting for extra impact.
- Store Items by Frequency: Place everyday items on the middle shelf (at eye level), less-used items on the top, and heavy items on the bottom. This small tweak makes your kitchen more efficient.
- Rotate Decor: Change your display with the seasons or when you get new items. This keeps your kitchen feeling fresh without a full remodel.
Floating Shelf Inspiration Sources
Looking for more ideas? Check out kitchen design magazines, Pinterest, and Instagram. You can also visit showrooms or watch home makeover shows for real-life examples. For more technical details about shelf types and installation, see this Wikipedia article.

Credit: www.youtube.com
Frequently Asked Questions
How Do I Keep My Floating Kitchen Shelves From Sagging?
Install shelves into wall studs using heavy-duty brackets. Check the manufacturer’s weight limit and avoid overloading. Spread weight evenly, and if your shelf still sags, consider using additional hidden supports.
Are Floating Shelves Practical For Everyday Kitchen Storage?
Yes, if you plan carefully. Keep everyday items on the lower shelves for easy access. Use upper shelves for display or less-used items. Make sure to clean regularly to avoid dust and grease buildup.
What Is The Ideal Spacing Between Floating Kitchen Shelves?
A good rule is 12 to 18 inches between shelves. This gives enough room for plates, glasses, or decor. Adjust based on what you plan to store.
Can I Install Floating Shelves On Tile Or Brick Walls?
Yes, but you need the right hardware. Use masonry anchors for brick or special drill bits for tile. Always check that your installation is secure before placing heavy items.
How Can I Make My Floating Shelves Look Less Cluttered?
Stick to a color palette, use groups of odd numbers, and leave space between items. Mix practical and decorative pieces, and edit your arrangement often to keep it looking fresh.
Transforming your kitchen with floating shelves is easier than you might think. With the right materials, a little planning, and thoughtful styling, you can create shelves that are both beautiful and useful. Whether your kitchen is big or small, modern or classic, floating shelves offer endless possibilities to express your style and make daily life a little easier.