
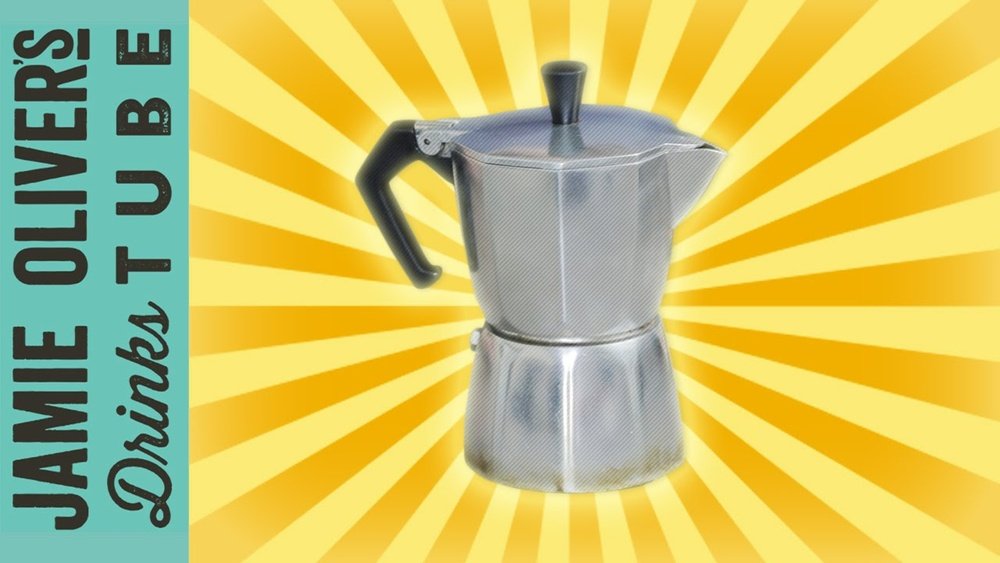
Making coffee in a stovetop percolator is both an art and a tradition. For many, it brings memories of camping trips, family kitchens, and the rich, bold scent of coffee filling the air. In a world full of pods and automatic machines, the percolator stands out as a simple, hands-on way to brew coffee that connects you with the process. If you’re curious about how to use this classic tool or want to perfect your method, you’re in the right place. This guide will walk you through every step, from choosing the right percolator to cleaning up when you’re done. You’ll also discover tips, troubleshooting advice, and answers to common questions, so you can brew with confidence.
What Is A Stovetop Percolator?
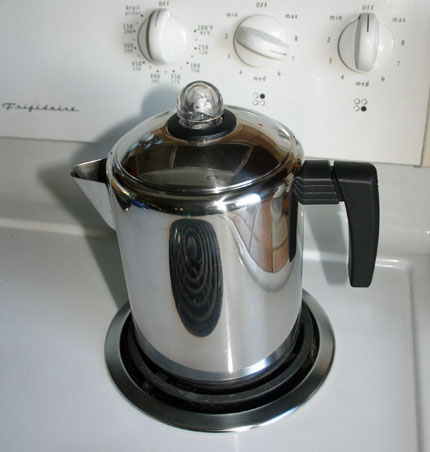
A stovetop percolator is a coffee-brewing device that uses boiling water to cycle through ground coffee repeatedly. The result is a strong, aromatic brew. The percolator has three main parts: the bottom chamber for water, a tube running up the center, and a perforated basket for coffee grounds. As the water heats, it rises through the tube, spills over the grounds, and drips back down, extracting flavor with each cycle.
This method was once the standard in American homes before the rise of drip coffee makers and espresso machines. Today, it’s still popular for its durability, simplicity, and the robust flavor it produces.
How Does It Work?
When you heat the percolator, steam pressure pushes hot water up the tube. The water sprays over the coffee grounds and drips back into the water chamber. This process continues, making the brew stronger each cycle.
Why Use A Stovetop Percolator?
Some people prefer the percolator over other methods for several reasons:
- Rich flavor: The repeated brewing makes the coffee bold and full-bodied.
- Simple equipment: No paper filters or electric parts to replace.
- Durability: Stainless steel or aluminum percolators can last decades.
- Versatility: Works on any heat source, even a campfire.
- Control: You choose how strong or light to make your coffee.
One thing to note: percolator coffee can become bitter if brewed too long. Learning the right timing and grind makes all the difference.

Credit: coletticoffee.com
Types Of Stovetop Percolators
There are a few types you’ll find in stores or online. Understanding their differences can help you choose the right one for your needs.
| Type | Material | Capacity | Best For |
|---|---|---|---|
| Classic Metal | Stainless steel or aluminum | 2–12 cups | Home & camping |
| Glass Knob Percolator | Stainless steel with glass top | 4–12 cups | Home brewing, easy viewing |
| Enamel Percolator | Enamel-coated steel | 6–12 cups | Outdoor use, camping |
Classic metal percolators are the most common. They’re tough, resist rust, and clean up easily. Glass-knob models let you see the color of the coffee as it brews, helping you judge strength. Enamel versions are lightweight and perfect for camping, but the enamel can chip if dropped.
What You Need To Make Percolator Coffee
Before you start, gather these essentials:
- Stovetop percolator
- Fresh coffee beans (or pre-ground coffee)
- Coffee grinder (if you grind beans)
- Filtered water
- Heat source (gas or electric stove, or campfire)
- Measuring spoon or scale
- Timer
- Mug or carafe
Optional Extras
- Paper filters: Some people use flat basket filters to reduce grounds in the cup.
- Kettle: For pre-heating water.
- Thermometer: To check water temperature, if you want precision.
Credit: www.coffeedetective.com
Choosing The Right Coffee Beans And Grind
The coffee you use makes a big difference. For percolators, medium or medium-coarse grind works best. Too fine and you’ll get sludge in your cup. Too coarse and the coffee will taste weak.
Grind Size Comparison
Here’s a quick look at how percolator grind compares to other brewing methods:
| Method | Grind Size | Texture |
|---|---|---|
| Percolator | Medium-coarse | Like rough sand |
| Drip coffee | Medium | Like table salt |
| French Press | Coarse | Like kosher salt |
| Espresso | Fine | Like powdered sugar |
If you’re buying pre-ground coffee, look for “percolator” or “coarse” on the package. If you have a grinder, set it to medium-coarse.
Insider Tip: Grinding beans just before brewing gives a fresher, more aromatic cup.
Step-by-step Guide: How To Make Coffee In A Stovetop Percolator
1. Measure Your Coffee And Water
A standard ratio is 1 tablespoon of coffee per 6 ounces of water. Adjust to taste. For a strong cup, use a bit more coffee.
- For a 6-cup percolator, use 6 tablespoons of coffee and 36 ounces (about 1 liter) of water.
- For lighter coffee, reduce the grounds a little.
Use filtered water for the best taste. Tap water with high minerals or chlorine can affect the flavor.
2. Add Water To The Percolator
Remove the basket and tube. Pour cold water into the bottom chamber up to the desired mark (most percolators have lines inside). Don’t overfill—it can cause leaks or weak coffee.
Practical Note: Some people pre-heat the water in a kettle to speed up brewing and reduce bitterness.
3. Add Coffee Grounds To The Basket
Place the metal tube in the percolator. Add the correct amount of ground coffee to the basket. Level the grounds for even extraction.
- If you worry about grounds in your cup, put a round paper filter in the basket first.
- Don’t press down the coffee; let it sit loosely.
4. Assemble The Percolator
Put the basket onto the tube and fit it back into the percolator. Make sure all parts are seated well. Attach the lid securely.
5. Place On Heat
Set the percolator on your stove over medium heat. If you’re using a campfire, keep the flames low and steady.
- Too much heat can cause spurting and bitterness.
- Too little and the coffee may be weak.
Watch for the first signs of percolation—bubbles or a gentle sound in the glass knob. This usually takes 4–7 minutes.
6. Monitor The Brewing Process
As the water heats, you’ll hear a regular “perk-perk” sound. If your percolator has a glass knob, you can see the coffee color change.
Watch for these signs:
- Light tan color: Still weak
- Medium brown: Medium strength
- Dark brown: Strong
7. Control Brewing Time
Let the coffee percolate for 6–10 minutes. The longer it perks, the stronger (and possibly more bitter) it gets.
- For mild coffee: 6 minutes
- For strong coffee: 8–10 minutes
Use a timer for accuracy. Over-percolating is a common mistake and can ruin the flavor.
8. Remove From Heat And Serve
Turn off the heat. Carefully remove the percolator using oven mitts (it will be very hot). Let it sit for a minute to settle any grounds.
- Remove the basket and tube, using a towel or tongs.
- Pour coffee slowly to keep grounds at the bottom.
Enjoy your coffee right away. Percolator coffee can become bitter if left on heat too long.

Credit: coletticoffee.com
Cleaning And Caring For Your Percolator
A clean percolator brews better-tasting coffee and lasts longer. Here’s how to care for it:
- Let it cool before cleaning.
- Take apart the percolator—remove the lid, basket, and tube.
- Wash all parts in warm, soapy water. Use a brush for any stuck grounds.
- Rinse thoroughly to remove soap residue.
- Dry completely before storing to prevent rust or odors.
Deep cleaning tip: Once a month, run a brew cycle with just water and a tablespoon of baking soda or vinegar. Rinse well afterward.
Common Percolator Problems (and Solutions)
Even experienced users run into problems sometimes. Here’s how to fix them:
Grounds In Coffee
- Use a coarser grind.
- Add a paper filter in the basket.
- Don’t overfill the basket.
Weak Coffee
- Use more grounds.
- Increase brewing time slightly.
- Make sure water is hot enough.
Bitter Coffee
- Brew for a shorter time.
- Use a medium-coarse grind.
- Don’t leave coffee sitting on heat.
Water Leaks
- Check that the percolator isn’t overfilled.
- Ensure all parts are seated properly.
- Look for cracks or worn seals.
Advanced Tips For Better Percolator Coffee
If you want to go beyond the basics, these expert tips can help:
1. Use Freshly Roasted Beans
Coffee loses aroma and flavor quickly. Buy whole beans and grind just before brewing for the richest taste.
2. Experiment With Ratios
Everyone’s taste is different. Try adjusting the coffee-to-water ratio by small amounts until you find your favorite strength.
3. Pre-wet The Grounds
Pour a tablespoon of hot water over the coffee in the basket before assembling. This helps release aroma and flavors.
4. Try Different Roasts
Light, medium, and dark roasts all taste different in a percolator. Many people find medium roasts balance flavor and smoothness best.
5. Watch The Temperature
If your stove runs hot, the coffee can boil and taste burnt. Use a thermometer to keep water around 195–205°F (90–96°C).
6. Let Coffee Rest
After removing from heat, let the coffee sit for one minute before pouring. This helps grounds settle and reduces sludge in your cup.
Pros And Cons Of Percolator Coffee
Understanding the strengths and weaknesses of percolator brewing can help you decide if it’s right for you.
| Pros | Cons |
|---|---|
| Rich, full flavor | Can be bitter if over-brewed |
| Simple, durable equipment | Needs attention during brewing |
| No paper filters required | May let grounds slip into coffee |
| Good for large groups | More cleanup than drip machines |
| Works without electricity | Less control than pour-over/espresso |
Percolator Vs. Other Brewing Methods
How does a stovetop percolator compare with other popular coffee makers? Here’s a quick comparison:
Drip Coffee Maker
- Easier to use: Just set and forget.
- Less strong: Percolator coffee is usually bolder.
- Requires filters: Drip machines need paper filters.
French Press
- Similar body: Both make rich, full-bodied coffee.
- Less messy: French press is easier to clean.
- Shorter brew time: French press takes 4–5 minutes.
Espresso Machine
- More concentrated: Espresso is stronger, smaller servings.
- Expensive: Machines can be costly.
- Complex: Needs more skill and parts.
Pour-over
- Delicate flavors: Pour-over highlights subtle notes.
- Takes practice: Requires careful pouring and timing.
- Single servings: Better for 1–2 cups.
Safety Tips When Using A Stovetop Percolator
- Always use oven mitts or a thick towel when handling the percolator after brewing.
- Don’t leave the percolator unattended on high heat; boiling dry can damage it.
- Make sure the lid is secure before moving the hot percolator.
- Let the percolator cool before cleaning to avoid burns.
How To Store Percolator Coffee
Percolator coffee tastes best fresh, but sometimes you have leftovers. Here’s how to store and reheat:
- Pour leftover coffee into a clean, airtight container.
- Store in the fridge for up to 2 days.
- Reheat gently on the stove or in a microwave; don’t boil.
Insider Tip: Coffee stored in the percolator itself can take on metallic or stale flavors. Always transfer to another container.
Percolator Coffee Recipes And Variations
Want to mix things up? Try these ideas:
1. Campfire Mocha
- Add 1 tablespoon of unsweetened cocoa powder to the grounds before brewing.
- Sweeten to taste after brewing.
2. Spiced Percolator Coffee
- Add a pinch of ground cinnamon or nutmeg to the basket with your coffee.
- Try a few crushed cardamom pods for a unique twist.
3. Cold Percolator Coffee
- Brew as usual, then chill the coffee in the fridge.
- Serve over ice for a refreshing summer drink.
4. Percolator Latte
- Brew double-strength coffee (twice the grounds).
- Add steamed milk and sugar for a homemade latte.
5. Flavored Syrups
- Add a teaspoon of vanilla, caramel, or hazelnut syrup to your mug before pouring in the coffee.
Environmental And Health Insights
Percolator coffee is eco-friendly—no paper filters or plastic pods to throw away. Most percolators are built to last for decades, reducing waste compared to single-use machines.
There’s also debate about health: percolator coffee may have higher levels of cafestol, a compound that can raise cholesterol in some people. If you’re concerned, use a paper filter to trap most oils. For most healthy adults, moderate coffee drinking is safe and even linked to some benefits, like reduced risk of type 2 diabetes and Parkinson’s disease. For more, see the research at Harvard T.H. Chan School of Public Health.
Frequently Asked Questions
How Do I Keep Grounds Out Of My Percolator Coffee?
Use a medium-coarse grind, and don’t overfill the basket. You can also use a round paper filter in the basket. Let the coffee sit for a minute after brewing so grounds settle before pouring.
Can I Use Regular Pre-ground Coffee In A Percolator?
Yes, but percolators work best with coarser grinds. Most pre-ground coffee is medium-fine for drip machines, which may allow grounds through. If possible, choose “percolator grind” or grind your own.
Why Does My Percolator Coffee Taste Bitter?
Bitterness usually comes from over-brewing or using too fine a grind. Try reducing the percolation time to 6–7 minutes and use a coarser grind. Don’t leave coffee on the heat after brewing.
How Do I Clean A Percolator If It Has Stains Or Odors?
Take it apart and wash with warm, soapy water. For tough stains, fill the percolator with water and add a tablespoon of baking soda or vinegar. Run a brew cycle, then rinse well. Dry all parts before storing.
Is Percolator Coffee Stronger Than Drip Coffee?
Generally, yes. Percolator coffee is bolder and has more body because the water passes through the grounds multiple times. You can adjust strength by changing the coffee-to-water ratio or brewing time.
Brewing coffee in a stovetop percolator is a rewarding ritual. It connects you with tradition, offers flexibility, and produces a cup full of character. With the right technique, you can enjoy rich, aromatic coffee every morning—whether you’re at home, camping, or anywhere in between.
As you practice, you’ll develop a feel for timing, grind, and ratios that match your taste. Happy brewing!