Moving a KitchenAid mixer is not like moving a regular appliance. These mixers are heavy, valuable, and have delicate parts that can break if not packed correctly. Many people make mistakes, like using the original box without extra padding, or simply wrapping the mixer in a towel and hoping for the best. If you want your KitchenAid mixer to arrive in perfect condition, you need to pack it with care and attention to detail. This guide will walk you through every step, from gathering supplies to unpacking at your new home, so your mixer stays safe and ready for your next baking adventure.
Why Packing A Kitchenaid Mixer Is Different
KitchenAid mixers are known for their solid construction, but that doesn’t mean they’re unbreakable. The mixing bowl, attachments, and especially the tilt-head or bowl-lift mechanisms need extra attention. Even small bumps in a moving truck can loosen internal gears or crack the finish. If you plan to move your mixer any distance, it’s important to understand why special packing matters.
Many movers list KitchenAid mixers as one of the top five small appliances damaged during moves. Their average weight ranges from 22 to 30 pounds for standard models, and their unique shape makes them tricky to fit into boxes. Unlike microwaves or toasters, they cannot simply be wrapped and packed with other items. The cost of replacing a damaged KitchenAid mixer can be $300 or more, not to mention the hassle of repairs.
Supplies You’ll Need For Safe Packing
Having the right packing materials is key. Here’s a list of what you’ll need, along with tips on choosing the best options:
- Sturdy moving box: The box should be slightly larger than the mixer, with room for padding on all sides. Double-walled boxes are best.
- Bubble wrap: Use small and large bubble sizes for different parts.
- Packing paper: Avoid newspaper, as the ink can rub off on your mixer.
- Packing tape: Heavy-duty tape is a must. Standard office tape is too weak.
- Zip-top bags: For small attachments and screws.
- Foam sheets or inserts: For extra padding under and around the mixer.
- Labels and markers: To clearly mark the box as fragile and note its contents.
- Stretch wrap or plastic bags: To cover the mixer and prevent scratches.
- Scissors: For cutting tape and bubble wrap.
Buying quality supplies can cost $10–$20, but it saves you from much larger losses if the mixer is damaged. Don’t rely on free grocery store boxes—they often collapse under the mixer’s weight.
Cleaning And Preparing Your Mixer
Before you pack, it’s smart to clean your KitchenAid mixer. Dust, oil, or flour left on the surface can attract dirt or even cause mold if the box gets damp during the move.
- Unplug the mixer and remove all attachments.
- Wash the mixing bowl and attachments with warm soapy water, then dry them completely.
- Wipe the mixer’s body with a damp cloth. Avoid getting water into the motor vents.
- Remove any food or crumbs from crevices with a small brush.
This step prevents unpleasant surprises when you unpack and keeps your mixer in top condition.
Disassembling The Mixer And Accessories
Packing is easier if you separate the parts. Here’s how to break down your mixer safely:
- Remove the mixing bowl: Most models twist off with a gentle turn.
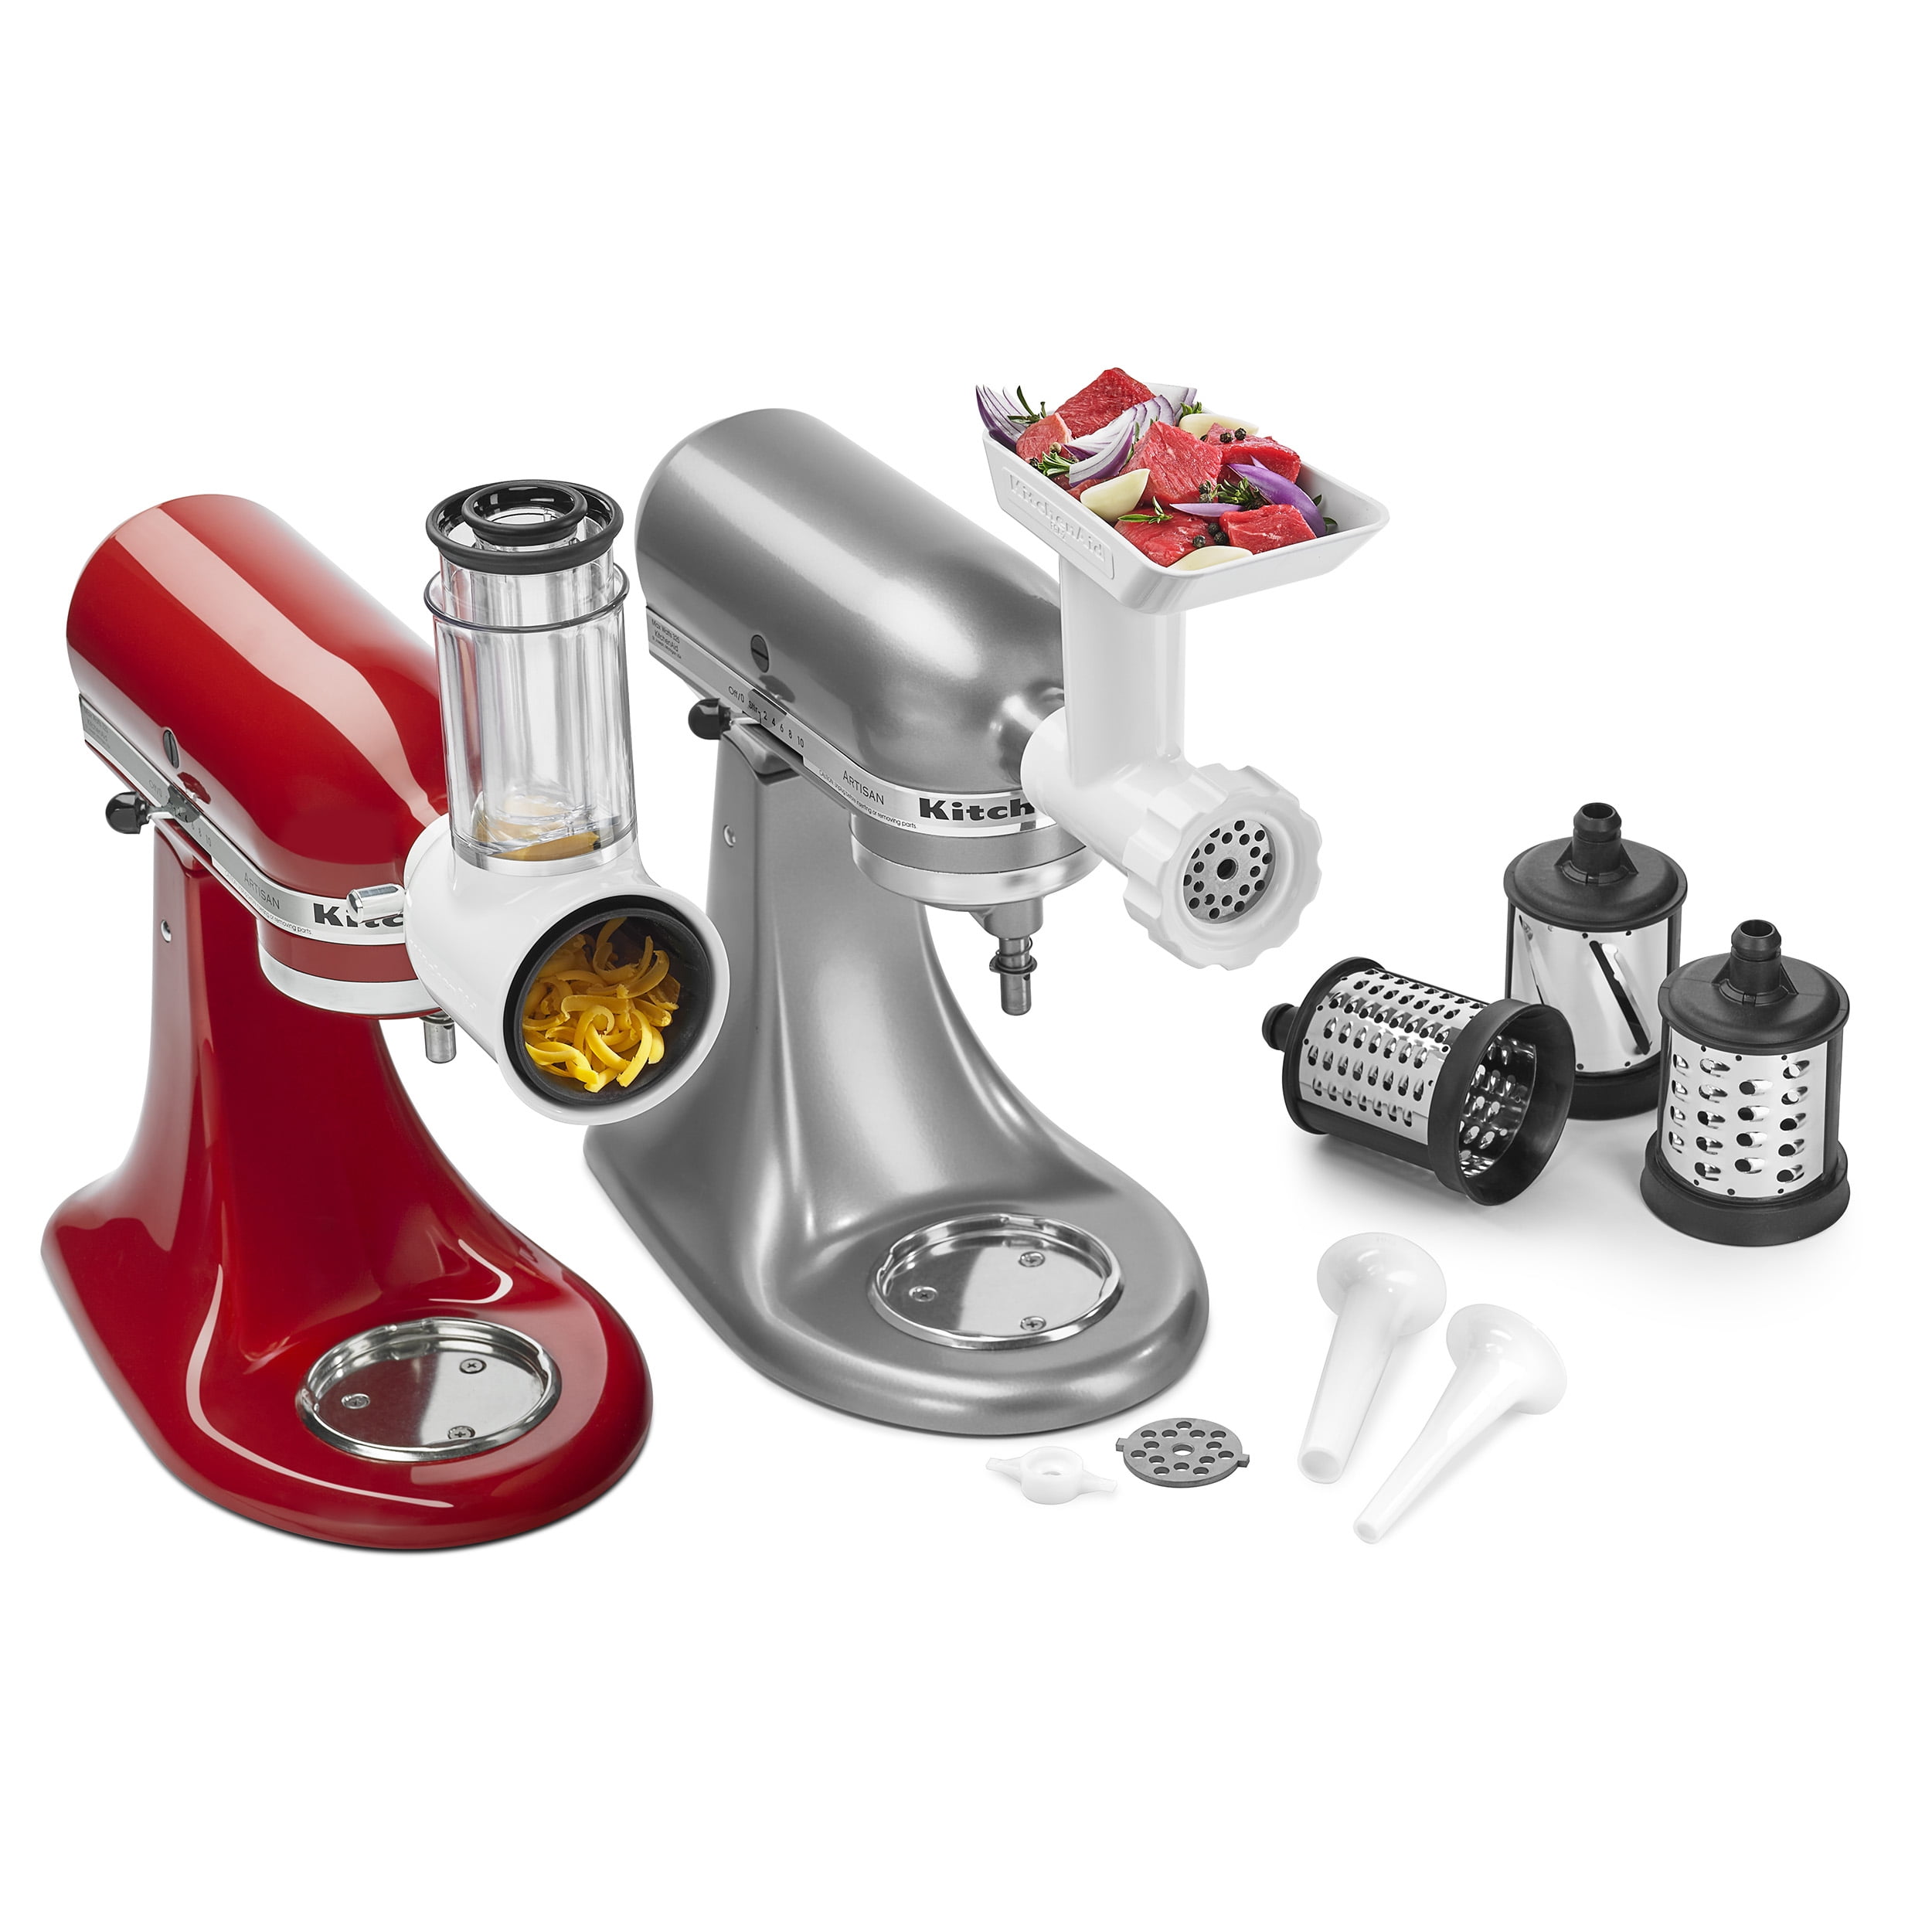
- Detach all attachments: Dough hook, flat beater, wire whisk, and others should be removed. Store them in a zip-top bag.
- Take off the pouring shield or splash guard: If your model has one, pack it separately.
- Check for loose parts: Some models have removable hubs or decorative trims—remove these if possible.
Do not try to open the mixer’s body or remove internal parts. This can void your warranty and is not necessary for moving.
Credit: www.guardianstorage.com
Wrapping Each Part For Protection
Now it’s time to wrap each part. This step is where most beginners make mistakes, either by under-padding or by wrapping items together.
Wrapping The Main Mixer Body
- Place the mixer on its side on a large sheet of bubble wrap.
- Wrap at least two layers around the body, paying special attention to the head and base.
- Secure with tape, but do not let tape touch the mixer’s surface.
- For extra safety, place a foam sheet between the mixer and the bubble wrap.
Wrapping The Bowl And Attachments
- Wrap the mixing bowl in a foam sheet first, then a layer of bubble wrap. Secure with tape.
- Each attachment should be wrapped separately in packing paper or bubble wrap.
- Place all small parts in a labeled zip-top bag. This prevents loss and makes reassembly easier.
Wrapping Cords And Additional Parts
- Coil the power cord loosely and secure it with a twist tie. Avoid tight bends.
- Wrap the cord in bubble wrap or a small piece of foam to prevent marks on the mixer.
Example Packing Order
Here’s a sample order that works well for most KitchenAid mixers:
- Mixer body (bubble wrap and foam)
- Bowl (foam, then bubble wrap)
- Attachments (paper or bubble wrap, then in a zip-top bag)
- Cords (bubble wrap)
- Extra accessories (packed separately if fragile)
Choosing The Best Box For Your Mixer
Picking the right box is one of the most important steps. The wrong box can lead to dents, scratches, or worse. Here’s what to look for:
- Double-walled cardboard: Supports the mixer’s weight.
- Size: The box should be 2–4 inches larger than the mixer on all sides to allow for padding.
- Condition: No tears, water damage, or weak spots.
If you still have the original KitchenAid box, you can use it. But you should add extra padding inside, as the factory packaging is designed for shipping on pallets, not for bumpy moving trucks.
Box Size Comparison
Below is a quick comparison of box sizes for different KitchenAid models:
| Mixer Model | Mixer Dimensions (inches) | Recommended Box Size (inches) |
|---|---|---|
| Artisan Tilt-Head | 14 x 8.5 x 13.9 | 18 x 14 x 18 |
| Pro 600 Bowl-Lift | 16.5 x 11.3 x 14.6 | 20 x 16 x 20 |
| Mini Tilt-Head | 12.3 x 7.8 x 12.3 | 16 x 12 x 16 |
Always measure your mixer before buying a box to be sure of the fit.
Credit: www.walmart.com
Securing The Mixer Inside The Box
Proper placement inside the box is as important as the wrapping. Here’s the safest way:
- Add a layer of padding (crumpled packing paper or foam) at the bottom of the box.
- Place the wrapped mixer body upright in the center.
- Fill the space around the mixer with more packing paper or bubble wrap. There should be no empty gaps.
- Add the wrapped bowl and attachments on the sides or top, not under the mixer.
- Add another thick layer of padding on top before closing the box.
Do not put heavy items on top of the mixer or inside the same box. If the box rattles or shifts when you move it, add more padding.
Packing Density Comparison
Choosing how tightly to pack the box makes a difference. Here’s a simple comparison:
| Packing Method | Risk of Damage | Ease of Unpacking |
|---|---|---|
| Loose Packing | High | Easy |
| Medium Packing | Medium | Medium |
| Tight Packing with Extra Padding | Low | Safe but slower |
For valuable appliances like a KitchenAid mixer, tight packing with extra padding is always the best choice.
Taping And Labeling The Box
Securing the box well will prevent accidents during the move.
- Use heavy-duty packing tape to seal the bottom and top of the box with at least two layers.
- Run an extra strip of tape across all seams for added strength.
- Use a permanent marker to write “FRAGILE – KITCHENAID MIXER” on multiple sides.
- Mark which end is “UP” to guide movers.
- Add your name and contact info in case the box gets misplaced.
If you’re using professional movers, consider marking the box with “DO NOT STACK” to avoid crushing.
Special Tips For Long-distance Or Climate Moves
If your move will take several days, or you’ll cross areas with extreme heat or humidity, take extra steps:
- Use desiccant packets inside the box to absorb moisture and prevent mold.
- Avoid storing the box in direct sunlight or in a hot truck for long periods.
- If possible, carry the mixer with you in your car, especially if moving in summer or winter.
Humidity and temperature changes can cause condensation inside the box, which may lead to rust or electrical problems. Most people don’t consider this, but it’s a real risk for valuable kitchen appliances.
Packing The Mixer Without The Original Box
Lost your KitchenAid box? No problem. Here’s how to improvise:
- Use a double-walled moving box and pad it more heavily.
- Use towels or blankets as extra padding, especially if you’re low on bubble wrap.
- For added safety, place the wrapped mixer in a plastic bag before boxing to protect against dust or spills.
- If you can’t find a perfect fit, use two boxes: One to hold the mixer, and a larger one outside with padding between.
Never use thin shipping boxes, as they can collapse under the mixer’s weight.
Moving Multiple Kitchen Appliances Together
If you have several small appliances to move, do not pack them together in one large box. Each appliance should be packed separately to avoid damage. For example, a toaster oven or blender can easily crack the finish on your KitchenAid mixer if packed together.
If you must combine, use heavy padding between each item, and make sure nothing presses on the mixer’s control knobs or head.
Loading The Mixer Into The Moving Vehicle
Placing your packed mixer in the right spot in your car or moving truck is important.
- Never stack heavy boxes on top of the mixer box.
- Place the box on a flat surface, not on top of uneven items.
- Make sure the box cannot slide or tip over during the move.
- If possible, keep the box upright and avoid stacking more than two boxes high.
If you’re moving yourself, the best place is on the floor of the car behind the front seats.
Unpacking And Setting Up Your Mixer
When you arrive at your new home, don’t rush to unpack. Here’s the best way to avoid accidental drops or scratches:
- Place the box on a stable surface.
- Carefully cut the tape and open the box.
- Remove each part, checking for damage.
- Let the mixer warm up to room temperature before plugging in, especially if it’s been in a hot or cold truck.
- Reassemble all parts, making sure attachments fit snugly.
If you notice any damage or the mixer won’t turn on, check your warranty or contact KitchenAid customer service before trying to repair it yourself.
Common Packing Mistakes And How To Avoid Them
Many people repeat the same errors when moving a KitchenAid mixer. Here are the most common mistakes and how to avoid them:
- Using the wrong box size: Too small and you risk crushing parts; too large and the mixer can shift.
- Not enough padding: One layer of bubble wrap is not enough for a heavy mixer.
- Leaving attachments in the bowl: These can bang around and chip the finish.
- Packing with other heavy items: This increases the chance of damage.
- Taping directly on the mixer: Tape can pull off paint or leave sticky residue.
- Ignoring climate risks: Heat, cold, and humidity can all affect your mixer.
- Not labeling the box: Movers may treat unlabeled boxes roughly.
Avoiding these mistakes means your mixer is much more likely to arrive safely.
Extra Insights Most People Miss
- Check for loose screws before moving. Sometimes, vibration during transport can loosen internal screws. If you hear rattling inside the mixer, get it checked before you move.
- Take a quick photo of your mixer setup before disassembly. This makes reassembly faster, especially for rare attachments or accessories.
- If your mixer has a custom-painted finish, wrap it in a soft cloth before bubble wrap to avoid scratches.
- For high-end models, consider insurance for moving. Some insurance policies cover only items packed by professionals, so check your terms.
When To Consider Professional Packing
If your mixer is expensive, antique, or especially valuable to you, professional packing is a smart option. Many moving companies offer appliance packing as an extra service. They use custom foam inserts and guarantee against damage. The cost is usually $30–$50, but it may be worth it for peace of mind.
Environmental Tips For Packing Materials
After your move, don’t just throw away all your packing materials:
- Save bubble wrap and foam for future moves or shipments.
- Recycle cardboard boxes at a local center.
- Offer clean packing materials to neighbors or through online groups.
Using recyclable materials helps reduce waste and is better for the environment.
Summary Table: Packing Steps Overview
Here’s a quick checklist for packing your KitchenAid mixer:
| Step | Action | Key Tip |
|---|---|---|
| 1 | Clean mixer and parts | Ensure all parts are dry |
| 2 | Disassemble attachments | Store small items in bags |
| 3 | Wrap each part individually | Use double layers for safety |
| 4 | Choose right box size | Box should allow for padding |
| 5 | Pad box bottom and sides | No empty spaces inside box |
| 6 | Seal and label box | Mark as FRAGILE and UP |
| 7 | Load box carefully | Do not stack heavy items on top |
Credit: olympiamoving.com
Frequently Asked Questions
How Much Does A Kitchenaid Mixer Weigh?
Most standard KitchenAid mixers weigh between 22 and 30 pounds. Larger commercial models can weigh up to 35 pounds. Always check your model’s manual for the exact weight before choosing a box.
Can I Use The Original Kitchenaid Box For Moving?
Yes, but it’s best to add extra padding. The original box is designed for shipping, but not always for long, bumpy moves. Place extra bubble wrap or foam around the mixer, especially if the box has been reused.
Is It Safe To Pack Attachments With The Mixer?
It’s safe if you wrap each attachment separately and place them in a zip-top bag. Never leave attachments in the mixing bowl or attached to the mixer—they can cause damage during the move.
How Do I Clean My Mixer Before Packing?
Unplug the mixer, remove all attachments, and wash them with soap and water. Wipe the mixer’s body with a damp cloth and dry completely. Don’t use harsh cleaners, as they can damage the finish.
Where Can I Find More Information About Kitchenaid Mixers?
You can visit the official KitchenAid website for more details, manuals, and care instructions.
Moving your KitchenAid mixer safely takes some planning and the right supplies, but it’s worth the effort. With careful packing, your mixer will be ready to help you create delicious recipes in your new kitchen, just as it did before the move.