A Samsung dishwasher can make life much easier—until an error code appears, stopping a wash cycle right in the middle. One of the most common problems is the leak sensor error. This sensor’s job is to protect your home from water damage, but sometimes it can trigger even when there’s no real leak. Many homeowners ask how to bypass the Samsung dishwasher leak sensor, especially if they suspect a false alarm.
Trying to bypass any safety system is serious, and it’s important to understand both the right way and the risks. In this guide, you’ll learn how the leak sensor works, why it might malfunction, and what to do if you need to bypass it.
Along the way, you’ll discover smarter options, practical steps, and the hidden dangers that many people miss. Even if you’ve never opened a dishwasher before, these steps and insights will help you make the right decision.
Understanding The Samsung Dishwasher Leak Sensor
Before taking any action, you should know what the leak sensor does. This small part sits at the bottom of your dishwasher, usually in the plastic pan under the main tub. It’s designed to detect water. If it senses water where it shouldn’t be, the dishwasher stops, and an error code appears.
Most Samsung models use a float switch or a moisture sensor. The float switch rises if water collects in the pan, activating the safety mechanism. The moisture sensor works like a metal probe; when water bridges the contacts, it completes the circuit and triggers the alarm.
Some high-end Samsung dishwashers even use both types of sensors for extra safety. These models are more sensitive, which is good for early leak detection—but also means they can trigger errors from even a few drops of water or excess humidity.
For example, after a heavy wash with a lot of steam, condensed water might trickle down to the pan and set off the sensor, even if there’s no real leak from the plumbing.
Why The Leak Sensor Is Important
The leak sensor is there to protect your kitchen and your home. Leaks can quickly cause expensive water damage, mold, and even electrical hazards. While it may feel like a hassle when the sensor gives a false alarm, the alternative could be much worse.
A dishwasher leak can spread water under cabinets and flooring, which is hard to see and even harder to clean. In many cases, water damage is not covered by basic home insurance if it’s due to neglect. The leak sensor helps you catch a small problem before it becomes a disaster.
Another thing people often miss: electrical systems under the dishwasher are at risk if water builds up. The sensor helps avoid short circuits and the risk of electric shock. This is especially important in homes with older wiring or if the dishwasher is installed on a second floor, where leaks can drip into lower rooms.
Common Reasons For Leak Sensor Errors
It’s not always an actual leak that triggers the sensor. Here are some common causes:
- Splashing or Overfilling: If you load the dishwasher incorrectly or use too much soap, water might splash into the base.
- Clogged Filters or Drains: Blockages cause water to back up into the machine.
- Condensation: In humid environments, moisture can collect in the base pan.
- Worn Seals or Gaskets: Over time, rubber parts can crack and let water escape.
- Sensor Malfunction: The sensor itself might be dirty, corroded, or defective.
- Loose Hoses or Connections: Even a small drip can set off the alarm.
Pro Tip: Many owners skip the step of checking for condensation or small drips from hoses. These are common causes but easy to overlook.
A less obvious cause is a recent move or installation. Sometimes, tilting the dishwasher can cause a bit of leftover water to spill into the base pan. If you’ve just had work done on your kitchen, always check the sensor before assuming it’s a bigger problem.
Another detail: using the wrong detergent can produce too many suds, which might overflow into the sensor area. Using regular dish soap instead of dishwasher detergent is a common beginner mistake that leads to false leak errors.
Diagnosing Leak Sensor Problems
Before thinking about bypassing the sensor, try to find the actual problem. Here’s how:
- Unplug the Dishwasher: Always disconnect power before opening the machine.
- Remove the Kick Plate: The kick plate is usually below the door. Take it off to see the base pan.
- Check for Water in the Pan: Use a flashlight to look for pooling water.
- Dry the Area: If you see water, soak it up with towels and let the area dry.
- Inspect Hoses and Seals: Look for drips or loose connections.
- Examine the Sensor: If it looks dirty or corroded, clean it gently with a dry cloth.
If you clear all water and the error stays, the sensor may be faulty. If you find a leak, fix it before running the dishwasher again.
A practical tip: To speed up drying, you can use a hair dryer on a low setting (keep it at a distance) to gently dry the base pan and sensor. This helps clear condensation that towels can’t reach.
If your dishwasher sits directly on a tile or laminate floor, check under the unit with a mirror for any hidden pools of water. Sometimes, leaks run along the subfloor and never reach the sensor, so you might solve one problem but miss another.
Is It Safe To Bypass The Leak Sensor?
Bypassing a safety feature always involves risk. The leak sensor is there to prevent water damage. If you bypass it, you could miss a real leak and end up with a flooded kitchen.
Hidden Risk: Many people forget that a small, slow leak can do more damage than a sudden large one. Without the sensor, you may not notice until it’s too late.
For this reason, consider bypassing only as a short-term test, not a permanent fix. If you do decide to bypass, always monitor your dishwasher closely, and fix the root problem as soon as possible.
It’s important to remember that water damage is not always visible right away. Even a single cycle run with the sensor bypassed can lead to hidden moisture under the appliance, which may only show up as mold or warped flooring weeks later.

Credit: www.wikihow.com
When Bypassing The Leak Sensor Makes Sense
There are only a few situations where bypassing the leak sensor is reasonable:
- You have confirmed there’s no actual leak.
- The sensor itself is broken, and you’re waiting for a replacement part.
- You need to run one emergency cycle and can supervise the dishwasher the entire time.
If you use the dishwasher often or leave it running while you’re out, bypassing the leak sensor is too risky.
Another scenario: if you live in a rental and need to show a technician the error, a temporary bypass might help demonstrate the problem for repair. Just make sure you always document what you did, so you can restore the safety features later.
Tools And Preparation
Before you start, gather these items:
- Screwdriver (Phillips or flathead, depending on your model)
- Needle-nose pliers
- Towel or sponge
- Multimeter (for electrical testing)
- Electrical tape or wire nuts (if needed)
- Safety gloves
Tip: Take photos of each step so you can put everything back in place.
If you have a smartphone, use it to record a short video as you disconnect wires. This helps avoid mistakes during reassembly, especially if you’re not familiar with electrical repairs.
Step-by-step: How To Bypass The Leak Sensor
If you decide to proceed, follow these steps carefully. Each dishwasher model is a bit different, but the main idea is similar.
1. Disconnect Power And Water
Unplug the dishwasher from the wall or turn off the circuit breaker. Shut off the water supply. Safety first!
For extra safety, wait a few minutes after unplugging. Some models keep a bit of electrical charge in the control board, which can give you a mild shock if you touch the wrong part too soon.
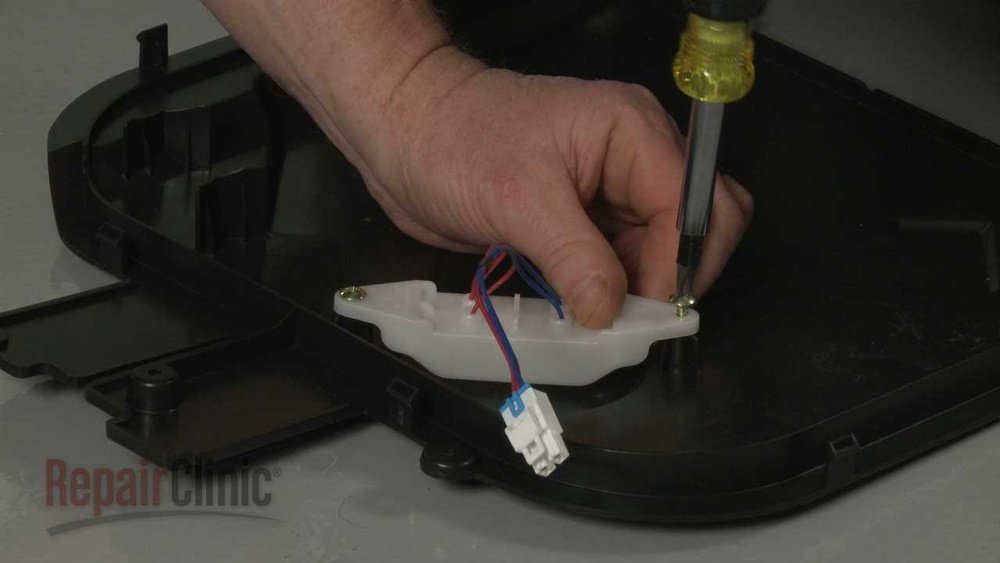
2. Access The Leak Sensor
Remove the bottom kick plate by unscrewing it. If necessary, remove the insulation. Look for the sensor in the base pan. In most Samsung dishwashers, it’s a small plastic float or a metal probe with wires.
Take note of how the insulation is fitted. Placing it back incorrectly can lead to noise or vibration later.
3. Locate The Sensor Wires
Find the wires connected to the sensor. Usually, you’ll see two wires leading from the sensor to the control board.
On some models, these wires are color-coded (for example, red and white), but always check your user manual or take a close-up photo to be sure.
4. Test The Sensor
Before bypassing, test the sensor with a multimeter:
- Set the multimeter to measure resistance (ohms).
- Disconnect the sensor wires.
- Place the probes on the sensor terminals.
- If you see zero resistance (closed circuit) when dry, the sensor is stuck.
- If you see infinite resistance (open circuit) when wet, the sensor is faulty.
This test helps you know if the sensor is really broken.
If you’re new to using a multimeter, look for video guides online for your dishwasher model. Testing before bypassing can save you time and prevent unnecessary risks.
5. Bypass The Sensor
To bypass, you need to “fool” the control board so it thinks the sensor is dry.
If it’s a float switch: The sensor is normally open when dry and closed when wet. Connect the two wires together using a wire nut or wrap them with electrical tape. This completes the circuit and tells the dishwasher that no leak is present.
If it’s a moisture sensor: Remove the sensor and connect the wires together the same way.
Important: Do not leave bare wires exposed. Always insulate connections to prevent short circuits.
If your wires are stiff or hard to twist, use a pair of needle-nose pliers for a tight connection. Good insulation is crucial—improper connections can lead to electrical hazards.
6. Test The Dishwasher
Restore power. Run a short wash cycle. Watch the base pan carefully for any water. If the dishwasher works without the error, you’ve successfully bypassed the sensor. If the error remains, the problem may be elsewhere.
It’s best to use the shortest cycle and keep a towel under the machine during the test. That way, you can catch any small leaks early.
7. Reassemble Carefully
If you plan to use the dishwasher for more than a test cycle, reattach the kick plate and insulation. Keep an eye on the dishwasher while it runs.
Some users forget small screws or clips. Missing hardware can cause rattling or let the kick plate fall off during operation. Double-check all fasteners before you finish.
Alternative Solutions To Bypassing
Bypassing should always be a last resort. Here are other options:
Clean The Sensor
Sometimes, grime or mineral deposits block the sensor. Remove it and clean with a soft brush or cloth.
You can use isopropyl alcohol on a cotton swab for stubborn dirt. Make sure the sensor is completely dry before reinstalling.
Replace The Sensor
Order a new sensor from Samsung or a trusted supplier. It’s usually an affordable part and easy to swap.
If you’re not sure which part to buy, check your dishwasher’s model number. Using the wrong sensor can cause new errors or fail to fit properly.
Dry Out The Base Pan
If water is present from a past leak or spill, dry the pan completely and leave the dishwasher open for several hours.
To speed up drying, leave the door propped open and run a fan nearby. This is especially helpful in humid climates.
Check For Firmware Updates
Some newer models can be updated by a technician. A software bug might cause false leak errors.
Contact Samsung support if your dishwasher is still under warranty—they might offer a free update or repair.
Table: Leak Sensor Bypass Methods Compared
Here’s a look at different ways to handle a faulty sensor, with their pros and cons.
| Method | Effectiveness | Risk Level | Difficulty |
|---|---|---|---|
| Bypass Sensor | Works if no leak | High | Moderate |
| Clean Sensor | Often solves false alarms | Low | Easy |
| Replace Sensor | Restores full safety | Low | Easy/Moderate |
| Dry Base Pan | Solves splash/condensation | Low | Easy |
Real-world Example: False Leak Error
Maria, a homeowner, noticed her Samsung dishwasher stopped mid-cycle, showing a leak error. After opening the base, she found just a few drops of water—caused by a loose hose clamp. She dried the area and tightened the hose, but the error didn’t clear.
The sensor had corroded contacts. She bypassed the sensor for one load while waiting for the replacement. She never left the house while it ran, and the machine worked fine until the new part arrived.
Insight: Most false errors have a simple cause, like a loose hose or soap suds. Always check these first.
Another example: John, a renter, kept getting leak errors after running the dishwasher on rainy days. He finally realized that the extra humidity in his kitchen was enough to create condensation in the base pan. He used a dehumidifier during dish cycles and the problem disappeared—without any need to bypass the sensor.

Credit: www.reddit.com
Common Mistakes When Bypassing The Leak Sensor
Many people make small errors that can lead to bigger problems:
- Not Disconnecting Power: Working on a live appliance is very dangerous.
- Skipping the Leak Inspection: Assuming it’s a false alarm can cause water damage if a real leak exists.
- Leaving Wires Exposed: Bare wires can short-circuit or cause shocks.
- Not Testing Thoroughly: Running a full cycle without watching for leaks is risky.
- Treating the Bypass as a Permanent Solution: Forgetting to replace the sensor means losing a key safety feature.
Hidden Detail: Some newer Samsung models will not run at all if the sensor is bypassed. For these, a new sensor is the only safe solution.
Also, if you have pets or children, leaving wires exposed—even for a short period—is an extra hazard you might not think about. Always secure any connections out of reach and out of sight.
Safety Tips For Diy Repairs
- Always unplug appliances before repairs.
- Wear insulated gloves to avoid shocks.
- Use only parts approved for your dishwasher model.
- Keep water away from all electrical connections.
- Never leave the dishwasher running unattended after bypassing safety features.
For added safety, keep a small fire extinguisher in your kitchen. Electrical repairs can carry risk, and it’s always better to be prepared.
Table: Leak Sensor Vs. Other Dishwasher Safety Features
Samsung dishwashers include several safety systems. Here’s how the leak sensor compares to others.
| Feature | Purpose | Bypass Risk | Recommended Action |
|---|---|---|---|
| Leak Sensor | Stops leaks and water damage | High | Bypass only for testing |
| Door Latch | Prevents opening during wash | Very high | Never bypass |
| Thermal Fuse | Prevents overheating | Critical | Replace, never bypass |
| Overflow Switch | Stops overfilling | High | Fix cause of activation |
How To Prevent Future Leak Sensor Problems
Instead of bypassing, prevention is the best solution. Here’s how:
- Check Seals Every 6 Months: Inspect the door gasket and sump seals.
- Clean Filters and Sprayers: Clogged parts can cause water to back up.
- Use the Right Detergent: Too much soap can create suds that overflow.
- Level the Dishwasher: An uneven unit can cause leaks at the door.
- Inspect Hoses Annually: Replace any with cracks or bulges.
Pro Tip: Many leaks start at the water inlet or drain hose. These are cheap to replace and prevent most problems.
Also, wipe around the base of your dishwasher after deep cleaning. Small cracks or white residue can indicate slow leaks before they trigger the sensor. Early action can save you from bigger repairs.
If you live in an area with hard water, consider using a dishwasher cleaner every few months. Mineral buildup can cause blockages and false leak errors over time.
Cost Of Replacing Vs. Bypassing The Sensor
Some people try to bypass the sensor to save money. But how much do you actually save? Here’s a quick comparison:
| Option | Parts Cost | Time Needed | Long-term Risk |
|---|---|---|---|
| Bypass Sensor | $0-$5 | 30-45 minutes | High |
| Replace Sensor | $15-$40 | 30-60 minutes | Low |
| Professional Repair | $100-$200 | 1-2 hours | Low |
In most cases, buying a new sensor is the smarter choice.
It’s also worth noting that some home warranties or insurance policies may not cover damage if you’ve bypassed safety features. Always check your policy before making changes.
When To Call A Professional
If you’re not comfortable working with electrical parts, or if the dishwasher is still under warranty, it’s safer to call a technician. They can:
- Diagnose hidden leaks or electrical faults
- Install new sensors safely
- Check for other issues
Some repairs require special tools or software updates that only professionals have.
A professional can also check for less obvious issues, like tiny cracks in the tub or faulty wiring, that most DIYers would miss. You may spend more upfront, but you’ll protect your kitchen and your investment.
For more information about home appliance safety, visit the Consumer Product Safety Commission.

Credit: www.youtube.com
Frequently Asked Questions
What Does The Leak Sensor In A Samsung Dishwasher Do?
The leak sensor detects water in the bottom pan of your dishwasher. If it senses moisture, it sends a signal to stop the machine to prevent flooding.
Can I Permanently Bypass The Leak Sensor?
It’s not recommended. Bypassing removes a key safety feature. You might not notice a real leak, which can cause water damage or electrical issues.
How Do I Know If The Leak Sensor Is Faulty?
If you dry the base pan, fix all leaks, and the error code stays, the sensor itself may be broken. Testing with a multimeter can confirm this.
Is It Safe To Run The Dishwasher With The Sensor Bypassed?
Only for short-term testing and if you can supervise the machine the whole time. Never leave the dishwasher running alone after bypassing safety features.
How Much Does It Cost To Replace A Samsung Dishwasher Leak Sensor?
A new sensor usually costs $15 to $40. Professional installation may add $100 or more, but it restores full safety.
Modern dishwashers are complex but designed to protect your home. While bypassing the Samsung dishwasher leak sensor is possible, it’s rarely the best long-term answer. Before risking your kitchen to water damage, check for simple causes, clean or replace the sensor, and call a pro if you’re unsure.
With the right approach, you can keep your dishwasher running smoothly and your home safe.