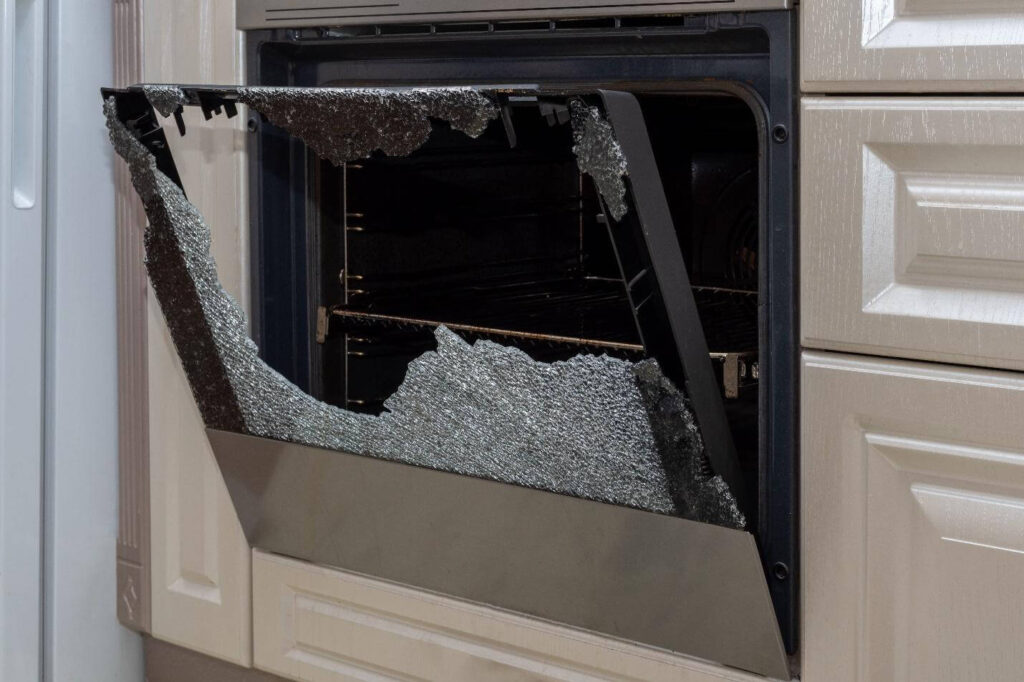
Replacing the glass in your oven door can seem like a complex task, but with the right guidance, you can do it yourself and save money on repair costs. Many homeowners are surprised to learn that oven door glass is one of the most common parts to break—whether from accidental impacts, sudden temperature changes, or simple wear and tear over time. A cracked or shattered oven glass door is not just an eyesore; it can also be dangerous and inefficient. Heat escapes, energy bills rise, and the risk of burns increases. If you’re ready to restore your oven’s safety and function, this article will walk you through the process step by step, from gathering the right tools to installing the new glass panel.
You don’t need to be a professional to handle this repair, but you do need to pay attention to detail. This guide will cover everything: how to identify the right replacement glass, prepare your workspace, and safely remove and install the glass panel. You’ll also learn about common mistakes, how to avoid them, and what to do if you run into unexpected issues. Whether you have a basic single-door oven or a more advanced model, you’ll find clear instructions that apply to most brands. By the end, you’ll have the confidence to tackle this repair and keep your kitchen running smoothly.
Understanding Oven Glass Doors
Before you start, it helps to know how oven glass doors are built. Most ovens use a double or triple pane design. That means there are two or three layers of glass, separated by a small air gap. This insulation keeps heat inside the oven and protects the outside from getting too hot. The glass is usually tempered—meaning it’s treated to be stronger and safer if it breaks.
Not all oven doors are the same. The way the glass is installed, the size and shape, and the way you open the door can vary by brand and model. Some ovens have a fixed outer glass panel, while others allow you to replace just the inner or outer pane.
Check your oven’s manual or look for a sticker inside the door with the model number. This will help you get the right replacement part.
Common Reasons For Glass Damage
Oven glass can break or crack for several reasons:
- Impact: Hitting the door with a heavy pan or object.
- Thermal shock: Pouring cold water on a hot glass surface.
- Manufacturing flaws: Rare, but possible with older models.
- Wear and tear: Over many years, seals can weaken and glass becomes more likely to crack.
Replacing the glass restores both the look and function of your oven.
Safety First: Preparing For The Job
Working with glass and heavy oven doors can be risky. Before you start, take these safety steps:
- Unplug the oven: Always disconnect the oven from the power source. If it’s a gas oven, turn off the gas supply.
- Let the oven cool: Never work on a hot oven. Wait at least an hour after last use.
- Wear gloves and eye protection: Even tempered glass can have sharp edges. Thick gloves and safety glasses protect you from cuts.
- Clear your workspace: Remove anything that could get in the way. Place towels or cardboard on the floor to catch screws or prevent damage.
Pro tip: If your oven is built-in, you may need help moving it out from the wall. Never try to move a heavy oven alone.
Tools And Materials You’ll Need
Gather everything before you begin. Having the right tools makes the job much easier and safer.
- Replacement oven glass panel (check model compatibility)
- Screwdrivers: Usually Phillips and flat-head
- Nut driver or socket set: For some oven brands
- Work gloves and safety glasses
- Soft cloths or towels
- Vacuum cleaner: For broken glass cleanup
- Masking tape: To secure broken glass temporarily
- Small container: For holding screws and small parts
Some ovens may require a special Torx driver. Check your oven’s manual or look at the screws on your door before starting.
How To Identify The Correct Replacement Glass
Not all oven glass panels are the same. Using the wrong size or type can cause leaks or even break again. Here’s how to find the right replacement:
- Check your oven’s model number. This is usually found on a sticker inside the door, on the frame, or near the bottom drawer.
- Search online or contact the manufacturer. Use the model number to find the correct part. Avoid generic glass panels—they may not fit tightly or have the right heat resistance.
- Double-check measurements. If possible, measure your old glass and compare it to the replacement before buying.
- Look for genuine parts. OEM (Original Equipment Manufacturer) glass is made for your oven. Aftermarket parts can be cheaper but may not last as long.
Non-obvious insight: Some ovens use a different type of glass for the inner and outer panels. Make sure you know which one you’re replacing.
Removing The Oven Door
Most ovens make it possible to remove the door for easier access. This step is important—trying to change the glass with the door still attached is much harder and riskier.
Steps To Remove The Door
- Open the oven door fully. Lay it flat.
- Locate the hinge locks. These are usually metal clips at the bottom of the door, near the hinges.
- Flip the hinge locks forward. Use a flat-head screwdriver if needed.
- Partially close the door (about 1/4 open). The door should now lift up and off the hinges.
- Set the door on a padded, flat surface. A towel on the kitchen floor or table works well.
Common mistake: Forcing the door off without unlocking the hinges can break them. Always check for hinge locks before lifting.
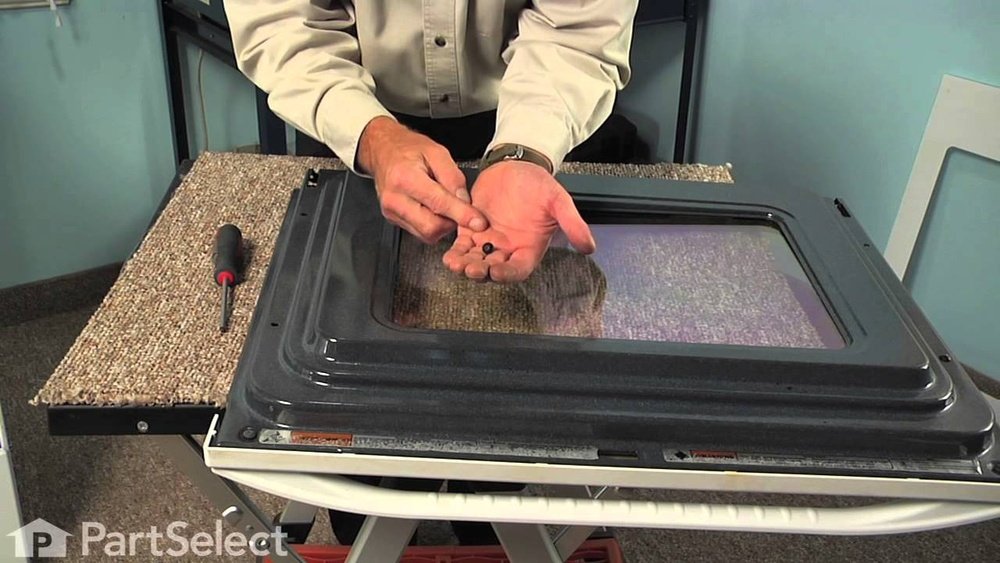
Disassembling The Oven Door
Now that the door is off, you’ll need to take it apart to reach the damaged glass. Most oven doors are held together by screws around the edge.
How To Disassemble
- Remove all screws from the perimeter. Some may be hidden under trim or rubber seals.
- Keep screws organized. Put them in a container so you don’t lose any.
- Carefully separate the inner and outer panels. Go slow—don’t force the panels apart.
- Identify the damaged glass panel. Some doors have two or three layers; be sure which one needs replacing.
If there are wires for a light or sensor, don’t pull them. Most will have enough slack for you to work, but if not, carefully disconnect them and note where they go.
Removing Broken Or Cracked Glass
If the glass is shattered, take extra care. Small shards can be sharp and hard to see.
Safe Removal Steps
- Cover the glass with masking tape. This holds loose pieces together.
- Lift out large pieces by hand (with gloves).
- Vacuum small shards. Use a brush attachment and clean the area well.
- Wipe the frame clean. Use a damp cloth to remove dust and glass fragments.
Non-obvious insight: Check for glass pieces caught in the door’s insulation or frame. Even small pieces can cause rattling or prevent the door from sealing.
Installing The New Oven Glass
Now you’re ready to put in the new glass panel.
- Clean the area. Make sure the frame and seals are free of debris.
- Check the fit. Place the new glass in the frame—there should be no wiggle or gaps.
- Install any brackets or clips. Some doors use metal brackets to hold the glass in place.
- Replace insulation if needed. Some ovens use thin insulation strips around the glass. If they’re damaged or missing, replace them for best heat retention.
- Reassemble the door. Align the panels and replace all screws.
- Do not overtighten. Too much pressure can crack new glass.
Example: If your oven has a triple-glass door, make sure each layer is in the correct order. The inner panel is usually thicker and more heat-resistant.
Reattaching The Oven Door
After the new glass is installed, it’s time to put the door back.
- Align the hinges with the slots on the oven.
- Slide the door down until it is fully seated.
- Open the door fully. Flip the hinge locks back into place.
- Test the door. Open and close it several times. It should feel solid, with no rattling or gaps.
Pro tip: If the door feels loose or doesn’t close tightly, double-check that all screws are secure and the glass is seated correctly.
Testing The Repair
Don’t rush to turn the oven on. First, check everything:
- Inspect for visible gaps or misalignment.
- Check the door seal. Close the door and run your hand around the edge—you shouldn’t feel air leaks.
- Test the oven light (if applicable). Make sure any wires reconnected are working.
- Power up the oven. Let it heat to 350°F (175°C) for 10 minutes. Check for any signs of smoke, smell, or noise.
Safety note: If you see smoke or hear glass cracking, turn off the oven immediately and unplug it. Double-check your installation.

Credit: www.amazon.com
Oven Glass Replacement: Cost And Value
Replacing oven glass yourself is usually much cheaper than hiring a technician. Here’s a quick comparison:
| Replacement Method | Estimated Cost | Time Required |
|---|---|---|
| DIY (Do it yourself) | $50–$120 (glass only) | 1–2 hours |
| Professional repair | $150–$350 (parts & labor) | 2–5 days (schedule + work) |
| Full door replacement | $200–$500+ | 2–5 days |
Tip: If your oven is old or has other problems, it may be better to replace the whole door or consider a new oven.
Common Mistakes To Avoid
Many DIYers make simple mistakes that can turn a quick repair into a bigger problem. Here’s what to watch out for:
- Ordering the wrong glass. Always double-check your model number.
- Forgetting to unplug the oven. This can cause electric shock.
- Losing screws or parts. Keep everything organized as you work.
- Overtightening screws. This can crack new glass.
- Ignoring insulation strips. Missing insulation means heat loss and higher energy bills.
- Not sealing the door properly. This can lead to uneven cooking and wasted energy.
Non-obvious insight: Some oven doors have a small vent or opening to prevent condensation. Don’t cover or block this when reassembling.
Special Cases: Double And Triple Pane Oven Doors
More advanced ovens often use two or three layers of glass for better insulation. Replacing glass in these doors is similar, but you need to be extra careful with the order and placement.
| Oven Door Type | Layers of Glass | Main Benefit | Replacement Difficulty |
|---|---|---|---|
| Single pane | 1 | Basic insulation | Easy |
| Double pane | 2 | Better safety & efficiency | Medium |
| Triple pane | 3 | Best insulation | Hard |
With double and triple pane doors, always check for:
- Correct order of glass panels
- Cleanliness between panes (dust or fingerprints can be sealed inside)
- All insulation and seals in place
If you see fogging or streaks between layers after reassembly, it means moisture or dust was trapped inside. You may need to disassemble and clean again.
When To Call A Professional
Most oven door glass replacements are safe for DIY, but some cases need expert help:
- Very heavy or complex doors (built-in or specialty ovens)
- Broken hinges or frame damage
- Wiring issues with door sensors or locks
- Warranty concerns (opening the door may void some warranties)
If you’re unsure, it’s better to ask a technician than risk further damage or injury.

Credit: www.youtube.com
Aftercare And Maintenance
Once your oven door is fixed, a little care will help it last longer:
- Clean glass only when cool. Hot glass and cold water can cause cracks.
- Use gentle cleaners. Avoid harsh chemicals and abrasive pads.
- Check door seals every 6 months. Replace if cracked or worn.
- Avoid slamming the door. This can loosen parts or crack glass over time.
Tip: If you notice condensation or streaks inside the glass, it may mean the seal is failing or the door was reassembled incorrectly.
Comparing Popular Oven Brands: Door Glass Replacement
Different brands may have unique features or challenges. Here’s a quick look at common US brands:
| Brand | Glass Replacement Ease | Typical Cost | Parts Availability |
|---|---|---|---|
| Whirlpool | Easy | $60–$120 | High |
| GE | Medium | $70–$130 | High |
| Samsung | Medium | $80–$150 | Medium |
| LG | Medium | $80–$140 | Medium |
| Frigidaire | Easy | $60–$110 | High |
| Bosch | Hard | $100–$200 | Low |
For rare or imported brands, parts may need to be ordered from overseas, which takes more time.
Credit: www.fabglassandmirror.com
Recycling Old Oven Glass
Don’t throw broken tempered glass in the regular trash. Tempered glass can shatter into tiny pieces, which are hard to clean up and can injure sanitation workers.
- Check local recycling rules. Some cities accept tempered glass at recycling centers.
- Wrap large pieces in heavy paper or a box. Mark as “broken glass” for safety.
- Never mix with regular glass recycling. Tempered glass melts at a different temperature and can ruin recycled batches.
For more information about recycling tempered glass, check resources like Wikipedia.
Frequently Asked Questions
How Do I Know If My Oven Glass Is Tempered?
Most oven glass is tempered, which is stronger and safer than regular glass. You can usually tell by a small logo or stamp in the corner. If you don’t see a mark, check your oven’s manual or search online for your model.
Can I Use Regular Glass As A Replacement?
No, you should only use tempered glass made for ovens. Regular glass cannot handle high temperatures and will break quickly, creating a safety hazard.
What If The New Glass Doesn’t Fit My Oven Door?
First, double-check your oven’s model number and the replacement part. Sometimes, even small differences can cause a poor fit. Contact the seller or manufacturer for help. Never force glass into place.
Is It Safe To Use My Oven With Cracked Glass?
No, using an oven with cracked or broken glass is dangerous. Heat can escape, and the glass may shatter completely during use. Always replace damaged glass before using the oven again.
How Often Should I Check My Oven Door Glass?
Inspect your oven door glass every 6–12 months, or if you notice any changes like fogging, cracks, or loose panels. Regular checks help you catch problems early and avoid sudden breaks.
Replacing oven glass may seem intimidating, but with careful steps and the right tools, most people can do it themselves. Paying attention to details, using proper parts, and following safety tips ensures your oven will be safe, efficient, and ready for years of cooking ahead.
If you ever feel unsure, don’t hesitate to ask for professional help—your safety is always worth it.