Cleaning your stove top coils might not be the most glamorous task, but it’s one that has a big impact on your kitchen. Over time, grease, burnt food, and residue build up on those coils, which can cause smoke, weird smells, and even uneven heating.
For anyone who cooks regularly, knowing how to clean stove top coils properly is essential—not just for cleanliness, but for safety and better meals. Many people make the mistake of only wiping the surface or using the wrong products. If you want your stove to last longer and cook better, learning the right cleaning steps is a smart move.
This guide is designed to help you tackle stove top coil cleaning with confidence. Whether you’re a first-time renter, a college student, or someone who’s always been afraid to remove those coils, you’ll learn everything you need. We’ll cover why regular cleaning matters, the tools you need, step-by-step instructions, and tips for tough messes.
You’ll also discover how to avoid common mistakes that could damage your stove or even be dangerous. If you’ve ever wondered how often to clean your coils, what products actually work, or how to deal with stubborn grime, you’ll find clear answers here.
Why Clean Stove Top Coils Regularly?
Many people put off cleaning their stove top coils, not realizing the problems that can develop. Dirty coils aren’t just an eyesore—they affect your cooking and can even become a fire risk. Grease and old food can start to burn every time you cook, producing smoke and unpleasant odors. Over time, this buildup makes the coils heat unevenly, which means your food might not cook correctly. In some cases, the residue can even start to damage the coil’s surface or the stovetop beneath.
Another concern is energy efficiency. A clean coil transfers heat better, using less energy and cooking your food more evenly. If you notice your meals are taking longer or burning on one side, dirty coils could be the reason. Beyond cooking performance, there’s also the issue of hygiene. Food spills and grease create a breeding ground for bacteria and pests, especially if left for weeks or months.
Regular cleaning also helps your stove last longer. Replacing coils or entire stove units is expensive, so a little maintenance now saves money and hassle later. Some landlords and property managers even require regular cleaning to prevent damage and protect their investment.
Safety Precautions Before Cleaning
Before you start, safety is crucial. Stove top coils are connected to electricity, so cleaning them incorrectly can be risky.
- Always unplug the stove or turn off the power at the circuit breaker. Even if the controls look off, coils can still be live. Never clean coils while they’re connected to power.
- Let the coils cool completely. Cleaning a hot coil can cause burns and may damage cleaning tools.
- Remove any pots, pans, or covers from the stove.
- If your coils are removable, check the manual to see how to take them out safely. Most electric coil stoves let you gently lift and pull the coils away from the socket.
- If you have a gas stove, do not try to remove the burners as you would with electric coils. This guide is for electric stove top coils only.
Taking a few minutes to prepare keeps you safe and prevents damage to your kitchen.
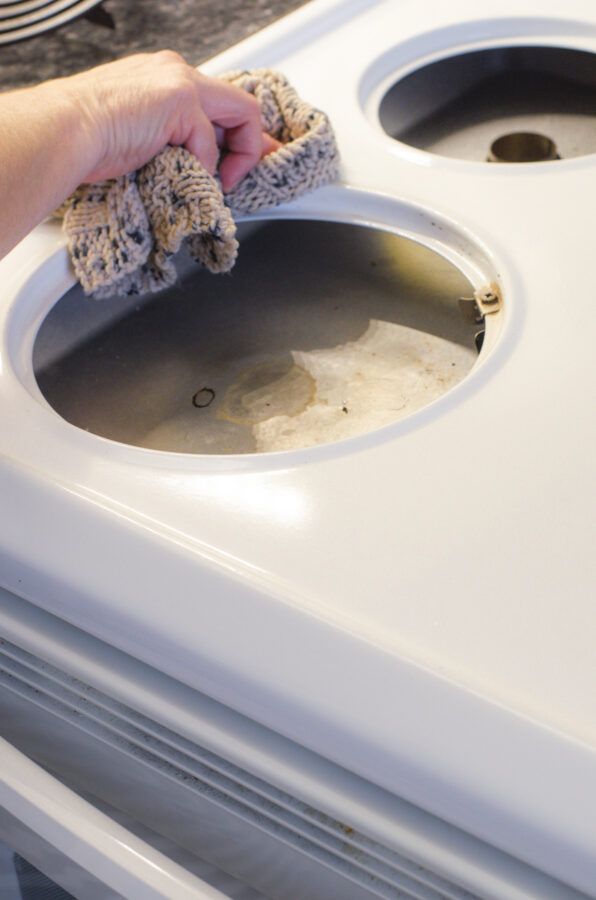
Credit: www.harbourbreezehome.com
Understanding Stove Top Coils
Not all stove top coils are the same. Understanding the type you have will help you choose the right cleaning method and avoid mistakes.
Types Of Electric Stove Top Coils
| Coil Type | Description | Removable? |
|---|---|---|
| Standard Electric Coil | Metal coil sits above the drip pan and plugs into a socket. | Yes |
| Sealed Electric Coil | Coil is fused or covered, not intended for removal. | No |
| Induction Coil | Flat glass surface, uses magnets (not covered here). | No |
If you’re unsure, look for a visible plug at the end of the coil. Removable coils are the most common in older and mid-range electric stoves.
Essential Tools And Cleaning Products
You don’t need expensive products to clean stove top coils. In fact, most items are already in your kitchen.
Basic Supplies
- Dish soap (preferably degreasing type)
- Baking soda
- White vinegar
- Soft sponge or cloth
- Non-abrasive scrub brush or old toothbrush
- Plastic or wooden spatula (for stuck-on debris)
- Paper towels or clean rags
- Spray bottle (for vinegar or water)
- Rubber gloves (optional, for sensitive skin)
Optional But Helpful
- Commercial degreaser (for heavy grease buildup)
- Magic eraser pad
- Microfiber towel (for drying)
- Toothpick or cotton swab (for small crevices)
Avoid using steel wool, metal brushes, or harsh chemical cleaners directly on coils. These can scratch the surface or damage the wiring.
Step-by-step Cleaning Process
Cleaning stove top coils doesn’t need to be complicated. Follow these steps for safe and effective results.
1. Disconnect And Remove Coils
Unplug the stove or switch off the circuit breaker. Wait until coils are completely cool. Gently lift each coil about an inch and pull straight out. Don’t force it—if it feels stuck, wiggle gently. Place the coils on a towel.
2. Wipe Off Loose Debris
Use a dry cloth or paper towel to remove any crumbs, loose food, or large debris. This makes washing easier and prevents scratching.
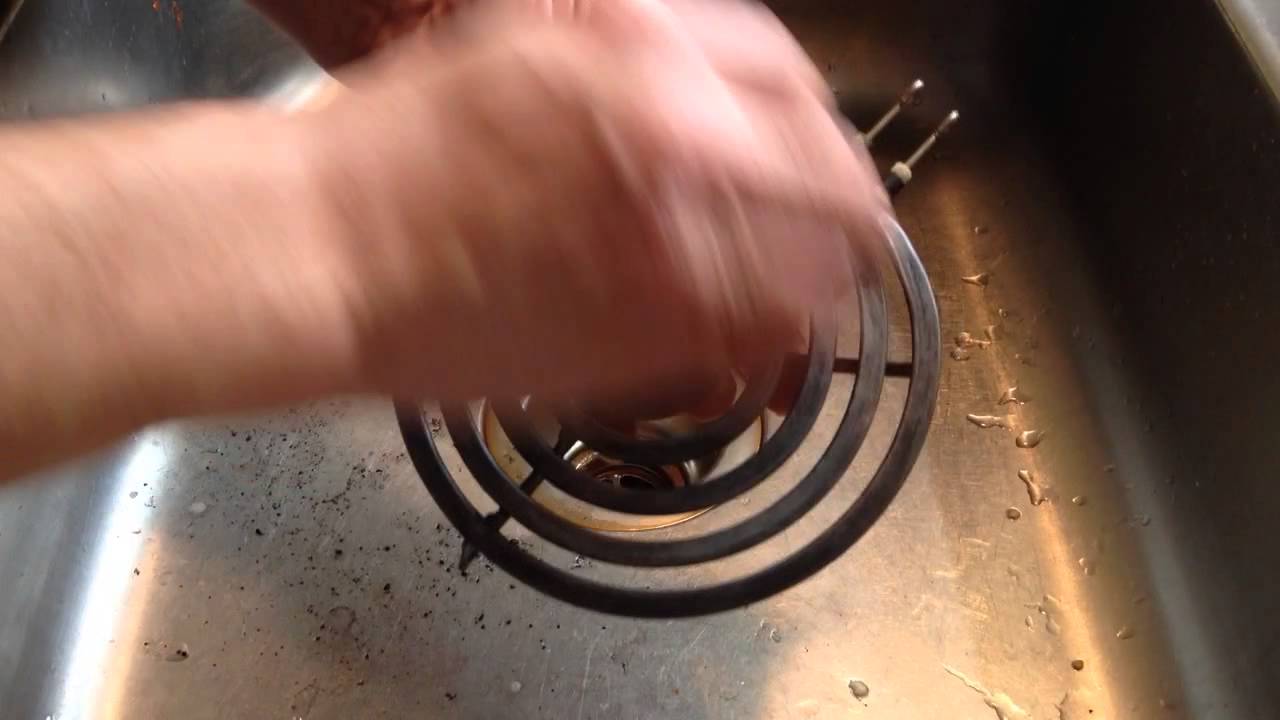
3. Soak And Wash
Fill a sink or large basin with warm water and a few drops of dish soap. Submerge the coils so the plug-in ends stay dry (do not put the metal prongs or electrical contacts in water). Let them soak for 15–20 minutes.
If the coils are fixed, skip soaking and move to surface cleaning.
After soaking, use a soft sponge or brush to scrub away grease and residue. For tough spots, sprinkle a little baking soda and scrub gently. Avoid getting water inside the electrical connections.
4. Rinse And Dry
Wipe the coils with a clean damp cloth to remove soap and baking soda. Dry thoroughly with a towel. Moisture left on the coils can cause short circuits or sparks, so let them air dry for at least an hour before reinstalling.
5. Clean Drip Pans And Stove Surface
While the coils are drying, wash the drip pans (the metal trays under the coils). Remove them and soak in hot soapy water. Scrub with a brush and rinse. If stains remain, sprinkle baking soda, spray with vinegar, and let fizz for 10 minutes before scrubbing again.
Wipe the stovetop surface with a damp cloth, using a little vinegar for extra shine. Dry completely before replacing parts.
6. Reinstall Coils
Once everything is dry, carefully plug the coils back into their sockets. Make sure they sit flat and are firmly connected. Plug the stove back in or turn the power on.
Tackling Stubborn Stains And Grease
Sometimes, regular washing isn’t enough—especially if you haven’t cleaned your stove in months. Here’s how to deal with burnt-on messes and heavy grease.
Baking Soda Paste
Mix 2 tablespoons of baking soda with a few drops of water to make a thick paste. Spread this over stubborn spots and let sit for 15–20 minutes. The paste breaks down grease and softens food residue. Scrub gently with a brush, then rinse.
Vinegar Spray
White vinegar is a natural degreaser. Fill a spray bottle with equal parts vinegar and water. Spray heavily on greasy areas, wait a few minutes, then wipe with a damp cloth.
Commercial Degreasers
For thick, sticky grease, a store-bought degreaser can help. Check the label to make sure it’s safe for electric stove coils. Spray, let sit, and wipe as directed. Always rinse with water after using chemicals.
Magic Eraser
A magic eraser works on many stubborn marks, but use it gently. Too much pressure can damage the coil’s finish.
Dealing With Burnt-on Food
If food is really stuck, use a plastic spatula to scrape gently. Never use knives or metal tools; they scratch and can break the coil.
Avoiding Water In Electrical Contacts
No matter how dirty the coils are, never soak the plug-in ends or get water inside the connectors. If water does get in, let the coil dry for 24 hours before plugging it in.

Credit: www.youtube.com
Cleaning Frequency: How Often Is Enough?
How often should you clean your stove top coils? The answer depends on how often you cook and what kind of food you prepare.
| Cooking Frequency | Recommended Cleaning Interval |
|---|---|
| Daily cooking (heavy use) | Every 1–2 weeks |
| Few times a week | Once a month |
| Rare use | Every 2–3 months |
If you cook foods that splatter—like frying bacon or making sauces—clean more often. Wiping spills as they happen helps prevent tough messes later.
Mistakes To Avoid When Cleaning Stove Top Coils
Many people make errors that can damage coils or even make the stove unsafe. Here are the most common mistakes:
- Using too much water: Submerging the electrical parts causes shorts and can ruin the coil.
- Scrubbing with metal tools: Steel wool and knives scratch the surface, making coils less efficient.
- Plugging in wet coils: Even a little moisture can cause sparks or shocks.
- Ignoring the drip pans: Dirty pans reflect heat unevenly and create more smoke.
- Using harsh chemicals: Some oven cleaners or bleach are too strong and can corrode the coil surface.
- Skipping regular cleaning: The longer you wait, the harder it is to remove buildup.
One non-obvious insight: grease that builds up under the coils can start small fires if it gets hot enough. Regular cleaning isn’t just about appearances—it’s about safety.
How To Maintain Clean Stove Top Coils
Once your coils are clean, there are easy habits to keep them that way.
- Wipe up spills right after cooking (when the coils are cool).
- Use drip pan liners to catch food and grease. Replace regularly.
- Avoid boiling over by not overfilling pots.
- Clean up splatters on the stove surface at least once a week.
- Inspect coils for cracks, blisters, or rust. Replace damaged coils promptly.
If you notice a coil heating unevenly or producing a burning smell even after cleaning, it may be time for a replacement.
When To Replace Stove Top Coils
Stove top coils are durable, but not indestructible. Cleaning helps, but after years of use, you may see signs of wear that mean it’s time for new coils.
Replace your coils if you notice:
- Cracks or blisters in the metal.
- Rust that won’t come off with cleaning.
- Loose connections or the coil doesn’t sit flat.
- Constant sparking or uneven heating.
Most replacement coils are easy to install—just unplug the old one and plug in the new. Always buy the correct size and type for your stove model.
Comparing Homemade Vs. Commercial Cleaners
You might wonder if you need a special cleaner or if simple ingredients are enough. Here’s a comparison to help you decide:
| Cleaner Type | Pros | Cons | Best Use |
|---|---|---|---|
| Baking Soda + Vinegar | Cheap, non-toxic, always available | Takes more time for heavy grease | Regular cleaning, light messes |
| Dish Soap | Gentle, safe for all surfaces | May need extra scrubbing for old stains | Quick cleans, everyday use |
| Commercial Degreaser | Fast, effective on heavy buildup | Can be harsh; must rinse well | Stubborn, sticky grease |
| Magic Eraser | Removes marks, easy to use | May wear down coil finish | Spot cleaning, tough stains |
For most people, a mix of baking soda, vinegar, and dish soap covers 90% of cleaning needs. Use commercial products only for extreme cases.
Dealing With Common Challenges
Cleaning Coils Without Removal
Some stoves have fixed coils. In this case, unplug the stove and wipe the coils with a damp cloth and mild soap. For tough spots, apply baking soda paste directly, let sit, then scrub gently. Use as little water as possible and dry with a towel.
Cleaning Rusty Coils
Light rust can sometimes be removed with a baking soda paste or a little vinegar. If the rust is deep or the coil is flaking, replacement is safer. Cooking with rusty coils can be unsafe.
Getting Rid Of Odors
Sometimes, coils develop a burnt smell even after cleaning. Soak a cloth in vinegar, wipe the coil surface, and let air dry before use. If smell remains, check the drip pans and stove cavity for hidden grease.
Cleaning Under The Coils
Don’t forget to clean the metal tray and area under the coils. Food and grease often hide here. Remove the coil and tray, wipe with a damp cloth, and dry before reassembling.
Environmental Impact And Safe Disposal
Cleaning products can have an environmental effect. Baking soda and vinegar are safe for most drains. If you use commercial cleaners, follow disposal instructions to avoid harming water systems.
When replacing coils, don’t just throw them in the trash. Many local recycling programs accept metal stove parts. Check with your city’s waste management department or visit EPA Electronics Recycling for guidance.
Advanced Tips For Deep Cleaning
If your stove hasn’t been cleaned in a long time, or you’ve moved into a new place, a deep clean may be needed.
- Soak drip pans overnight in a mix of hot water, 1/4 cup baking soda, and a splash of vinegar.
- Use a toothbrush to scrub around coil sockets (when dry and unplugged).
- Clean control knobs by pulling them off (if possible) and washing in soapy water.
- Vacuum crumbs from around the stove base with a nozzle attachment.
One advanced but little-known tip: placing a sheet of aluminum foil under the drip pan (not touching the coil) makes cleanup easier after messy meals. Replace the foil regularly, and never wrap the coil itself.
Credit: www.youtube.com
Cleaning For Renters And Shared Kitchens
If you rent or share a kitchen, keeping the stove clean helps avoid disputes and keeps everyone safe. Many leases require regular cleaning of appliances, and some landlords check during inspections.
- Set a cleaning schedule with roommates.
- Take photos before and after deep cleaning for records.
- Use removable drip pan liners to make your part of cleaning easier.
If you notice damage or problems you can’t fix, report them to your landlord before using the stove.
The Science Behind Clean Coils
A clean coil transfers heat more efficiently. Grease and burnt food act as insulators, forcing the coil to use more energy and sometimes overheat. In tests, clean coils reach the desired cooking temperature about 15–20% faster than dirty ones. This means less waiting and more even cooking.
Research also shows that regular coil cleaning reduces indoor air pollution from smoke and burnt food particles. For people with allergies or asthma, this is especially important.
Common Questions And Misconceptions
Many people believe stove top coils are self-cleaning or that wiping is enough. In reality, only regular, thorough cleaning keeps them safe and efficient. Another misconception is that all cleaning products are safe for coils—this isn’t true. Always check that a product is approved for use on electric stove parts.
Some people worry that removing coils will break them. Done gently, most coils are designed to be removed for cleaning. If you have doubts, your stove’s manual or the manufacturer’s website can offer guidance.
Frequently Asked Questions
How Do I Know If My Stove Top Coils Are Removable?
Most standard electric stoves have removable coils. Look for a plug-in connection where the coil meets the stove. Gently lift and pull—if it comes out, it’s removable. If you feel resistance, check your manual to avoid damage.
Can I Use Oven Cleaner On Stove Top Coils?
Oven cleaner is usually too harsh for electric coils and can damage their surface. Stick with dish soap, baking soda, and vinegar. If you need something stronger, use a degreaser labeled safe for electric stove parts.
What Should I Do If Water Gets Inside The Coil Plug?
If water gets inside the plug end of a coil, do not use the stove. Let the coil dry completely for at least 24 hours in a warm, dry place. Using a wet coil can cause shocks or short circuits.
Is It Safe To Wrap Coils In Aluminum Foil To Keep Them Clean?
Never wrap coils themselves in foil. This can cause overheating, uneven cooking, or even fire. Instead, use foil under the drip pan (not touching the coil) or use drip pan liners designed for this purpose.
How Do I Clean Coils With Burnt Sugar Or Melted Plastic?
For burnt sugar, apply a baking soda paste, let sit, and gently scrub. For melted plastic, let the stove cool, then peel off as much as possible. Avoid using sharp tools. If residue remains, heat the coil briefly to soften the plastic, then wipe with a cloth.
Be careful and use good ventilation.
Keeping your stove top coils clean is one of the simplest ways to improve your kitchen’s safety, appearance, and cooking performance. With a little effort and the right techniques, you can avoid smoke, smells, and uneven meals—while saving money on repairs and energy.
Regular cleaning becomes easy once you know what to do and what to avoid. The next time you cook, you’ll notice the difference, and your kitchen will thank you.